- Preface
- GettingStarted
- Creating the Spaces Services
- Adding Devices
- Configurations
- Working with Faults
- Working with the Signage Menu
- Working with the Signage Content
- RoomSetup
- EmergencyDisplay
- Working with Information Signage
- Working with Smart+Connected Green Advisor
- Working with Tools
- Managing Locations
- Managing the Quick Response Codes
- Managing Workspace Features
- Working with Reports
- Usage Scenarios
- Troubleshooting
Working with Information Signage
The Cisco Smart+Connected Information Signage (Smart+Connected IS) solution allows you to communicate with the end users about news or other useful information, such as important events, financial results of the organization, acquisitions, general updates, and so on. You can display this information on the digital signage/IEC. In addition, you can also display internal and external URLs in a logical sequence.
About Information Signage
The Smart+Connected IS solution allows you to broadcast news and other useful information on the digital signage/IEC, kiosks, and room panels. You can broadcast news about important events, financial results of the organization, acquisitions, general updates, and so on.
You can use the following types of signage based on the location at which the events and occurrences are taking place:
The content that is relevant for an entire organization, such as the annual performance, the financial results, and so on, can be displayed on all three types of signage at all locations. The events and occurrences that concern a particular building, floor, or conference room are selectively displayed only on the signage associated with that particular location.
For example, if the end users on a particular floor are expected to attend a gathering on the same floor, news announcing the event and requesting their presence can be displayed only on the floor signage and conference room signage present on that floor.
You can configure content and broadcast it by performing the following tasks:
- Managing the news content—You can manually add the news content or other information in the Smart+Connected Spaces application. After adding and enabling the content, the content is displayed on the digital signage/IEC of the associated location. You can also view, modify, and delete this content.
- Managing the content links—You can use the following content links to add information:
–![]() External Application Links—External content URLs that are outside the Smart+Connected Spaces application. These URLs must be reachable from the Digital Media Player (DMP) and compatible with the format supported by the DMP.
External Application Links—External content URLs that are outside the Smart+Connected Spaces application. These URLs must be reachable from the Digital Media Player (DMP) and compatible with the format supported by the DMP.
–![]() SSP Application Links—Intranet URLs that are a part of the Smart+Connected Spaces application, such as news content, conference room, floor plan, green advisor, building view, kiosk, and room panel. You need to create content links for each content type that you want to display on the digital signage/IEC.
SSP Application Links—Intranet URLs that are a part of the Smart+Connected Spaces application, such as news content, conference room, floor plan, green advisor, building view, kiosk, and room panel. You need to create content links for each content type that you want to display on the digital signage/IEC.
You can also view, modify, and delete the content links.
- Managing the sequence of the content links—If you have enabled multiple content links for a location, you can define their order and duration by adding a sequence. For example, you can display a floor plan for 120 seconds followed by news content for 60 seconds. You can also view or modify the defined sequence.
Managing News Content
You can add, modify, view, or delete the news content for a specific location. You can also enable or disable the content from being displayed on the digital signage/IEC of the selected location.
- Adding or Enabling News Content
- Viewing News Content
- Editing News Content
- Disabling News Content
- Deleting News Content
Adding or Enabling News Content
You can add the news content or other useful information in the Smart+Connected Spaces application. After the information is added and enabled, it is automatically displayed on the digital signage/IEC of a specified location.
To add the news content or other useful information, perform the following steps:
Step 1![]() In the home page of the Smart+Connected Spaces portal for managing meeting spaces and digital signage, choose Smart+Connected Information Signage > News Content.
In the home page of the Smart+Connected Spaces portal for managing meeting spaces and digital signage, choose Smart+Connected Information Signage > News Content.
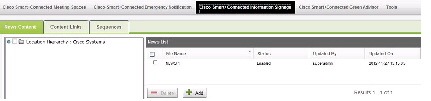
Figure 10-1 displays the News Content tab. The left pane displays the location hierarchy. The right pane displays the News List area. The News List area displays the news content that have been added to the Smart+Connected Spaces application.
Step 2![]() In the location hierarchy, select a location for which you want to add the news content:
In the location hierarchy, select a location for which you want to add the news content:
a.![]() Right-click the root location in the location hierarchy, and choose Expand.
Right-click the root location in the location hierarchy, and choose Expand.
b.![]() Check the check box(es) for the appropriate location(s).
Check the check box(es) for the appropriate location(s).
Step 3![]() In the News List area, click Add.
In the News List area, click Add.
The News Content area appears.
Step 4![]() Enter the following details:
Enter the following details:
You can configure the news template from the Tools tab. For more information on how to configure the news template, see the “Adding Templates” section.
The Enabled check box is checked by default, which indicates that the added news content is to be displayed on the digital signage/IEC.
The added news file is listed in the News List area. If you have enabled the news content file, the content is automatically broadcasted on the digital signage/IEC at the selected location(s), provided the sequence for the specified digital signage/IEC has been setup to display the news content.
You can choose to enable multiple news content at a time. In case multiple news content is enabled for a location or set of locations, then the new content is displayed one after another in a sequence, based on the order in which they were created. For more information on how to add a sequence to the multiple news content, see the “Adding a Sequence” section.
If you want to disable the news content, see the “Disabling News Content” section.
Viewing News Content
You can view details about the news content or other useful information that you have added in the Smart+Connected Spaces application. These details are the added news filename, content status (enabled or disabled), users who last updated the message, and time at which the message was updated, and the detailed news text.
To view details about the added news content, perform the following steps:
Step 1![]() In the home page of the Smart+Connected Spaces portal for managing meeting spaces and digital signage, choose Smart+Connected Information Signage > News Content.
In the home page of the Smart+Connected Spaces portal for managing meeting spaces and digital signage, choose Smart+Connected Information Signage > News Content.
The left pane displays the location hierarchy. The right pane displays the News List area. The News List area displays the news content that have been added to the Smart+Connected DS application.
Step 2![]() In the location hierarchy, select a location for which you want to view the news content:
In the location hierarchy, select a location for which you want to view the news content:
a.![]() Right-click the root location in the location hierarchy, and choose Expand.
Right-click the root location in the location hierarchy, and choose Expand.
b.![]() Check the check box(es) for the appropriate location(s).
Check the check box(es) for the appropriate location(s).
The News List area displays the following details about the news files that have been added to the Smart+Connected DS application:
–![]() Enabled—If the news content is being broadcasted.
Enabled—If the news content is being broadcasted.
–![]() Disabled—If the news content have been stopped from being broadcasted.
Disabled—If the news content have been stopped from being broadcasted.
- Updated By—User who last updated the news content details.
- Updated On—Time at which the news content details were last updated.
By default, the news content list is sorted alphabetically.
Step 3![]() To sort the news content details in an ascending or descending order, click the respective column headings.
To sort the news content details in an ascending or descending order, click the respective column headings.
Step 4![]() To view the detailed news text, in the File Name column, select the news filename.
To view the detailed news text, in the File Name column, select the news filename.
The News Content area appears with the detailed news text.
If you want to modify the existing news content details, see the “Editing News Content” section.
Editing News Content
You can modify details about the existing news content that you have added in the Smart+Connected Spaces application. These details are the news filename, news template, and news text. After modifying, the updated content is automatically enabled on the digital signage/IEC.
To modify the news content, perform the following steps:
Step 1![]() In the home page of the Smart+Connected Spaces portal for managing meeting spaces and digital signage, choose Smart+Connected Information Signage > News Content.
In the home page of the Smart+Connected Spaces portal for managing meeting spaces and digital signage, choose Smart+Connected Information Signage > News Content.
The left pane displays the location hierarchy. The right pane displays the News List area. The News List area displays the news content that has been added to the Smart+Connected Spaces application.
Step 2![]() In the location hierarchy, select a location for which you want to modify the news content:
In the location hierarchy, select a location for which you want to modify the news content:
a.![]() Right-click the root location in the location hierarchy, and choose Expand.
Right-click the root location in the location hierarchy, and choose Expand.
b.![]() Check the check box(es) for the appropriate location(s).
Check the check box(es) for the appropriate location(s).
Step 3![]() In the File Name column of the News List area, select the news filename that you want to modify.
In the File Name column of the News List area, select the news filename that you want to modify.
The News Content area appears with the existing details.
Step 4![]() Modify the following details, as necessary:
Modify the following details, as necessary:
You can configure the news template from the Tools tab. For more information on how to configure the news template, see the “Adding Templates” section.
The Enabled check box is checked by default, which indicates that the modified news content will be displayed on the digital signage/IEC.
The updated news file is listed in the News List area. If you have enabled the news content file, the content is automatically broadcast on the digital signage/IEC of the selected location(s) based on the sequence configuration.
If you want to disable the news content, see the “Disabling News Content” section.
Disabling News Content
You can disable the news content that is being displayed on the digital signage/IEC of a location. After disabling the content, it is not displayed on the digital signage/IEC of the specified location.
To disable the news content, perform the following steps:
Step 1![]() In the home page of the Smart+Connected Spaces portal for managing meeting spaces and digital signage, choose Smart+Connected Information Signage > News Content.
In the home page of the Smart+Connected Spaces portal for managing meeting spaces and digital signage, choose Smart+Connected Information Signage > News Content.
The left pane displays the location hierarchy. The right pane displays the News List area. The News List area displays the news content that has been added to the Smart+Connected DS application.
Step 2![]() In the File Name column, select the news filename that you want to disable.
In the File Name column, select the news filename that you want to disable.
The News Content area appears with the existing details.
Step 3![]() Uncheck the Enabled check box.
Uncheck the Enabled check box.
In the News List area, the status of the selected news file appears as disabled. Also, the news content is automatically removed from the digital signage/IEC of the selected location.
Deleting News Content
You can delete all news content that has been previously disabled.
To delete the news content, perform the following steps:
Step 1![]() In the home page of the Smart+Connected Spaces portal for managing meeting spaces and digital signage, choose Smart+Connected Information Signage > News Content.
In the home page of the Smart+Connected Spaces portal for managing meeting spaces and digital signage, choose Smart+Connected Information Signage > News Content.
The left pane displays the location hierarchy. The right pane displays the News List area. The News List area displays the news content that has been added to the Smart+Connected Spaces application.
Step 2![]() In the File Name column, select the news filename that you want to delete, and click Delete.
In the File Name column, select the news filename that you want to delete, and click Delete.
A confirmation message dialog box appears.
Step 3![]() Click Yes to confirm the deletion.
Click Yes to confirm the deletion.
The news content is deleted, and is not recoverable.
Managing Content Links
You can use one or more content links to add information that needs to be displayed on the digital signage/IEC. In addition, you can modify, view, and delete the content links.
Adding Content Links
You can add one or more content links to display information on the digital signage/IEC.
To add the content links, perform the following steps:
Step 1![]() In the home page of the Smart+Connected Spaces portal for managing meeting spaces and digital signage, choose Smart+Connected Information Signage > Content Links.
In the home page of the Smart+Connected Spaces portal for managing meeting spaces and digital signage, choose Smart+Connected Information Signage > Content Links.
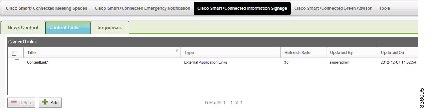
Figure 10-2 displays the Content Links tab. The Content Links area displays the content links that have been added to the Smart+Connected Spaces application.
The Content Link Detail area appears.
Step 3![]() Enter the following details:
Enter the following details:
–![]() External Application Links—External content URLs that are outside the Smart+Connected Spaces application.
External Application Links—External content URLs that are outside the Smart+Connected Spaces application.

Note![]() The URL must be accessible from the DMP and the content in the URL should be in a format that is compatible with the DMP.
The URL must be accessible from the DMP and the content in the URL should be in a format that is compatible with the DMP.
–![]() SSP Application Links—Content URLs that are part of the Smart+Connected Spaces application, such as news content, conference room, floor plan, green advisor, building view, kiosk, and room panel.
SSP Application Links—Content URLs that are part of the Smart+Connected Spaces application, such as news content, conference room, floor plan, green advisor, building view, kiosk, and room panel.
Note![]() We recommend that you provide a refresh rate value greater than 30 seconds.
We recommend that you provide a refresh rate value greater than 30 seconds.
The added content link is listed in the Content Links area. You can add a sequence in which these links should be broadcast on the digital signage/IEC. For more information on how to add a sequence to the content links, see the “Adding a Sequence” section.
Viewing Content Links
You can view details of the content links that have been added in the Smart+Connected Spaces application. These details are the content link title, content link type (external application link or SSP application link), the duration after which the detailed page should be refreshed, the user who last updated the content link, and time at which the content link was updated.
To view the content links, perform the following steps:
Step 1![]() In the home page of the Smart+Connected Spaces portal for managing meeting spaces and digital signage, choose Smart+Connected Information Signage > Content Links.
In the home page of the Smart+Connected Spaces portal for managing meeting spaces and digital signage, choose Smart+Connected Information Signage > Content Links.
The Content Links area displays the following details for the content links that are added to the Smart+Connected Spaces application:
–![]() External Application Links—External content URLs that are outside the Smart+Connected Spaces application.
External Application Links—External content URLs that are outside the Smart+Connected Spaces application.
–![]() SSP Application Links—Content URLs that are part of the Smart+Connected DS application, such as news content, conference room, floor plan, green advisor, building view, kiosk, and room panel.
SSP Application Links—Content URLs that are part of the Smart+Connected DS application, such as news content, conference room, floor plan, green advisor, building view, kiosk, and room panel.
- Refresh Rate—Duration after which the displayed page needs to be refreshed.
- Updated By—User who last updated the content link details.
- Updated On—Time at which the content link details were last updated.
By default, the content links list is sorted alphabetically.
Step 2![]() To sort the news content details in an ascending or descending order, click the respective column headings.
To sort the news content details in an ascending or descending order, click the respective column headings.
If you want to modify the existing content link details, see the “Editing Content Links” section.
Editing Content Links
You can modify the details of the content links that you have added in the Smart+Connected Spaces application. These details are the content link title, content link type (external application link or SSP application link), and the duration after which the detailed page should be refreshed.
To modify the content links, perform the following steps:
Step 1![]() In the home page of the Smart+Connected Spaces portal for managing meeting spaces and digital signage, choose Smart+Connected Information Signage > Content Links.
In the home page of the Smart+Connected Spaces portal for managing meeting spaces and digital signage, choose Smart+Connected Information Signage > Content Links.
The Content Links area displays the content links that are added to the Smart+Connected Spaces application.
Step 2![]() In the Title column of the Content Links area, click a content link title that you want to modify.
In the Title column of the Content Links area, click a content link title that you want to modify.
The Content Link Detail area appears with the existing details.
Step 3![]() Modify the following details, as necessary:
Modify the following details, as necessary:
–![]() External Application Links—External content URLs that are outside the Smart+Connected Spaces application.
External Application Links—External content URLs that are outside the Smart+Connected Spaces application.
–![]() SSP Application Links—Content URLs that are part of the Smart+Connected Spaces application, such as news content, conference room, floor plan, green advisor, building view, kiosk, and room panel.
SSP Application Links—Content URLs that are part of the Smart+Connected Spaces application, such as news content, conference room, floor plan, green advisor, building view, kiosk, and room panel.
The updated content link is listed in the Content Links area.
Deleting Content Links
You can delete the content links that you have added to theSmart+Connected Spaces application. After a content link is deleted, it is automatically removed from the sequence and all of the content associated with the link is not displayed on the digital signage/IEC.
To delete the content links, perform the following steps:
Step 1![]() In the home page of the Smart+Connected Spaces portal for managing meeting spaces and digital signage, choose Smart+Connected Information Signage > Content Links.
In the home page of the Smart+Connected Spaces portal for managing meeting spaces and digital signage, choose Smart+Connected Information Signage > Content Links.
The Content Links area displays the content links that are added to the Smart+Connected Spaces application.
Step 2![]() In the Title column of the Content Links area, check the check boxes for one or more content links that you want to modify, and click Delete.
In the Title column of the Content Links area, check the check boxes for one or more content links that you want to modify, and click Delete.
A confirmation message dialog box appears.
Step 3![]() Click Yes to confirm the deletion.
Click Yes to confirm the deletion.
The content link is deleted, and is not recoverable.
Managing Sequence
You can add a sequence to the content links that you want to display on the digital signage/IEC by defining the order and duration of the display. In addition, you can modify and view the added sequence.
Adding a Sequence
To add a sequence to the content links, perform the following steps:
Step 1![]() In the home page of the Smart+Connected Spaces portal for managing meeting spaces and digital signage, choose Smart+Connected Information Signage > Sequences.
In the home page of the Smart+Connected Spaces portal for managing meeting spaces and digital signage, choose Smart+Connected Information Signage > Sequences.
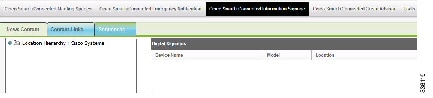
Figure 10-3 displays the Sequences tab. The left pane displays the location hierarchy. The right pane displays the Digital Signages area.
Step 2![]() In the location hierarchy, select a location at which you want to display the news content:
In the location hierarchy, select a location at which you want to display the news content:
a.![]() Right-click the root location in the location hierarchy, and choose Expand.
Right-click the root location in the location hierarchy, and choose Expand.
b.![]() Click the appropriate location. The DMPs associated with the location and any child locations appears in the right pane. The following details are displayed about the digital signage/IEC devices that are associated with the selected location.
Click the appropriate location. The DMPs associated with the location and any child locations appears in the right pane. The following details are displayed about the digital signage/IEC devices that are associated with the selected location.
- Device Name—Name of the DMP.
- Model—Model number of the DMP.
- Location—Location at which the DMP is available.
Step 3![]() In the Device Name column, select the DMP device on which you want to broadcast the content links.
In the Device Name column, select the DMP device on which you want to broadcast the content links.
The Content Links area appears.
Step 4![]() In the Content Links area, do the following:
In the Content Links area, do the following:
a.![]() Add a list of content links that you want to display on the digital signage/IEC:
Add a list of content links that you want to display on the digital signage/IEC:
Click  to move a single content link from the left to the right text area.
Click  to move all of the content links from the left to the right text area.
Click  to move a single content link from the right to the left text area.
Click  to move all of the content links from the right to the left text area.
Note![]() Ensure that you add the content links that are compatible with the associated location types. For example, if a digital signage/IEC has been added at a floor level, you must not add the conference room content link.
Ensure that you add the content links that are compatible with the associated location types. For example, if a digital signage/IEC has been added at a floor level, you must not add the conference room content link.
b.![]() In the right text area, do the following:
In the right text area, do the following:
1. Add the sequence to the added content links:
Click  to push a content link to the first position in the list.
Click  to push a content link one step higher.
Click  to push the content link one step lower.
Click  to push the content link to the last position in the list.
2. Select each content link, and in the Display Time field, enter the time for which the content link needs to appear on the digital signage/IEC before the display is changed to the next content link.
Note![]() We recommend that have the display time value be greater than 30 seconds.
We recommend that have the display time value be greater than 30 seconds.
A sequence is added to the selected content links. If you want to modify the sequence, see the “Editing a Sequence” section.
Viewing a Sequence
To view the sequence that you have added to the content links, perform the following steps:
Step 1![]() In the home page of the Smart+Connected Spaces portal for managing meeting spaces and digital signage, choose Smart+Connected Information Signage > Sequences.
In the home page of the Smart+Connected Spaces portal for managing meeting spaces and digital signage, choose Smart+Connected Information Signage > Sequences.
The left pane displays the location hierarchy. The right pane displays the Digital Signages area.
Step 2![]() In the location hierarchy, select a location for which you want to view the content links’ sequence:
In the location hierarchy, select a location for which you want to view the content links’ sequence:
a.![]() Right-click the root location in the location hierarchy, and choose Expand.
Right-click the root location in the location hierarchy, and choose Expand.
b.![]() Check the check box(es) next to the appropriate location(s).
Check the check box(es) next to the appropriate location(s).
The Digital Signage area appears with the following details about the digital signage/IEC devices that are associated with the selected location:
- Device Name—Name of the DMP.
- Model—Model number of the DMP.
- Location—Location at which the DMP is available.
Step 3![]() In the Device Name column, select the DMP device that is configured to broadcast the content links.
In the Device Name column, select the DMP device that is configured to broadcast the content links.
The Content Links area appears. The right text pane displays the sequence in which the content links have been added.
If you want to modify the existing sequence, see the “Editing a Sequence” section.
Editing a Sequence
To modify the sequence that you have added to the content links, perform the following steps:
Step 1![]() In the home page of the Smart+Connected Spaces portal for managing meeting spaces and digital signage, choose Smart+Connected Information Signage > Sequences.
In the home page of the Smart+Connected Spaces portal for managing meeting spaces and digital signage, choose Smart+Connected Information Signage > Sequences.
The left pane displays the location hierarchy. The right pane displays the Digital Signages area.
Step 2![]() In the location hierarchy, select a location for which you want to modify the content links’ sequence:
In the location hierarchy, select a location for which you want to modify the content links’ sequence:
a.![]() Right-click the root location in the location hierarchy, and choose Expand.
Right-click the root location in the location hierarchy, and choose Expand.
b.![]() Check the check box(es) next to the appropriate location(s).
Check the check box(es) next to the appropriate location(s).
The Digital Signage area appears with the following details about the digital signage/IEC devices that are associated with the selected location:
- Device Name—Name of the DMP.
- Model—Model number of the DMP.
- Location—Location at which the DMP is available.
Step 3![]() In the Device Name column, select the DMP device that is configured to broadcast the content links.
In the Device Name column, select the DMP device that is configured to broadcast the content links.
The Content Links area appears.
Step 4![]() In the Content Links area, modify the necessary details:
In the Content Links area, modify the necessary details:
a.![]() Add a list of content links that you want to display on the digital signage/IEC:
Add a list of content links that you want to display on the digital signage/IEC:
Click  to move a single content link from the left to the right text area.
Click  to move all of the content links from the left to the right text area.
Click  to move a single content link from the right to the left text area.
Click  to move all of the content links from the right to the left text area.
Note![]() Ensure that you add the content links that are compatible with the associated location types. For example, if a digital signage/IEC has been added at a floor level, you must not add the conference room content link.
Ensure that you add the content links that are compatible with the associated location types. For example, if a digital signage/IEC has been added at a floor level, you must not add the conference room content link.
b.![]() In the right text area, do the following:
In the right text area, do the following:
1. Add the sequence to the added content links:
Click  to push a content link to the first position in the list.
Click  to push a content link one step higher.
Click  to push the content link one step lower.
Click  to push the content link to the last position in the list.
2. Select each content link, and in the Display Time field, enter the time for which the content link needs to appear on the digital signage/IEC before the display is changed to the next content link.
The sequence is modified for the selected content links.
Enabling Conference/TP Room Panel on a Tablet
Conference or TP room panels are used to view the room schedule, availability/occupancy status, confirm room occupancy, and book and release the rooms.
To enable a conference/TP room panel on a tablet, perform the following steps:
Step 1![]() Download and install the room panel application.
Download and install the room panel application.
a.![]() To download the room panel application, go to the following URL:
To download the room panel application, go to the following URL:
http://<msps host>:<port>/ipsapp/roompanel_download/, and tap Go.
The Smart+ Connected Spaces Welcome screen appears.
c.![]() Once the application is downloaded to a tablet, tap Install and follow the on-screen instructions to install the application.
Once the application is downloaded to a tablet, tap Install and follow the on-screen instructions to install the application.
The “Application Installed Successfully” message is displayed upon successful installation.
d.![]() Tap Done to close the application.
Tap Done to close the application.
Step 2![]() Configure the room panel application.
Configure the room panel application.
a.![]() To configure the room panel application, tap the
To configure the room panel application, tap the  icon on the tablet.
Room Panel Configuration screen appears.
b.![]() Enter the following details:
Enter the following details:
–![]() Host URL—Enter the IP address or the DNS name of the host on which the Smart Spaces application is deployed, and the port is the port number that you have defined for the application server, and then tap Set. Currently, only HTTP is supported.
Host URL—Enter the IP address or the DNS name of the host on which the Smart Spaces application is deployed, and the port is the port number that you have defined for the application server, and then tap Set. Currently, only HTTP is supported.
–![]() Refresh Rate—Select the screen refresh interval in seconds from the drop-down list.
Refresh Rate—Select the screen refresh interval in seconds from the drop-down list.
–![]() Building—Select the building name from the drop-down list.
Building—Select the building name from the drop-down list.
–![]() Floor—Select the floor number from the drop-down list.
Floor—Select the floor number from the drop-down list.
–![]() Room—Select the conference room name from the drop-down list.
Room—Select the conference room name from the drop-down list.
The room panel application is successfully installed and configured on a tablet.
 Feedback