Upgrade Software Agents

Upgrade Agents from UI

Agents can be upgraded using Agent Config Intent workflow as described here - Software Agent Config. While configuring an agent config profile, there is an Auto Upgrade option which can be enabled or disabled. If the option is enabled, the agents matching inventory filter criteria are automatically upgraded to the latest available version.
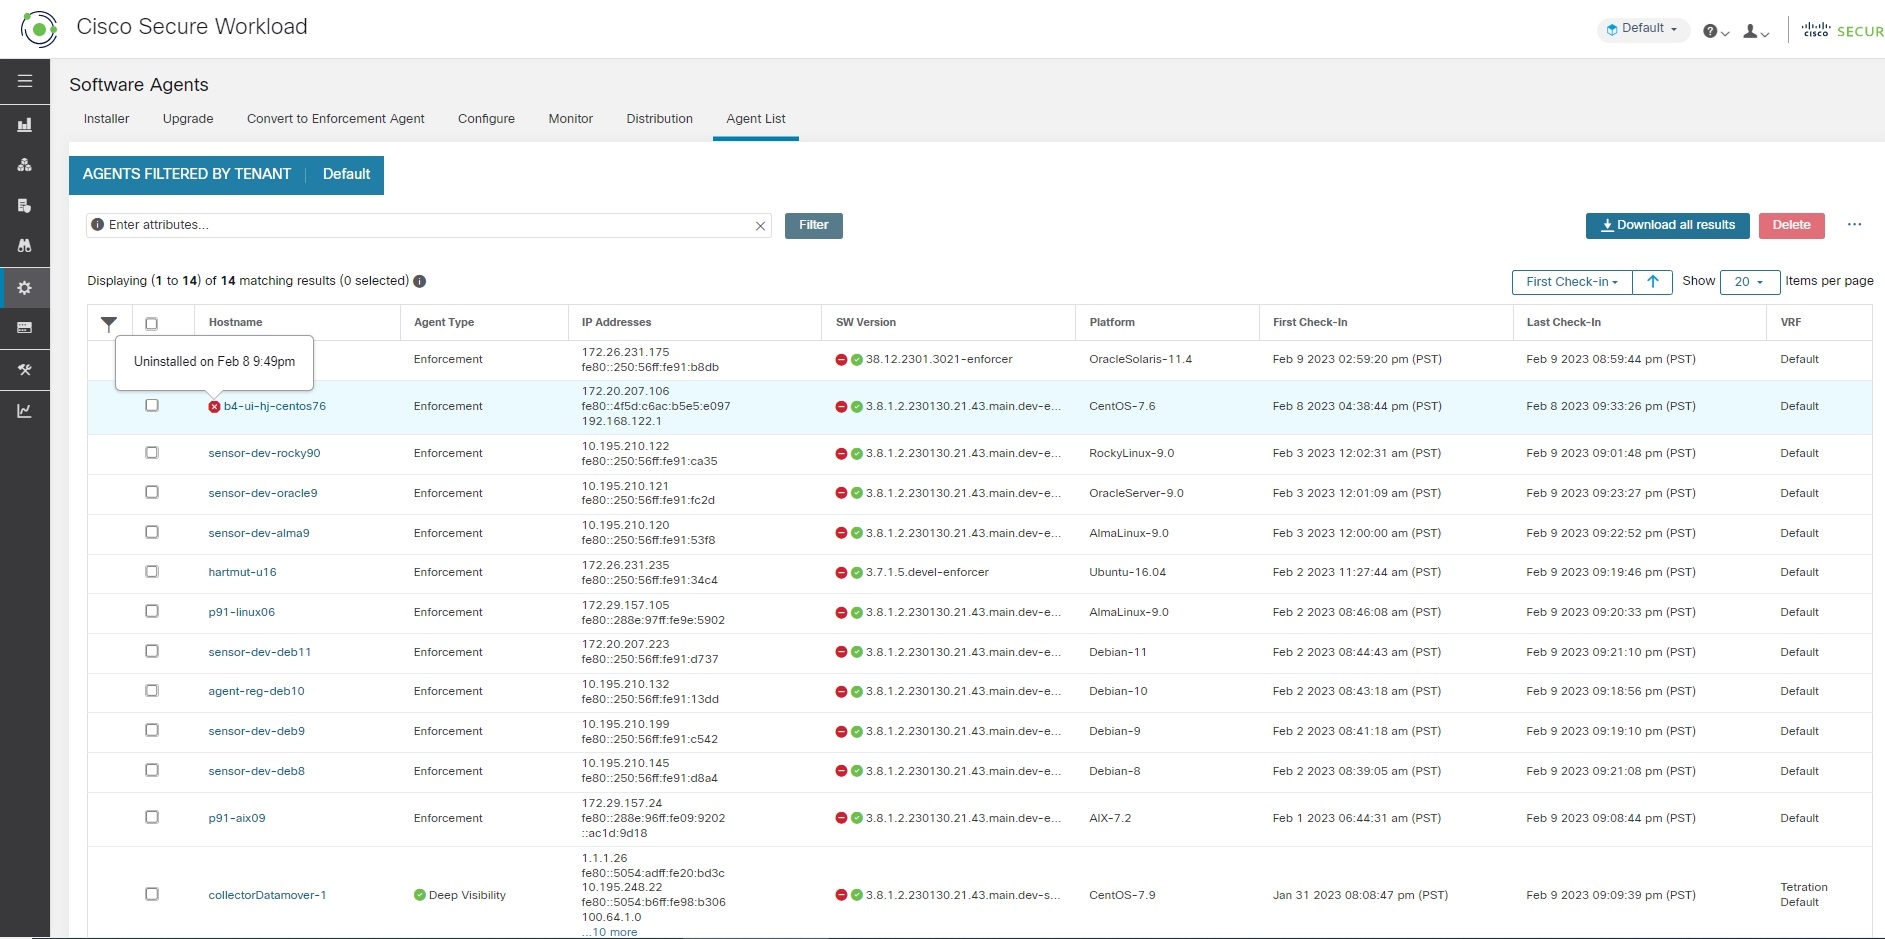
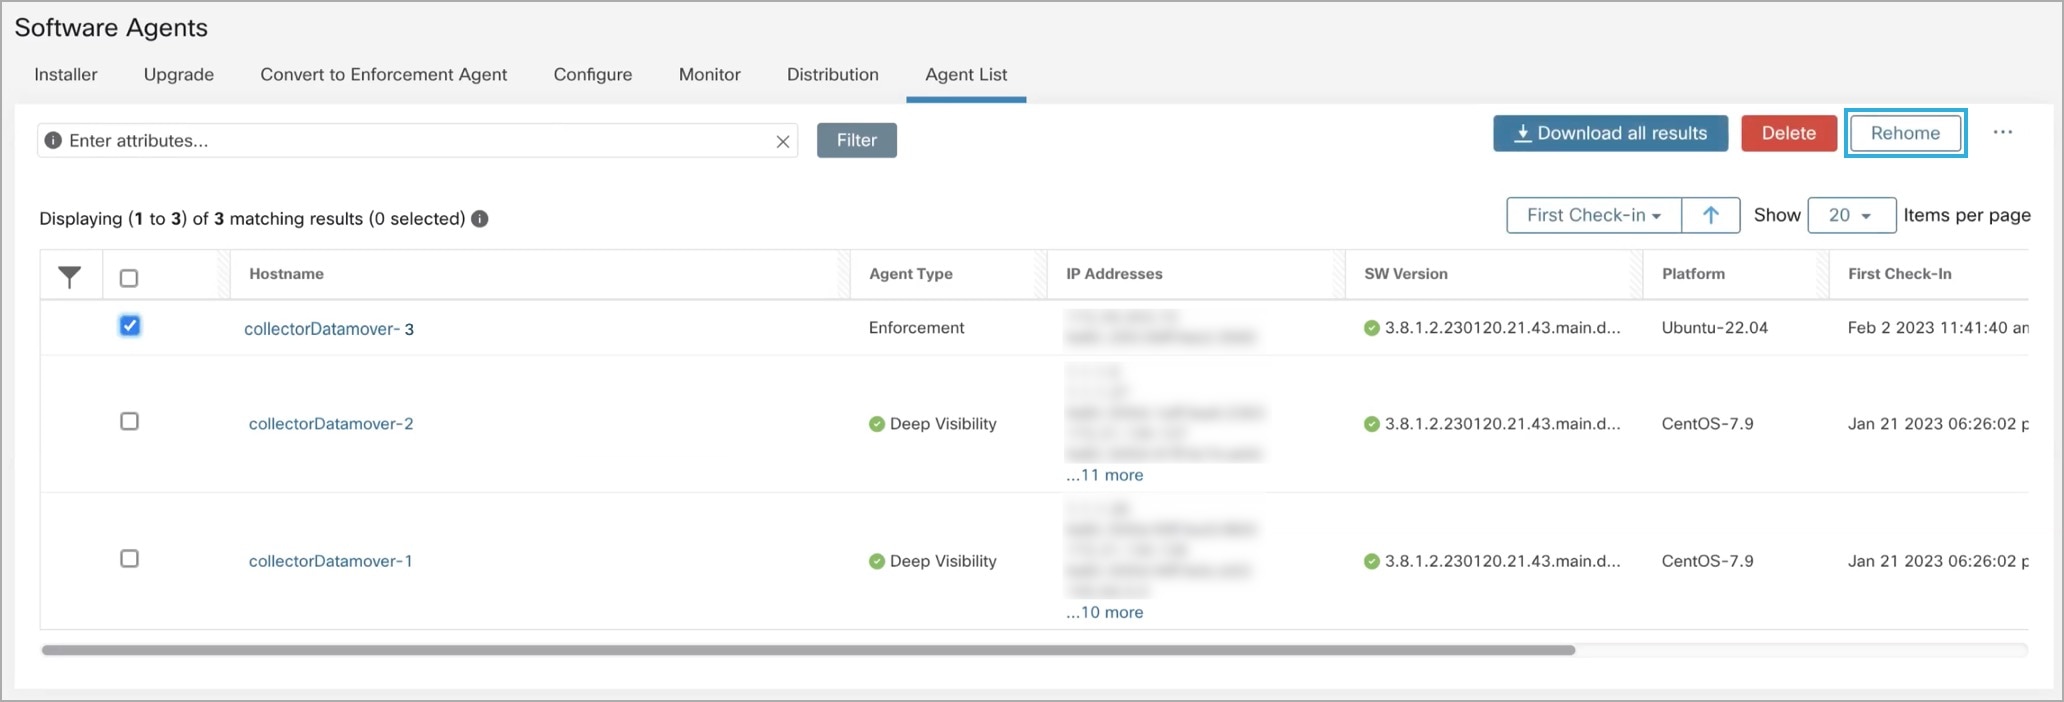
On the Software Agents > Agent List page, software agents with outdated versions are highlighted with a warning sign under the SW Version column. It is important to upgrade these agents to the latest available version on the cluster.

To use software agent config intent workflow to configure software agent upgrade:

Procedure


Step 1

Create an inventory filter on the Inventory Filters page. For more information, see Filters.
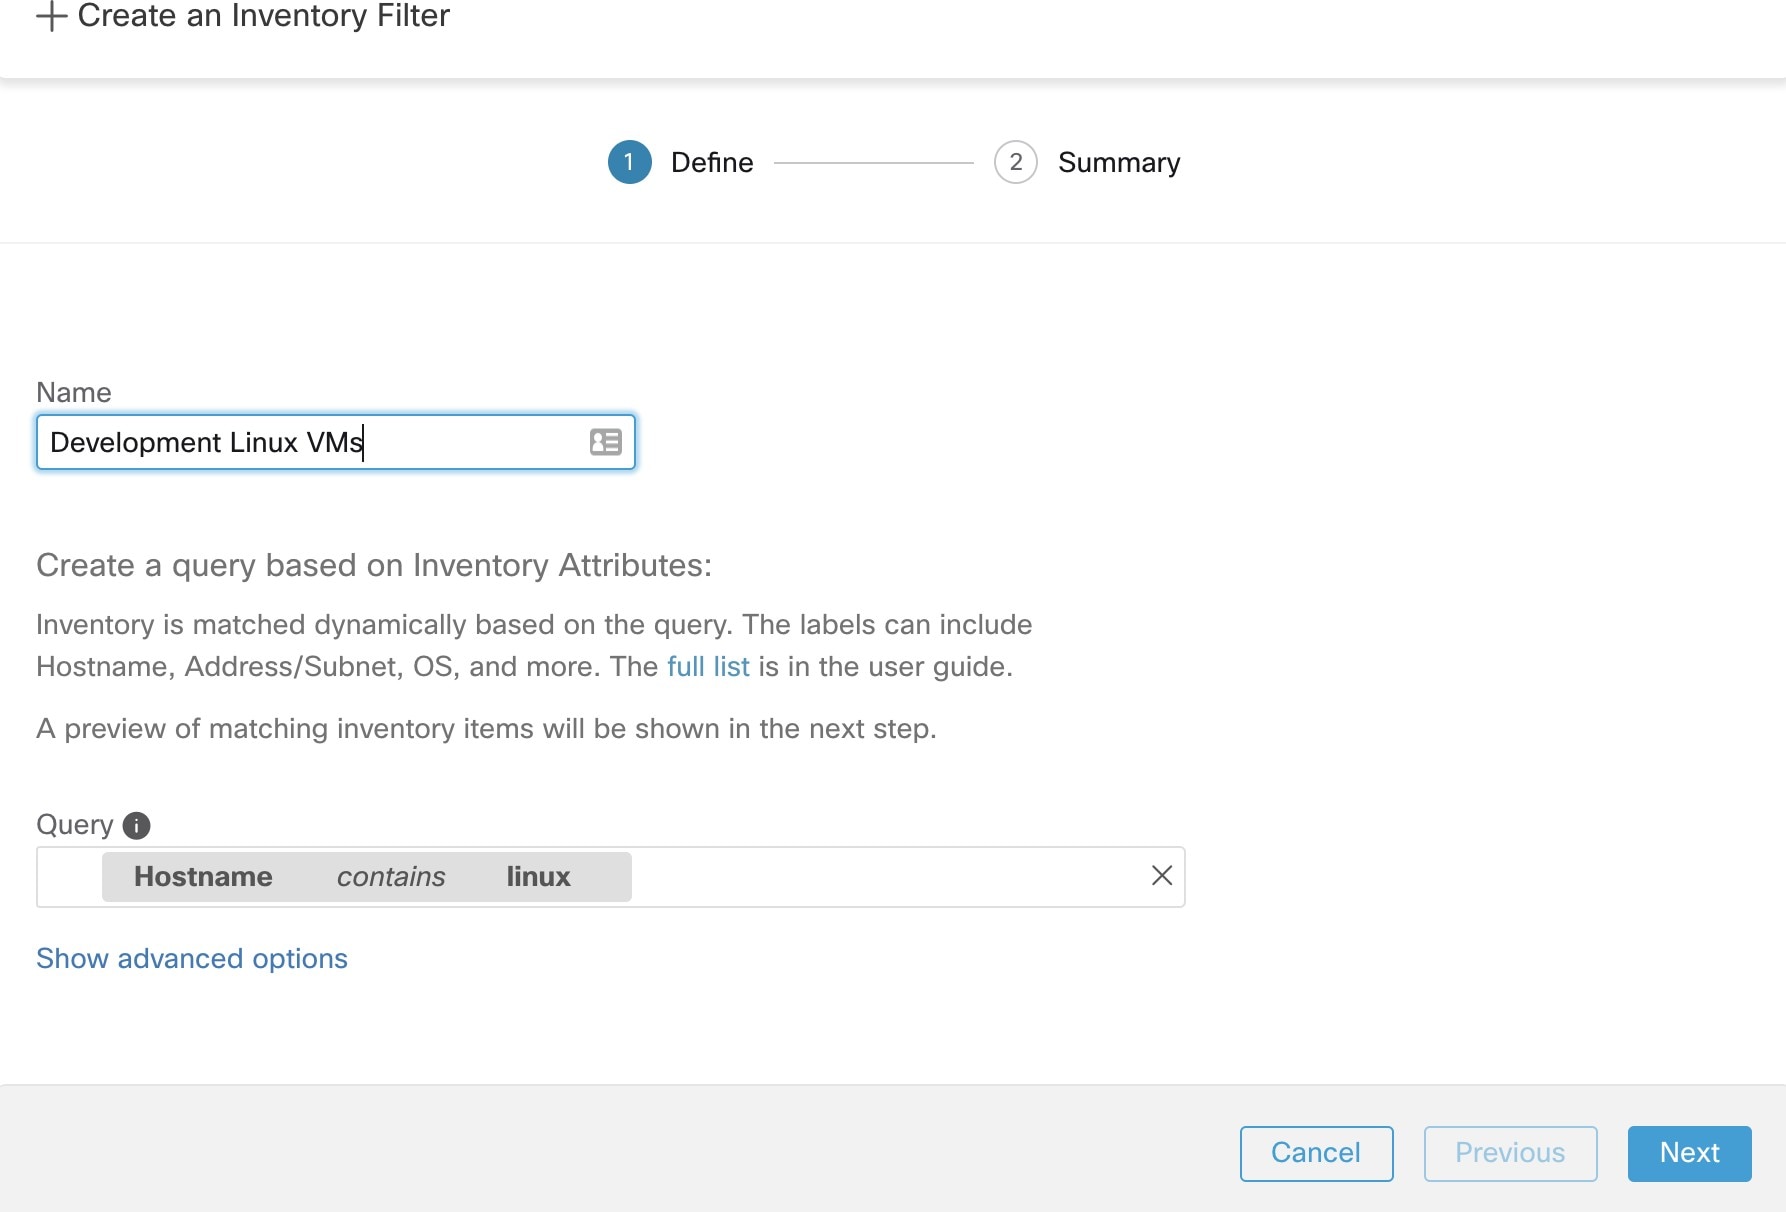
Figure 1. Inventory Filter
Inventory Filter

Step 2

Create an Agent Config profile for the agents selected by the inventory filter. Optionally, you can enable the Auto Upgrade option to automatically upgrade the selected agents.
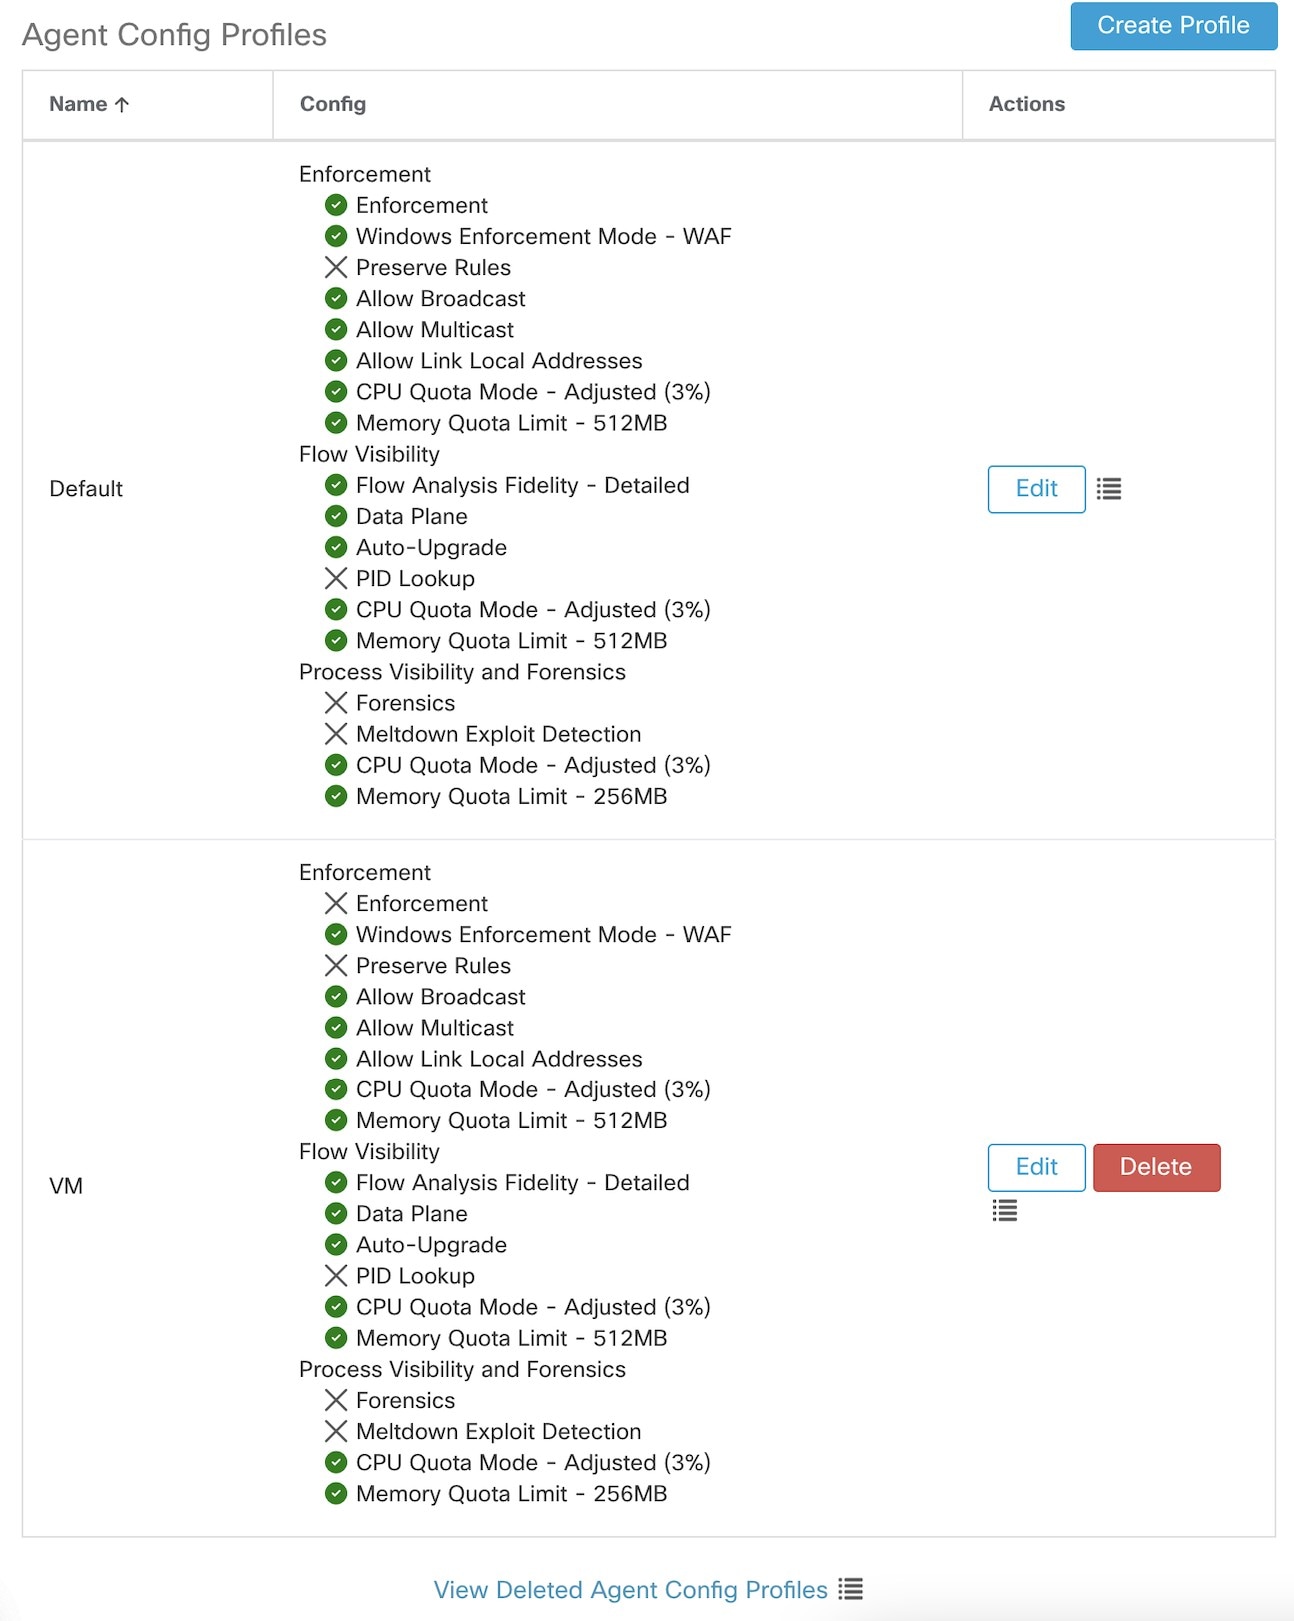
Figure 2. Agent Config
Agent Config

Step 3

Create an agent config intent to apply the config profile to the agents selected using inventory filter. If the auto upgrade option is enabled, the selected agents are automatically upgraded.

It normally takes up to 30 minutes to upgrade an agent after an agent profile is applied to them.

Figure 3. Agent Config Intent
Agent Config Intent

Note


Auto Upgrade setting in the default agent profile applies to ERSPAN. All other connector agents are auto upgraded whenever there is a cluster upgrade, including patch releases.


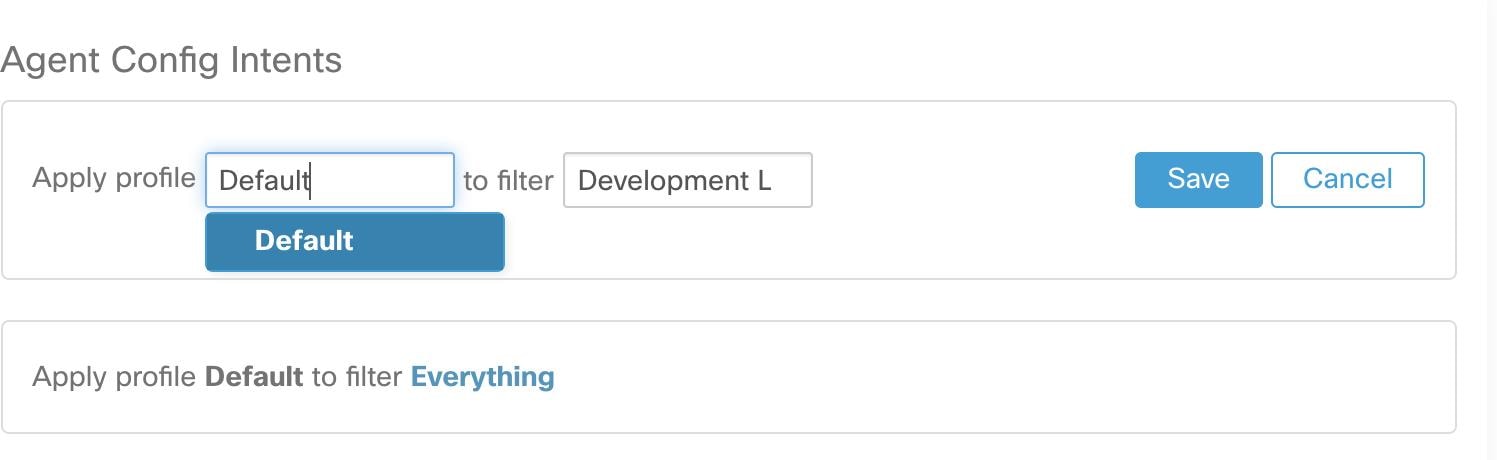
Manual Agent Upgrade

The following section explains how to manually upgrade agents without using the Sensor Config intent workflow.

Procedure


Step 1

In the left navigation pane, click Manage > Workloads > Agents.

Step 2

Click the Upgrade tab.

Deep visibility and enforcement agents are displayed and for each agent only newer versions to which it is upgradable are listed. By default, the latest version is selected.

Step 3

To filter specific agents, enter your search query in the filter box. For example, enter Platform = CentOS-7.6.

Step 4

Select the agents to be upgraded to the selected version and click Upgrade.

Note


Under normal circumstances, allowing the agent to automatically upgrade is strongly recommended and is the only supported upgrade method. If you want to control the upgrade by manually downloading the latest version and directly deploying it to the agents which are running on workloads, ensure that you follow the safety precautions.


Upgrade Behaviour of Kubernetes/Openshift Agent

Agents installed on Kubernetes/Openshift nodes using the daemonset installer script are capable of self-upgrade. The upgrade process is controlled by either the auto-upgrade option or by manually triggering an upgrade for any node in the Kubernetes/Openshift cluster. The mechanism of the upgrade in this environment is to upgrade the Docker image in the daemonset specification, which means that an upgrade of one agent affects all agents covered by the daemonset, as explained in the next paragraph.

When a Daemonset Pod specification changes, Kubernetes/Openshift will trigger a graceful shutdown, fetch the new docker image(s) and start the Secure Workload agent pods on ALL nodes in the Kubernetes/Openshift cluster. This will cause agents to be upgraded on other nodes, even if the policy to allow upgrades is applicable only to a subset of the nodes in the cluster.

If auto-upgrade is disabled for all nodes, manual upgrade is possible by downloading a new installer script and re-running the install. The installation script auto-detects the case of new installation vs upgrading an existing installation and will work to manually upgrade the daemonset pods when it detects an installation is already in place.

Remove Deep Visibility or Enforcement Linux Agent

RPM based installation:

  1. Run command: rpm -e tet-sensor

Agent uninstallation event is communicated to the cluster and the agent will be marked as uninstalled on Software Agent page.

Manually delete the agent from UI on the Software Agent page or the user can enable automated cleanup or removal of the agent by turning on the cleanup period from agent config profiles.


Note


By default, the cleanup period is turned off.


Ubuntu .deb based installation:

Fresh installation of Ubuntu agents now uses the native .deb format.

  1. Run command: dpkg –purge tet-sensor

Agent uninstallation event is communicated to the cluster and the agent will be marked as uninstalled on Software Agent page.

Manually delete the agent from UI on Software Agent page or the user can enable automated cleanup or removal of the agent by turning on the cleanup period from agent config profiles.


Note


  • By default, the cleanup period is turned off.

  • During the agent operations, it is possible that some kernel modules will be loaded automatically by the kernel. For example, if enforcement is enabled in Linux, Netfilter modules might be loaded. Agents do not have a list of modules loaded by kernel. Therefore, during agent uninstallation, it cannot possibly unloaded the kernel modules.

  • If enforcement agent applied a policy to the system firewall, uninstalling agent clears the applied policy and opens the system firewall.


Figure 4. Agent Uninstallation Alert

Remove a Deep Visibility or Enforcement Windows Agent

There are two options to uninstall Secure Workload agents:

Procedure


Step 1

Navigate to Control Panel > Programs > Programs and Features, and uninstall Cisco Secure Workload Agent.

Step 2

Alternatively, run the shortcut Uninstall.lnk within.

C:\Program Files\Cisco Tetration

Step 3

If an enforcement agent applies a policy to the system firewall, uninstalling the agent clears the applied policy, and opens the system firewall.

After you have uninstalled the agent, the cluster information is updated. The status of the agent is updated on the Software Agent page and the agent is marked as uninstalled.

Manually delete the agent from the UI on the Software Agent page or user can enable automated cleanup or removal of the agent by activating the cleanup period in the agent config profiles.

Note


By default, keep the cleanup period turned off.

Note

 
  • If you have installed Npcap during agent installation, Ncap will also get uninstalled while uninstalling the agent.

  • By default, log files, config files and certs will not get removed during uninstall. If you want to remove them, run the shortcut UninstallAll.lnk in the same folder.


Uninstall the Deep Visibility Agent or Enforcement AIX Agent

Procedure


To uninstall a software agent, run the following command:

installp -u tet-sensor

After the software agent is uninstalled and is no longer available on the UI, this information is communicated to the cluster, and the agent is marked as Uninstalled in the Software Agent page.

There are two ways in which you can delete an agent from the UI:

  • Delete the agent that is no longer needed directly from the Software Agent page. Additionally, you can delete the Tetration agent installation directory /opt/cisco/tetration by running the following command:

    rm -rf /opt/cisco/tetration
  • Configure the cleanup period in the Agent Configuration Profiles page to enable automated cleanup.

Note

 
  • By default, the cleanup period is set to Off.

  • The System Resource Controller controls the Deep Visibility agent as tet-sensor. You can start, stop, restart, and delete it. The service is made persistent with inittab as tet-sen-engine.

  • The System Resource Controller controls the Enforcement agent as tet-enforcer. You can start, stop, restart, and delete it. The service is made persistent with inittab as tet-enf-engine.

  • During the agent operations, the kernel may load some kernel modules automatically. For example, if enforcement is enabled in AIX, ipfilter modules are loaded. Agents do not have a list of modules loaded by the kernel. Therefore, during agent uninstallation, it cannot unload the kernel modules.

  • If the Enforcement agent applied a policy to the system firewall, uninstalling the agent clears the applied policy and opens the system firewall.


Remove Universal Linux Agent

Procedure


Step 1

Run the uninstall script: ‘/usr/local/tet-light/uninstall.sh‘

Step 2

Delete the agent from UI on the Software Agent page


Remove Universal Windows Agent

Procedure


Step 1

Run the uninstall script: ‘C:\Program Files\Cisco Tetration\Lightweight Sensor\uninstall.cmd‘

Step 2

Delete the agent from UI on the Software Agent page


Remove an Enforcement Kubernetes or OpenShift Agent

Procedure


Step 1

Locate the original installer script or download a new script from the Secure Workload UI.

Step 2

Run the uninstall option: install.sh –uninstall. The same considerations apply as during the install.

  • Only supported on Linux x86_64 architectures.

  • Either ~/.kube/config contains an admin credentials user or use the –kubeconfig option to point to the kubectl admin credentials file.

Step 3

Delete the agents for all the Kubernetes nodes from UI on the Software Agent page


Remove a Deep Visibility Solaris Agent

Procedure


Step 1

Run the following command:

  • For Solaris 11.4: pkg uninstall tet-sensor

  • For Solaris 10: pkgrm -a /opt/cisco/secure-workload/noask.admin -n tet-sensor

Step 2

Delete the agent on the Software Agent page.


Enable Rehoming

Procedure


Step 1

In the left navigation menu, click Manage > Workloads > Agents.

Step 2

Click the Agent List tab.

Step 3

Click the menu icon and select Rehome Agents.

Figure 5. Rehome Agents

Step 4

On the Agent Rehoming window, fill in the following details:

Field

Description

Destination Scope Activation Key

  1. Navigate to Manage > Workloads > Agents.

  2. Click the Installer tab.

  3. Select Manual install using classic packaged installers.

  4. Click Next.

  5. Click Agent Activation Key.

  6. Copy the Key value and paste it into the Destination Scope Activation Key field.

Destination Sensor VIP

  1. Navigate to Platforms > Cluster Configuration.

  2. Copy the Sensor VIP and paste it into the Destination Sensor VIP field.

HTTPS proxy

Enter a proxy domain or address if the agent needs

to use a proxy for outbound communication.

Destination Sensor CA Cert

  1. Navigate to Platforms > Cluster Configuration.

  2. Click Download Sensor CA Cert.

Figure 6. Enable Agent Rehoming

Step 5

Click Enable Agent Rehoming.

The configuration is saved. The Rehome button appears at the top right.


Select Agents to Rehome

Procedure


Step 1

Select an agent.

Step 2

Click Rehome.

Figure 7. Select Agents to Rehome

Step 3

Click Yes to confirm.


Disable Rehoming


Note


If there are multiple users rehoming to or from SaaS, the site administrator has to move each tenant or an appliance separately. To do this, disable Rehoming to clear the settings, and then enable Rehoming for the new user.


Procedure


Step 1

Click the menu icon and choose Rehome Agents.

Step 2

On the Agent Rehoming window, click Disable Agent Rehoming.

Figure 8. Disable Agent Rehoming