- Preface
-
- Administration User Interface Reference
- Guest Access User Interface Reference
- Web Portals Customization Reference
- Policy User Interface Reference
- Operations User Interface Reference
- Network Access Flows
- Switch and Wireless LAN Controller Configuration Required to Support Cisco ISE Functions
- Supported Management Information Bases in Cisco ISE
- Enable Client Provisioning in Cisco ISE
- Client Provisioning Resource Types
- Add Client Provisioning Resources from Remote Sources
- Download Client Provisioning Resources Automatically
- Add Cisco Provided Client Provisioning Resources from a Local Machine
- Add Customer Created Resources for AnyConnect from a Local Machine
- Configure Personal Device Registration Behavior
- Create Native Supplicant Profiles
- Create AnyConnect Configuration
- Create AnyConnect and Cisco NAC Agent Profiles
- Agent Profile Configuration Guidelines
Configure Client Provisioning
This chapter describes client provisioning functions in Cisco ISE that allows you to download client provisioning resources and configure agent profiles for Windows and MAC OS X clients, and native supplicant profiles for your own personal devices.
Client provisioning resource policies enable users to download and install resources on client devices.
- Enable Client Provisioning in Cisco ISE
- Client Provisioning Resource Types
- Add Client Provisioning Resources from Remote Sources
- Download Client Provisioning Resources Automatically
- Add Cisco Provided Client Provisioning Resources from a Local Machine
- Add Customer Created Resources for AnyConnect from a Local Machine
- Configure Personal Device Registration Behavior
- Create Native Supplicant Profiles
- Create AnyConnect Configuration
- Create AnyConnect and Cisco NAC Agent Profiles
- Agent Profile Configuration Guidelines
- Client IP Address Refresh Configuration
- Posture Protocol Settings
- Client Login Session Criteria
- Provision Client Machines with the Cisco NAC Agent MSI Installer
- Cisco ISE Posture Agents
- AnyConnect
- Cisco NAC Agent XML File Installation Directories
- Cisco NAC Agent for Windows Clients
- Cisco NAC Agent for Macintosh Clients
- Cisco Web Agent
- Cisco NAC Agent Logs
- Create an Agent Customization File for the Cisco NAC Agent
- Configure Client Provisioning Resource Policies
- Client Provisioning Reports
- Client Provisioning Event Logs
Enable Client Provisioning in Cisco ISE
Enable client provisioning to allow users to download client provisioning resources and configure agent profiles. You can configure agent profiles for Windows clients, Mac OS X clients, and native supplicant profiles for personal devices. When you choose to disable this function of Cisco ISE, users who attempt to access the network will receive a warning message indicating that they are not able to download client provisioning resources.
To ensure that you are able to access the appropriate remote location from which you can download client provisioning resources to Cisco ISE, you may be required to verify that you have the correct proxy settings configured for your network.
What to Do Next
Add client provisioning resources for posture agents in Cisco ISE and configure client provisioning policies to enable users to download and install client provisioning resources on client machines.
Client Provisioning Resource Types
Client provisioning resources are provided by Cisco for AnyConnect, Cisco NAC Agents, and Cisco Web Agent or customers can create resources for AnyConnect.
Client provisioning resources types include:
Add Client Provisioning Resources from Remote Sources
You can add client provisioning resources from Cisco.com for AnyConnect and Cisco NAC Agent for Windows and MAC OS x clients, and Cisco Web agent. Depending on the resources that you select and available network bandwidth, Cisco ISE can take a few seconds or even a few minutes to download client provisioning resources to Cisco ISE.
What to Do Next
After you have successfully added client provisioning resources to Cisco ISE, you can begin to configure client provisioning resource policies.
Download Client Provisioning Resources Automatically
Downloading automatically uploads all available software from Cisco to Cisco ISE, many items of which may not be pertinent to your deployment. Cisco recommends manually uploading resources whenever possible rather than opting to download them automatically from Cisco.
Ensure that you have the correct proxy settings configured in Cisco ISE and you are able to access the appropriate remote location from which you can download client provisioning resources to Cisco ISE.
What to Do Next
After you have successfully added client provisioning resources to Cisco ISE, you can begin to configure client provisioning resource policies.
Add Cisco Provided Client Provisioning Resources from a Local Machine
Be sure to upload only current, supported resources to Cisco ISE. Older, unsupported resources (older versions of the Cisco NAC Agent, for example) will likely cause serious issues for client access.
If you are downloading the resource files manually from the Cisco.com, refer to “Cisco ISE Offline Updates” section in the Release Notes.
What to Do Next
After you have successfully added client provisioning resources to Cisco ISE, you can begin to configure client provisioning resource policies.
Add Customer Created Resources for AnyConnect from a Local Machine
Add customer created resources like AnyConnect customization and localization packages and AnyConnect profiles from the local machine to Cisco ISE.
Ensure that customer created resources for AnyConnect are zipped files and available in your local disk.
What to Do Next
Create AnyConnect agent profile
Configure Personal Device Registration Behavior
Use this function to specify how Cisco ISE should handle user login sessions via personal devices on which Cisco ISE cannot install a native supplicant provisioning wizard (For example, Research In Motion Blackberry devices).
What to Do Next
Enable self-provisioning capabilities that allow employees to directly connect their personal devices to the network, as described in the Support for Multiple Guest Portals section.
Create Native Supplicant Profiles
You can create native supplicant profiles to enable users to bring their own devices into the Cisco ISE network. When the user logs in, based on the profile that you associate with that user’s authorization requirements, Cisco ISE provides the necessary supplicant provisioning wizard needed to set up the user’s personal device to access the network.
-
If you intend to use a TLS device protocol for remote device registration, be sure you set up at least one Simple Certificate Enrollment Protocol (SCEP) profile.
-
Be sure to open up TCP port 8909 and UDP port 8909 to enable Cisco NAC Agent, Cisco NAC Web Agent, and supplicant provisioning wizard installation. For more information on port usage, see the “Cisco ISE Appliance Ports Reference” appendix in the Cisco Identity Services Engine Hardware Installation Guide, Release 1.3.
What to Do Next
Enable self-provisioning capabilities that allow employees to directly connect their personal devices to the network, as described in the Support for multiple Guest Portals section.
Create AnyConnect Configuration
AnyConnect configuration includes AnyConnect software and its associated configuration files. This configuration can be used in the client provisioning policy that allows users to download and install AnyConnect resources on the clients.
You must upload the AnyConnect package, compliance module, profiles, and optionally any customization and localization bundles before configuring an AnyConnect Configuration object.
Create AnyConnect and Cisco NAC Agent Profiles
Use this procedure to create an AnyConnect or a NAC posture agent profile where you can specify parameters that define the agent behavior, parameters that are related to whether or not to refresh the client IP address, and for the posture protocol.
Agent Profile Configuration Guidelines
Cisco recommends configuring agent profiles to control remediation timers, network transition delay timers, and the timer that is used to automatically close the login success screen on client machines so that these settings are policy based. However, when there are no agent profiles configured to match client provisioning policies, you can use the settings in the to accomplish the same goal.
Once you configure and upload an agent profile to a client device via policy enforcement or another method, that agent profile remains on the client and affects login and operation behavior until you change it to something else. Therefore, deleting an agent profile from Cisco ISE does not remove that behavior from previously affected clients. To alter the login and operational behavior, you must define a new agent profile that overwrites the values of existing agent profile parameters on the client and upload it via policy enforcement.
If Cisco ISE has a different agent profile than what is present on the client (which is determined using MD5 checksum), then Cisco ISE downloads the new agent profile to the client. If the agent customization file originating from Cisco ISE is different, Cisco ISE also downloads the new agent customization file to the client.
Agent Behavior Configuration
The following table describes the fields in the NAC or AnyConnect Posture Profile page, which allows you to configure parameters for the posture agent (AnyConnect and Cisco NAC Agent). The navigation path for this page is .
|
Field |
Default Value |
Mode (Applies only to Cisco ISE NAC Agent ) |
Usage Guidelines |
|---|---|---|---|
|
Disable Agent Exit. (Not applicable for a Mac OS X client) |
No |
Merge |
If the value is set to Yes, this setting prevents users from exiting the agent via the system tray. |
|
Enable Accessibility Mode (Not applicable for a Mac OS X client) |
No—Agent does not interact with the Job Access with Speech (JAWS) |
Merge |
If the value is set to Yes, this setting enables compatibility with the JAWS screen reader. Users may experience a slight impact on performance when this feature is enabled. The agent still functions normally if this feature is enabled on a client machine that does not have the JAWS screen reader installed. |
|
Enable signature check(Not applicable for a Mac OS X client) |
No |
Overwrite |
If the value is set to Yes, this setting enables Windows to check the digital signature of the executables before launching the programs for remediation. |
|
Bypass Summary Screen(Not applicable for a Mac OS X client) |
Yes |
Merge |
|
|
Locale(Not applicable for a Mac OS X client) |
Default |
Merge |
The default setting enables the agent to use the locale settings from the client operating system. If this setting is either the ID, the abbreviated name, or the full name of a supported language, the agent automatically displays the appropriate localized text in the agent dialogs on the client machine. |
|
Posture report filter(Not applicable for a Mac OS X client) |
Display Failed |
Merge |
If the value is set to Display Failed, the client posture assessment report display only remediation errors when the user clicks Show Details in the agent dialog. If the value is set to Display All, the client posture assessment report displays all the results when the user clicks Show Details in the agent dialog. |
|
Remediation timer |
4 |
Overwrite |
This setting specifies the time to remediate any failed posture assessment checks on the client machine before having to go through the entire login process again. The valid range is 1 to 300 minutes. |
|
Network transition delay |
3 |
Overwrite |
This setting specifies the time to wait for the network transition (IP address change) to occur before beginning the remediation timer countdown. The vaild range is 2- 30 seconds. |
|
Log file size |
5 |
Merge |
This setting specifies file size in megabytes for the agent log files on the client machine. If the log file size is set to zero, the agent does not record any login or operation information for the user session on the client machine. If the log file size is other than zero, the agent records login and session information up to the specified number of megabytes. |
|
Enable Auto Close. (Not applicable for AnyConnect) |
No |
Overwrite |
if this setting is set to Yes, this setting allows the agent login dialog to close automatically following the user authentication. |
|
Auto close timer (Not applicable for AnyConnect) |
0 |
Overwrite |
This setting enables the agent login screen to wait for a specified period of time and close automatically following the user authentication. The valid range is 0 yo 30 seconds. |
 Note | Merge parameter values with existing agent profile settings or overwrite them to appropriately configure agent behavior on Windows and Mac OS X clients. |
Note | Agent log files are stored in a directory on the client machine. After the first login session, two files reside in the directory: one backup file from the previous log in session, and one new file containing login and operation from the current session. If the log file for the current session grows beyond the specified file size, the first segment of agent login and operation information automatically becomes the backup file in the directory. and the agent continues to record the latest entries in the current session file. |
Supported Languages
Client IP Address Refresh Configuration
The following table describes the fields in the NAC AnyConnect Posture Profile page, which allows you to configure parameters for the client to renew or refresh its IP address after VLAN change. The navigation path for this page is .
|
Field |
Default Value |
Mode (Applies only to Cisco NAC Agent) |
Usage Guidelines |
|---|---|---|---|
|
VLAN detection interval |
0, 5 |
Merge |
This setting is the interval at which the agent check for the VLAN change. For the Windows NAC agent, the default value is 0. By default, the access to authentication VLAN change feature is disabled for Windows. The valid range is 0 to 5 seconds. For the Mac OS X agent, the default value is 5. By default, the access to authentication VLAN change feature is enabled with VlanDetectInteval as 5 seconds for Mac OS X. The valid range is 5 to 900 seconds. 0 —Access to Authentication VLAN change feature is disabled. 1 to 5—Agent sends an Internet Control Message Protocol (ICMP) or Address Resolution Protocol (ARP) query every 5 seconds. 6 to 900—An ICMP or ARP query is sent every x seconds. |
|
Enable VLAN detection without UI (Not applicable for a Mac OS X client) |
No |
Merge |
This setting enables or disables VLAN detection even when the user is not logged in. No—VLAN detect feature is disabled. Yes—VLAN detect feature is enabled. |
|
Retry detection count |
3 |
Merge |
If the Internet Control Message Protocol (ICMP) or Address Resolution Protocol (ARP) polling fails, this setting configures the agent to retry x times before refreshing the client IP address. |
|
Ping or ARP |
0 The valid range is 0 to 2. |
Merge |
This setting specifies the method used for detecting the client IP address change. 0—Poll using ICMP 1—Poll using ARP 2—Poll using ICMP first, then (if ICMP fails) ARP |
|
Maximum timeout for ping |
1 The valid range is 1 to 10 seconds. |
Merge |
Poll using ICMP, and if there is no response within the specified time, then declare an ICMP polling failure. |
|
Enable agent IP refresh |
Yes (Default) |
Overwrite |
This setting specifies whether or not the client machine to renew or refresh its IP address after the switch (or WLC) changes the VLAN for the login session of the client on the respective switch port. |
|
DHCP renew delay |
0 The valid range is 0 to 60 seconds. |
Overwrite |
This setting specifies that the client machine waits before attempting to request for a new IP address from the network DHCP server. |
|
DHCP release delay |
0 The valid range is 0 to 60 seconds. |
Overwrite |
The setting specifies that the client machine waits before releasing its current IP address. |
Note | Merge parameter values with existing agent profile settings or overwrite them to appropriately configure clients on Windows and Mac OS X clients for refreshing IP addresses. |
Posture Protocol Settings
The following table describes the fields in the NAC AnyConnect Profile page, which allows you to configure the posture protocol settings. The navigation path for this page is .
|
Field |
Value |
Mode |
Usage Guidelines |
|---|---|---|---|
|
Allow CRL Checks (Not applicable for a Mac OS X client) |
Yes |
Overwrite |
If the value is set to No, this setting turns off checking the certificate revocation list (CRL) during discovery and negotiation. |
|
MAC Address Exemption List (Not applicable for a Mac OS X client) |
Enter MAC addresses separated by a comma. For example, AA:BB:CC:DD:EE:FF, 11:22:33:44:55:66 |
Merge |
If you specify one or more MAC addresses in ths setting, the agent does not advertise those MAC addresses to Cisco ISE during login and authentication to help prevent sending unnecessary MAC addresses over th network. |
|
Discovery Host (Not applicable for a Mac OS X client) |
Enter the IP address or the fully qualified domain name (FQDN) |
Overwrite |
This setting specifies the Discovery Host address or resolvable domain name that the agent uses to connect to Cisco ISE in a Layer 3 deployment. |
|
Enable Discovery Host (Not applicable for a Mac OS X client) |
Yes |
Overwrite |
Yes—User can specify a custom value in the Discovery Host field in the agent Properties dialog box. No—Ensure that the user cannot update the value in the Discovery Host field on the client machine. |
|
Server Name Rules |
Enter the fully qualified domain name (FQDN) of the Cisco ISE server that are separated by a comma. |
Merge |
This field consists of comma-separated names of associated Cisco ISE servers. The agent uses the names in this list to authorize Cisco ISE access points. If this list is empty, then authorization is not performed. if any of the names is not found, then an error is reported. |
|
Auto-generated MAC Address (Not applicable for a Mac OS X client) |
— |
Merge |
This setting supports Evolution-Data Optimized connects on the client machine. if the client machine does not have an active network interface card, the agent creates a dummy MAC address for the system. |
|
SWISS Timeout (Not applicable for a Mac OS X client) |
1—Agent performs SWISS discovery as designed and no additional UDP response packet delay time out value is introduced. |
Merge |
If the value is set to greater than one, the agent waits the additional number of seconds for a SWISS UDP discovery response packet from Cisco ISE before sending another discovery packet. The agent makes this action to ensure that the network latency is not delaying the response packet en route. (SWISS Timeout only for UDP SWISS Timeouts) |
|
Disable L3 SWISS delay (Not applicable for a Mac OS X client) |
No |
Merge |
If this setting is set to Yes, the agent disables the ability to increase the transmission interval for Layer 3 discovery packets. Therefore, the Layer 3 discovery packets repeatedly go out every 5 seconds, just like Layer 2 packets. |
|
HTTP Discovery Timeout (Not applicable for a Mac OS X client) |
30 (Default for Windows clients) The valid range is 3 seconds and above. |
Merge |
This setting specifies the HTTP discovery timeout for which the HTTPS discovery from the agent waits for the discovery response from Cisco ISE. if there is no response for the specified time, then the discovery process times out. If the value is set to 0, then the default client machine operating system timeout settings are used. If the value is set to 1 or 2, automatically the value is set to 3. |
|
HTTP Timeout (Not applicable for a Mac OS X client) |
120 (Default for Windows clients) The valid range is 3 seconds and above. |
Merge |
This setting specifies the HTTP timeout for which the HTTP request from the agent waits for the response. if there is no response for the specified time, then the request times out, and the discovery process times out. If the value is set to 0, then the default client machine operating system timeout settings are used. If the value is set to 1 or 2, automatically the value is set to 3. |
Client Login Session Criteria
Cisco ISE looks at various elements when classifying the type of login session through which users access the internal network, including:
After Cisco ISE classifies a client machine, it uses client provisioning resource policies to ensure that the client machine is set up with an appropriate agent version, up-to-date compliance modules for antivirus and antispyware vendor support, and correct agent customization packages and profiles, if necessary.
Agent Download Issues on Client Machine
Problem
The client machine browser displays a “no policy matched” error message after user authentication and authorization. This issue applies to user sessions during the client provisioning phase of authentication.
Possible Causes
The client provisioning policy is missing required settings.
Posture Agent Download Issues
Remember that downloading the posture agent installer requires the following:
Resolution
-
Ensure that a client provisioning policy exists in Cisco ISE. If yes, verify the policy identity group, conditions, and type of agent(s) defined in the policy. (Also ensure whether or not there is any agent profile configured under , even a profile with all default values.)
-
Try re-authenticating the client machine by bouncing the port on the access switch.
Provision Client Machines with the Cisco NAC Agent MSI Installer
You can place the MSI installer in a directory or a zip version of the same installer on the client machine along with an Agent configuration XML file (named NACAgentCFG.xml) containing the appropriate Agent profile information required to coincide with your network.
| Step 1 | Download the nacagentsetup-win.msi or nacagentsetup-win.zip installer file from the Cisco Software Download site from http://software.cisco.com/download/navigator.html and navigate to . |
| Step 2 | Place the
nacagentsetup-win.msi file in a specific directory
on the client machine (for example, C:\temp\nacagentsetup-win.msi):
|
| Step 3 | Place an Agent
configuration XML file in the same directory as the Cisco NAC Agent MSI
package.
If you are not connected to Cisco ISE, you can copy the NACAgentCFG.xml file from a client that has already been successfully provisioned. The file is located at C:\Program Files\Cisco\Cisco NAC Agent\NACAgentCFG.xml. As long as the Agent configuration XML file exists in the same directory as the MSI installer package, the installation process automatically places the Agent configuration XML file in the appropriate Cisco NAC Agent application directory so that the agent can point to the correct Layer 3 network location when it is first launched. |
| Step 4 | Open a Command
prompt on the client machine and enter the following to execute the
installation:
msiexec.exe /i NACAgentSetup-win.msi /qn /l*v c:\temp\agent-install.log (The /qn qualifier installs the Cisco NAC Agent completely silently. The /l*v logs the installation session in verbose mode.) To uninstall the NAC Agent, you can execute the following command:msiexec /x NACAgentSetup-win-<version>.msi /qnInstalling a new version of the Agent using MSI will uninstall the old version and install the new version using the above commands. |
| Step 5 | If you are using Altiris/SMS to distribute the MSI installer, place the Agent customization files in a sub-directory named “brand” in the directory “%TEMP%/CCAA”. When the Cisco NAC Agent is installed in the client, the customization is applied to the Agent. To remove the customization, send a plain MSI without the customization files. |
Cisco ISE Posture Agents
Agents are applications that reside on client machines logging into the Cisco ISE network. Agents can be persistent (like the AnyConnect, Cisco NAC Agent for Windows and Mac OS X) and remain on the client machine after installation, even when the client is not logged into the network. Agents can also be temporal (like the Cisco NAC Web Agent), removing themselves from the client machine after the login session has terminated. In either case, the Agent helps the user to log in to the network, receive the appropriate access profile, and even perform posture assessment on the client machine to ensure it complies with network security guidelines before accessing the core of the network.
Note | Currently Cisco NAC Agent and Cisco NAC Web Agent support Client Provisioning Portal and Native Supplicant Provisioning. Cisco NAC Web Agent supports Central Web Authentication flow (CWA), but Cisco NAC Agent does not support CWA. |
- Posture Agent Discovery Request and Cisco ISE Response
- Web Agent Posture Discovery Request and Cisco ISE Response
- Agent Displays “Temporary Access”
- Agent Fails to Initiate Posture Assessment
Posture Agent Discovery Request and Cisco ISE Response
Cisco ISE supports coexistence of AnyConnect and legacy Cisco ISE NAC agents on Windows and Mac OS x clients. Agents start the posture discovery probe only when there is any change in the network on the clients. Cisco ISE responds to the client's posture discovery probe based on the client provisioning policy and the corresponding agent will get the discovery response, which results in only one agent being active.
Based on the client provisioning policy, Cisco ISE differs in responding to the agents posture discovery probe as below:
-
If the endpoint is configured to use the legacy agent (Cisco ISE NAC agent for Windows and Mac OS x), the agent receives the discovery response with a string "X-perfigo-CAS=FQDN" in the existing format. AnyConnect stops discovery, if the discovery response is received for the legacy agent.
-
If the endpoint is configured to use AnyConnect, Cisco ISE responds in a different format. This will be the Cisco ISE Policy Service node FQDN and the AnyConnect Configuration URL, AnyConnect package location and version based on the client provisioning policy. The legacy agent stops discovery, if the response is received for AnyConnect.
Web Agent Posture Discovery Request and Cisco ISE Response
The Web agent does not do discovery probe. if an endpoint is configured to use the Web agent, Cisco ISE responds using the format, X-ISE-PDP-WEBAGENT=FQDN". The webagent discovery response is used to invoke the Cisco NAC Agent on the client, if the client provisioning policy is configured to use the Web agent.
Agent Displays “Temporary Access”
Problem
A client machine is granted “Temporary Access” to the network following login and authentication, but administrator and users expect full network access.
Possible Causes
This issue is applicable to any client machine login session using an agent to connect.
Resolution
The user must try to verify network connectivity and then try to log in again (and pass through posture assessment, as well) to attempt to reestablish the connection.
Agent Fails to Initiate Posture Assessment
Problem
The user is presented with a “Clean access server not available” message. This issue applies to any agent authentication session from Cisco ISE.
Possible Cause
This error could mean that either the session has terminated or Cisco ISE is no longer reachable on the network.
Resolution
-
The user can try to ping the default gateway or the RADIUS server IP address or FQDN supplied by the network administrator.
-
The administrator can check network access attributes for the user (like the assigned VLAN, ACLs, routing, execute the nslookup command on the client, client machine DNS connection, and so on).
AnyConnect
Cisco ISE uses an integrated module in AnyConnect for Cisco ISE posture requirements. AnyConnect is the posture agent that coexists with Cisco ISE NAC Agent on the same endpoint. Based on the client provisioning policy configuration in Cisco ISE, only one of the agents will be active at a time.
To leverage Cisco ISE for integration with AnyConnect agent, Cisco ISE:
-
Serves as a staging server to deploy AnyConnect, Version 3.2 and its future releases
-
Interacts with AnyConnect posture component for Cisco ISE posture requirements
-
Supports deployment of AnyConnect profiles, customization/language packages, and OPSWAT library updates for Windows and Mac OS x operating systems.
-
Supports AnyConnect and legacy agents at the same time.
Cisco NAC Agent XML File Installation Directories
In a system where the Cisco NAC Agent installed at the default location, you can find the following .xml files in the following directories:
-
The nac_login.xml file is available in the “C:\Program Files\Cisco\Cisco NAC Agent\UI\nac_divs\login” directory.
-
In the nacStrings_xx.xml file, the “xx” indicates the locale. You can find a complete list of the files in the “C:\Program Files\Cisco\Cisco NAC Agent\UI\cues_utility” directory.
If the agent is installed at a different location, then the files would be available at “<Agent Installed path>\Cisco\Cisco NAC Agent\UI\nac_divs\login” and “<Agent Installed path>\Cisco\Cisco NAC Agent\cues_utility”.
Cisco NAC Agent for Windows Clients
The Cisco NAC Agent provides the posture assessment and remediation for client machines.
Users can download and install the Cisco NAC Agent (read-only client software), which can check the host registry, processes, applications, and services. The Cisco NAC Agent can be used to perform Windows updates or antivirus and antispyware definition updates, launch qualified remediation programs, distribute files uploaded to the Cisco ISE server, distribute website links to web sites for users to download files to fix their system, or simply distribute information and instructions.
Cisco strongly recommends that you ensure that the latest Windows hotfixes and patches are installed on Windows XP clients so that the Cisco NAC Agent can establish a secure and encrypted communication with Cisco ISE (via SSL over TCP).
- Uninstall the Cisco NAC Agent from Windows 7 and Earlier Clients
- Uninstall the Cisco NAC Agent in a Windows 8 Client
- Windows 8 Metro and Metro App Support —Toast Notifications
Uninstall the Cisco NAC Agent from Windows 7 and Earlier Clients
The Cisco NAC Agent installs to C:\Program Files\Cisco\Cisco NAC Agent\ on the Windows client.
You can uninstall the agent in the following ways:
Uninstall the Cisco NAC Agent in a Windows 8 Client
You can uninstall Cisco NAC Agent in a Windows 8 client in Metro mode.
| Step 1 | Switch to Metro Mode. |
| Step 2 | Right-Click Cisco NAC Agent tile. |
| Step 3 | Select Un-Install from the options available at the bottom of the screen. |
| Step 4 | The system automatically switches to Desktop mode and opens Add/Remove control panel. |
| Step 5 | In the Add/Remove control panel, perform one of the following: |
Windows 8 Metro and Metro App Support —Toast Notifications
In Cisco NAC Agent scenarios where the user does not get network access, like "Remediation Failed" or "Network Access expired", the Agent displays the following toast notification:Network not available, Click "OK" to continue.
To get more details, you can select the toast and you will be redirected to Desktop mode and the Cisco NAC agent dialog is displayed.
Toast Notification is displayed for all positive recommended actions that the user needs to perform to gain network access. The following are some examples:
-
For Network Acceptance policy, toast will be displayed as: "Click Accept to gain network access"
-
For Agent/Compliance Module Upgrade, toast will be displayed as: "Click OK to Upgrade/Update"
-
In the "user logged out" event, when "Auto Close" option for Logoff is not enabled in Clean Access Manager (CAM), toast notification is provided. This toast enables the users to know that they have been logged out and that they need to login again to get network access.
Cisco NAC Agent for Macintosh Clients
The Cisco NAC OS X Agent provides the posture assessment and remediation for Macintosh client machines.
Users can download and install the Cisco NAC OS X Agent (read-only client software), which can check antivirus and antispyware definition updates.
After users log in to the Cisco NAC OS X Agent, the agent gets the requirements that are configured for the user role and the operating system from the Cisco ISE server, checks for required packages and sends a report back to the Cisco ISE server. If requirements are met on the client, the user is allowed network access. If requirements are not met, the agent presents a dialog to the user for each requirement that is not satisfied. The dialog provides the user with instructions and the action to take for the client machine to meet the requirement. Alternatively, if the specified requirements are not met, users can choose to accept restricted network access while the user tries to remediate the client system.
Uninstall the Cisco NAC Agent from Macintosh Clients
You can uninstall the Cisco NAC Agent for Mac OS X clients by running the uninstall script as follows:
Cisco Web Agent
The Cisco Web Agent provides temporal posture assessment for client machines.
Users can launch the Cisco Web Agent executable, which installs the Web Agent files in a temporary directory on the client machine via ActiveX control or Java applet.
After users log in to the Cisco Web Agent, the Web Agent gets the requirements that are configured for the user role and the operating system from the Cisco ISE server, checks the host registry, processes, applications, and services for required packages and sends a report back to the Cisco ISE server. If requirements are met on the client machine, the user is allowed network access. If requirements are not met, the Web Agent presents a dialog to the user for each requirement that is not satisfied. The dialog provides the user with instructions and the action to take for the client machine to meet the requirement. Alternatively, if the specified requirements are not met, users can choose to accept the restricted network access while they try to remediate the client system so that it meets requirements for the user login role.
Note | ActiveX is supported only on the 32-bit versions of Internet Explorer. You cannot install ActiveX on a Firefox web browser or on a 64-bit version of Internet Explorer. |
Cisco NAC Agent Logs
In the Cisco NAC Agent for Windows, right-click the Agent Tray Icon and then click Log Packager to run the support package and collect the agent logs.
In the Cisco NAC Agent for Cisco NAC OS X, in the Tools menu, right-click the Agent icon and click the Collect Support Logs option to collect the agent logs and support information. The collected information is available as a zip file. The user can save the file by choosing the file location and filename. By default the file is saved on the desktop with the filename as CiscoSupportReport.zip.
If the agent crashes or hangs, you can run the CCAAgentLogPackager.app to collect the logs. This file is available at /Applications/CCAAgent.app. You can right-click CCAAgent.app, select Show Package Contents and double-click CCAAgentLogPackager to collect the support information.
Create an Agent Customization File for the Cisco NAC Agent
An agent customization file allows you to customize the logo, fields, and message text contained in a Cisco NAC Agent login dialog to suit your specific Windows client network access requirements.
You can create a customization package as a .zip file that contains an XML descriptor file and another .zip file with the contents comprising the customized options.
| Step 1 | Assemble the files required to comprise your Agent login customization package: |
| Step 2 | Create a zip file called “brand-win.zip” that contains the assembled files. For example, in a Linux or Unix environment, execute the following: zip -r brand-win.zip nac_login.xml nac_logo.gif nacStrings_en.xml nacStrings_cy.xml nacStrings_el.xml |
| Step 3 | Create a “custom.zip” file that contains an appropriate updateFeed.xml descriptor file and the .zip file created above. For example, in a Linux or Unix environment, execute the following: zip -r custom.zip updateFeed.xml brand-win.zip |
| Step 4 | Save the resulting “custom.zip” file to a location on a local machine that you can access when uploading the file to Cisco ISE. |
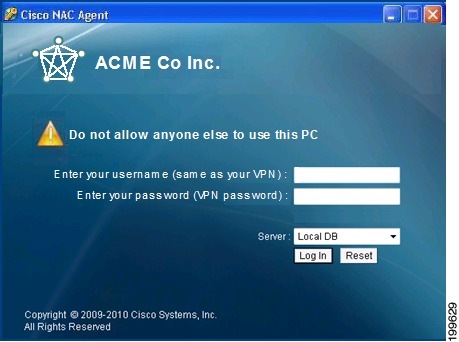
Cisco NAC Agent Default and Customized Login Screens
Cisco NAC Agent Login—Default Screen
You can customize the default elements in the login screen on the Cisco NAC Agent. Once you have customized these elements, you then combine them with an “updateFeed.xml” XML descriptor file in the Agent login customization package to upload to Cisco ISE.

Cisco NAC Agent Login—Customized Screen
Windows client users see the customized login screen when they access your network via the Cisco NAC Agent. You can replace the Cisco logo that appears in the Cisco NAC Agent login screen with your corporate/company logo. You can modify the nac_login.xml file replacing the default Cisco logo with your own corporate/company logo in the form of a .gif file named “nac_logo.gif file,” and creating one or more “nacStrings_xx.xml” files. Be sure the image is a .gif file, not exceeding 67 x 40 pixels. Be sure to name the image “nac_logo.gif.”
Custom nac_login.xml File Template
The nac_login.xml file is one of the files that is required in your Agent login customization package, which allows you to customize the logo, fields, and message text contained in a Cisco NAC Agent login dialog to suit your specific Windows client network access requirements.
Use the following template to construct an appropriate “nac_login.xml” file to customize the logo, fields, and message text contained in a Cisco NAC Agent login screen.
The following example shows customized text in boldface.
<tr class="nacLoginMiddleSectionContainerInput">
   <td colspan="2">
      <fieldset width="100%" id="nacLoginCustomAlert"
                style="display:block" class="nacLoginAlertBox">
          <table width="100%">
             <tr>
                <td id="nacLoginCustomAlert.img" valign="top" width="32px">
                  <img src="./cues_icons/Status_warning_icon.png" align="absmiddle"
																		onload="cuesFixPNG(null,this)"></img>
                </td>
                <td id="nacLoginCustomAlert.content" class="nacLoginAlertText">
                  <cues:localize key="login.customalert"/>
                </td>
              </tr>
          </table>
       </fieldset>
    </td>
</tr>
<tr id="nacLoginRememberMe" style="visibility:hidden">
    <td>
       <cues:localize key="cd.nbsp"/>
    </td>
    <td class="cuesLoginField">
      <nobr>
      <input type="checkbox" alt="" title="" name="rememberme"
             id="rememberme" checked="true"/>
            <cues:localize key="login.remember_me"/>
      </nobr>
    </td>
</tr>
Custom nacStrings_xx.xml File Template
This is one of the files that is required in your Agent login customization package, allows you to customize the logo, fields, and message text contained in a Cisco NAC Agent login dialog to suit your specific Windows client network access requirements.
Use the following template to construct a one or more nacStrings_xx.xml files, where the xx is a two-character identifier for the specific language.
The following example shows customized text in boldface.
<cueslookup:name key="login.productname"> XYZ Co Inc. </cueslookup:name>
<cueslookup:name key="login.version">Version</cueslookup:name>
<cueslookup:name key="login.username"> Enter your username (same as your VPN)
</cueslookup:name>
<cueslookup:name key="login.password">Enter your password (VPN password)</cueslookup:name>
<cueslookup:name key="login.remember_me">Remember Me</cueslookup:name>
<cueslookup:name key="login.server">Server</cueslookup:name>
<cueslookup:name key="login.customalert">Do not allow anyone else to use this PC
</cueslookup:name>
<cueslookup:name key="login.Too many users using this account">This account is already active
on another device</cueslookup:name>
<cueslookup:name key="login.differentuser">Login as Different User</cueslookup:name>
<cueslookup:name key="login.removeoldest">Remove Oldest Login Session</cueslookup:name>
Note | There is no limit to the number of characters you can use for the customized text. However, Cisco recommends restricting the length so that these fields do not take up too much space in the resulting customized login screen as it appears on the client. |
Sample Extended nacStrings_xx.xml File
<cueslookup:name key="dp.status.fullNetAccess">Full Network Access</cueslookup:name>
<cueslookup:name key="dp.status.fullNetAccess.verbose">Your device conforms with all the security policies for this protected network</cueslookup:name>
<cueslookup:name key="dp.status.fullNetAccessWarn.verbose">Only optional requirements are failing. It is recommended that you update your system at your earliest convenience.</cueslookup:name>
<cueslookup:name key="dp.status.iprefresh.progress.verbose">Refreshing IP address. Please Wait ...</cueslookup:name>
<cueslookup:name key="dp.status.iprefresh.complete.verbose">Refreshing IP address succeeded.</cueslookup:name>
<cueslookup:name key="dp.status.vlanchange.progress.verbose">Connecting to protected Network. Please Wait ...</cueslookup:name>
<cueslookup:name key="dp.status.guestNetAccess">Guest Network Access</cueslookup:name>
<cueslookup:name key="dp.status.noNetAccess">Network Access Denied</cueslookup:name>
<cueslookup:name key="dp.status.noNetAccess.verbose">There is at least one mandatory requirement failing. You are required to update your system before you can access the network.
</cueslookup:name><cueslookup:name key="dp.status.rejectNetPolicy.verbose">Network Usage Terms and Conditions are rejected. You will not be allowed to access the network.</cueslookup:name>
<cueslookup:name key="dp.status.RestrictedNetAccess">Restricted Network Access granted.</cueslookup:name>
<cueslookup:name key="dp.status.RestrictedNetAccess.verbose">You have been granted restricted network access because your device did not conform with all the security policies for this protected network and you have opted to defer updating your system. It is recommended that you update your system at your earliest convenience.</cueslookup:name>
<cueslookup:name key="dp.status.temporaryNetAccess">Temporary Network Access</cueslookup:name>
<cueslookup:name key="dp.status.temporaryNetAccess.bepatient.verbose">Please be patient while your system is checked against the network security policy.</cueslookup:name>
<cueslookup:name key="dp.status.pra.mandatoryfailure">Performing Re-assessment</cueslookup:name>
<cueslookup:name key="dp.status.pra.mandatoryfailure.verbose">There is at least one mandatory requirement failing. You are required to update your system otherwise your network access will be restricted.</cueslookup:name>
<cueslookup:name key="dp.status.pra.optionalfailure">Performing Re-assessment</cueslookup:name>
<cueslookup:name key="dp.status.pra.optionalfailure.verbose">Only optional requirements are failing. It is recommended that you update your system at your earliest convenience.</cueslookup:name>
<cueslookup:name key="dp.status.SessionTimeout">Logged out</cueslookup:name>
<cueslookup:name key="dp.status.SessionTimeout.verbose">Temporary Access to the network has expired.</cueslookup:name>
<cueslookup:name key="dp.status.Unauthenticated">Logged out</cueslookup:name>
<cueslookup:name key="dp.status.Unauthenticated.verbose"> </cueslookup:name>
UpdateFeed.xml Descriptor File Template
This is one of the files that is required in your Agent login customization package, which allows you to customize the logo, fields, and message text contained in a Cisco NAC Agent login dialog to suit your specific Windows client network access requirements.
Before you can complete your Agent login customization package, you must construct a suitable updateFeed.xml XML descriptor file. Use the following example as a template to set up the updateFeed.xml descriptor file required for your customization package.
<?xml version="1.0" encoding="utf-8"?>
<feed xmlns="http://www.w3.org/2005/Atom" xmlns:update="http://www.cisco.com/cpm/update/1.0">
   <title>Provisioning Update</title>
   <updated>2011-12-21T12:00:00Z</updated>
   <id>https://www.cisco.com/web/secure/pmbu/provisioning-update.xml</id>
   <author>
      <name>Cisco Support</name>
      <email>support@cisco.com</email>
   </author>

   <!-- Custom Branding -->
      <entry>
         <id>http://foo.foo.com/foo/AgentCustomizationPackage/1/1/1/1</id>
           -- This id can be anything, but should be unique within an ISE deployment
         <title>Agent Customization Package</title>
         <updated>2010-06-07T12:00:00Z</updated>
         <summary>This is the agent customization package </summary> - Can be anything
         <link rel="enclosure" type="application/zip" href="brand-windows.zip" length="18884" />
         <update:type>AgentCustomizationPackage</update:type>
         <update:version>1.1.1.0</update:version> -- Important to have this as 4 digit
         <update:os>Win</update:os>
      </entry>
</feed>
Example XML File Generated Using the Create Profile Function
<?xml version="1.0" ?>
<cfg>
   <VlanDetectInterval>0</VlanDetectInterval>
   <RetryDetection>3</RetryDetection>
   <PingArp>0</PingArp>
   <PingMaxTimeout>1</PingMaxTimeout>
   <EnableVlanDetectWithoutUI>0</EnableVlanDetectWithoutUI>
   <SignatureCheck>0</SignatureCheck>
   <DisableExit>0</DisableExit>
   <PostureReportFilter>displayFailed</PostureReportFilter>
   <BypassSummaryScreen>1</BypassSummaryScreen>
   <LogFileSize>5</LogFileSize>
   <DiscoveryHost></DiscoveryHost>
   <DiscoveryHostEditable>1</DiscoveryHostEditable>
   <Locale>default</Locale>
   <AccessibilityMode>0</AccessibilityMode>
   <SwissTimeout>1</SwissTimeout>
   <HttpDiscoveryTimeout>30</HttpDiscoveryTimeout>
   <HttpTimeout>120</HttpTimeout>
   <ExceptionMACList></ExceptionMACList>
   <GeneratedMAC></GeneratedMAC>
   <AllowCRLChecks>1</AllowCRLChecks>
   <DisableL3SwissDelay>0</DisableL3SwissDelay>
   <ServerNameRules></ServerNameRules>
</cfg>
Note | This file also contains two static (that is, uneditable by the user or Cisco ISE administrator) “AgentCfgVersion” and “AgentBrandVersion” parameters used to identify the current version of the agent profile and agent customization file, respectively, on the client. |
Configure Client Provisioning Resource Policies
For clients, the client provisioning resource policies determine which users receive which version (or versions) of resources (agents, agent compliance modules, and/or agent customization packages/profiles) from Cisco ISE upon login and user session initiation.
For AnyConnect, resources can be selected either from the client provisioning resources page to create an AnyConnect configuration that you can use it the client provisioning policy page. AnyConnect configuration is the AnyConnect software and its association with different configuration files that includes AnyConnect binary package for Windows and Mac OS X clients, compliance module. module profiles, customization and language packages for AnyConnect.
For Cisco ISE NAC agents, resources can be selected from the client provisioning policy page.
Before you can create effective client-provisioning resource policies, ensure that you have added resources to Cisco ISE. When you download the agent compliance module, it always overwrites the existing one, if any, available in the system.
| Step 1 | Choose . |
| Step 2 | Choose
Enable,
Disable, or
Monitor from
the behavior drop-down list:
|
| Step 3 | Enter a name for the new resource policy in the Rule Name text box. |
| Step 4 | Specify one or
more Identity Groups to which a user who logs into Cisco ISE might belong.
You can choose to specify the Any identity group type, or choose one or more groups from a list of existing Identity Groups that you have configured. |
| Step 5 | Use the Operating Systems field to specify one or more operating systems that might be running on the client machine or device through which the user is logging into Cisco ISE. You can choose to specify a single operating system like "Android" , "Mac iOS', and "Mac OS X" or an umbrella operating system designation that addresses a number of client machine operating systems like "Windows XP (All)" or "Windows 7 (All)." |
| Step 6 | In the Other Conditions field, specify a new expression that you want to create for this particular resource policy. |
| Step 7 | For client machines, use Agent Configuration to specify which agent type, compliance module, agent customization package, and/or profile to make available and provision on the client machine. It is mandatory to include the client provisioning URL in authorization policy, to enable the NAC Agent to popup in the client machines. This prevents request from any random clients and ensures that only clients with proper redirect URL can request for posture assessment. |
| Step 8 | Click Save. |
What to Do Next
Once you have successfully configured one or more client provisioning resource policies, you can start to configure Cisco ISE to perform posture assessment on client machines during login.
Configure Cisco ISE Posture Agent in the Client Provisioning Policy
For client machines, configure which agent type, compliance module, agent customization package, and/or profile to make available and provision for users to download and install on the client machine.
You must have added client provisioning resources for AnyConnect and Cisco ISE NAC in Cisco ISE.
| Step 1 | Choose an
available agent from the
Agent drop-down list and specify whether the agent
upgrade (download) defined here is mandatory for the client machine by enabling
or disabling the
Is Upgrade Mandatory option, as appropriate.
The Is Upgrade Mandatory setting only applies to agent downloads. Agent profile, compliance module, and Agent customization package updates are always mandatory. |
| Step 2 | Choose an existing agent profile from the Profile drop-down list. |
| Step 3 | Choose an available compliance module to download to the client machine using the Compliance Module drop-down list. |
| Step 4 | Choose an available agent customization package for the client machine from the Agent Customization Package drop-down list. |
Configure Native Supplicants for Personal Devices
Employees can connect their personal devices to the network directly using native supplicants, which are available for Windows, Mac OS, iOS, and Android devices. For personal devices, specify which Native Supplicant configuration to make available and provision on the registered personal device.
Create native supplicant profiles so that when user log in, based on the profile that you associate with that users authorization requirements , Cisco ISE provides the necessary supplicant provisioning wizard to set up the users personal devices to access the network.
| Step 1 | Choose . |
| Step 2 | Choose Enable, Disable, or Monitor from the behavior drop-down list: |
| Step 3 | Enter a name for the new resource policy in the Rule Name text box. |
| Step 4 | Specify the following:
|
| Step 5 | For personal devices, use Native Supplicant Configuration to choose the specific Configuration Wizard to distribute to these personal devices. |
| Step 6 | Specify the applicable Wizard Profile for the given personal device type. |
| Step 7 | Click Save. |
Client Provisioning Reports
You can access the Cisco ISE monitoring and troubleshooting functions to check on overall trends for successful or unsuccessful user login sessions, gather statistics about the number and types of client machines logging into the network during a specified time period, or check on any recent configuration changes in client provisioning resources.
Client Provisioning Requests
The ISE ReportsEndpoints and UsersClient Provisioning report displays statistics about successful and unsuccessful client provisioning requests. When you choose Run and specify one of the preset time periods, Cisco ISE combs the database and displays the resulting client provisioning data.
Supplicant Provisioning Requests
The window displays information about recent successful and unsuccessful user device registration and supplicant provisioning requests. When you choose Run and specify one of the preset time periods, Cisco ISE combs the database and displays the resulting supplicant provisioning data.
The Supplicant Provisioning report provides information about a list of endpoints that are registered through the device registration portal for a specific period of time, including data like the Logged at Date and Time, Identity (user ID), IP Address, MAC Address (endpoint ID), Server, profile, Endpoint Operating System, SPW Version, Failure Reason (if any), and the Status of the registration.
Client Provisioning Event Logs
You can search event log entries to help diagnose a possible problem with client login behavior. For example, you may need to determine the source of an issue where client machines on your network are not able to get client provisioning resource updates upon login. You can use logging entries for Posture and Client Provisioning Audit and Posture and Client Provisioning Diagnostics.
 Feedback