Procedure with the Cisco Cyber Vision sensor management extension

After the Initial configuration, proceed to the steps described in this section.

Install the sensor management extension

To install the Sensor Management extension, you must:

  1. Retrieve the extension file (i.e. CiscoCyberVision-sensor-management-<version>.ext) from cisco.com.

  2. Access the Extension administration page in Cisco Cyber Vision.

  3. Import the extension file.

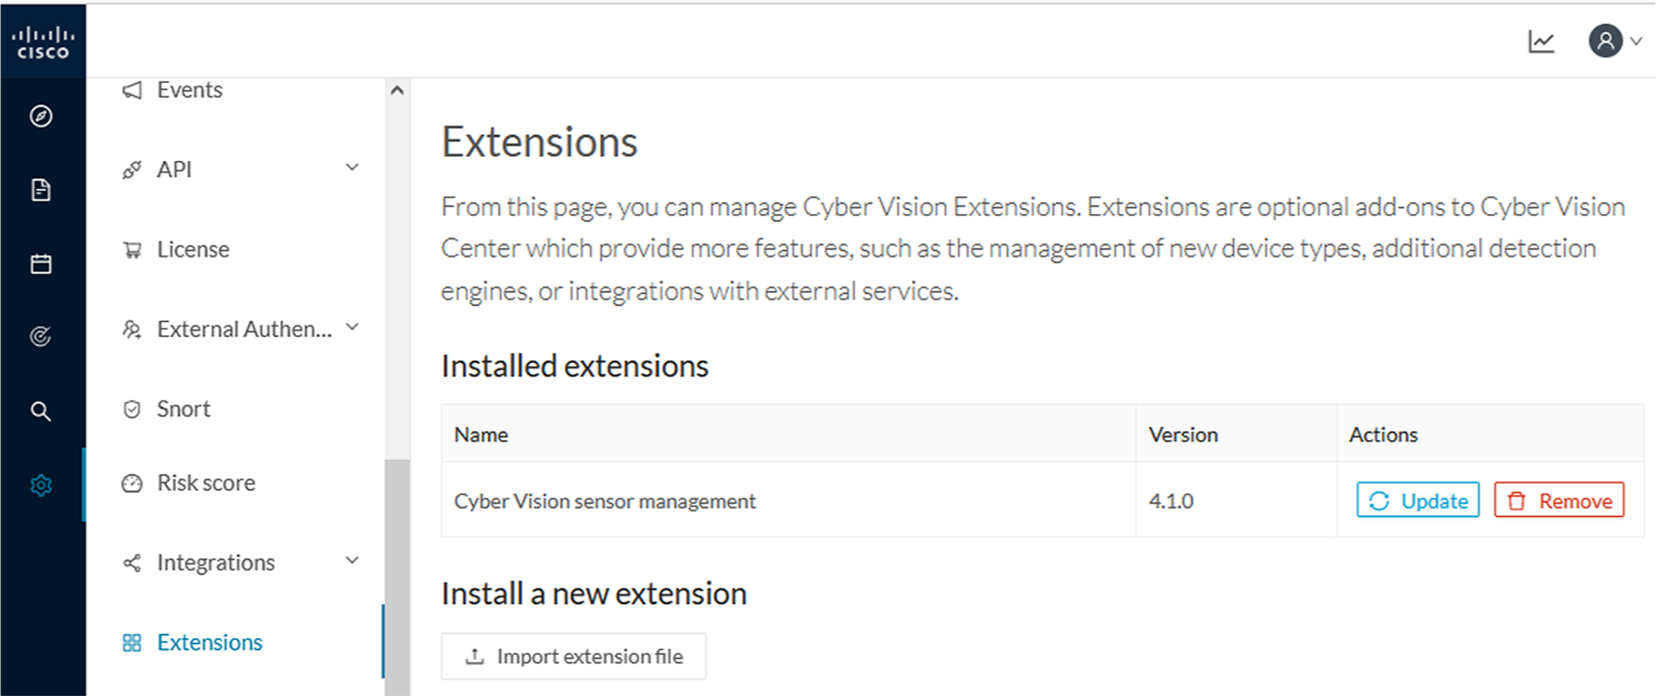
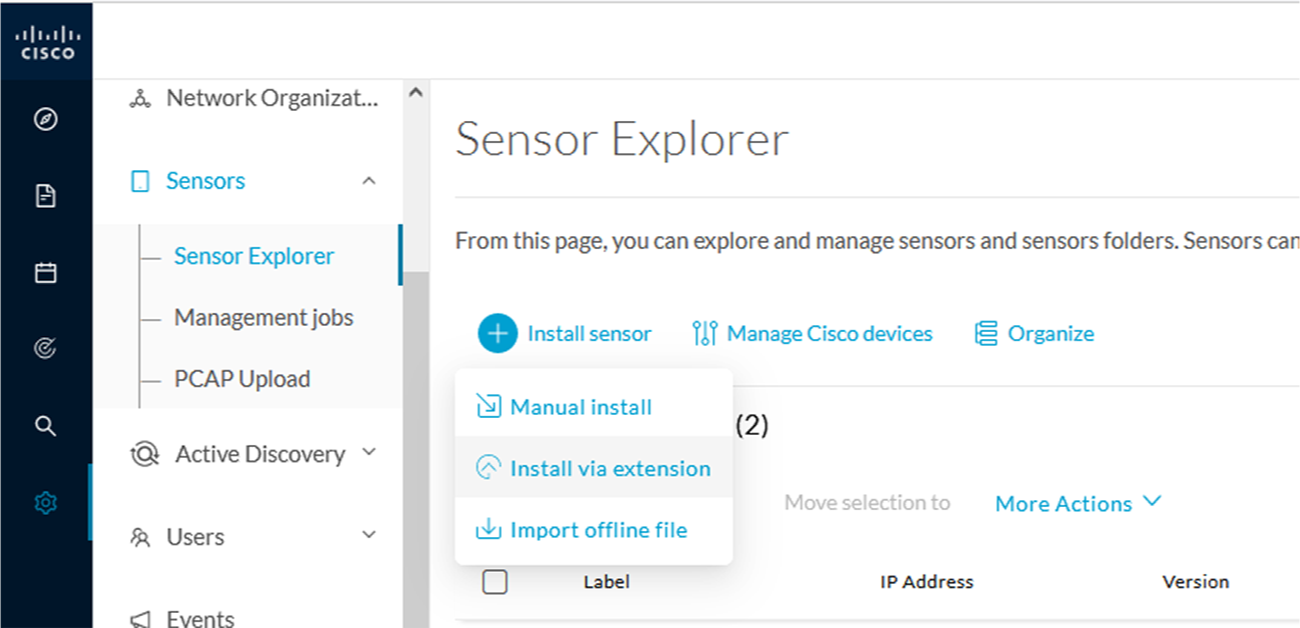
Once the sensor management extension is installed, you will find a new management job under the sensor administration menu (Management jobs page), and the Install via extension button will be enabled in the Sensor Explorer page.
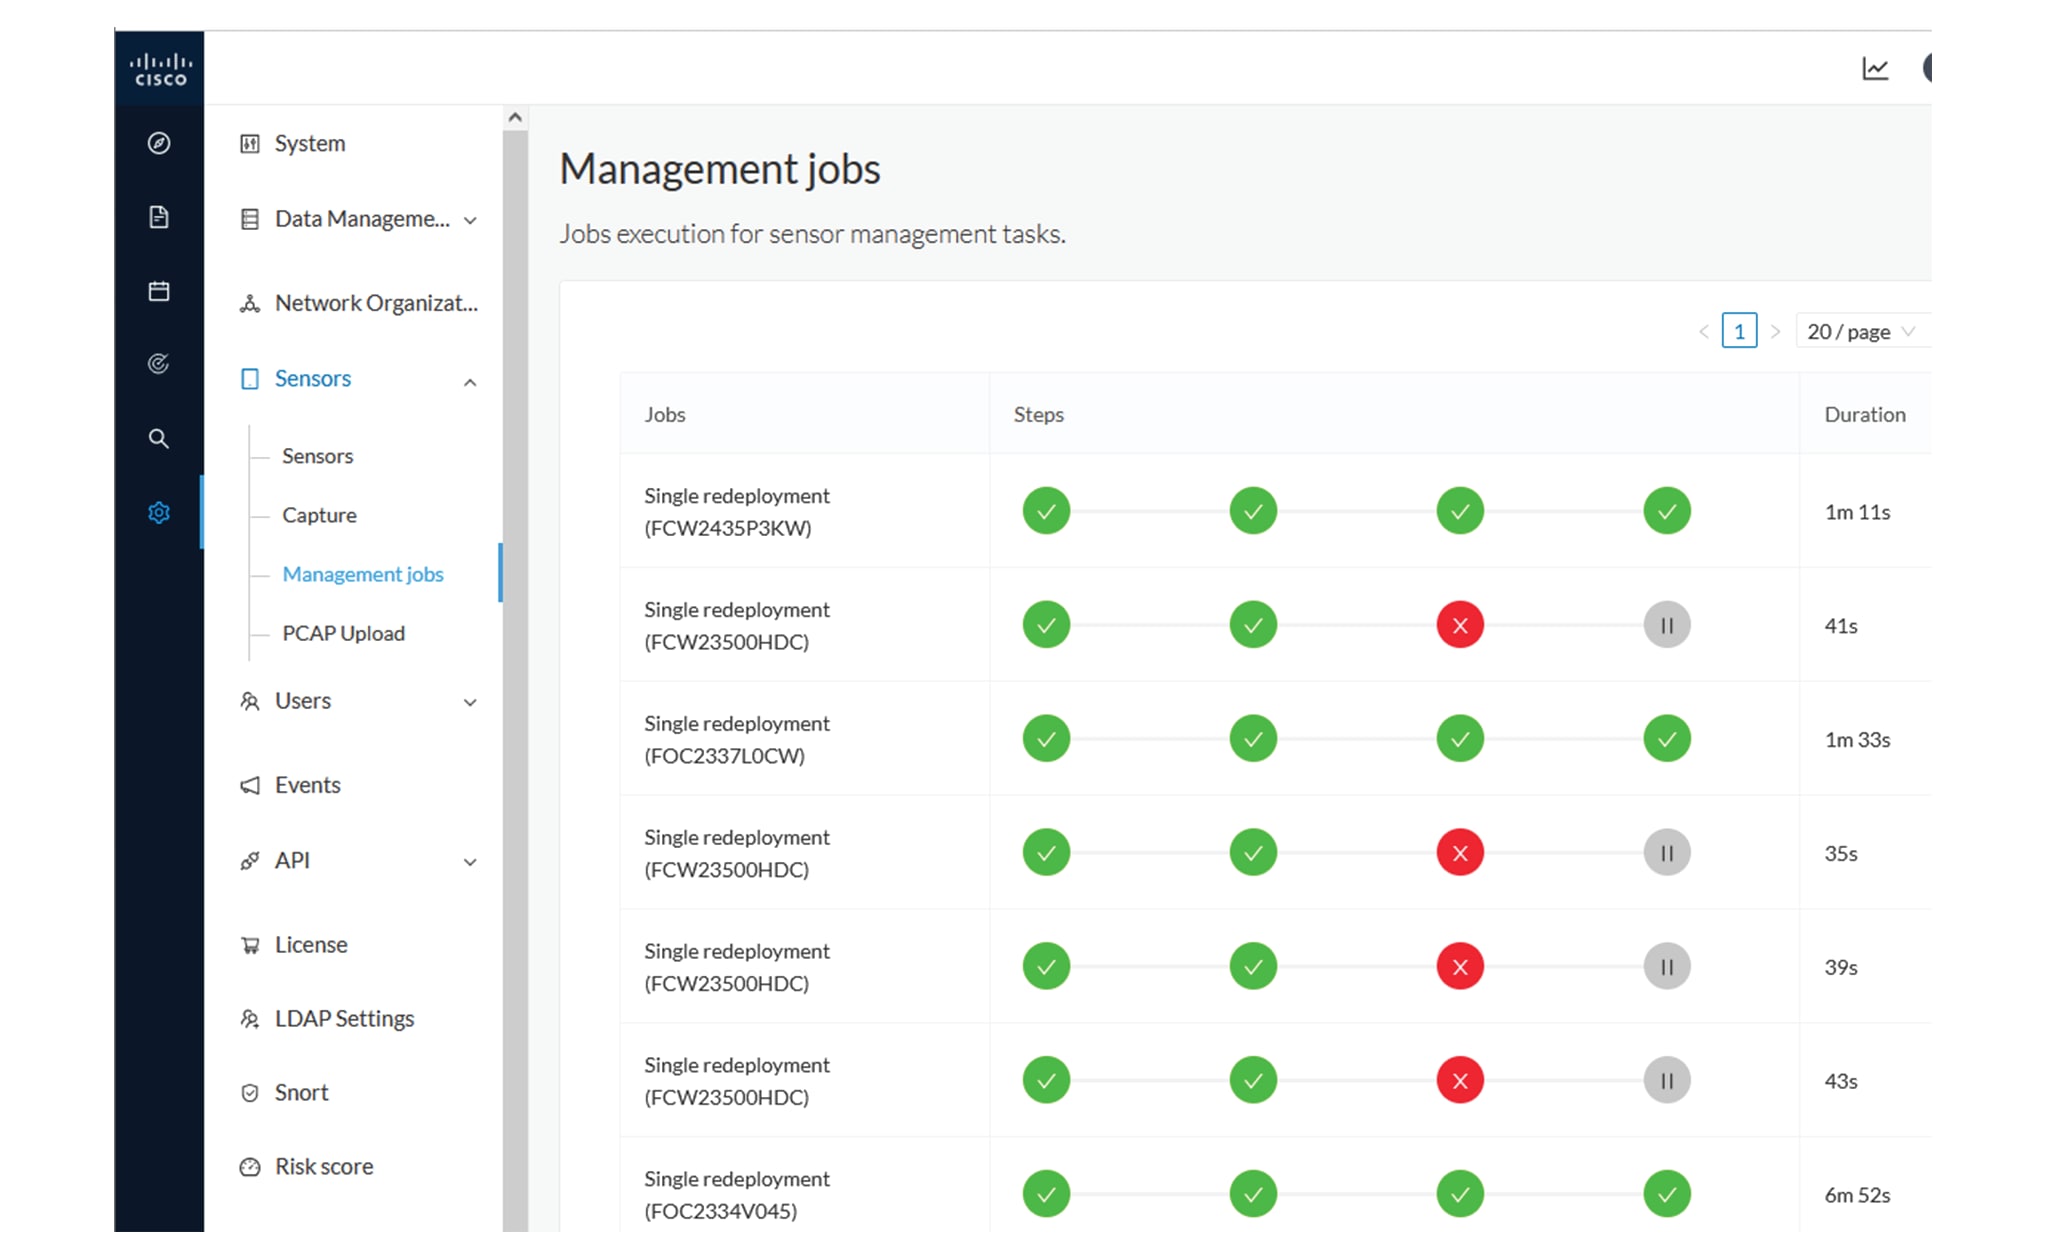
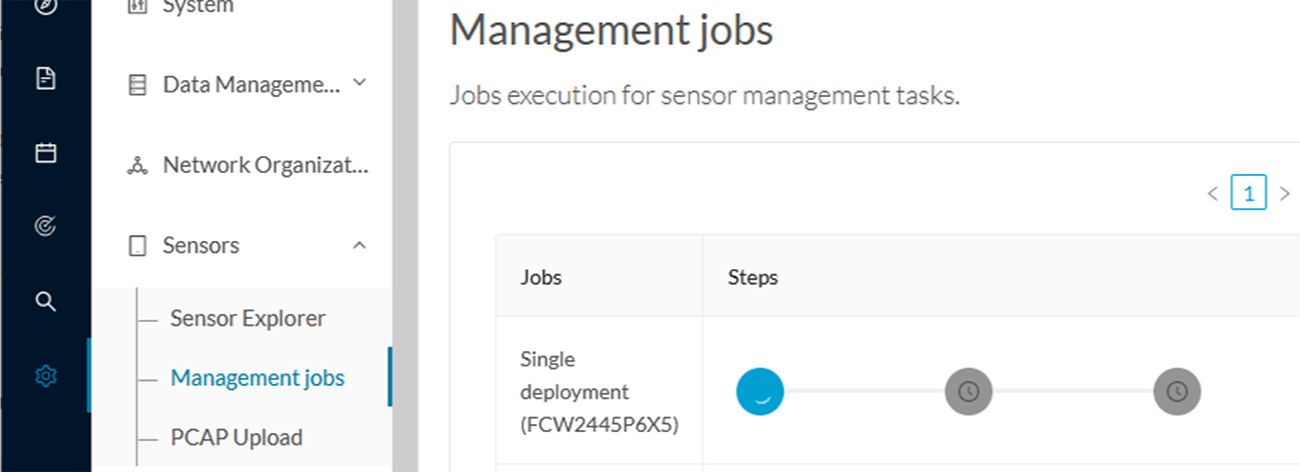
Management jobs

As some deployment tasks on sensors can take several minutes, this page shows the jobs execution status and advancement for each sensor deployed with the sensor management extension.

This page is only visible when the sensor management extension is installed in Cisco Cyber Vision.

You will find the following jobs:

  • Single deployment

    This job is launched when clicking the Deploy Cisco device button in the sensor administration page, that is when a new IOx sensor is deployed.

  • Single redeployment

    This job is launched when clicking the Reconfigure Redeploy button in the sensor administration page, that is when deploying on a sensor that has already been deployed. This option is used for example to change the sensor's parameters like enabling active discovery.

  • Single removal

    This job is launched when clicking the Remove button from the sensor administration page.

  • Update all devices

    This job is launched when clicking the Update Cisco devices button from the sensor administration page. A unique job is created for all managed sensors that are being updated.

If a job fails, you can click on the error icon to view detailed logs.

IOx APP sensor creation

  1. In Cisco Cyber Vision, navigate to Admin > Sensors > Sensor Explorer and click Install sensor, then Install via extension.

  2. Fill the requested fields so Cisco Cyber Vision can reach the device:

    • IP address: admin address of the device.

    • Port: management port (443).

    • Login: user with the admin rights of the device.

    • Password: password of the admin user.

    • Capture Mode: Optionally, select a capture mode.

  3. Click Connect.

The Center will join the device and the second parameter list will be displayed. For this step to succeed, the device needs to be reachable by the Center on its eth1 connection.

IOx APP sensor configuration

If the Center can join the device, the following form appears:

While some parameters are filled automatically, you can still change them if necessary.

Procedure


Step 1

Fill the following parameters for the Collection interface:

  1. Capture interface: traffic capture from routed ports

    • Capture IP address: IP address destination of the monitor session in the sensor

    • Capture prefix length: mask of the capture IP address

  2. Extra capture interface: traffic capture from switched ports

    • Extra capture IP address

    • Extra capture prefix length

    • Extra capture VLAN number

  3. Collection interface: capture traffic to the Center

    • Collection IP address: IP address of the sensor in the device

    • Collection prefix length: mask of the Collection IP address

    • Collection gateway: IP address of the interface VirtualPortGroup 1

Step 2

Click Next.

Step 3

Active Discovery:

If you want to enable Active Discovery on the sensor, select Passive and Active Discovery.

You can:

  • use the sensor Collection interface by selecting it:

  • add new network interfaces filling the following parameters to set dedicated network interfaces and clicking Add.

    • IP address

    • Prefix length

    • VLAN number

Step 4

Click Deploy.

The Center starts deploying the sensor application on the target equipment. This can take a few minutes. You can go to the Management jobs page to check the deployment advancements.

Once the deployment is finished, a new sensor appears in the sensors list of the Sensor Explorer page.

The sensor's status will eventually turn to Connected.

If the Active Discovery has been enabled and set -that is if the Passive and Active Discovery option was selected during the IOX App sensor configuration- the sensor is displayed as below with Active Discovery's status as Enabled.