Initial Configuration

Docker Setup

Install Docker from the Docker repository. Use the following commands to install Docker on a fresh OS.

Procedure


Step 1

Uninstall all other packages.

for pkg in docker.io docker-doc docker-compose docker-compose-v2 podman-docker containerd runc; do sudo apt-get remove $pkg; done

Step 2

Set up Docker's APT repository.

  1. Add Docker's official GPG key.

    sudo apt-get update
    sudo apt-get install ca-certificates curl
    sudo install -m 0755 -d /etc/apt/keyrings
    sudo curl -fsSL https://download.docker.com/linux/ubuntu/gpg -o /etc/apt/keyrings/docker.asc
    sudo chmod a+r /etc/apt/keyrings/docker.asc
  2. Add the repository to APT sources.

    echo \ 
      "deb [arch=$(dpkg --print-architecture) signed-by=/etc/apt/keyrings/docker.asc]
    https://download.docker.com/linux/ubuntu $(. /etc/os-release && echo "$VERSION_CODENAME") stable" | sudo tee /etc/apt/sources.list.d/docker.list > /dev/null
    sudo apt-get update 

Step 3

Verify the repository file using the cat /etc/apt/sources.list.d/docker.list command.

The expected response is deb [arch=amd64 signed-by=/etc/apt/keyrings/docker.asc] https://download.docker.com/linux/ubuntu jammy stable.

Step 4

Install the Docker packages.

sudo apt-get install docker-ce docker-ce-cli containerd.io docker-buildx-plugin docker-compose-plugin

Note


Reboot the system to start Docker.

Step 5

Verify that the Docker Engine installation is successful by running the hello-world image using the command:

sudo docker run hello-world

This command downloads a test image and runs it in a container. When the container runs, it prints a confirmation message and exits.


Cisco Cyber Vision Docker Sensor Host Configuration

Docker Registry

Docker uses registries to pull container images. This step establishes Docker registry connectivity with the Cisco Cyber Vision Center, enabling the sensor image to be pulled using either secure (TLS) or insecure configuration. Failure in this step will result in image pull errors and prevent successful container deployment.

Docker classifies a registry as either secure or insecure.

  • A secure registry uses TLS and places a copy of its CA certificate on the Docker host at /etc/docker/certs.d/registry-FQDN:443/ca.crt.

  • An insecure registry does not use TLS (listens on plaintext HTTP) or uses TLS with a CA certificate that is not recognized by the Docker daemon.

If a certificate is missing in /etc/docker/certs.d/registry-FQDN:443/ or if certificate verification fails due to an incorrect CA, container deployment may fail.

By default, Docker assumes all registries are secure, except for local ones. If Docker assumes a registry is secure, communication with an insecure registry fails. Configure the Docker daemon specifically to communicate with an insecure registry.

Docker Registry Secure Configuration

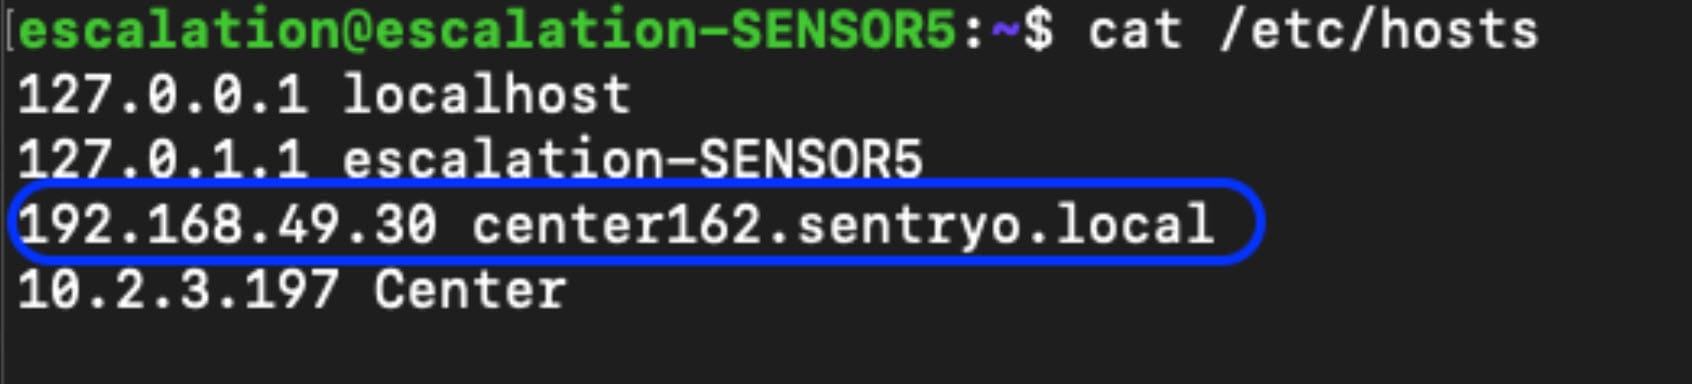
  1. FQDN: Ensure that the host resolves the Cyber Vision Center FQDN. If the host cannot resolve the Center FQDN, specify the correct IP address in the host's configuration file.

  2. Certificate: If the Cyber Vision Center and the host share the same Certificate Authority, you do not need additional configuration. Otherwise, add the Center certificate to a specific folder on the host for authentication.

    Download the ca.pem file of your Center, rename it as ca.crt, and copy it into the folder /etc/docker/certs.d/Center FQDN:443/.

    Create a folder with the Center FQDN + ‘:443’, for example, center162.sentryo.local:443, and add the ca.crt file to it.

    /etc/docker/certs.d/center162.sentryo.local:443/ca.crt

Docker Registry Insecure Configuration

Use the Center IP directly without FQDN resolution. Define the Center IP as an insecure registry in the Docker configuration by adding it to /etc/docker/daemon.json. Restart Docker with sudo systemctl restart docker.service.

For example:

Configuration example:
{ 

        "insecure-registries" : ["192.168.49.30:443"] 

} 

Other Host Configurations

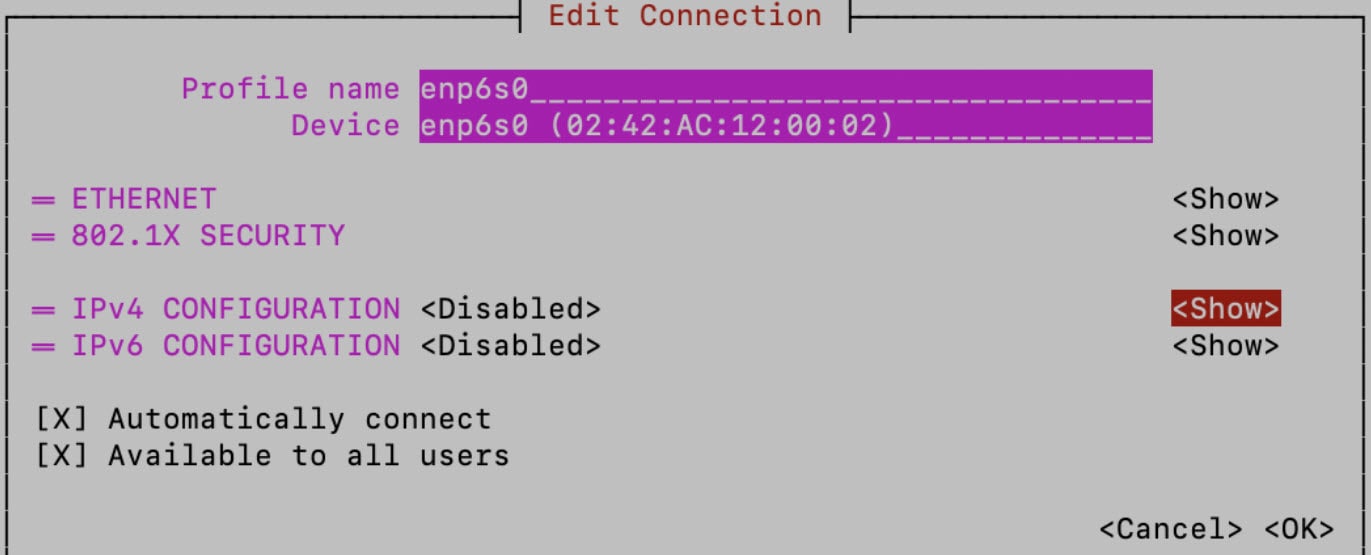
  1. Network Configuration: Disable IPv4 and IPv6 on all interfaces that are used for capturing traffic or performing active discovery.

    1. Use the nmcli device status command to check which network management method is in use.

    2. If you use the NetworkManager to manage the interfaces in your network, install the NetworkManager text user interface using one of these commands:

      • sudo apt install network-manager

      • sudo yum install NetworkManager-tui

    3. Then, use nmtui (Network Manager Text User Interface) to configure passive monitoring and active discovery oneach interface for the Docker sensor application. Launch the tool using the command sudo nmtui. Then, use the graphical interface to disable IPv4 and IPv6 on all sensor interfaces.

      For example:

  2. Time Zone: Set the host time zone to UTC using the command 'sudo timedatectl set-timezone UTC'. Alternatively, set it to any other time zone with a valid source of synchronization. The system requires a valid NTP server.

    sudo nano /etc/systemd/timesyncd.conf (add at the end NTP=valid ntp server) 
    
    sudo systemctl restart systemd-timesyncd

    For example: