Overview of Configuration Groups for SD-Routing devices

Cisco Catalyst SD-WAN Manager simplifies the provisioning of SD-Routing devices by using Configuration Groups, which provide a structured, reusable approach for creating and applying device-specific configurations. After onboarding a device, the Manager provisions it with the required configurations, streamlining this provisioning process.

Key components of Configuration Groups

Configuration Group - A configuration group is a logical grouping of features or configurations that can be applied to one or more devices in the network managed by Cisco Catalyst SD-WAN Manager. You can define and customize this grouping based on your business needs.

Feature Profile - A feature profile is a flexible building block of configurations that can be reused across different configuration groups. You can create profiles based on features that are required, recommended, or uniquely used, and then put together the profiles to complete a device configuration.

Feature - Features are the individual capabilities you want to share across different configuration groups.

To learn more about the different types of feature and feature profiles, along with examples, see, Building Blocks for Profile-based Configuration Groups

Methods to create Configuration Groups

The Configuration Group menu in Cisco Catalyst SD-WAN Manager provides building blocks to assemble configurations for SD-Routing devices. There are two types of Configuration Group, namely, CLI Configuration Group and Profile-based Configuration Group.

Release 17.15.1a/20.15.1 introduces support for including Cisco IOS XE CLI configurations that do not have an associated YANG model, through the Classic CLI feature. The Classic CLI feature, when combined with the current configuration group offers a robust provisioning mechanism for your SD-Routing devices.

For New Devices

New devices can use profile-based configuration groups for easier setup, allowing you to define your configuration intent using profile building blocks in the UI. This approach integrates with feature profiles and CLI Add-On profiles for comprehensive configuration management and also supports Classic CLI. Alternatively, you can use CLI configuration group as it eliminates the need to map all existing configurations to feature profiles.

For Existing Devices

CLI configuration group is the preferred choice for existing devices as it provides faster configuration and supports Classic CLI. Alternatively, you can also use the profile-based configuration group which provides integration with feature profiles and CLI Add-On profiles for comprehensive configuration management.

Both these Configuration Group Types can be used for existing and new devices. While each method has its strengths, it's important to consider their practical applications and benefits to ensure optimal configuration.

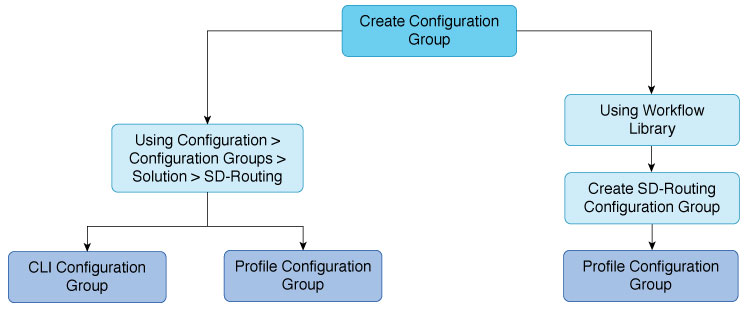
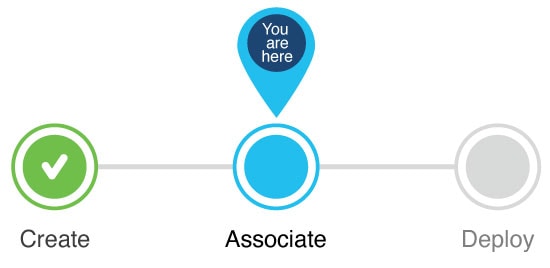
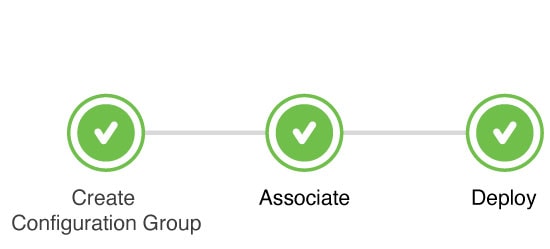
Cisco Catalyst SD-WAN Manager provides multiple ways to create configuration groups

Create SD-Routing Configuration Groups using Configuration Group menu Create a SD-Routing Configuration Group using the Workflow Library Create Configuration Groups using CLI Configuration Group Create Configuration Groups using Profile Configuration Group Create Configuration Groups using Profile Configuration Group

Prerequisites for using Configuration Groups

  • Cisco SD-Routing devices should be on a minimum software version of Cisco IOS XE Release 17.15.1a to use configuration groups in Cisco SD-WAN Manager. The minimum software version for SD-WAN Manager should be 20.15.1.

  • Cisco SD-WAN Manager version should be equal to or greater than the edge version.

    Releases 17.x refers to IOS-XE on the Routers and releases 20.x refers to the SD-WAN Manager.

Supported devices for Configuration Groups

Configuration Group provisioning is supported on the following platforms.

  • Cisco Catalyst 8000V Series Edge Platforms, Cisco Catalyst 8200 Series Edge Platforms, Cisco Catalyst 8300 Series Edge Platforms, Cisco Catalyst 8500 Series Edge Platforms.

  • Cisco 1000 Series Integrated Services Routers. However, ISR1100-4G/6G and ISR1100X-4G/6G do not support SD-Routing mode.

  • Cisco Catalyst IR1100 Rugged Series Routers, Cisco Catalyst IR1800 Rugged Series Routers, Cisco Catalyst IR8140 Heavy Duty Router and Cisco Catalyst IR8300 Rugged Series Router.

Create SD-Routing Configuration Groups using Configuration Group menu

Workflow to create SD-Routing Configuration Groups using CLI Configurations Group
Create Configuration Groups using CLI Configuration Group

Workflow to create SD-Routing Configuration Groups using Profile Based Configuration Group

Create Configuration Groups using Profile Configuration Group

Create Configuration Groups using CLI Configuration Group

The Configuration Groups menu on Cisco Catalyst SD-WAN Manager provides a user friendly method to create configuration groups for SD-Routing devices. After onboarding existing SD-Routing devices into Cisco SD-WAN Manager, use the CLI Configuration Group to load the device’s running configurations, modify and deploy the configurations to these devices.

To create a CLI configuration group for SD-Routing devices, perform the outlined procedure.

The progress bar is a visual indication of the steps that you are expected to complete in the module before you move on to the next configuration step.

Before you begin

Ensure that you have an understanding of the configurations needed for your deployment.

Procedure


Step 1

From Cisco SD-WAN Manager main menu, go to Configuration > Configuration Groups and select Solution as SD-Routing.

Step 2

Click Create Configuration Group.

Step 3

Add a name and description, select the checkbox CLI Configuration Group and click Create.

Step 4

On the CLI pane, select a device from the drop-down list and load the running configuration from a reachable device. If your device has configurations that do not have an associated YANG model, a prompt suggests including those configurations. Click Yes to proceed. If you click No, Classic CLI will not be added.

Alternatively, you can import a configuration file from an existing device by clicking Action in the top-right corner of the CLI pane and selecting Import Config File. Note, this method is not recommended as you will not be notified if your device has configurations that do not have an associated YANG model.

Step 5

You can use a single configuration across multiple devices of the same device models. To convert an actual configuration value to a variable, select the value and click Action > Create Variable. Enter the variable name and click Create Variable. You can also type the variable name directly, in the format {{variable-name}}. For example,{{hostname}}.

Note, Variables can be used for rapid bulk configuration rollout with unique per-device settings. Common configurations like system-IP, site-id, hostname, IP addresses, and so on, can be defined as editable variables in the template and the same template can be attached to multiple devices.

Step 6

On the Classic CLI pane, review these configurations and click Save to create the Configuration Group.


This successfully concludes the creation of Configuration Group.

What to do next

Associate and deploy the Configuration Group to an SD-Routing device

Create Configuration Groups using Profile Configuration Group

The Configuration Groups menu on Cisco Catalyst SD-WAN Manager provides a user friendly method to create configuration groups for SD-Routing devices. The building blocks: feature profiles, features and subfeatures, can be quickly assembled to create the configuration group and deployed to provision the SD-Routing devices.

The term Profile Configuration Group is used to distinguish between configuration group types. However, in the Cisco Catalyst SD-WAN Manager interface, it is labeled as Configuration Group. To create a profile-based configuration group for SD-Routing devices, perform the outlined procedure.

To create a profile based configuration group for SD-Routing devices, perform the outlined procedure.

Before you begin

Ensure that you have an understanding of the configurations needed for your deployment.

Procedure


Step 1

From Cisco SD-WAN Manager main menu, go to Configuration > Configuration Groups and select Solution as SD-Routing.

Step 2

Click Create Configuration Group.

Step 3

Add a name and description, and click Create.

Step 4

Createthe required feature profile(s). The available profiles are System Profile, Transport & Management Profile, CLI Add-on Profile, Service Profile and Policy Profile.

Step 5

Add features tothese feature profiles. To know how to add features, refer to Add a Feature to a Feature Profile. To know more about the different types of features and feature profiles, along with examples, see, Building Blocks for Profile-based Configuration Groups

Step 6

Createa CLI Add-on Profile to add device configurations that are not available through other configuration group features. You can add these commands in the CLI Configuration area or click Action > Import Config File to import a configuration and save the configurations.

Step 7

(Optional) If you want to add configurations that do not have associated YANG models, click Action and select the Classic CLI pane and enter the configurations.

Step 8

You can use a single configuration across multiple devices of the same device models. To convert an actual configuration value to a variable, select the value and click Action > Create Variable. Enter the variable name and click Create Variable. You can also type the variable name directly, in the format {{variable-name}} . For example, {{hostname}}.

Note, Variables can be used for rapid bulk configuration rollout with unique per-device settings. Common configurations like system-IP, site-id, hostname, IP addresses, and so on, can be defined as editable variables in the template and the same template can be attached to multiple devices.

Step 9

Review these configurations and click Save to create the configuration group


What to do next

Associate and deploy the Configuration Group to an SD-Routing device

Add a Feature to a Feature Profile

Before you begin

You should have created a profile based configuration group earlier.

Procedure

Step 1

From Cisco Catalyst SD-WAN Manager, select the SD-Routing configuration group and click the down arrow on the right.

Step 2

Select the feature profile and edit using the Pencil icon.

Step 3

Click Add New Feature and choose a feature from the drop-down list.

Step 4

Enter a name and description for the feature.

Step 5

Configure the options as needed. Some parameter have a scope drop-down list that enables you to choose Global, Device Specific, or Default for the parameter value. Select your preference as described in the table.

Parameter Scope

Scope Description

Global (indicated by a globe icon)

Enter a value for the parameter to apply the value to all devices.

Examples of parameters that you might apply globally to a group of devices are DNS server, syslog server, and interface MTUs.

Device Specific (indicated by a host icon)

Use a device-specific value for the parameter.

Choose Device Specific to provide a value for the key in the field. The key is a unique string that helps identify the parameter. To change the default key, enter a new string in the field.

Examples of device-specific parameters are system IP address, host name, GPS location, and site ID.

Default (indicated by a check mark)

The default value is shown for parameters that have a default setting.

Step 6

Add features as required.

Step 7

Click Save to add the feature to the Feature profile.


What to do next

Associate and deploy the Configuration Group to an SD-Routing device

Associate and deploy the Configuration Group to an SD-Routing device

This task involves reviewing configurations in the configuration group, associating the device with the configuration group, and provisioning one or more SD-Routing devices.

Before you begin

Ensure that the configuration group you select is a SD-Routing configuration group. For details on how to create Configuration Group, refer, Create SD-Routing Configuration Groups Using Configuration Group Menu

Procedure


Step 1

From Cisco SD-WAN Manager, select the Configuration Group created earlier.

Step 2

Click + Add and select the devices from the list. Click Save to attach the configuration group to the selected devices.

Step 3

To provision the configuration changes, click Deploy.

Step 4

Select the device on which you prefer to provision the configuration changes. Click Next

Step 5

Add and review device configurations. Edit the table to include the variable values per device, for example, System IP and Site IDs. Alternatively, you can export the table as a CSV file, manually edit the variables in the file, and then re-import it. Once the configurations are updated, click Next to proceed.

Step 6

To preview deviceconfiguration changes, click Preview CLI.

If there are discrepancies in the syntax of the device configuration, a Config Group Validation Error message appears in the top-left corner of the preview screen, highlighting the issue.

Validation errors can be classified as:

Table 1. Error types

Error Type

User Action

Syntax Error

Following is an example output of a syntax error caused by an invalid command.


Config Group validation error: 
Configuration validation failed with error: --------^syntax error: 
expecting log - Error:login on-success logs

Following is an example output of a syntax error caused by an incorrect value.


[2-Apr-2025 15:27:27 UTC] Failed to deploy device with Config Group
- sd_routing, ip address syntax error: "10.1.15.16.abcd" is not a valid
value.

Error: ip address 10.1.15.16.abcd 255.255.255.0

Following is an example output of a syntax error caused by an unknown command.


Config Group validation error:
Configuration validation failed with error: 
syntax error: unknown command

Error abcd

Go back to configuration group via Configuration > Configuration Groups > Solution > SD-Routing. Select the device and edit using the Pencil icon. Based on the issue highlighted in preview, identify error and correct it. Then, click Save and Done.

Note, if a valid IOS XE CLI without an associated YANG model is present in the CLI pane, the preview shows an 'Unknown Command' error. User action - move the configuration to the Classic CLI pane.

Unknown Error

Get in touch with Cisco Technical Assistance (TAC) team.

  1. Once the corrections are made, go back to the Deploy Configuration Group workflow, click Deploy to provision the configuration changes on the device and review the changes again.

  2. Select the device to review the configuration changes on the CLI pane and on the Classic CLI pane either inline or side by side. The configurations that are removed are highlighted in red and the new configuration is highlighted in green. The Classic CLI pane also shows Cisco IOS XE CLI commands that do not have associated YANG models, submitted as part of configuration commands.

Step 7

Click Deploy to proceed with deployment.


This concludes the workflow of Creating, Associating and Deploying a Configuration Group.

Deployment status

Once the deployment is complete, click View deployment status to view the status of the device provisioning. The Device Group pane provides the following information:

Table 2. Deployment status

Parameters

Description

Status

Indicates the deployment status.

Chassis Number

Specifies the Chassis number of the devices.

Hostname

Specifies the name of the host(s).

Message

Describes the status.

Start Time

Date and time at which you started the deployment.

System IP

Displays the system IP of the devices.

Action

Displays an ellipsis (…), which, when clicked, opens a menu providing you with detailed information about the logs.

Use the Device Group pane to review the deployment status and click on Action > Ellipsis (…) to view the detailed logs on the deployment status.

This workflow illustrates the various deployment statuses.

This table provided outlines the different deployment statuses and the recommended user actions for each scenario.

Status

Description

User Action

Successful

The deployment was successful, and the device is fully configured.

-

Partial success

The associated YANG configuration was committed, but Classic CLI failed at the device end.

Following is an example output of Partial Success.

2-Apr-2025 15:43:40 UTC] Deploying device with Config Group sd_routing
[2-Apr-2025 15:43:41 UTC] Generating configuration
[2-Apr-2025 15:43:41 UTC) Checking and creating device in Manager
[2-Apr-2025 15:43:47 UTC] Device is online
[2-Apr-2025 15:43:47 UTC] Updating device configuration in Manager
[2-Apr-2025 15:43:47 UTC] Sending configuration to device
[2-Apr-2025 15:43:52 UTC] Successfully notified device to pull configuration
[2-Apr-2025 15:43:52 UTC] Device has pulled the configuration
[2-Apr-2025 15:44:07 UTC] Device: Error:lOS command parser failed,
FailedCommand:abcd, CommandErrorPosition:2, ParserModeContext:line aux O, ParserOutput:
[2-Apr-2025 15:44:07 UTC] Config Group deployment completed with partial success. 
IOS add-on CLI config failed on the device

Select Action > ellipsis (…) to view detailed log information about the issue. Then go back to the configuration group page to correct the error and then deploy the device again.

Failure

The associated YANG configuration failed. The entire transaction was aborted, and no configuration was committed.

Following is an example output of Failure.

[2-Apr-2025 15:33:40 UTC) Deploying device with Config Group sd_routing
[2-Apr-2025 15:33:41 UTC] Generating configuration
[2-Apr-2025 15:33:41 UTC] Checking and creating device in Manager
[2-Apr-2025 15:33:47 UTC] Device is online
[2-Apr-2025 15:33:47 UTC] Updating device configuration in Manager
[2-Apr-2025 15:33:47 UTC] Sending configuration to device
[2-Apr-2025 15:33:52 UTC] Successfully notified device to pull configuration
[2-Apr-2025 15:33:53 UTC] Device has pulled the configuration
[2-Apr-2025 15:33:58 UTC] Device: Validation failure, YANG CLIs found, content:
fogin on-success log subscriber templating
[2-Apr-2025 15:33:58 UTC] Failed to deploy Config Group

Select Action > ellipsis (…) to view detailed log information about the issue. Then go back to the configuration group page to correct the error and if there is a Valid IOS XE CLI without an associated YANG model then move the configuration to the Classic CLI pane. Then deploy the device again.

Rollback

The Control Connection failed causing a rollback to its previous working state. Only the CLI section reverts to its previous state, rollback for Classic CLI is not supported. To retain the previous device configurations, you need to correct these manually using SD-WAN Manager.

Note, the system will wait for 5 minutes to re-establish the control connection; if the connection is not restored within this time, a rollback will occur.

Following is an example output of Rollback.

12-Apr-2025 16:05:12 UTCJ Device has pulled the configuration
[2-Apr-2025 16:10:44 UTC] Device: Control connections affected by config
Current Date and time is 2025-04-02 16:10:27.446127
Personality is SD-Routing vdaemon
Checking Mandatory System Configs
system-ip organization-name sp-organization-name root-ca-chain-status 
certificate-status certificate-validity number-active-wan-interfaces token 
dns-name/Validator Checking CDB
name configured org-name configured sys-ip configured
Checking WAN interfaces
wan intf GigabitEthernet1
PASS
PASS
PASS
PASS
PASS PASS
PASS
PASS
PASS
FAIL
WAN interface GigabitEthernet1 is down due to which control connection 
could not be established! Mandatory configs missing
[2-Apr-2025 16:10:44 UTC] Failed to attach configuration

Select Action > ellipsis (…) to view detailed log information about the issue. Then go back to the configuration group page to correct the error and then deploy the device again.

For any unknown issues, get in touch with Cisco Technical Assistance (TAC) team.

Disassociate a device from Configuration Group

When moving a device to a different Configuration Group, you must first disassociate it from its current group. Follow these steps to disassociate a device from the Configuration Group.

Procedure


Step 1

From Cisco Catalyst SD-WAN Manager, choose Configuration > Configuration Groups.

Step 2

Select the preferred SD-Routing configuration group from the list.

Step 3

Click +Add adjacent to Associated field.

Step 4

Uncheck the devices to disassociate the devices from the Configuration group.

Step 5

Click Save.


Create a SD-Routing Configuration Group using the Workflow Library

The Create SD-Routing Config workflow available in the Workflow Library is a simplified workflow that guides you in creating a configuration group for SD-Routing devices. This is an alternative way to quickly create a configuration group.

Procedure


Step 1

From Cisco SD-WAN Manager menu, choose Workflows > Workflow Library > Create SD-Routing Config.

Step 2

Enter a name and optionally a description and click to create a SD-Routing configuration group.

Step 3

Select the configuration group and add any additional profiles that you need. For more information refer to Create Configuration Groups using Profile Configuration Group


What to do next

Associate and deploy the Configuration Group to an SD-Routing device

Deploy SD-Routing devices using the Deploy Configuration Group Workflow

Before you begin

You should have created an SD-Routing Configuration Group and associated one or more devices with the configuration group.

Procedure


Step 1

From Cisco SD-WAN Manager menu, choose Workflows > Workflow Library.

Step 2

Start the Deploy Configuration Group workflow.

Step 3

Follow the instructions provided in the workflow.


Release a console

When you push configurations to a device using a Configuration Group, the device console locks, blocking any other actions through the terminal. To make the console available for pushing configurations directly through the terminal, you release it from the SD-WAN Manager. Follow these steps to release a console from a Configuration Group.

Procedure


Step 1

From Cisco Catalyst SD-WAN Manager, choose Configuration > Devices > WAN Edges.

Step 2

Click adjacent to the configuration group name.

Step 3

Select Config Unlock.

Step 4

Click Yes in the Config Unlock dialogue box to release the console.