Configure Devices

This chapter describes the tasks related to device configuration in Cisco Optical Site Manager.

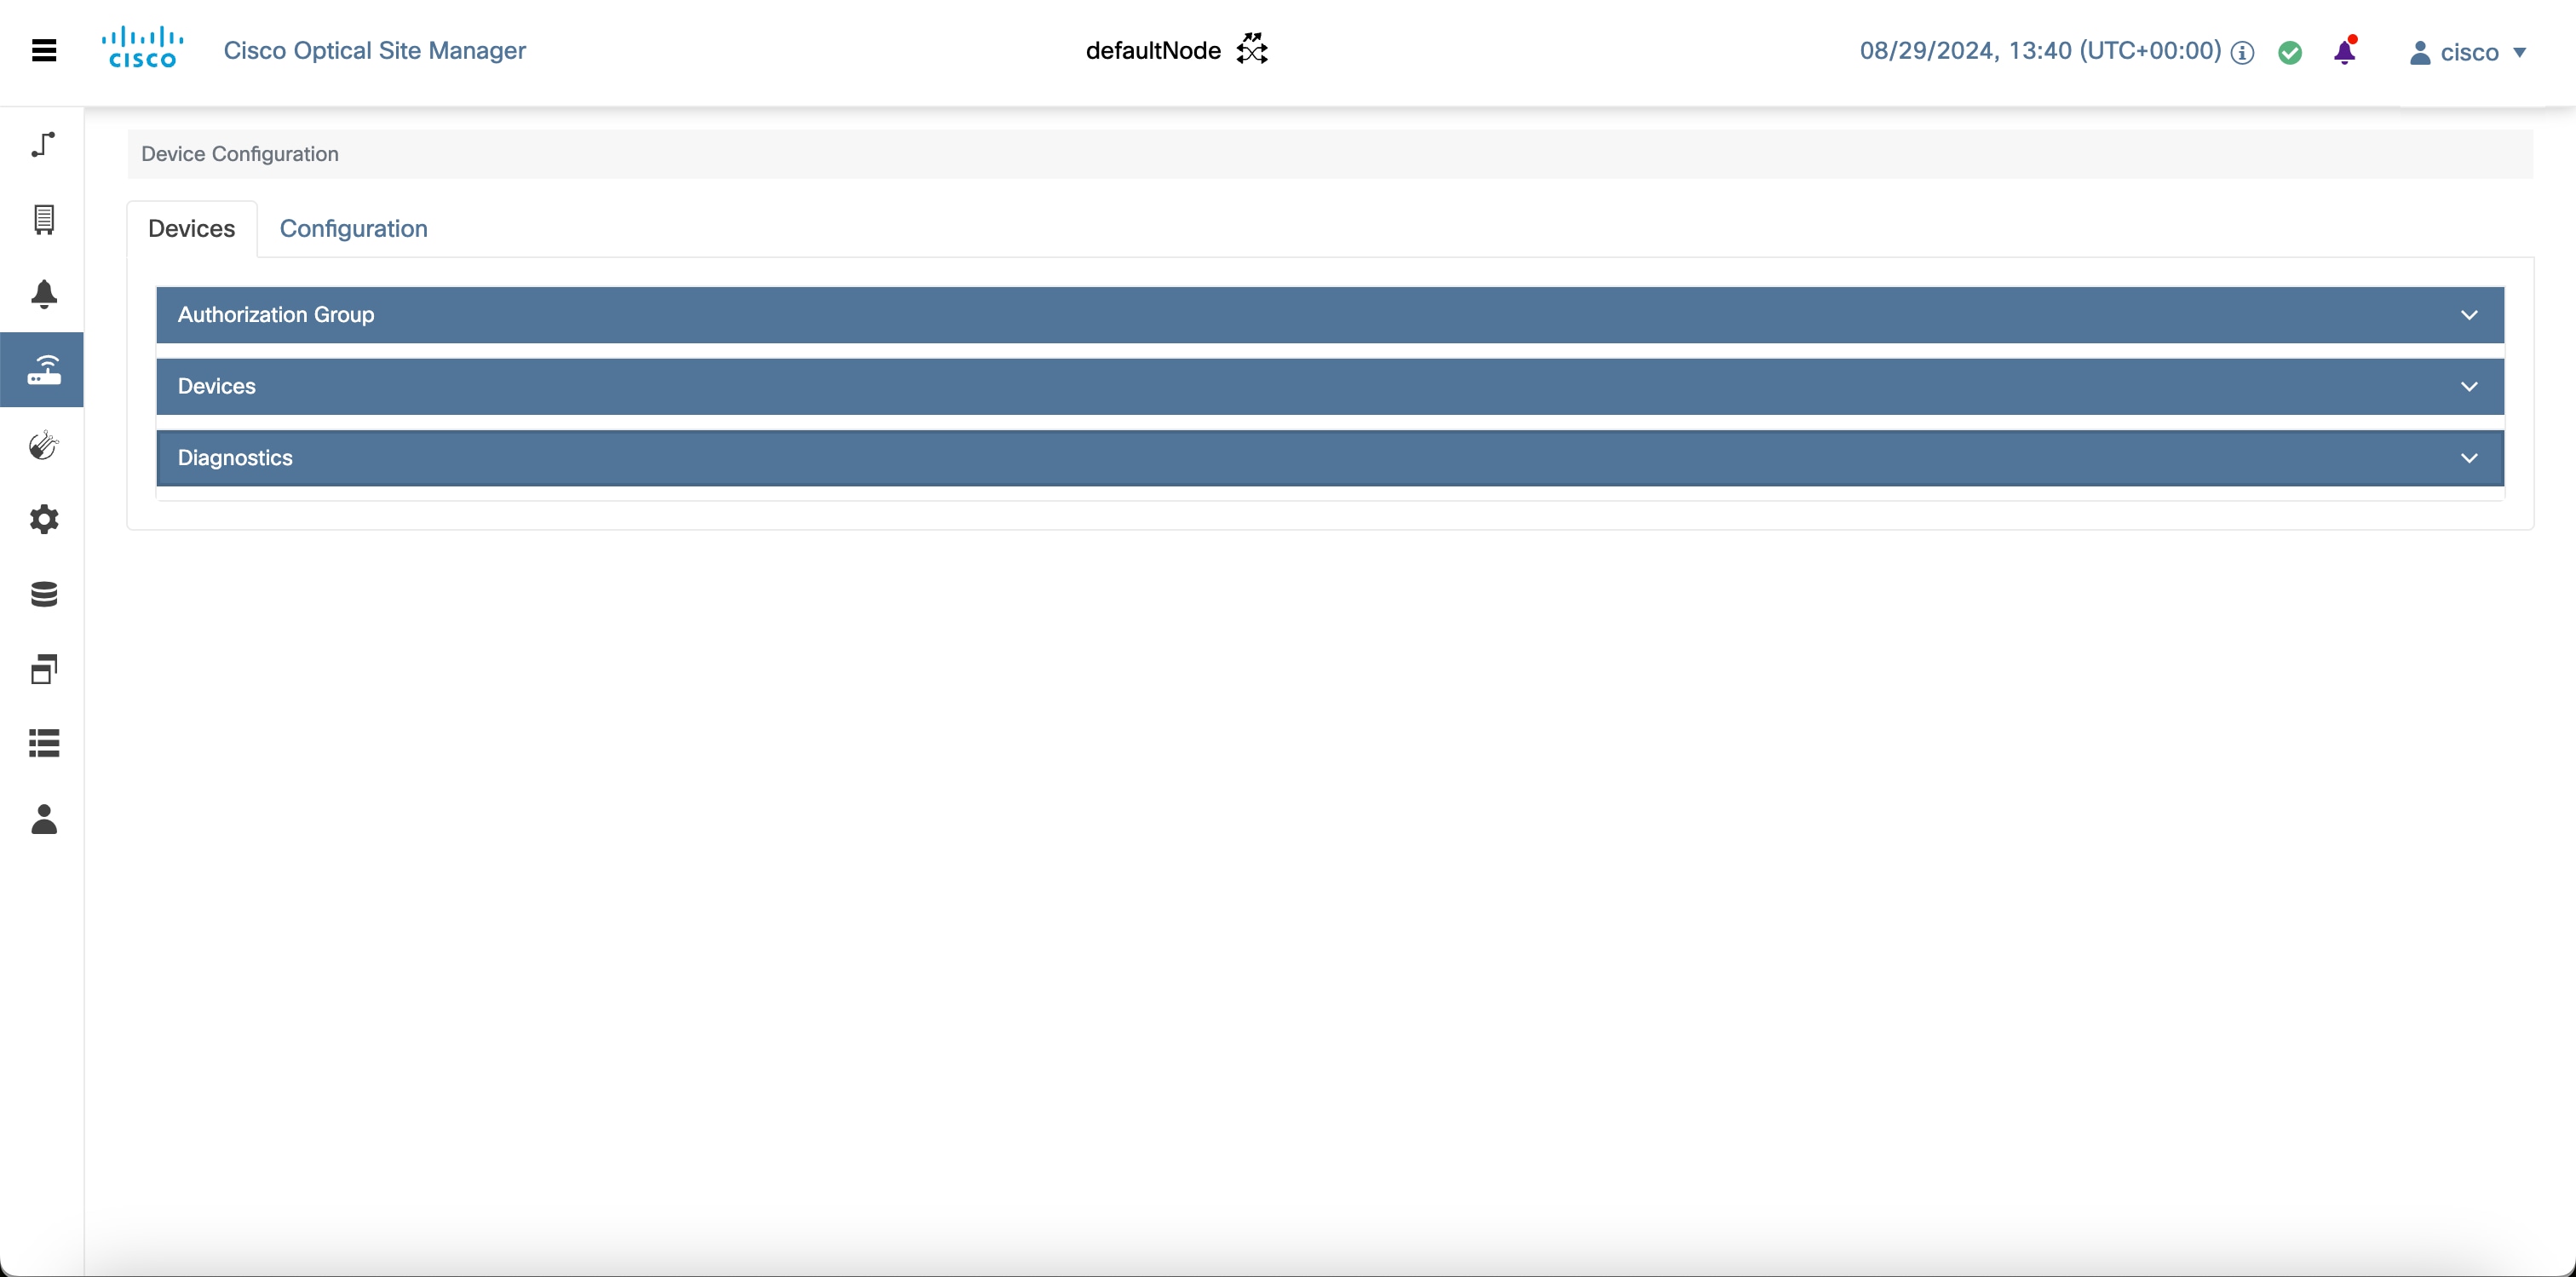
Figure 1. Configure Devices

Manage authorization groups

Authorization groups are used to manage user and group attributes for authentication and authorization processes.

Follow these steps to create, edit, or delete authorization groups for devices.

Before you begin

Log into Cisco Optical Site Manager

Procedure


Step 1

Click Devices in the left panel.

The Device Configuration page appears.

Step 2

In the Devices section, click the Authorization Group section to expand it.

The table lists all the available groups.

Step 3

Perform these steps, as needed:

To perform these steps
Create a new authorization group
  1. Click the Add Auth Group button.

    The Add Authorization Group dialog box appears.

  2. Enter the Auth Group Name, Remote User Name, and Remote Password in their respective fields.

  3. Click Add.

    The new auth group is added to the table.

Edit an authorization group
  1. Click the Add Auth Group button.

    The Add Authorization Group dialog box appears.

  2. Enter the Auth Group Name, Remote User Name, and Remote Password in their respective fields.

  3. Click Add.

    The authorization group is added to the table.

Delete an authorization group
  1. Select the check box next to the authorization group you want to edit.

  2. Click the Delete Auth Group button.

    A confirmation message appears.

  3. Click OK.

    The authorization group is deleted from the table.


Add a device

Cisco Optical Site Manager automatically detects and onboards directly connected peer devices on the network. However, if you've added a new device after configuring Cisco Optical Site Manager, you can manually add the device for management using the application.

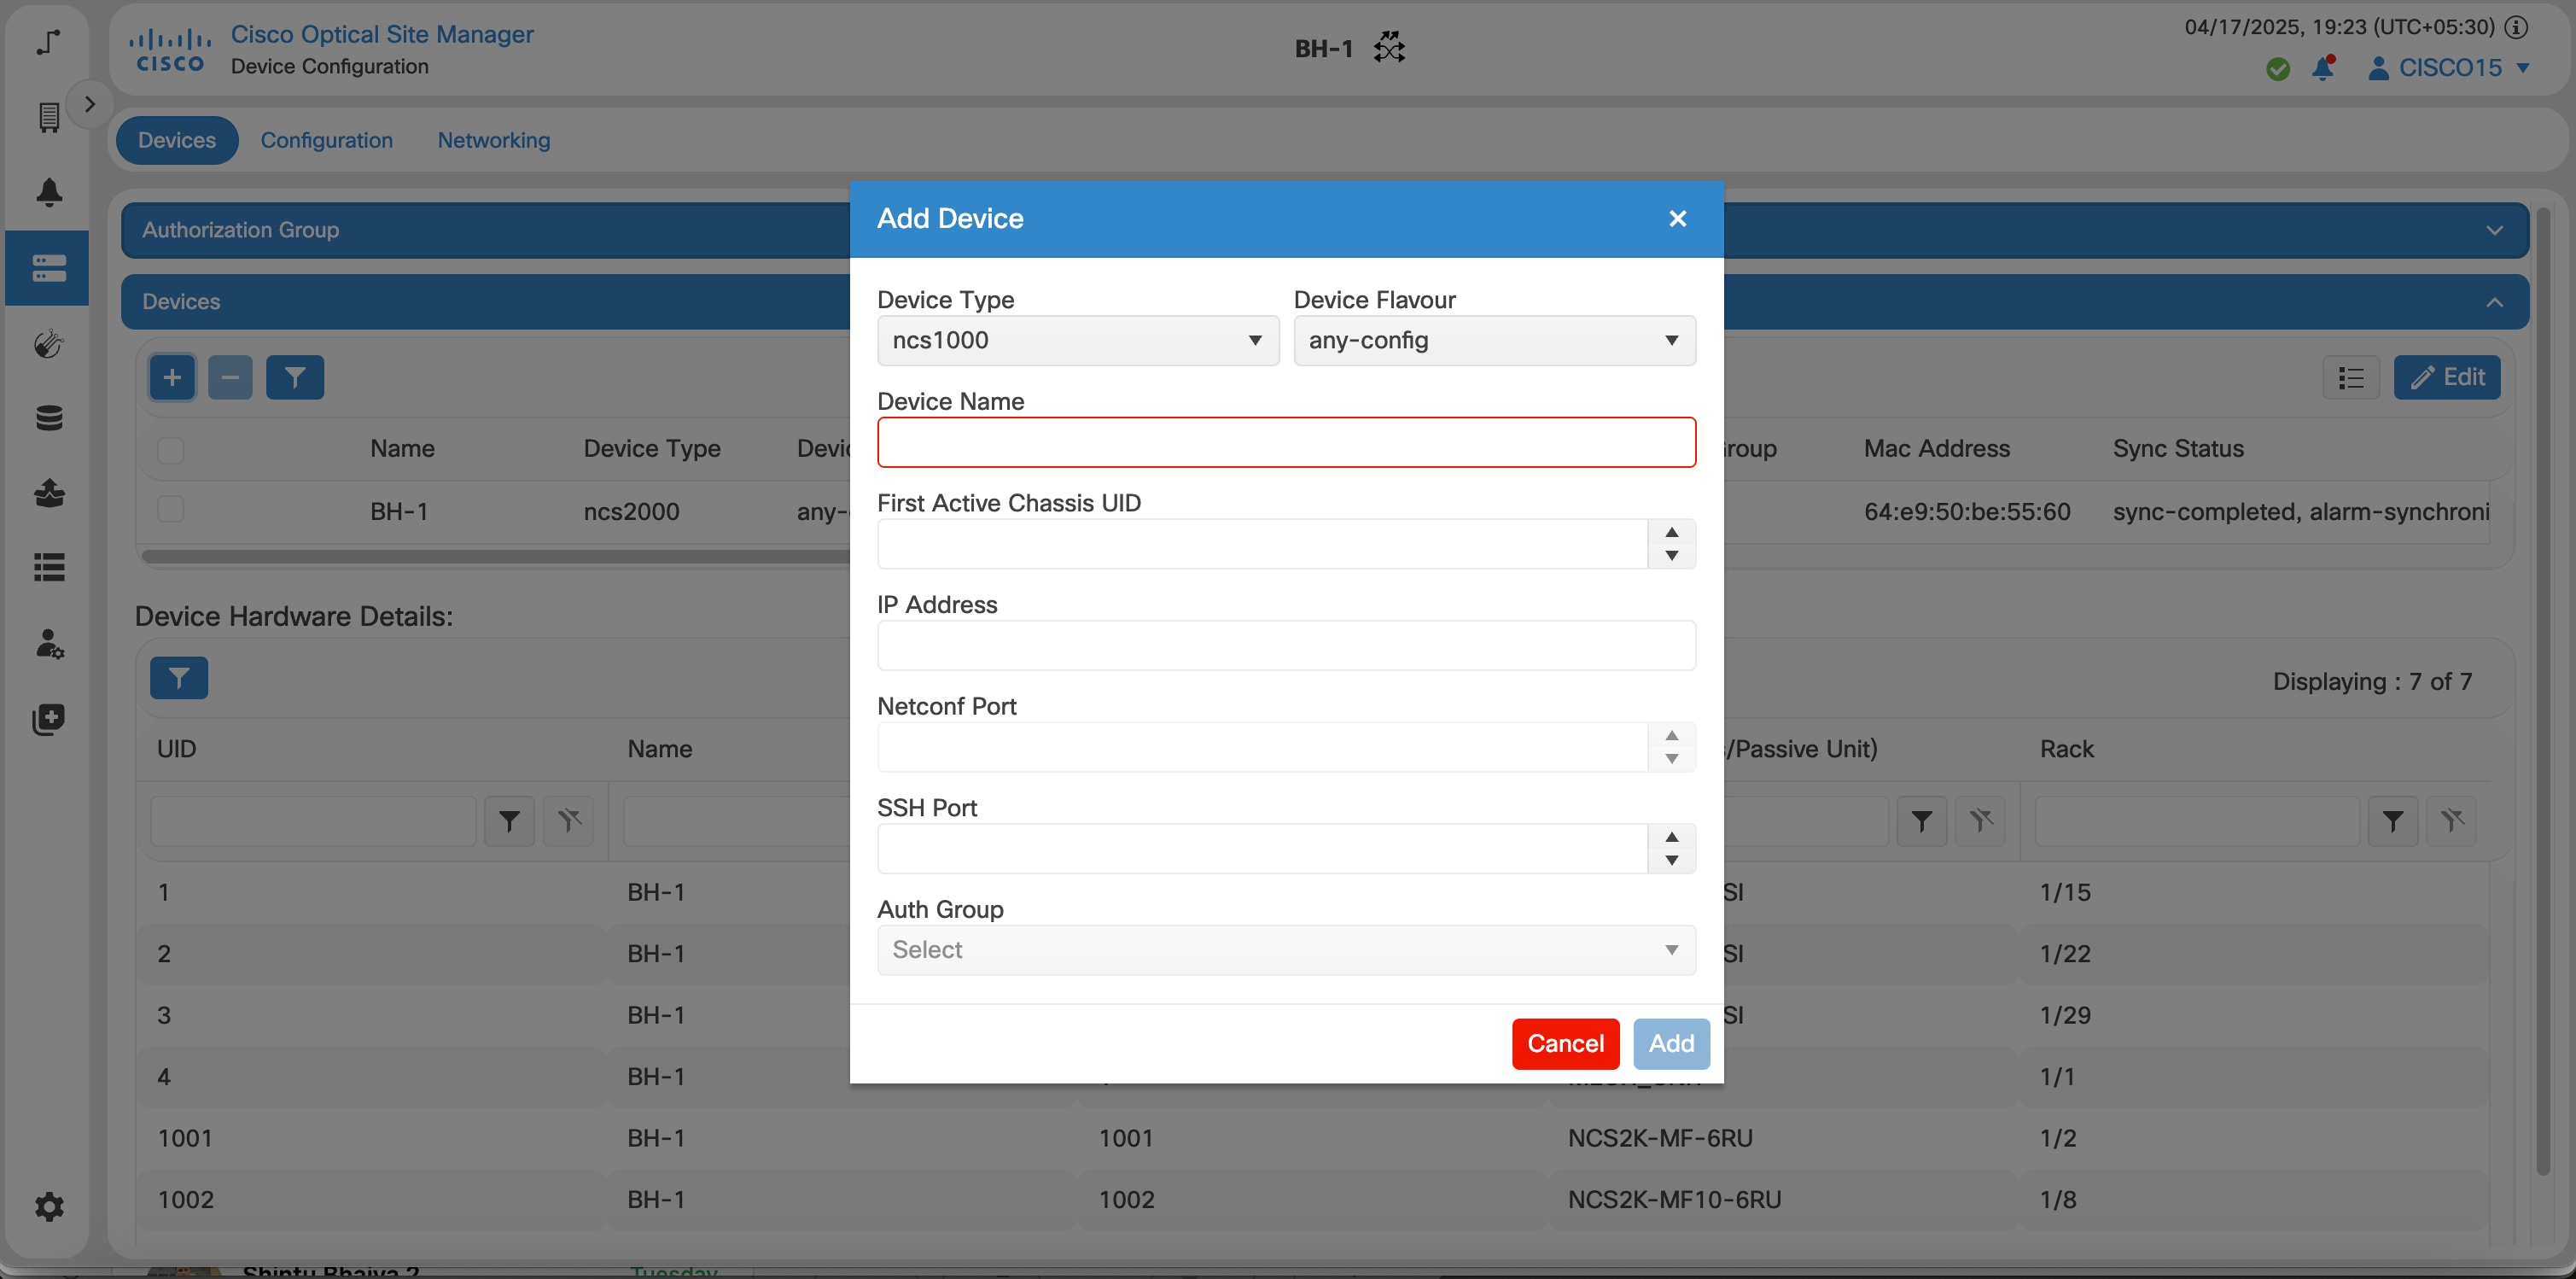
Figure 2. Add a Device

Follow these steps to add an NCS 1000 or NCS 2000 device to Cisco Optical Site Manager.

Before you begin

Log into Cisco Optical Site Manager

Procedure


Step 1

Click Devices in the left panel.

The Device Configuration page appears.

Step 2

In the Devices tab, click the Devices section to expand it.

A table appears that lists all the devices that are configured.

Step 3

Click the Add Device icon.

The Add Device dialog box appears.

Step 4

Select the Device Type from the drop-down list.

Select

to

ncs1000

add a NCS 1000 device.

ncs2000

add a NCS 2000 device.

external-switch

add an external switch.

Step 5

Enter the Netconf Port.

Note

 
This field is displayed only if ncs1000 is selected in the Device Type drop-down list.

Step 6

Enter the Device Name and IP Address.

Step 7

Enter the UID.

Note

 
This field is displayed only if ncs1000 or ncs2000 is selected in the Device Type drop-down list.

Step 8

Select an authorization group from the Auth Group drop-down list.

Step 9

Click Add.


The device is added to Cisco Optical Site Manager and displayed in the Devices section.

Delete devices

Delete devices that are no longer used in the network.

Follow these steps to delete an NCS 1000, NCS 2000, passive device, or an external controller.

Before you begin

Log into Cisco Optical Site Manager

Procedure


Step 1

Click Devices in the left panel.

The Device Configuration page appears.

Step 2

Click the Devices section to expand it.

The table lists all the configured devices.

Step 3

Select the check box next to the devices you want to delete.

Step 4

Click the Delete Device(s) button to delete the selected devices.

A confirmation message appears.

Step 5

Click Yes.


Retrieve device diagnostics

Retrieve, download, and review diagnostics on the Diagnostics page.

Follow these steps to retrieve and download the device diagnostics:

Before you begin

Log into Cisco Optical Site Manager

Procedure


Step 1

Click Devices in the left panel.

Step 2

In the Devices tab, click the Diagnostics section to expand it.

The configured devices are listed in a table.

Step 3

Select the Node Diagnostics check box next to the device for which you want to retrieve the diagnostics.

Step 4

Click Retrieve.

A confirmation message appears.

Step 5

Click Yes to proceed.

A Request Accepted message appears.

Step 6

Click OK.

A message appears when the diagnostic action is completed.

Step 7

Select the check box next to the device for which you want to download the diagnostics and click Download.

The system downloads a zip file containing the logs.


The downloaded ZIP file contains diagnostic logs, which can be reviewed for troubleshooting, performance monitoring, or compliance purposes.