![]()
Provisioning Tasks
This section describes the tasks for provisioning Managed Device services pack in Cisco MSX.
This section contains the following topics:
Provisioning a Device Supported Out-of-the-Box by Managed Device
Out-of-the-box, Managed Device service pack support for Cisco IOS-XE based devices by default.
|
Task |
See |
|---|---|
|
Onboarding the device. |
Adding a Device |
|
Bulk provisioning |
|
|
Configuring the template parameters to the default device using the Cisco MSX Portal. |
|
|
Deconfiguring the applied template parameter from the device. |
|
|
Deleting and removing the site information from Cisco MSX. |
Subscribing to Managed Device Service
The Cisco MSX Managed Device service pack allows you to onboard devices to the Cisco MSX platform and monitor their status and metrics. You can onboard a single device manually or multiple devices at once using the Bulk Import feature.
Before you begin
The prerequisites for the task are:
-
A tenant and a tenant user are created.
-
The device template is defined and is available for the tenant user.
-
Import the device model.
Procedure
| Step 1 |
Log in to the Cisco MSX portal. |
| Step 2 |
From the left pane, choose Tenant Workspace > Offer Catalog. Alternatively, you can go to Services tile and click View Offer Catalog. The Offer Catalog window is displayed with the available services. |
| Step 3 |
Click Managed Device. |
| Step 4 |
Click Subscribe. The Confirm Subscription dialog box is displayed for you to confirm the subscription. |
| Step 5 |
Click Subscribe. |
| Step 6 |
Click Continue. The Managed Device service pack is subscribed and is shown as a service in the Services tile. Next step: Now add a new device into the Cisco MSX. For more information, see Adding a Device. |
Adding a Device
To add a device:
Before you begin
If you are adding a Meraki device, make sure to create Meraki network. For more information, see Creating Networks.
Procedure
| Step 1 |
Log in to the Cisco MSX portal. |
||||
| Step 2 |
From the left pane, choose Tenant Workspace > Services, and select a tenant, and click Continue. The list of services available for the tenant is displayed. |
||||
| Step 3 |
Click the Managed Device service panel to expand, and click the ellipsis (…)and choose Add Device from the menu. You can also click the Add Device button. The Add New Device wizard is displayed.
|
||||
| Step 4 |
Click Get Started. The Service Selection window is displayed. |
||||
| Step 5 |
Select the Managed Device option, and click >. |
||||
| Step 6 |
Select the device Onboarding Method from the available options. 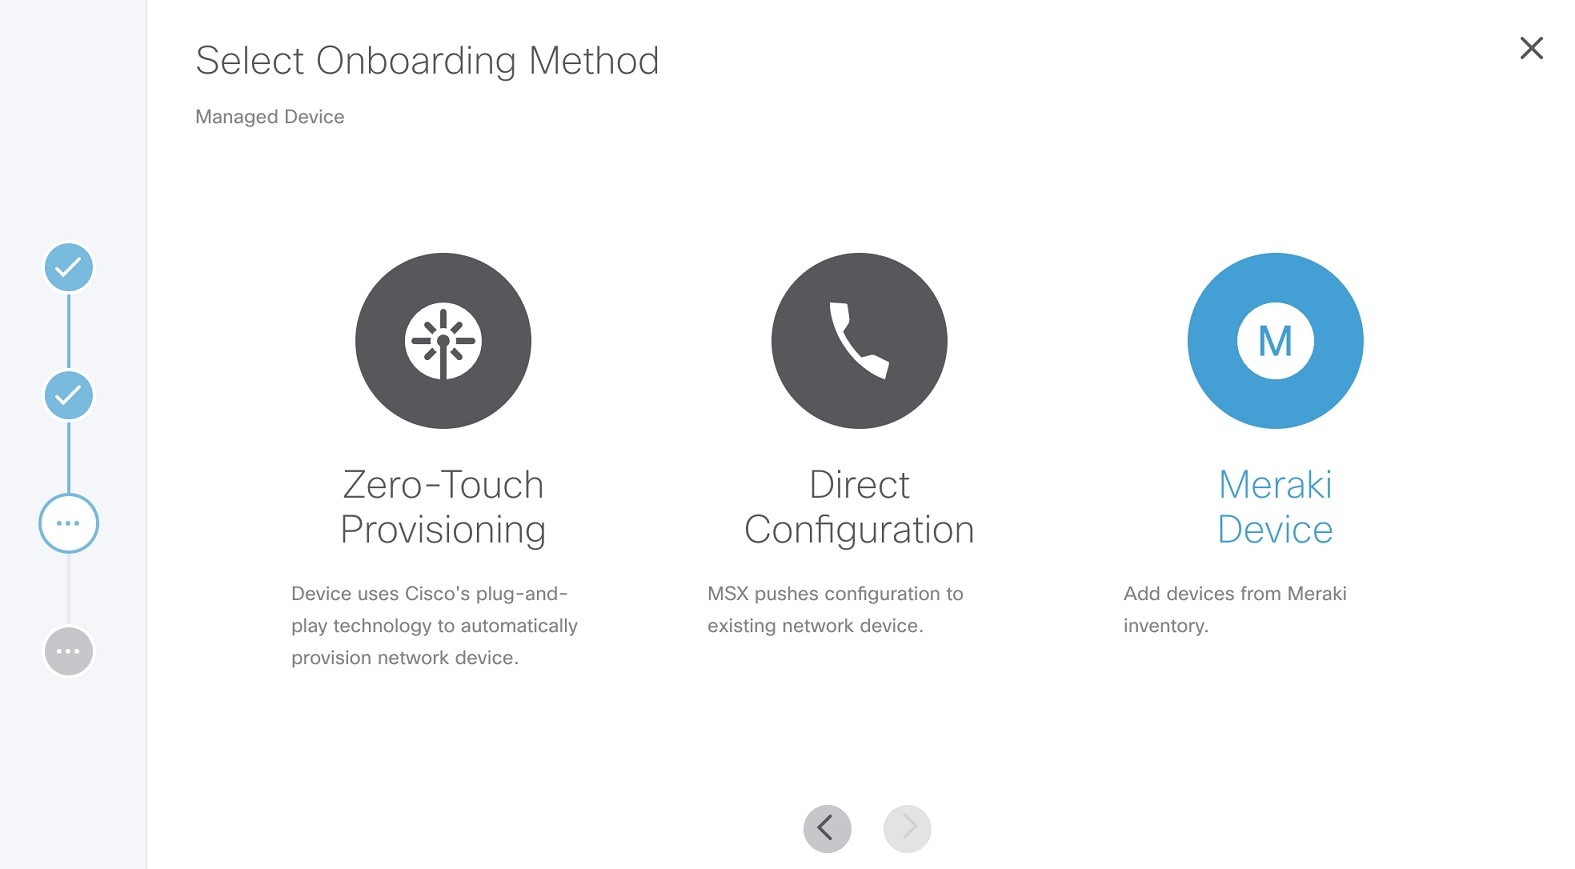
|
||||
| Step 7 |
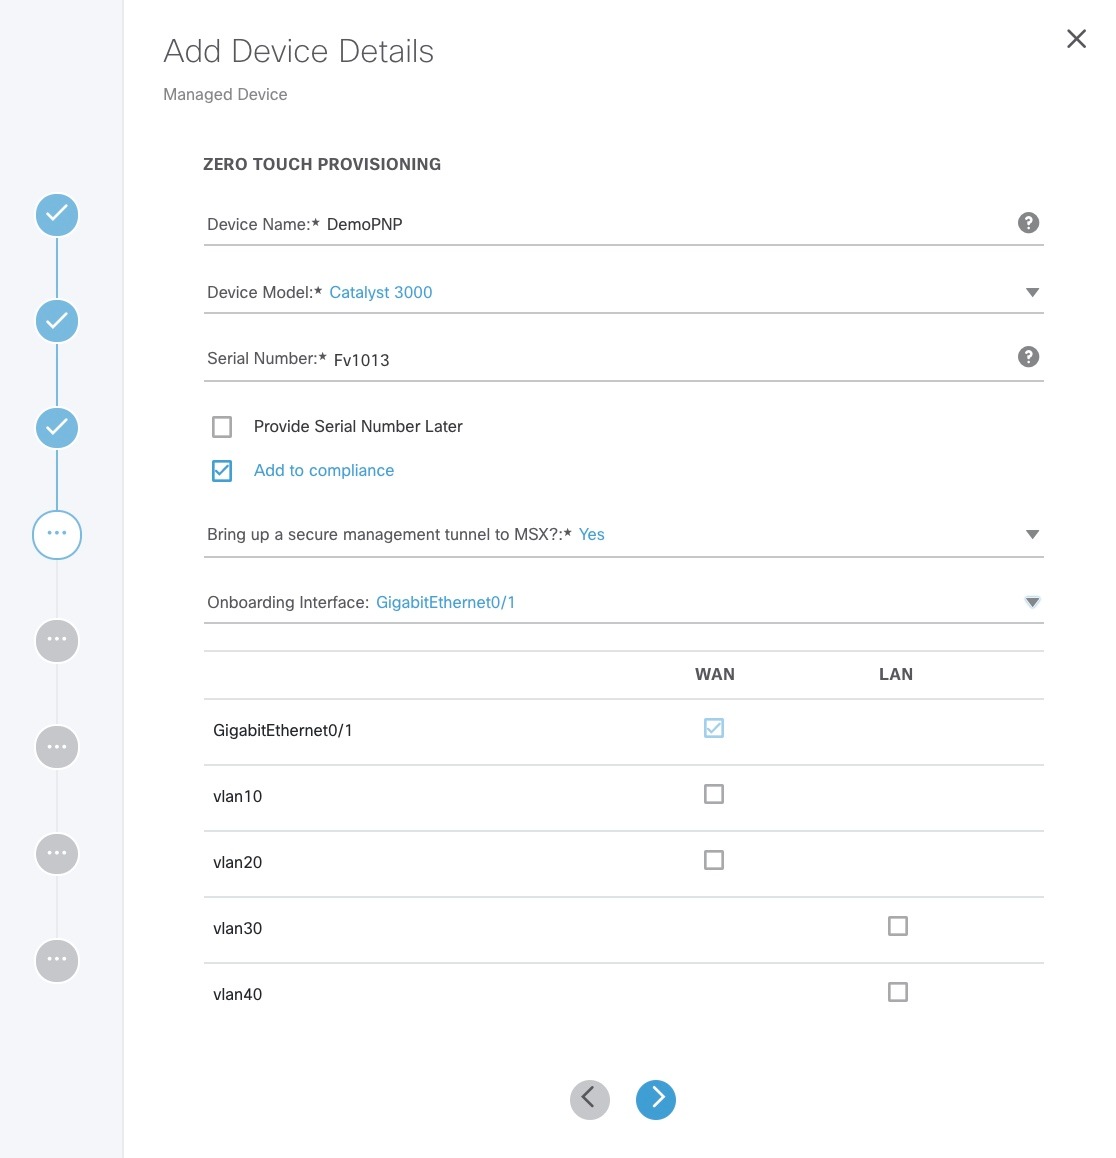
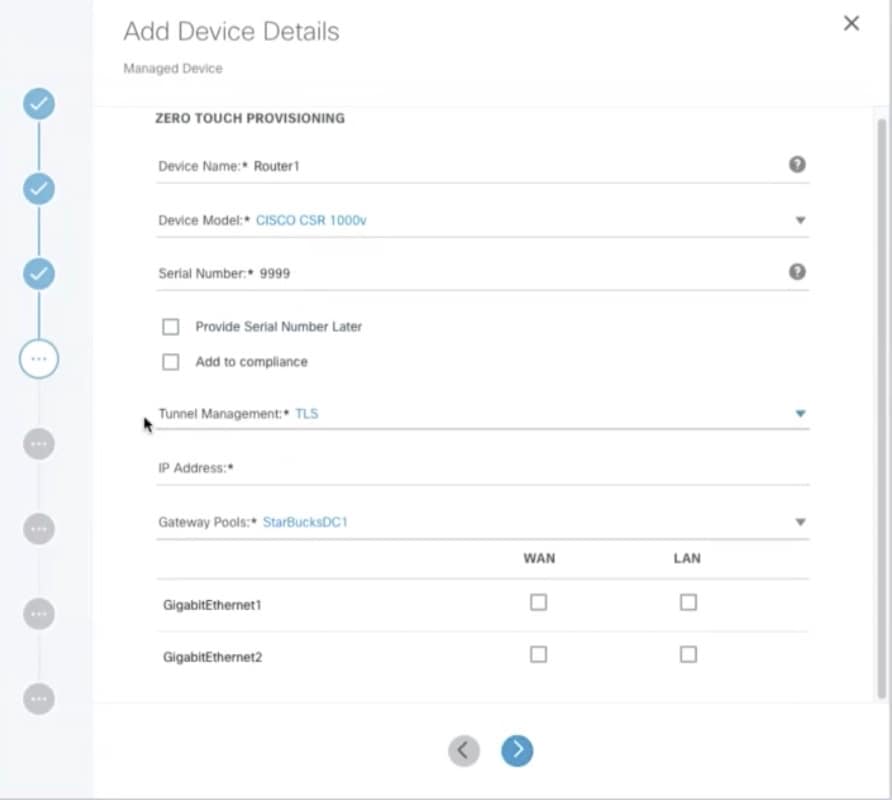
Specify the Device Details. Based on the selected onboarding type, enter the device details. For Zero-Touch Provisioning:
For the Direct onboarding type: 
Meraki |
||||
| Step 8 |
Click Next. |
||||
| Step 9 |
In the Select Template section, you can select one or more templates that you want apply on the device from the Template Options pane. The selected stack of templates appears on the Selected Templates pane. 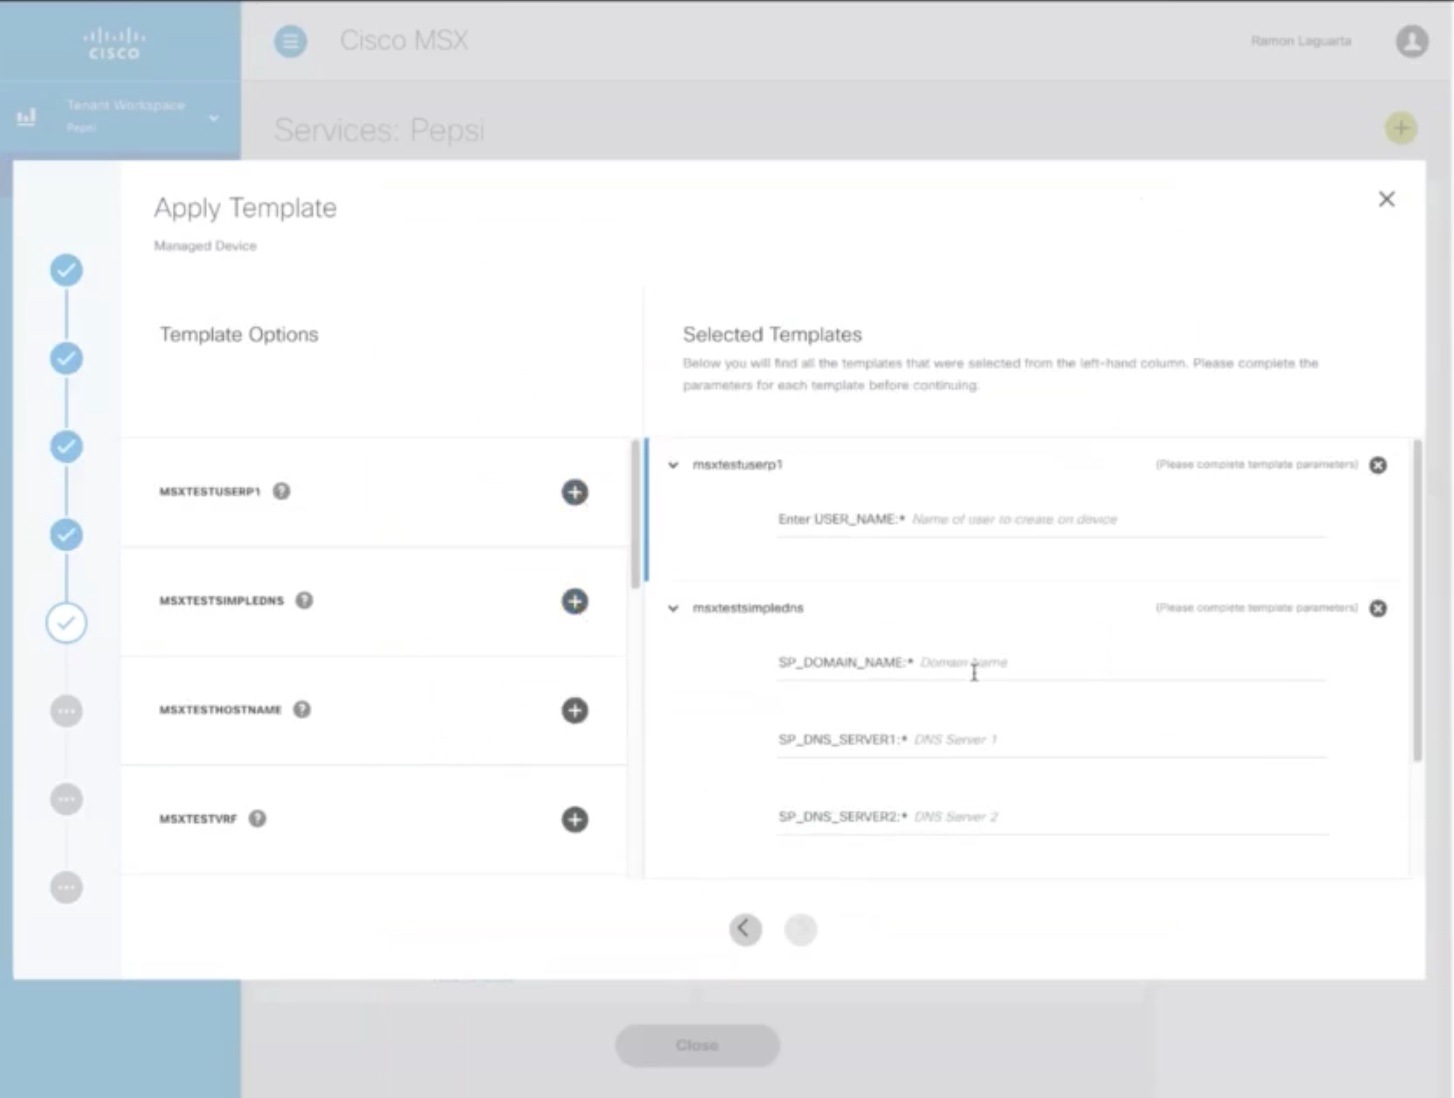
Each template in the stack is independent of the other template. These templates can be selected in any order. The latest selected template appears first in the template stack. These configurations are applied to the device in an appropriate order.
|
||||
| Step 10 |
Click Next. The device information you configured is displayed for review. |
||||
| Step 11 |
Click Next. The device is added successfully and a message is displayed. From here, you can either view the device details or assign device to a site. Click View Device to view the details of the device. |
||||
| Step 12 |
Click Assign Device to Site to assign the device to a site. Click Do not show this introductory step again to skip the introductory step. Next time this window will not be shown when you assign a site. |
||||
| Step 13 |
Click Next. The Select Site window is displayed. |
||||
| Step 14 |
In the Site name field, search for the site name and select a site from the drop-down list. |
||||
| Step 15 |
Click Next. The site is assigned to a device. |
||||
| Step 16 |
Click Close. |
Adding a Serial Number
Procedure
| Step 1 |
Log in to the Cisco MSX portal. |
| Step 2 |
From the left pane, choose Tenant Workspace > Devices. The Devices tile is displayed with the available devices. |
| Step 3 |
Choose a device from the list. The device information is displayed. 
|
| Step 4 |
In the Device Status section, click Add Serial. The Add Serial Number dialog box is displayed.
|
| Step 5 |
Enter the serial number. |
| Step 6 |
Click Add Serial. The serial number is added successfully and a message is displayed. |
| Step 7 |
Click Close. |
Importing Multiple Devices
Cisco Managed Device service pack allows you to import multiple devices at once using the bulk import feature. The Site Template file is used to import multiple devices. This file has a custom header row, and each subsequent row in the file represents a device to be created. You need to enter the required data in the appropriate columns of the file and then import the Site Template file to Cisco MSX.
 Note |
|
To avoid potential errors, disable the bulk import function if a bulk import job is already running. For example, if an error occurs when the bulk import job includes a device that is already provisioned, then the device gets duplicated in the Cisco MSX. Performing the jobs in sequence ensure that all the devices are added correctly by detecting and ignoring duplicate devices.
To download a Site Template:
Procedure
| Step 1 |
Log in to the Cisco MSX portal. |
||
| Step 2 |
From the left pane, choose Tenant Workspace > Services. The Services tile is displayed with the Managed Device service. |
||
| Step 3 |
Click the ellipsis (…) and choose Import Devices Using CSV from the menu. The Import Managed Devices using CSV window is displayed.
|
||
| Step 4 |
Prepare the Site Template file. 
|
||
| Step 5 |
Download a Site Template file. |
||
| Step 6 |
Edit the downloaded Site Template file. The downloaded Site Template file contains only the selected templates. The header of this file depends on the templates you had selected. You can manually add the devices and parameter values in the Site Template file. Each subsequent row represents a device to be created. Using the Site Template file, you can apply single or multiple templates and reapply the same template repeatedly to the selected device.

|
||
| Step 7 |
Import the Site Template file.
|


Applying Template from Cisco MSX Portal
To apply template to a device:
Procedure
| Step 1 |
Log in to the Cisco MSX portal. |
| Step 2 |
From the left pane, choose Tenant Workspace > Devices. The Devices tile is displayed with the list of devices. |
| Step 3 |
Click the ellipsis (...) that is located far right on the same row and then choose Apply Template. The Apply Template window is displayed. |
| Step 4 |
From the Apply Template window, select one or more templates that you want to apply on the device. The selected stack of templates appears on the Selected Templates pane.
|
| Step 5 |
Click Submit. |

Applying Template Using CSV File
To apply template on multiple devices using CSV file:
Procedure
| Step 1 |
Log in to the Cisco MSX portal. |
| Step 2 |
From the left pane, choose Tenant Workspace > Devices. The Devices tile is displayed with the list of devices. |
| Step 3 |
Select multiple devices from the list. |
| Step 4 |
Click the ellipsis (...) that is located far right on the column header and then choose Apply Template by CSV. 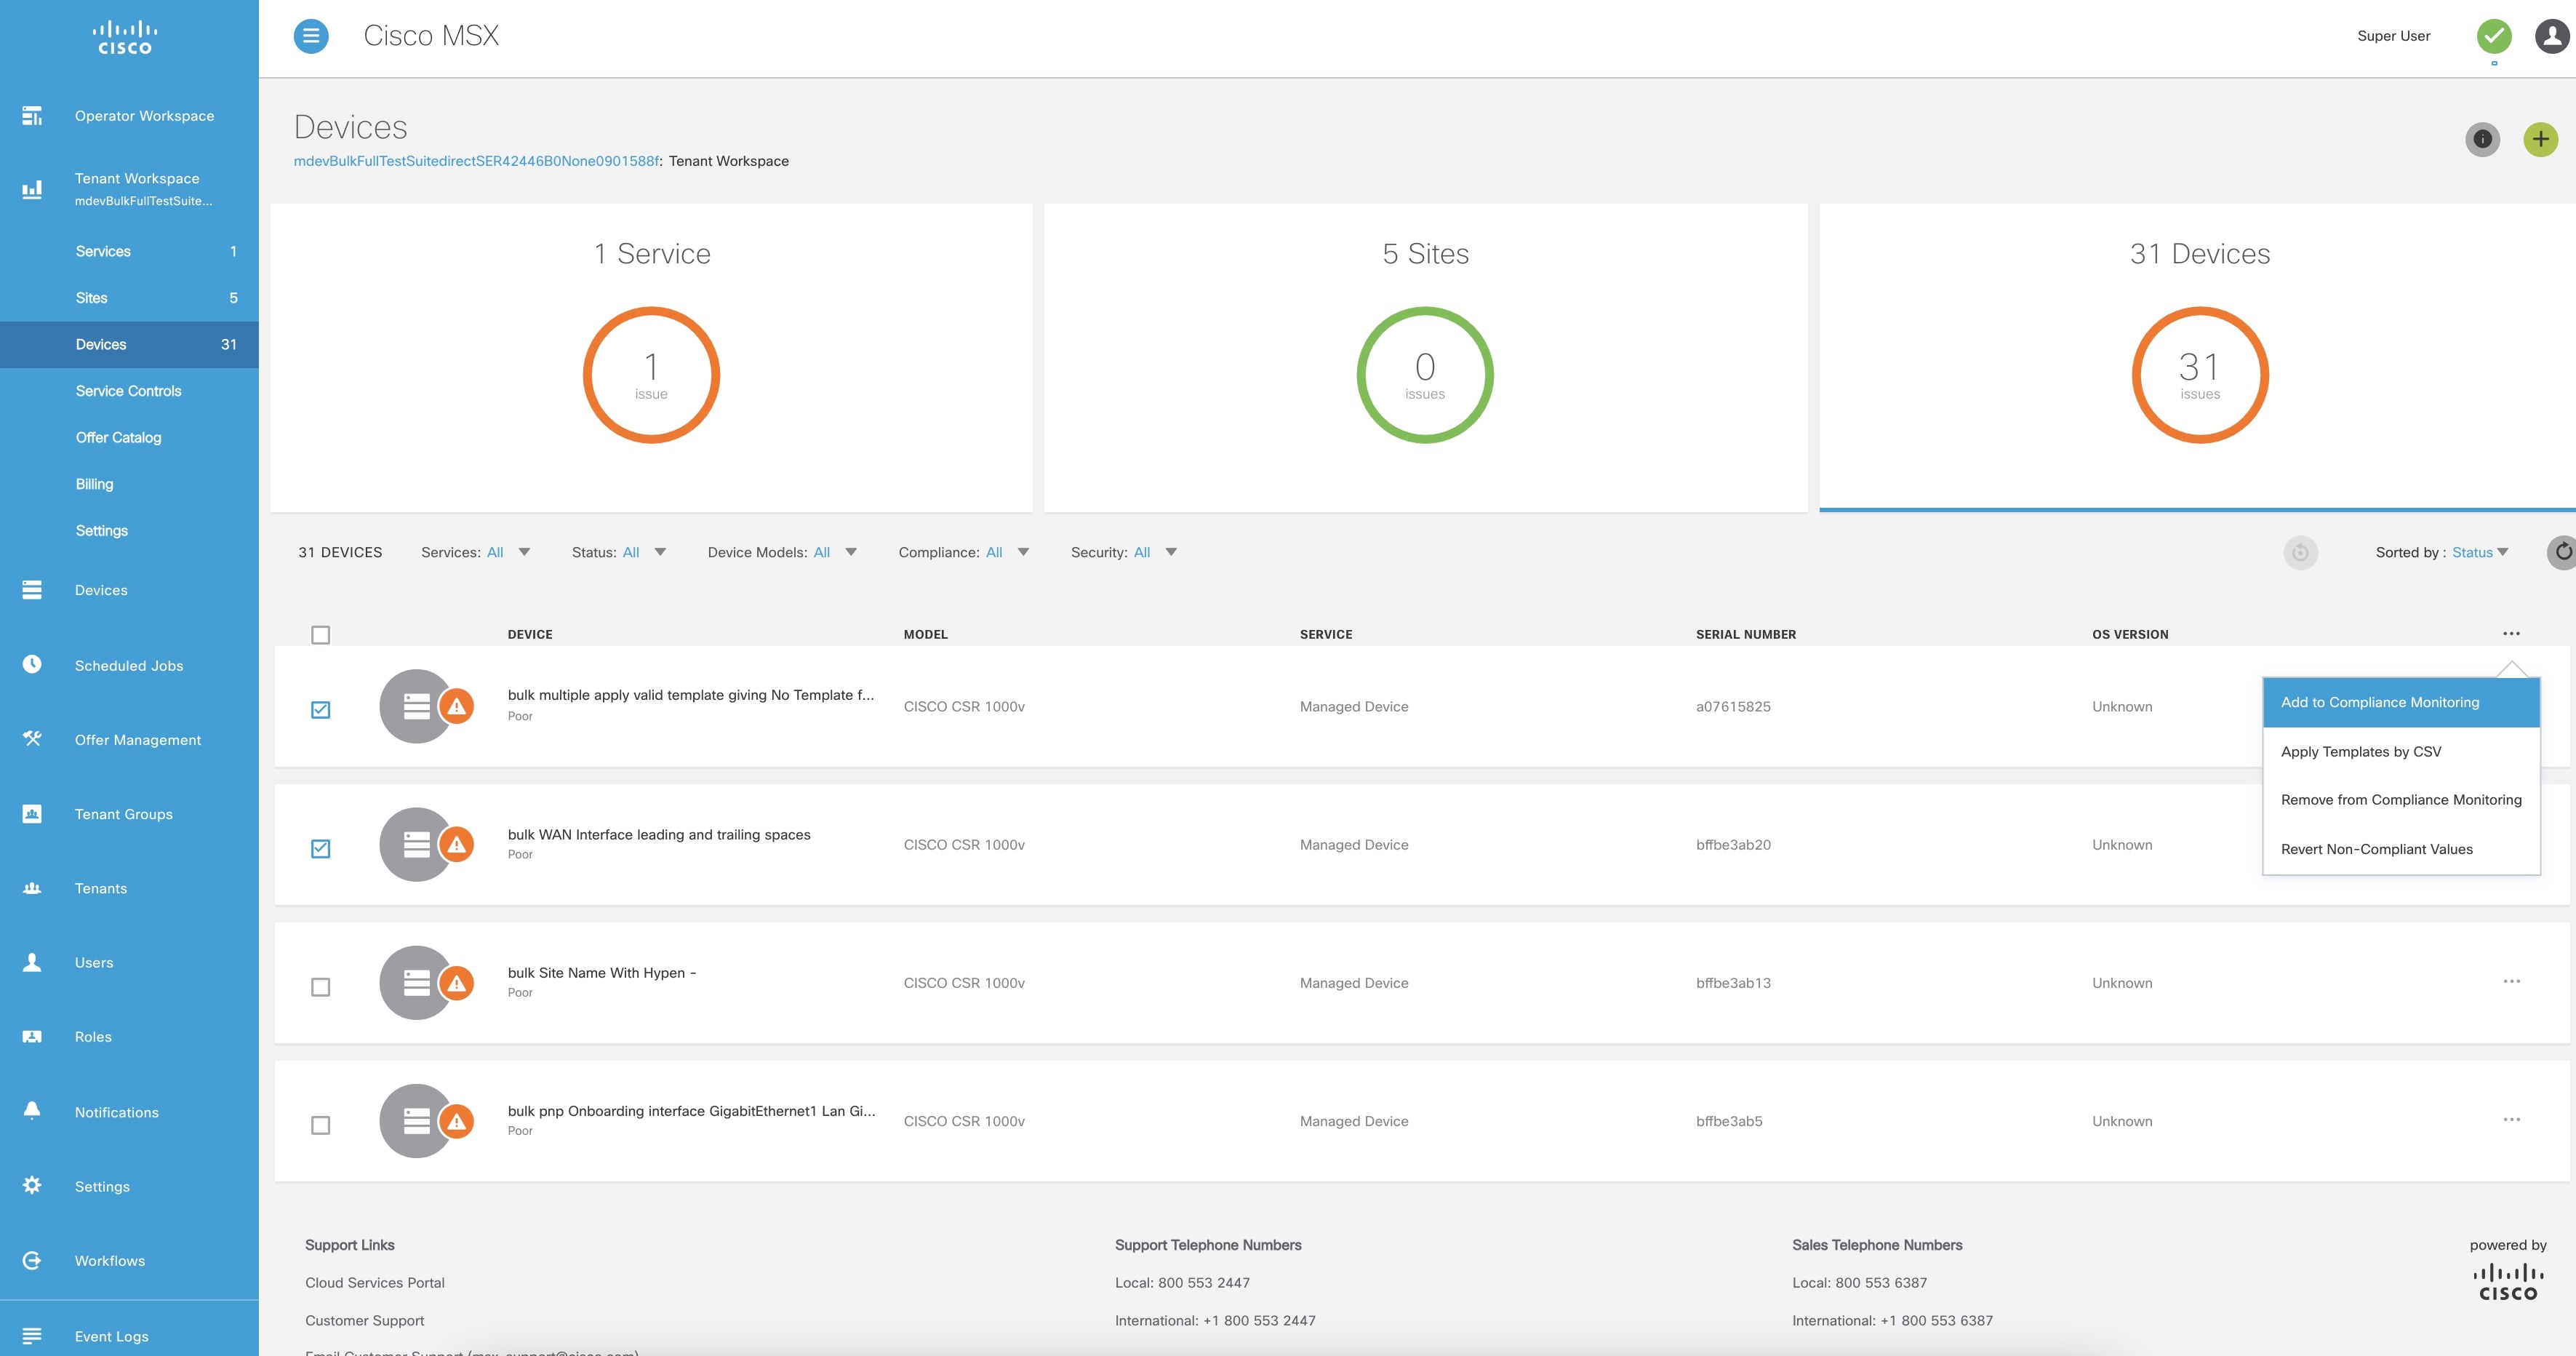
|
| Step 5 |
Prepare the Site Template file.
|
| Step 6 |
Download a Site Template file. |
| Step 7 |
Edit the downloaded Site Template file. The downloaded Site Template file contains only the selected templates. The header of this file depends on the templates you had selected. You can manually add the devices and parameter values in the Site Template file. Each subsequent row represents a device to be created. Using the Site Template file, you can apply single or multiple templates and reapply the same template repeatedly to the selected device.

|
| Step 8 |
Import the Site Template file.
|
Removing Templates from Device
To remove templates from a device:
Procedure
| Step 1 |
Log in to the Cisco MSX portal. |
| Step 2 |
From the left pane, choose Tenant Workspace > Devices. The Devices tile is displayed with the list of devices. |
| Step 3 |
From the list, select the device for which you want to remove the template. |
| Step 4 |
Click the ellipsis (...) that is located far right on the same row and then choose Remove Templates. The Remove Templates confirmation dialog box appears for you to confirm the removal of all the templates from the device. |
| Step 5 |
Click Remove Template. The applied templates are removed from the device. |
Deleting a Device
To delete a device:
SUMMARY STEPS
- Log in to the Cisco MSX portal.
- From the left pane, choose Tenant Workspace > Devices.
- From the list view, select the device that you want to delete.
- Click the ellipsis (...) that is located far right on the same row of the device and then choose Delete Device.
- Click Yes to delete the device from Cisco MSX.
- Click Delete Site.
DETAILED STEPS
| Step 1 |
Log in to the Cisco MSX portal. |
| Step 2 |
From the left pane, choose Tenant Workspace > Devices. The Devices tile is displayed with the list of devices. |
| Step 3 |
From the list view, select the device that you want to delete. |
| Step 4 |
Click the ellipsis (...) that is located far right on the same row of the device and then choose Delete Device. The Delete Device confirmation dialog box appears. |
| Step 5 |
Click Yes to delete the device from Cisco MSX. |
| Step 6 |
Click Delete Site. |
Unsubscribing Managed Device Service
To unsubscribe Managed Device service pack:
Procedure
| Step 1 |
Log in to the Cisco MSX portal. |
||
| Step 2 |
From the left pane, choose Tenant Workspace > Services. The Services tile is displayed with the Managed Device service. |
||
| Step 3 |
Click the ellipsis (…) and choose Unsubscribe from the menu. The Unsubscribe from Managed Device dialog box is displayed. |
||
| Step 4 |
Click Unsubscribe.
|
Provisioning a Device that is Not Supported Out-of-the-Box by Managed Device
|
Task |
See |
|---|---|
|
The Managed Device consists of Cisco IOS NED by default to onboard any Cisco IOS-XE devices. The NED package is decided based on the new device type that is to be onboarded. Upload the new NED into the Managed Device NSO. |
|
|
Preparing the SNMP device template. |
|
|
Preparing the device model construct (JSON file) to collect the SNMP metrics data for the new device type that is to be onboarded into Cisco MSX. |
|
|
The JSON file now has all the necessary device model fields. Upload this file into the Cisco MSX Portal to capture the SNMP metric data of the new device type. |
|
|
Onboard the new device type in the Managed Device service pack. |
Loading SNMP Configuration Template
To load SNMP configuration template:
Procedure
| Step 1 |
Convert CLI configuration into the NSO XML template for a new device type using the procedure explained here. For more information on workflow, see Creating Device Template. Convert some of the tags in the XML template to variables. The tags are:
|
||
| Step 2 |
Add the SNMP template to custom-templates folder on kubernetes-master node. |
||
| Step 3 |
Reload the NSO. The XML template should be loaded into NSO database system. Next Steps
|
Preparing Device Model Information for New Device Type
To facilitate the SNMP metric collection for the new device type, you can utilize the device model construct to collect metrics details.
For more details on how to build each SNMP field in the device model construct, see 'Sample device model field with description' in the Preparing Device Model.
Sample device model construct of Juniper:
{
    "deviceModels": [{
        "deviceModelName": "Juniper SRX",
        "platformDeviceType": "",
        "platformDeviceSubType": "",
        "interfaces": [],
        "lan": [],
        "wan": [],
        "nedId": "",
        "deviceType": "",
        "directTemplate":""


    }],
    "deviceMetricConfigurations": [{
        "snmpDetails": {
            "snmpAuthProto": "",
            "snmpVersion": "",
            "snmpPrivProto": "",
            "snmpUserName": ""
        },
        "platformDeviceType": "",
        "platformDeviceSubType": "",
        "snmpOidList":[],
        "snmpCpuMemoryUptimeQueryTemplate": {
        }
    }]
}
Next step:
After preparing the device model information (JSON file) for the new device type, upload this JSON file into Cisco MSX. For more information, see Importing Device Model.
![]()
 Feedback