![]()
Managing Organizations
Cisco MSX provides the ability to manage organizations.
You can attach one or more organizations to the tenant's control plane. Organization implies a collection of networks that are part of a single organizational entity. These networks, in turn, can have multiple devices.
 Note |
For more information on these APIs, refer the Swagger documentation that can be accessed from Cisco MSX portal > Account Settings > Swagger > Meraki Service API. |
Attaching Organizations
Procedure
| Step 1 |
Log in to the Cisco MSX portal using your credential. |
||
| Step 2 |
From the left pane, choose Tenant Workspace > Settings > Meraki Organizations. The Meraki Organization page is dispalyed. |
||
| Step 3 |
Click Attach Organizations. The Attach Meraki Organizations dialog box is displayed.  |
||
| Step 4 |
Click Get Started. |
||
| Step 5 |
Enter the Meraki API Access Key on the Connect to Meraki page. Use the eye icon to view and validate the API key.
 |
||
| Step 6 |
Click > to move to the next page. |
||
| Step 7 |
On the Select Meraki Organization page, select upto five organizations to attach to your Meraki control plane. The drop-down lists the available organizations for the access key you had provided in the previous step. In case you want to attach more than five organizations, you can do so at the end of this process by selecting Attach Another Organization option.
|
||
| Step 8 |
Click > to move to the next window and initiate the attaching process. You can close the window or click Attach Another Organization to add more organizations to the control plane. All the organizations added to the tenant's control plane is displayed in Tenant Workspace > Settings > Meraki Organizations. |
Editing and Detaching Organizations
Procedure
| Step 1 |
Log in to the Cisco MSX portal using your credential. |
||
| Step 2 |
From the left pane, choose Tenant Workspace > Settings > Meraki Organizations. The Meraki Organization page is displayed with the list of organizations that were added to the tenant's control plane. |
||
| Step 3 |
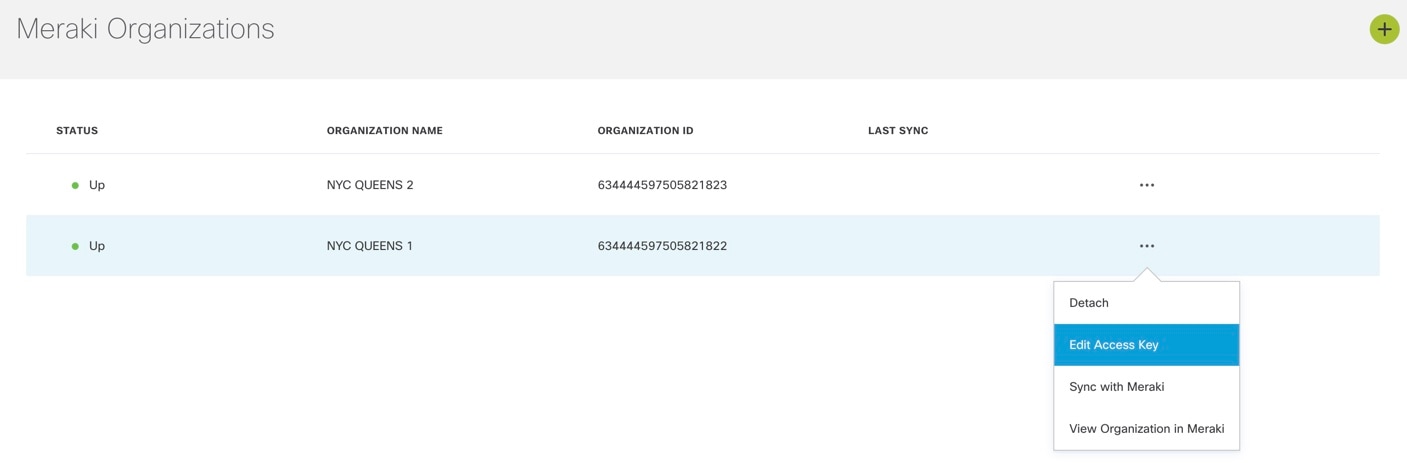
Select a row and click on the ellipsis (...) and choose Edit Access Key to edit the Organization details that were provided while attaching the organization to your tenant's control plane.
|
||
| Step 4 |
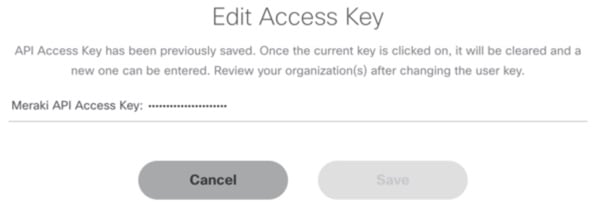
On the Edit Access Key dialog box, click Meraki API Access Key field to clear the previous key and enter a new key and click Save. Click Cancel to retain the old key.
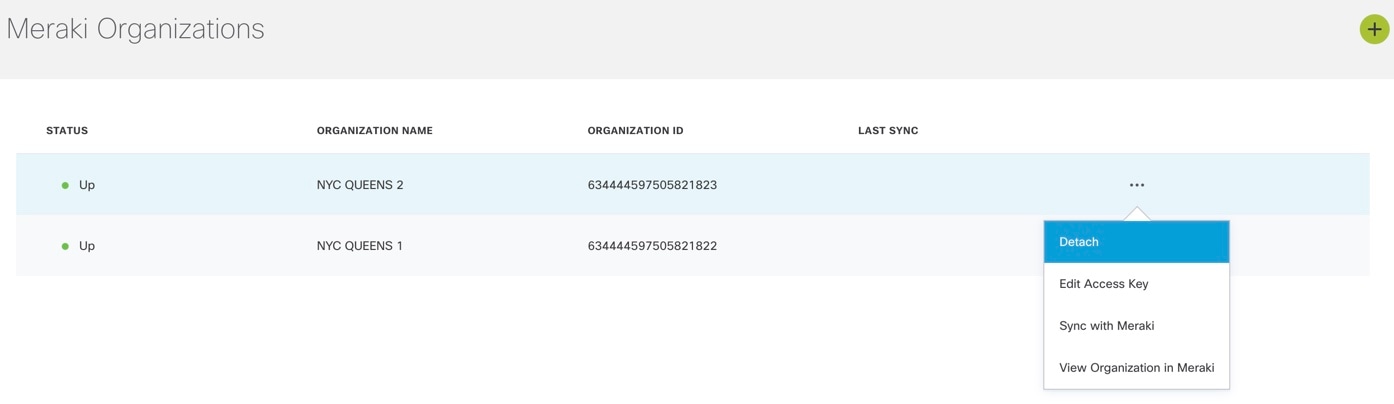
Detaching Organizations: If you want to detach or disassociate an organization from a tenants control plane, click on the ellipsis (...) and choose Detach.
 |
Managing Networks
A network is a logical container of multiple devices that can be created for a site and can be a combination of different device models. Cisco MSX provides the ability to manage networks.
Note |
For more information on these APIs, refer the Swagger documentation that can be accessed from Cisco MSX portal > Account Settings > Swagger > Meraki Service API. |
Creating Networks
Before you begin
Procedure
| Step 1 |
Log in to the Cisco MSX portal. |
| Step 2 |
From the left pane, choose Tenant Workspace > Sites. The list of sites associated with a tenant is displayed. |
| Step 3 |
Select any one of the sites to view the detailed site status. This page lists all the site metrics along with status of the selected site. |
| Step 4 |
Under the Managed Device section on the page, click + > Create New Meraki Networks to associate a new network to the selected site. 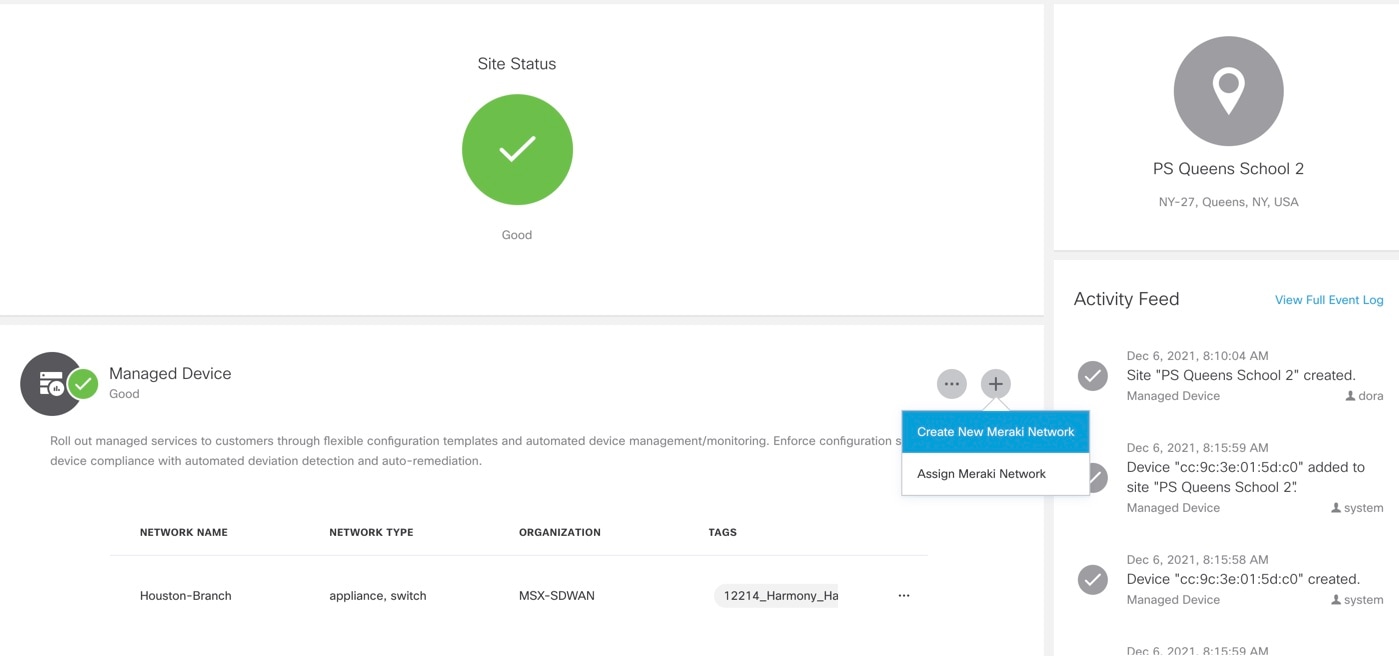 The Create New Meraki Network wizard is displayed to set up networks to manage multiple devices. |
| Step 5 |
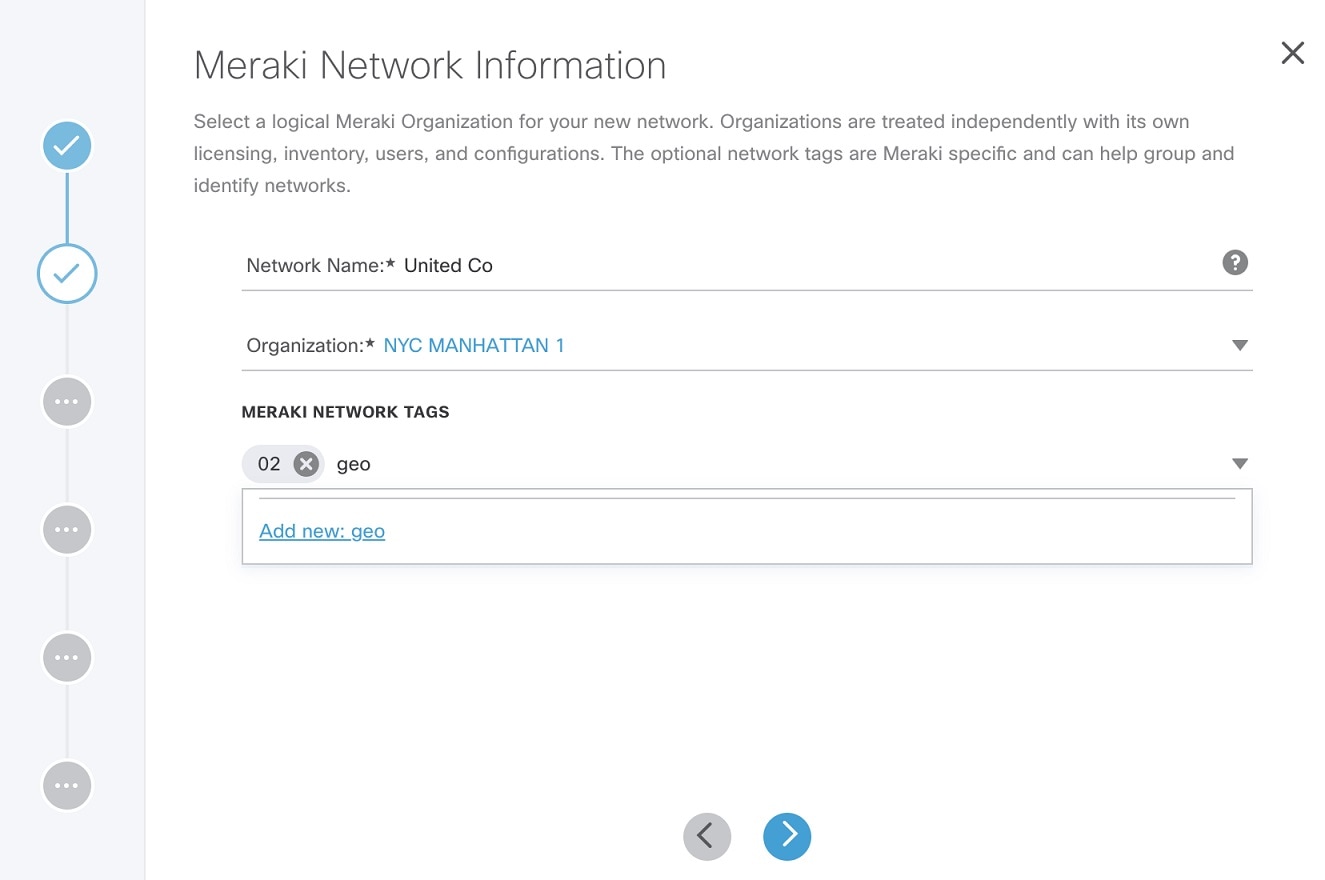
Click Get Started. The Meraki Network Information dialog box is displayed. |
| Step 6 |
Enter the following details on the Meraki Network Information page.
|
| Step 7 |
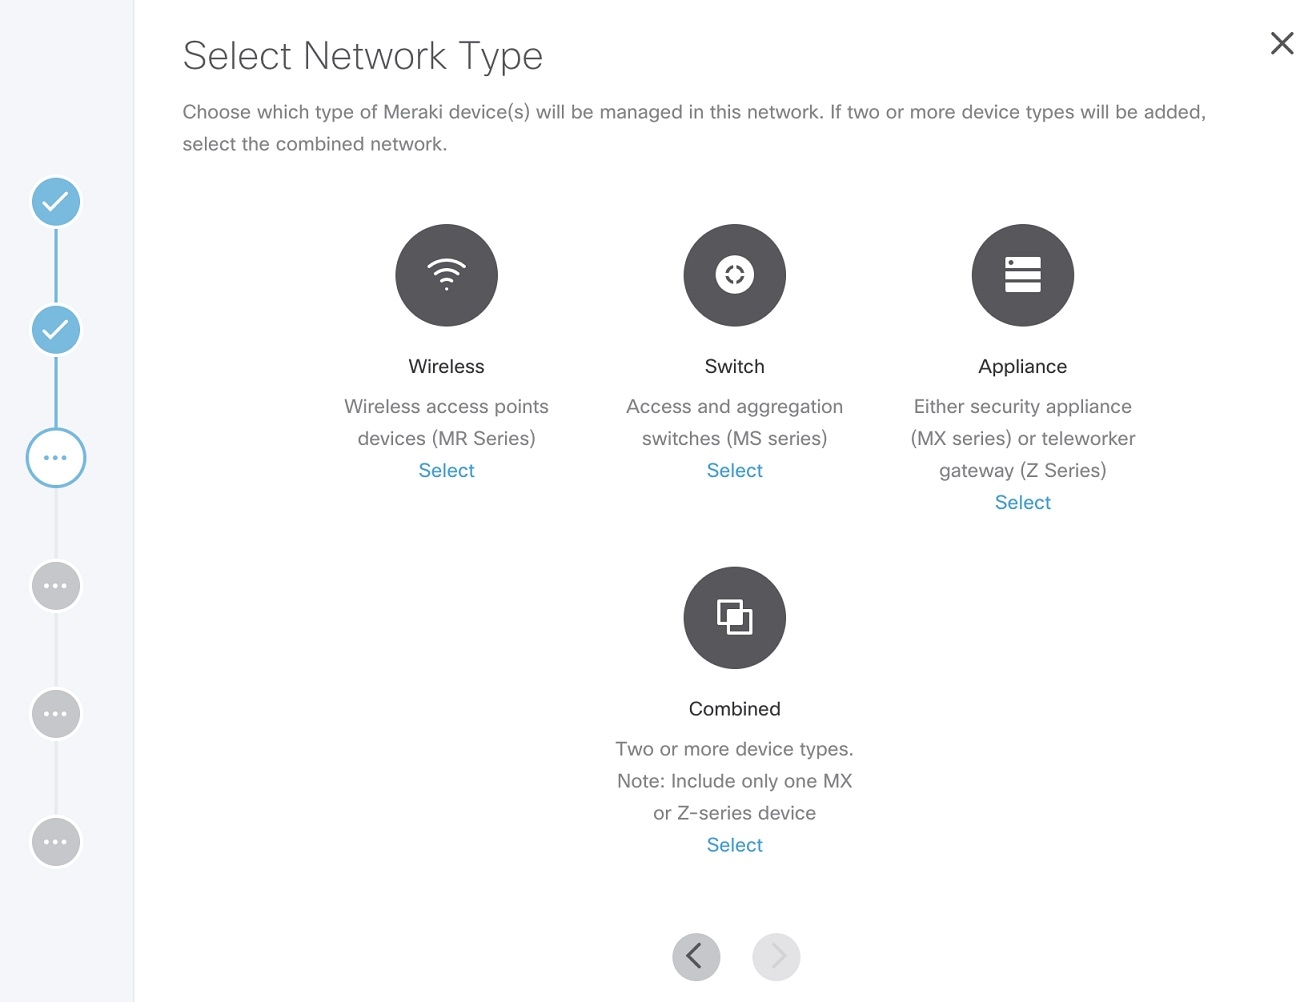
Click > to move to the Select Network Type page. |
| Step 8 |
In the Select Network Type page, choose the type of Meraki devices (Wireless, Switch, Appliance) that will be managed in this new network. Choose the
Combined option to add different device types to your network. |
| Step 9 |
Click > to move to the Select Initial Configuration for Network page. |
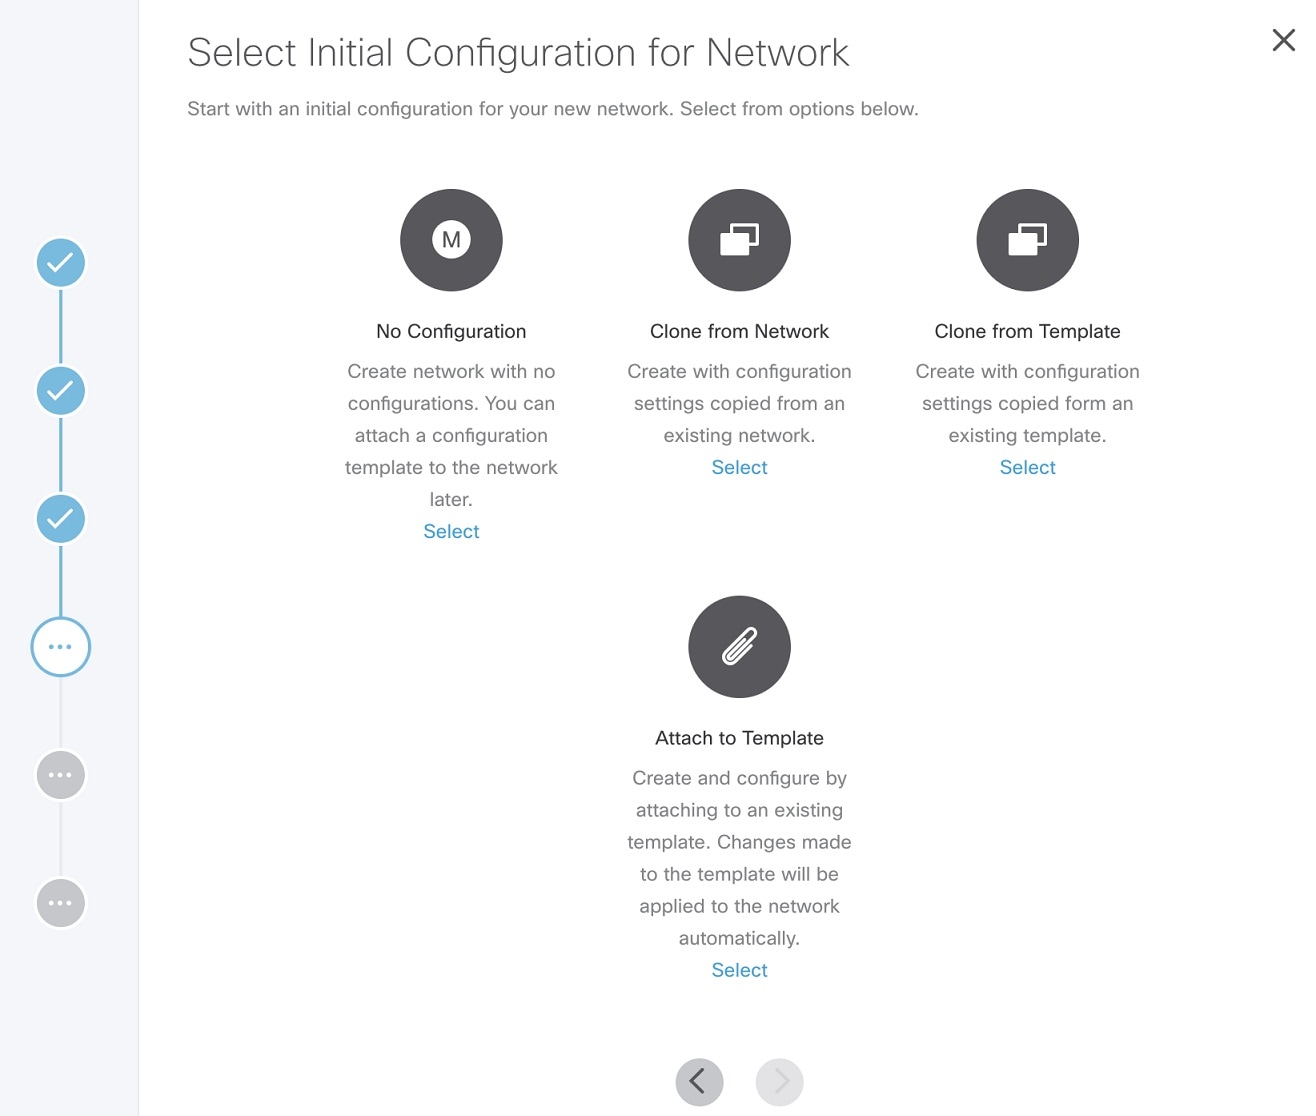
| Step 10 |
Set up a network. Choose from one of the following options to setup the network configurations:
 |
| Step 11 |
Click > to move to the Review and Submit page. |
| Step 12 |
Review the details and click Submit to complete the process. |
Viewing Meraki Networks for a Site
Cisco MSX Managed Device service pack provides the capability to monitor the site status and the networks associated to the sites.
To view the site details:
Procedure
| Step 1 |
Log in to the Cisco MSX portal. |
| Step 2 |
From the left pane, choose Tenant Workspace > Sites. The list of sites associated with a tenant is displayed. |
| Step 3 |
Select any one of the sites to view the detailed site status. This page lists all the site metrics along with status of the selected site. Under the Managed Device section of the page, you can view the list of Meraki network assigned to this site. |
Assigning Meraki Network to a Site
A Meraki network must be assigned to a site in the following cases:
-
When a control plane is attached, and you want to plot network to different site locations.
-
When a site is deleted, the network gets unmapped, and you want to assign this network with a site.
-
When you want to assign Meraki devices to a site.
Note |
In a single assign operation, you can assign up to 5 networks to a site that can be managed separately. |
Using this procedure, you can assign networks from an organization at a time. However, if you wish to assign sites from more organizations, you must repeat this procedure. To assign a network to a site:
Before you begin
Procedure
| Step 1 |
Log in to the Cisco MSX portal. |
||
| Step 2 |
From the left pane, choose Tenant Workspace > Sites. The list of sites assigned with a tenant is displayed. |
||
| Step 3 |
Select any one of the sites to view the detailed site status. This page lists all the site metrics along with status of the selected site. |
||
| Step 4 |
Under the Managed Device section on the page, click + > Assign Meraki Network to assign networks already available in a Meraki organization to a selected site. The Assign Meraki Network to Site wizard is displayed to assign networks to a site. |
||
| Step 5 |
Click Get Started. The Select Meraki Network dialog box is displayed. |
||
| Step 6 |
Select an organization to which the network needs to be assigned, and select one or more available networks for a site. Narrow down the networks using network name and network type. |
||
| Step 7 |
Click > to move to the Review and Submit page. |
||
| Step 8 |
Review the details and click Submit to complete the process. Under the Managed Device section of the page, you can view the list of Meraki network assigned to the site. The Tenant Workspace > Site tab will also list the devices assigned for a Meraki network. Unassigning a Network from a Site You can use the unassign option to disassociate a network and later assign it to another site. From the Managed Device section of the Site Details page, select a Meraki network row, click on the ellipsis (...), and choose Unassign Network. This will remove the networks and devices attached to the site.
|
Synchronizing Meraki Data Entities
In Cisco MSX, you can synchorinze Meraki details into Cisco MSX at:
-
Organization-level: Use the Sync with Meraki option in Tenant > Setting > Organization to sync various entities, such as networks, devices, tags, policies available within an Organization.
-
Network-level: Using the APIs in the Meraki-Control-Plane-Controller section of Meraki Service APIs, you can do the following:
-
Schedule a task to synchronize Meraki control plane entities. Use the POST /meraki/api/v1/controlplanes/{controlPlaneId}/schedulesync to periodically synchronize these entities. Specify networkIDs to schedule synchronization for a specific network; otherwise, Cisco MSX synchronizes entities from all networks.
-
Schedule a task to synchronize all Meraki control plane entities. Use the POST /meraki/api/v1/controlplanes/{controlPlaneID}/synchronize to synchronize these entities.
Note
This API synchronizes entities from all networks. To specify a particular network ID, use the schedulesync API.
-
Note |
|
Editing or Deleting a Network
To edit and delete a Meraki network:
Procedure
| Step 1 |
Log in to the Cisco MSX portal. |
| Step 2 |
From the left pane, choose Tenant Workspace > Sites. The list of sites associated with a tenant is displayed. |
| Step 3 |
Select any one of the sites to view the detailed site status. This page lists all the site metrics along with status of the selected site. Under the Managed Device section of the page, you can view the list of Meraki network assigned to this site. |
| Step 4 |
Select a network, and click on the ellipsis (…) and select Edit Networkto edit the network details. You can add or edit the existing network tags, and also change template for a network using the
Edit Meraki Network dialog box. 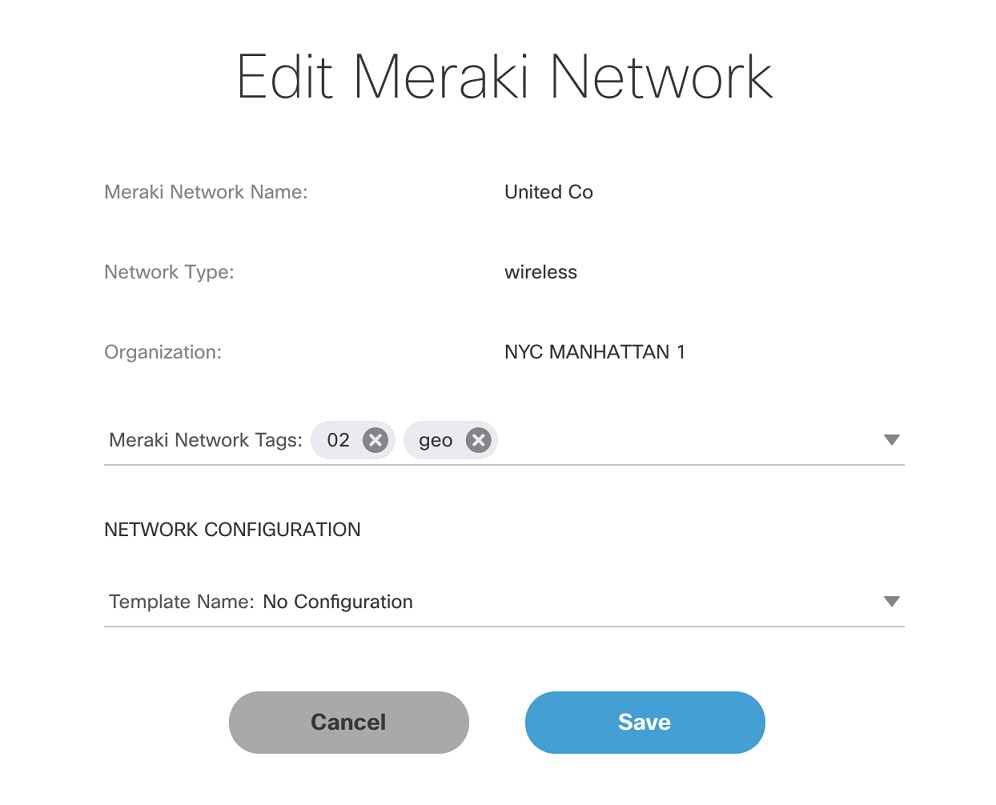 Deleting the Network: Click on the ellipsis (…) and select Delete to delete the selected network. Deleting the network completely removes the network from Meraki organization. If there are any devices associated to the network, it places them in the Meraki inventory for other networks. |

Managing Configurations
Cisco MSX provides the ability to create configurations and deploy them across Meraki networks or switch ports using the pre-defined out-of-the-box templates that are available within the Cisco MSX. For more information on these templates, see Meraki Feature Templates.
Note |
|
Creating Configurations
Cisco MSX provides feature templates to create new configurations and apply them to Meraki entities within tenant hierarchy. Feature template provides a predefined set of feature properties and attributes values for easy and quick configurations of networks and the switch ports. Once the new configurations are created and tagged appropriately, you can apply these configurations to ports or networks across a tenant hierarchy that uses the same tags. For more information on these templates, see Meraki Feature Templates .
To create a new Meraki configuration using out-of-the-box feature templates available within Cisco MSX, do the following:
Procedure
| Step 1 |
Log in to the Cisco MSX portal. |
||
| Step 2 |
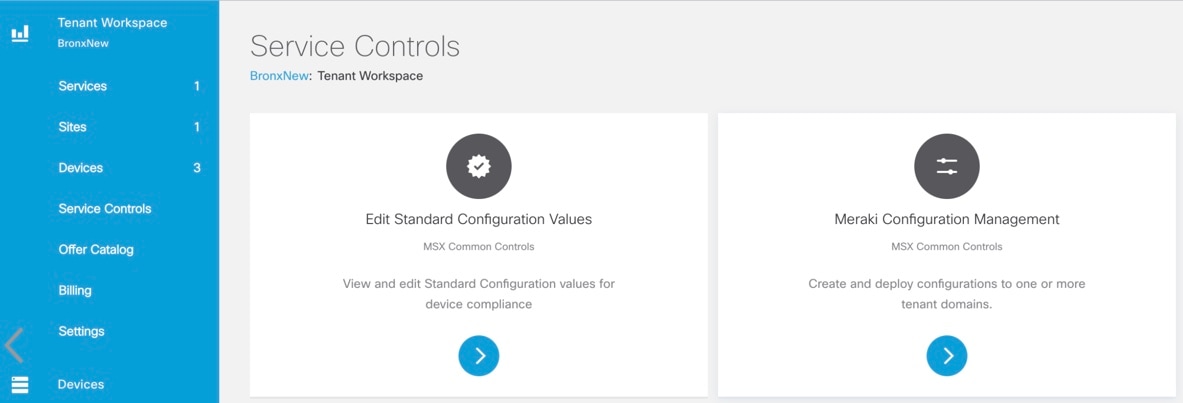
From the left pane, choose Tenant Workspace > Service Controls. |
||
| Step 3 |
Select Meraki Configuration Management to create new configurations.
|
||
| Step 4 |
On the Meraki Configuration Management page, click + or New Configuration option to create a new Meraki configuration. The Create Configurationwizard is displayed. |
||
| Step 5 |
Click Get Started. The Add Configuration Information window is displayed. 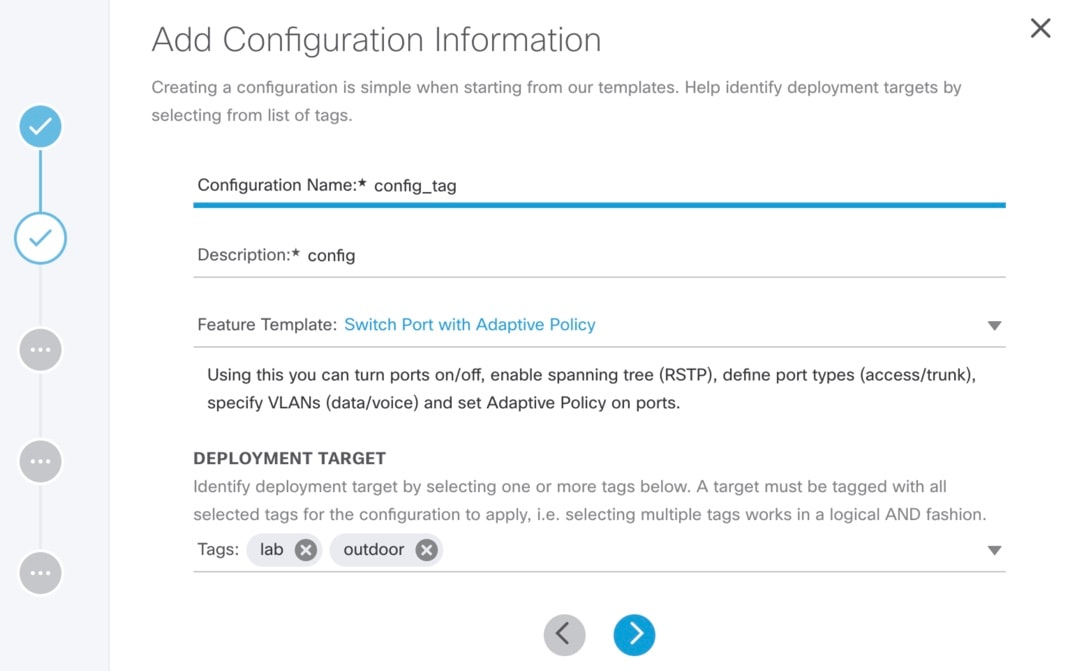 |
||
| Step 6 |
Enter the following details:
|
||
| Step 7 |
Click > to move to the Enter Configuration page. |
||
| Step 8 |
Enter the values based on the template that was selected to create the new configuration. Some of the fields on the Enter Configuration page require additional settings. For more information, see Meraki Feature Templates.
|
||
| Step 9 |
Click > to move to the Review and Save page. |
||
| Step 10 |
Review the details and click Submit to complete the process. On the Meraki Configuration Management page, you can view the new configuration, and apply only one configuration at a time to a destination target. |
Editing Configurations
To edit Meraki configurations:
Procedure
| Step 1 |
Log in to the Cisco MSX portal. |
||
| Step 2 |
From the left pane, choose Tenant Workspace > Service Controls. |
||
| Step 3 |
Select Meraki Configuration Management to edit new Meraki configurations. You cannot edit when a configuration application is in-progress. The Meraki Configuration Management page lists configurations that were created and saved. |
||
| Step 4 |
Select a configuration and click on the ellipsis (…) > Edit Configuration. The Edit Configuration window is displayed. |
||
| Step 5 |
Edit to modify an existing configurations. These configurations apply to tenants that use the same tags. If locked, tenants would not be able to modify these values. During edit configuration, if locked, you can only view values, however, you cannot add new rows, or change orders. During edit configuration, if unlocked, you can add or remove rows, change orders, and further lock values for the next set of tenants. |
||
| Step 6 |
Click > to move to the Review and Save page. |
||
| Step 7 |
Review the details and click Submit to complete the process. Under the Meraki Configuration Management page, you can view the edited configuration, and apply these configurations to a destination target. There can be many targets.
|
Applying Configurations
To apply a new configuration:
Before you begin
Make sure the entities where the configurations have to be applied are pre-configured with tags outside of Cisco MSX. For example, for Meraki, the Switch Ports can be tagged from the Meraki Dashboard. For more information, see Manage Tags in Meraki Documentation.
Procedure
| Step 1 |
Log in to the Cisco MSX portal. |
||
| Step 2 |
From the left pane, choose Tenant Workspace > Service Controls > Meraki Configuration Management tile. |
||
| Step 3 |
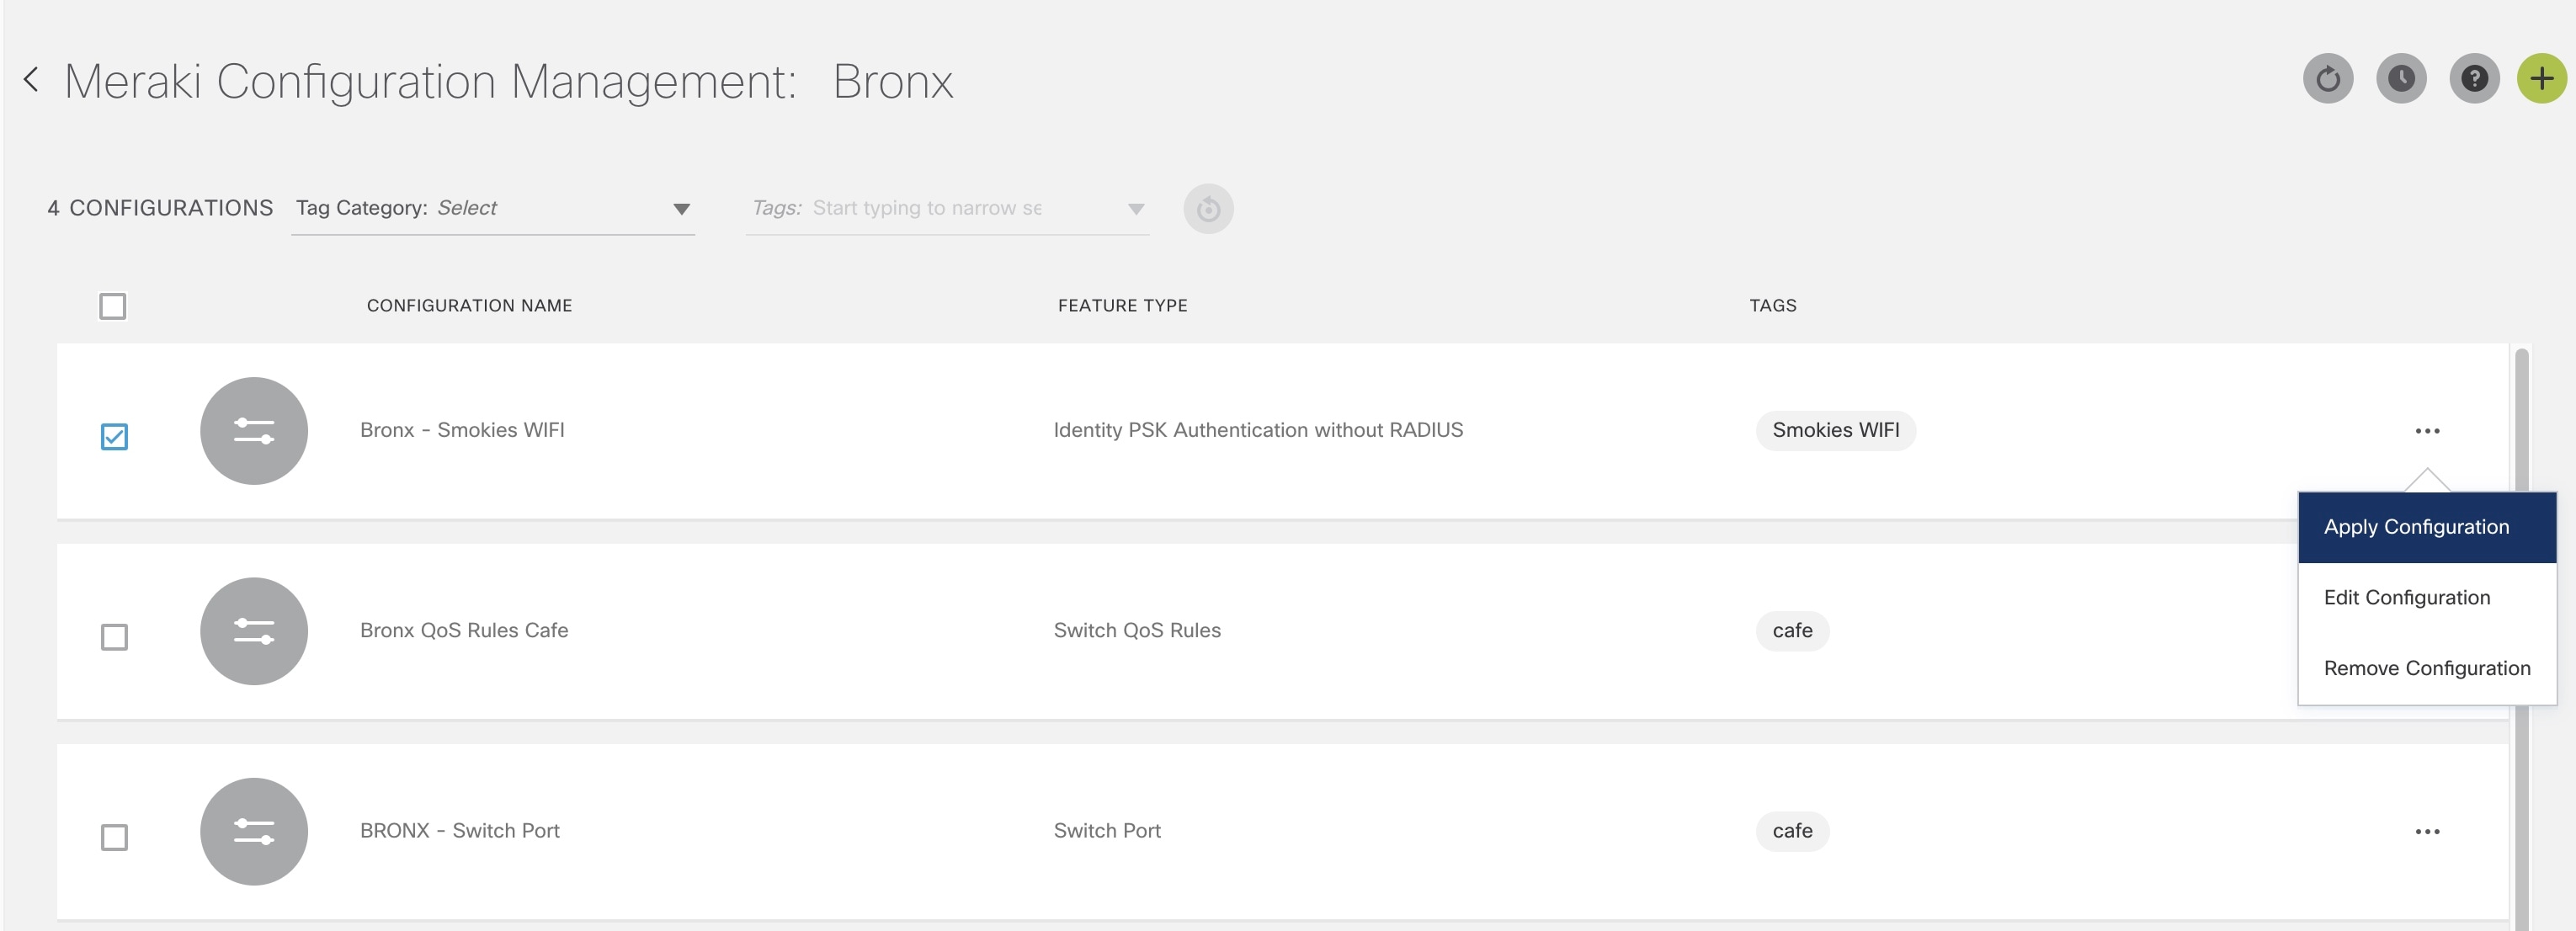
On the Meraki Configuration Management page, select a configuration, and click the ellipsis (...), and choose Apply Configuration.
|
||
| Step 4 |
Click Apply Configuration to deploy the configuration on entities that use similar tags across a tenant hierarchy. |
||
| Step 5 |
To track the status of the deployment, from the Meraki Configuration Management page, click on the clock icon on the top right side and choose Deployment Activity.
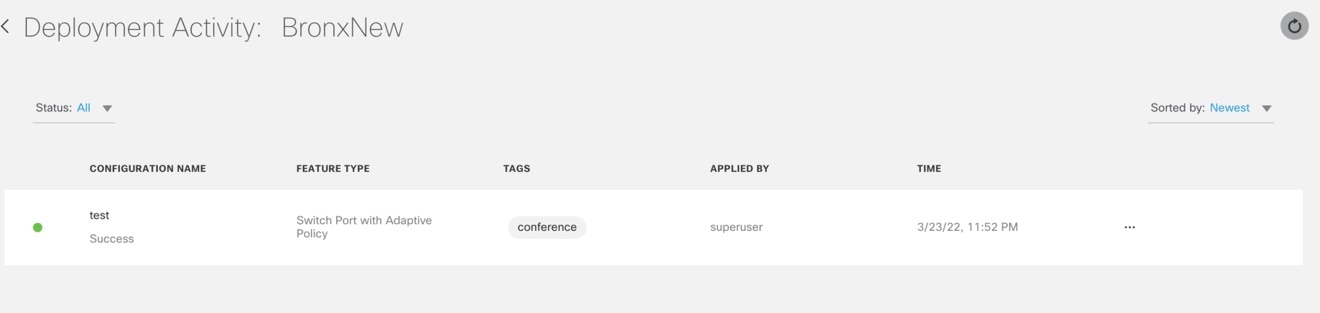
On the Deployment Activity page, select a configuration, and click the ellipsis (...), and choose View Deployment Details to view the deployment details. You can view the target name, description, tenant name, and time on the Deployment Activity page. 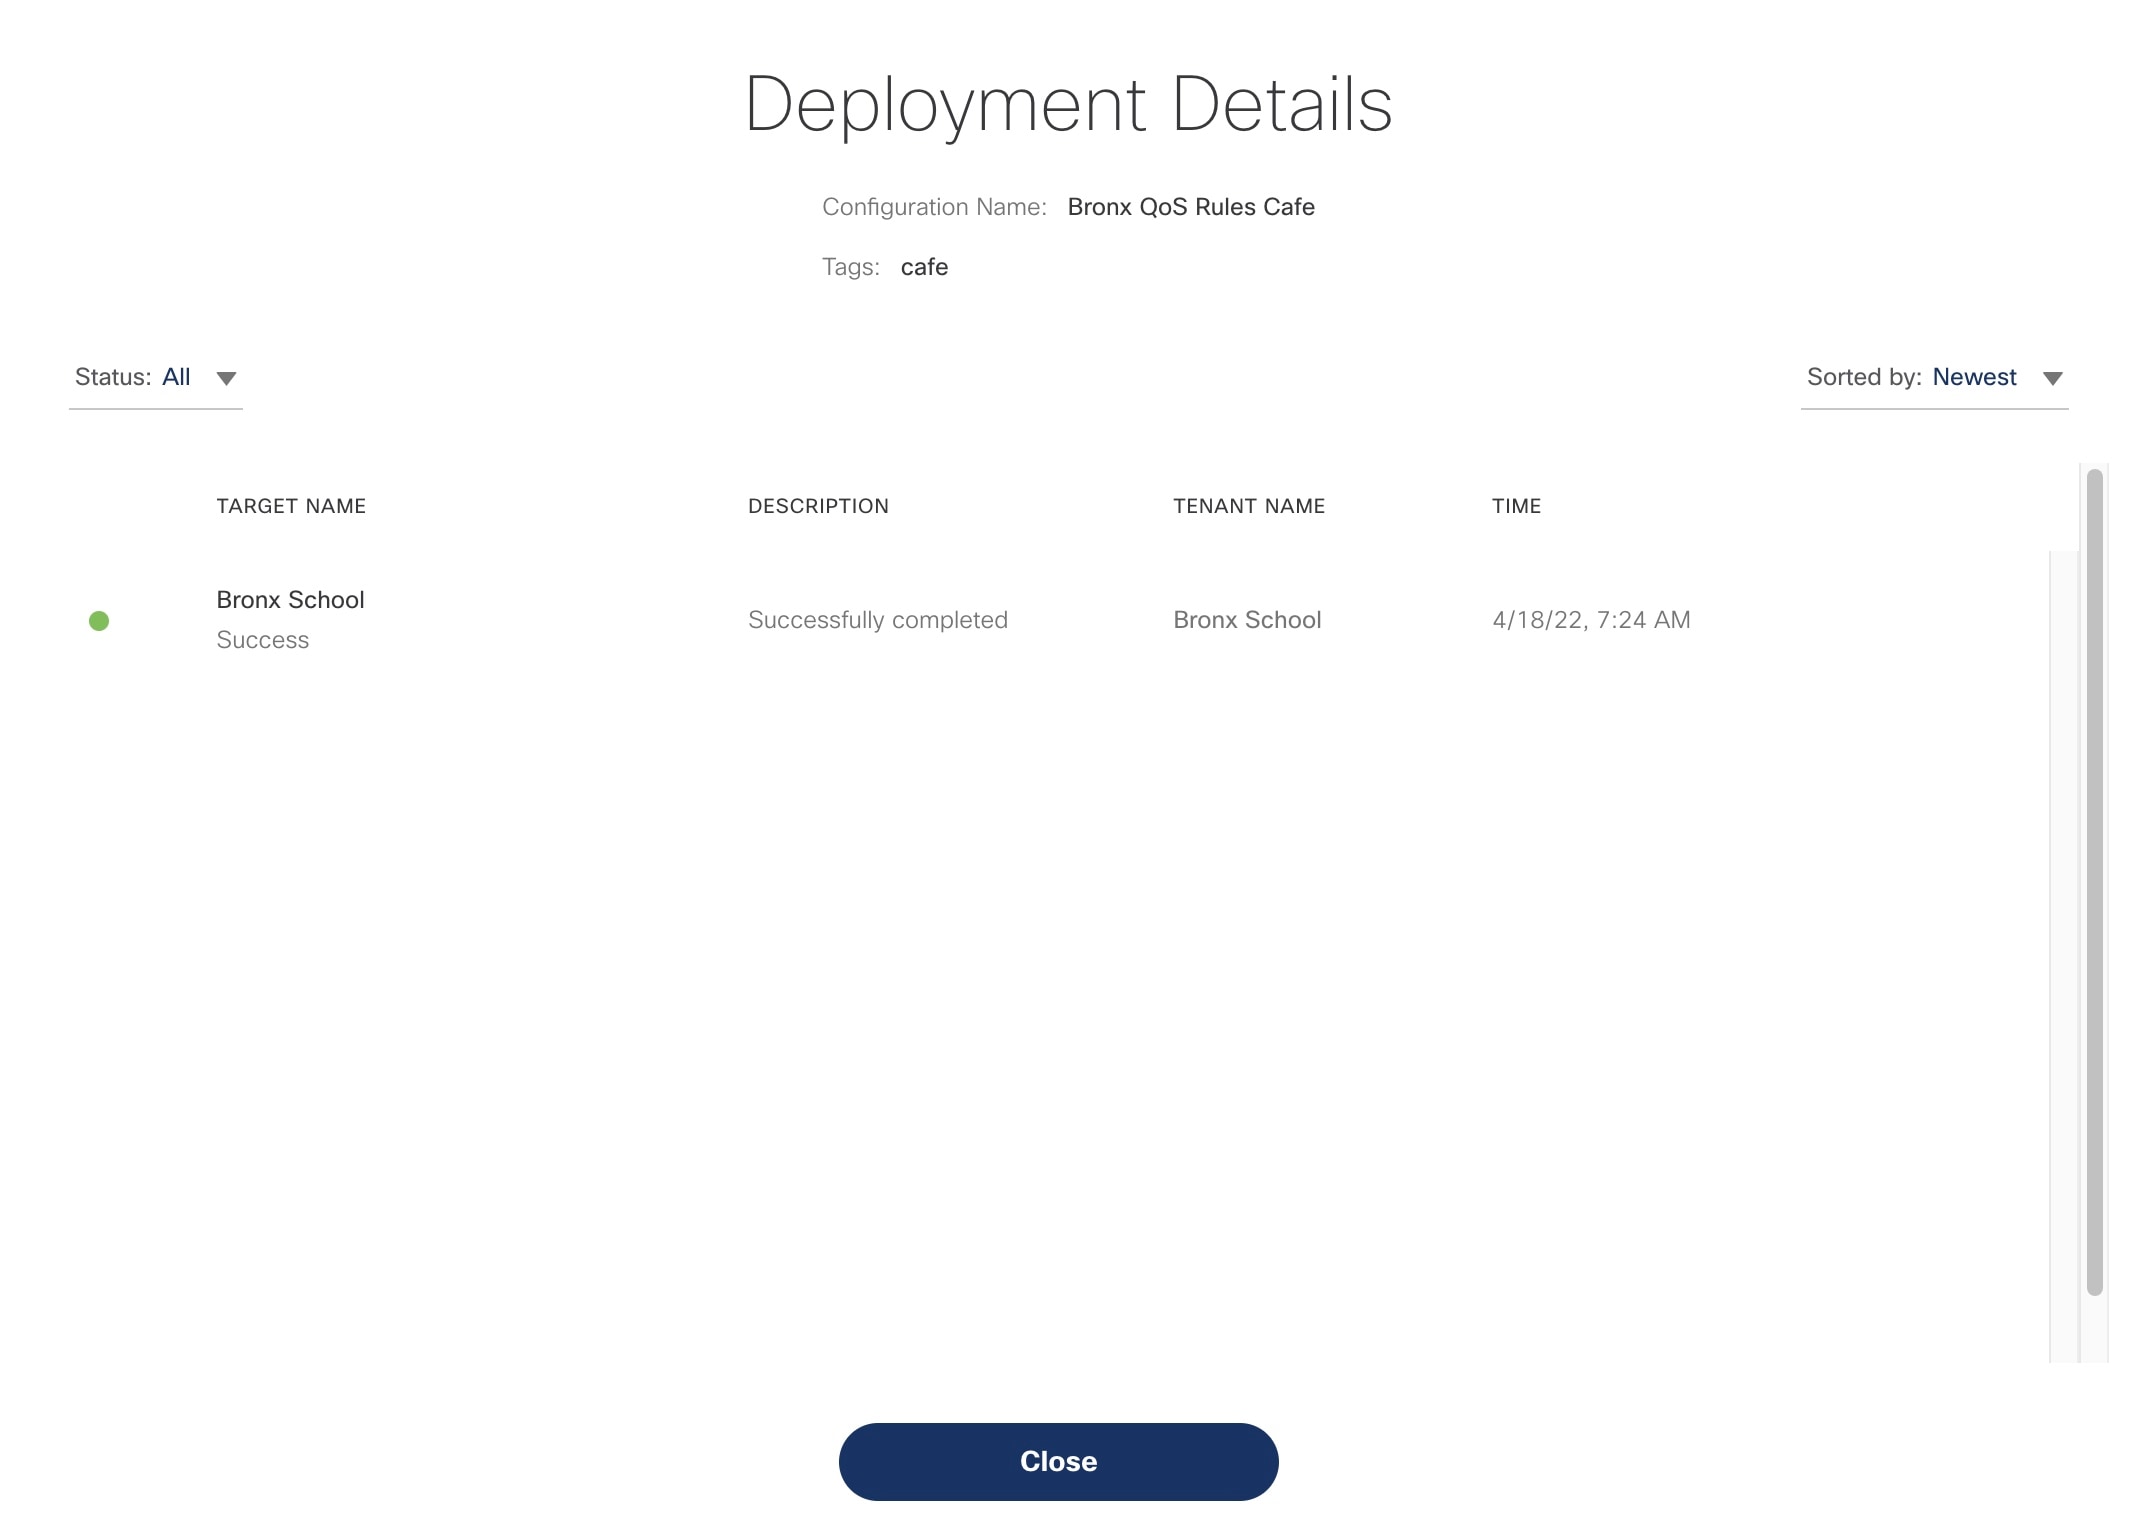
|
Meraki Feature Templates
| Feature Template | Description | ||
|---|---|---|---|
| Switch Port | Use the Switch Port template to turn on/off the ports. You can have the ports enabled and the storm control enabled. Storm control is not applicable
to all the devices.
When you select the Switch Port template, the tags option displays only the switch port tags. The following are important notes for the Storm Control field that is displayed on the Enter Configuration page:
|
||
|
Switch Port with Adaptive Policy |
|
||
| Switch Port with Access Policy |
Use the Switch Port with Access Policy template to configure policies that will prevent unauthorized devices from connecting to the network. These access policies are typically applied to ports at network level. For more information, see Cisco Meraki documentation. The access policy shows up with Access Type is set to Access. Access policies need to be pre-configured and synced to Cisco MSX when you sync the organization or network. When you select the Switch Port with Access Policy template, the tags option displays only the switch port tags. |
||
|
Switch QoS Rules |
Use the Switch QoS Rules template to create and apply QoS configuration to prioritize traffic within a network. Cisco MSX supports complex arrays that you can use to change and maintain the QoS ordering. You can choose VLAN, protocol, source, destination port type, and Differentiated Services Code Point (DSCP) tags to specify the Class-of-Service (CoS) queue for the switches. For more information on these fields, see Cisco Meraki documentation. DSCP choice options come from Meraki and synced to Cisco MSX based on each tenant level. On the Enter Configuration page, from the Protocols field, choose TCP or UDP from the choices. When you select TCP or UDP, you get the following other choices of port ranges—Source Port Type, Destination Port Type, Source Port, and Destination Port. You can either select Single Port or Port Range. If you select the source port type as: Port Range, then the Source Port field changes to Source Port Range where you can enter values between 10-70. You can enter 70 for the Destination Port field. You can also lock the features so that the child tenants cannot change values for locked features. |
||
|
Identity Pre-Shared Key (PSK) Authentication without Radius |
Use the Identity PSK Authentication without Radius template to configure multiple PSKs for a single SSID without the use of a RADIUS server. Typically if you want to connect to a particular SSID, you need to use a particular password to connect. Meraki has a special case where you can configure multiple passphrases for the same SSID, and for each passphrase you can assign a specific group. Meraki allows you to add upto 50 PSKs. For more information, see Cisco Meraki documentation. When you select the Identity PSK Authentication without Radius template, the tags option displays only the SSID names tags that is present across that hierarchy level.
|
![]()
 Feedback