Deleting the Connector VM
There may be instances where you need to delete the connector VM from Microsoft Hyper-V Server 2016. For example, you may need to change the resource location or you wish to use a different base VM as the template for the connector VM. This procedure outlines how to delete the connector VM from the Hyper-V Manager, and how to perform a clean-up of entries from Hyper-V. This procedure also covers how to remove the Citrix Cloud Connector for the connector VM.
Procedure
| Step 1 |
Log in to the Hyper-V instance using a Remote Desktop connection and then launch the Hyper-V Manager from the Microsoft Windows Server. |
| Step 2 |
From Hyper-V Manager, locate the installed Citrix Cloud Connector VM in the list of Virtual Machines in the HX cluster along with the original base VM. |
| Step 3 |
Select the Citrix Cloud Connector VM, then right-click and select Turn Off from the menu. Confirm the action from the Turn Off Machine dialog box. 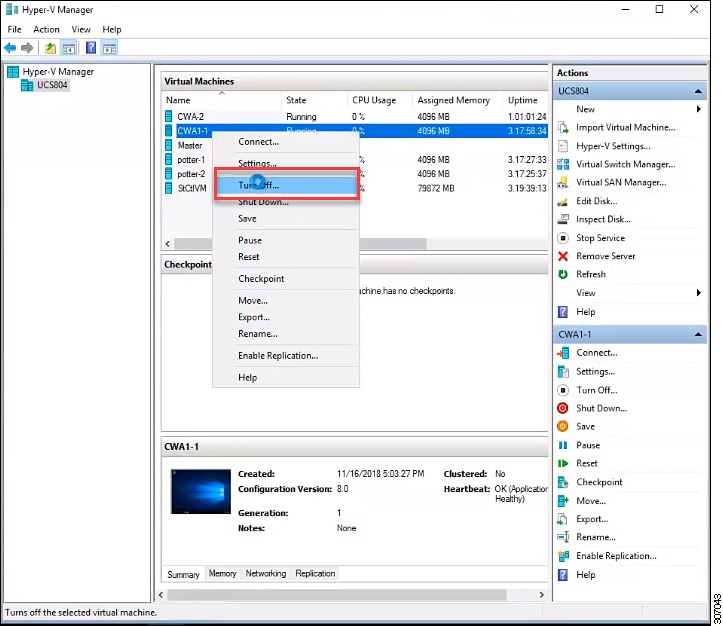
|
| Step 4 |
Select the VM, then select Delete from the list of actions. Confirm the deletion action from the Delete dialog box. The selected VM is deleted from the list of virtual machines in the HX cluster. 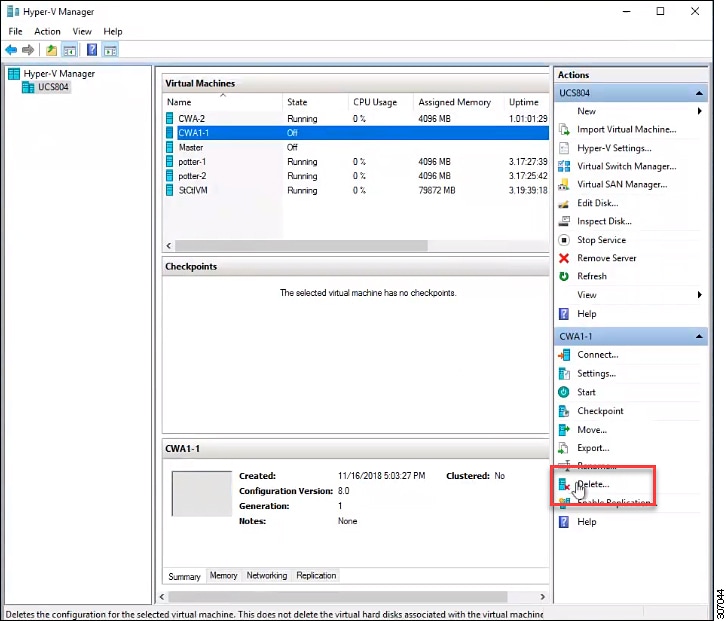
|
| Step 5 |
OpenWindows Explorer and navigate to the location of the cluster SMB share and datastore folder in Hyper-V Manager on which the base VM is running (for example, \\ucs804smb.cloud.local\ds1). 
|
| Step 6 |
Locate the Citrix Cloud Connector VM folder. Right-click the folder and select Delete to remove the folder and all stale entries that are contained in the folder. 
|
| Step 7 |
Enter your Citrix credentials (Citrix.com, My Citrix, or Citrix Cloud) to securely log in to your Citrix Cloud account. Be sure to sign in with the email address and password you provided when you signed up. If your company allows you to sign-in to Citrix Cloud using their company credentials instead of a Citrix account, click Sign in with my company credentials and enter your company’s sign in URL for your account. |
| Step 8 |
After signing in to the Citrix Cloud GUI, click Resource Location to access the Resource Locations page. 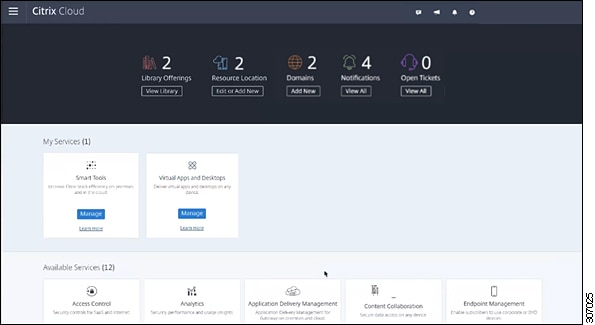
|
| Step 9 |
From the Resource Locations page, click Refresh All to see the Citrix Cloud Connectors. 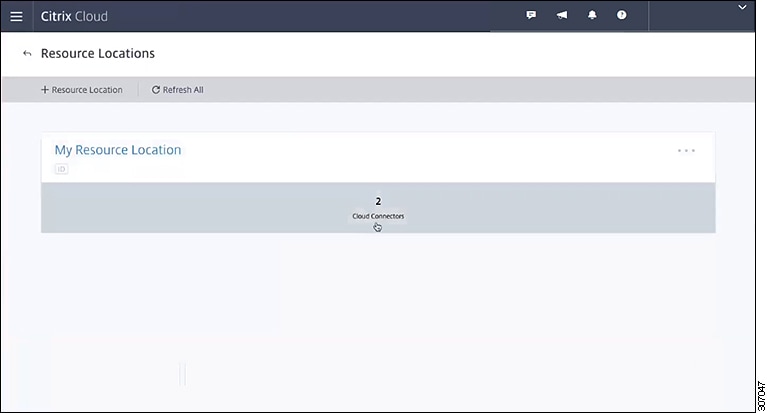
|
| Step 10 |
Click Cloud Connection to view the available Citrix Cloud Connectors for the resource location. |
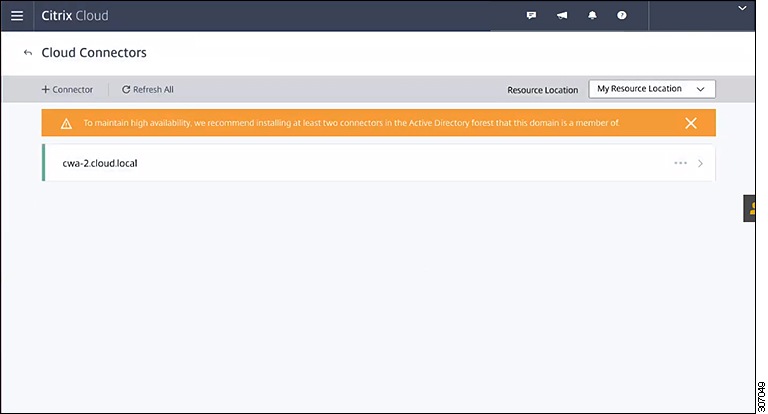
| Step 11 |
Select the Citrix Cloud Connector that you want to delete from the Cloud Connections page, and then right-click and select Remove Connector from the menu. 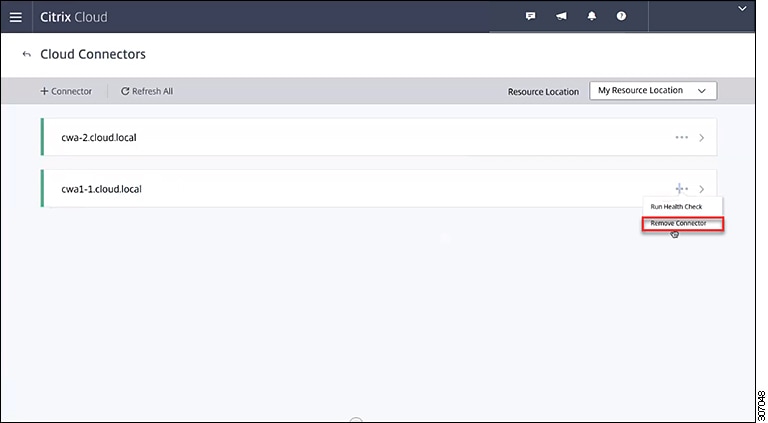
|
 Feedback