Install the Cisco Webex Meetings Virtual Desktop Software

Feature Toggle

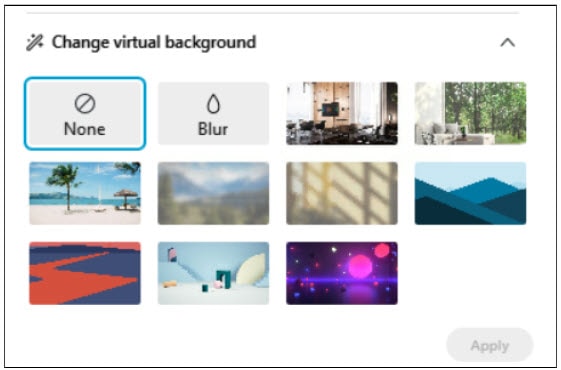
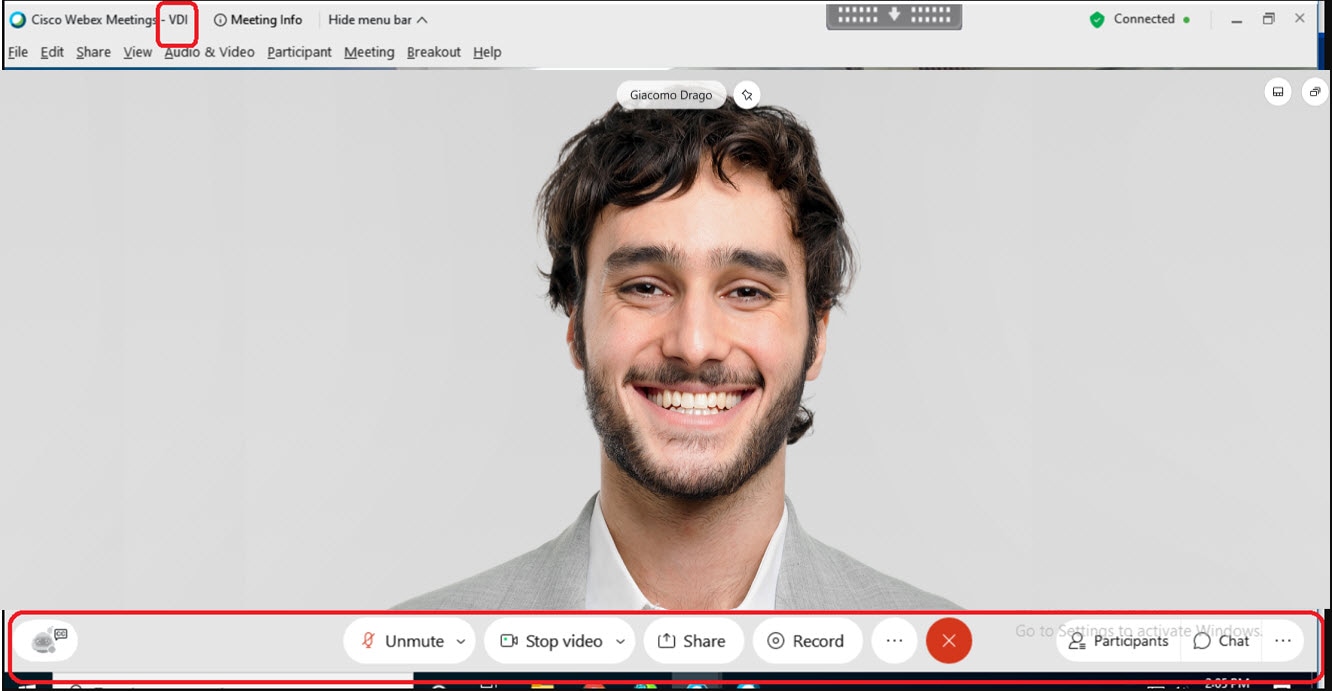
Test the Virtual Desktop Infrastructure (VDI) Plugin

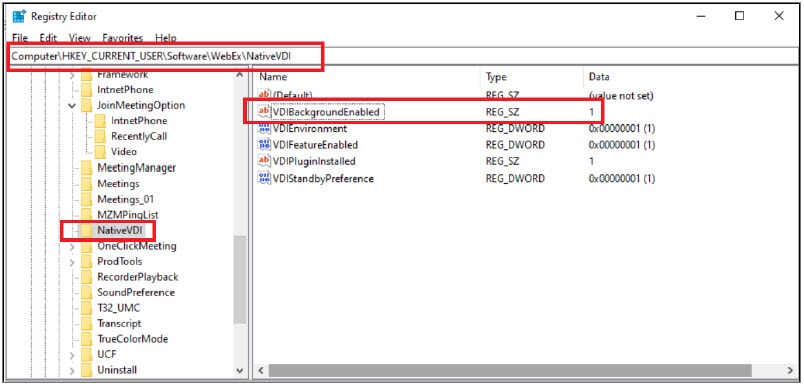
To test the VDI plugin for a few users, enable the native VDI feature by adding the following registry Key to their Hosted Virtual Desktops (HVD).

Key: Computer\HKEY_CURRENT_USER\Software\WebEx\NativeVDI

Value:
Name Type Data
VDIFeatureEnabled REG_DWORD 1 - Enabled, 0 - Disabled, others - Ignore

Guidelines for Webex VDI Optimized Meetings

Video Blur and Background support on Windows Thin Client

Video Blur and Background support on Windows Thin Client only supports the default video blur and background replacement, but doesn't support customized background image replacement.

System Requirements on Thin Client

  • Windows 10 32-bit or 64-bit

  • Intel Core i3, i5, or i7 4000 series or higher

  • AMD Ryzen 5, 7, 9, or higher

  • 4 GB of RAM or more

  • 2GB or more of VRAM for dedicated GPUs


Note

Using a virtual background increases the CPU usage of your computer and therefore may impact your battery life.


The system requirements leverages the native meeting client system requirements. The system requirements should be updated if the native meeting client system changes. For more information, see Use a Virtual Background in the Cisco Webex Meetings Suite.

Supported Version

From 41.3 (both thin client version and site version should be 41.3.0 or later).

Feature Toggle

VDI Background Feature support is OFF by default, and will be enabled only if:

  1. Site admin native background toggle is ON.

  2. Thin client is Windows OS 10.

  3. VDI Background Feature toggle is ON (on HVD, not thin client) as following. We added a temporary local toggle that user can enable or disable native VDI background registry. Add a key and value in your registry as following when you want to enable or disable VDI background feature.

    Data Value: 1 - Enabled, 0 - Disabled, others - disable (by default it is disabled)

    Key: Computer\HKEY_CURRENT_USER\Software\WebEx\NativeVDI

    Table 1. Value

    Name

    Type

    Data

    VDIBackgroundEnabled

    REG_SZ

    1

Enable Cisco Webex Meetings for VDI

After you finish testing, you can use Site Administration or Control Hub to enable VDI site-wide.

We recommend that you wait until all VDI users on your site have the thin-client plugin installed. Because the Webex Meetings App looks for the plugin, enabling this toggle adds to the join time for meetings. This toggle doesn't affect non-VDI users or their join meeting times. If the feature toggle isn't on, Webex Meetings App doesn't look for the thin client, and the media continues to route through your datacenter.

Procedure


Step 1

Sign in to Site Administration or Control Hub and go to Configuration > Common Site Settings > Options.

Step 2

In the Site Options section, check Enable meeting client for VDI.

The option is unchecked by default. If you don't see the option in Site Administration or Control Hub, contact Cisco to have the feature toggle turned on.


Installation Workflow

Use this procedure to install the Cisco Webex Meetings Virtual Desktop Software components.

Before you begin

Set up and test the Citrix or VMware connection between the thin clients and the hosted virtual desktops (HVD).

For more information about installation and configuration, see the documentation for your Citrix or VMware solution.

Procedure


Step 1

On the thin clients, install the Cisco Webex Meetings Virtual Desktop Plugin.

The Cisco Webex Meetings Virtual Desktop Plugin is available for the following operating systems:

Follow the installation procedure for your thin client OS.

Attention 

The Cisco Webex Meetings Virtual Desktop Plugin comes preinstalled for supported iGel, HP ThinPro, & Dell Wyse Thin OS versions.

Step 2

On the HVDs, Install the Webex Meetings App on the Hosted Virtual Desktops.


Install the Cisco Webex Meetings Virtual Desktop Plugin on the Thin Clients—Microsoft Windows


Important

Always install the plugin after you install or update your Citrix or VMware solution.


Before you begin

Install your Citrix or VMware software.

Procedure


Step 1

Download the Cisco Webex Meetings Virtual Desktop Plugin for Windows.

  1. Download webexvdi.msi from https://<sitename>.webex.com/webappng/sites/<sitename>/dashboard/download

    Replace <sitename> with your company name.

  2. After you download the plugin, install it by double-clicking the webexvdi.msi file, or run the command as an administrator.

Step 2

Click Next.

Step 3

Review and accept the license agreement.

Step 4

Click Install.

Step 5

Click Yes on the pop-up dialog box to permit the installation.

Step 6

Click Finish to complete the plugin installation.


Install the Webex Meetings Virtual Desktop Plugin on the Thin Clients—Ubuntu

Procedure


Step 1

Download the Cisco Webex Meetings Virtual Desktop Plugin for Ubuntu.

https://<sitename>.webex.com/webappng/sites/<sitename>/dashboard/download

Replace <sitename> with your company name.

Step 2

Select the Ubuntu installer and download the file.

Depending on your browser settings, the file downloads to the Downloads folder or to the folder of your choice.

Step 3

From the Downloads folder, extract the .zip file.

Step 4

Double-click the .deb file and then click Install to proceed with the installation.

Step 5

Enter you user name and password and click Authenticate.

After the system reboots, the newly-installed upgrade is ready to use.


Install the Webex Meetings Virtual Desktop Plugin on the Thin Clients—Unicon eLux

The follow procedure requires familiarity with Scout ELIAS. For more information about how to use Scout ELIAS, see the documentation available from Unicon eLux.

Procedure


Step 1

Download the Cisco Webex Meetings Virtual Desktop Plugin for eLux.

  1. https://<sitename>.webex.com/webappng/sites/<sitename>/dashboard/download

    Replace <sitename> with your company name.

  2. Unzip the package to extract the file.

Step 2

Import this package through Scout ELIAS.

  1. Select the eLux file from Devices.

  2. Edit the .idf file.

  3. From the Container select Import Packages and add the Cisco Webex VDI File from the Available Package to the Defined Packages column.

Note 

The name of the package must match the name in the local data base.

Step 3

To select the name of the package click the dots… near Configuration.

Step 4

Select the Firmware tab and from the drop-down option select the Image file.

You can configure your device by going to the Network, Security, Screen, Hardware, Power Management, and Multimedia tabs.

Important 

The system restarts multiple times during this process. Ensure that you set the Network settings to Never Change.

Step 5

Select the eLux Device and click Commands > Update Info to send the firmware update through the Scout Console.

Step 6

Click Execute.


Install the Webex Meetings App on the Hosted Virtual Desktops

Procedure


Step 1

Log in to the hosted virtual desktop (HVD).

Step 2

Download the Cisco Webex Meetings desktop app from your company website.

Step 3

Double-click the .msi file and follow the prompts to install the Meetings desktop app on the HVD.

Step 4

In the Personal Room, select the down arrow on the right side of the Start Meeting or Join Meeting button.

Step 5

Select Always start from desktop app to open the meeting in the virtual desktop app.

Step 6

Select Start meeting or Join meeting to join in meeting.


What to do next

Start a meeting and check the title bar; for a VDI meeting, the title bar says Cisco Webex Meetings –VDI .


Note

The Preview banner is solid white when you join using VDI. During the meeting, the action bar is fixed and not transparent, and it overlaps the video area.