Install the Appliance

Appliance installation workflow

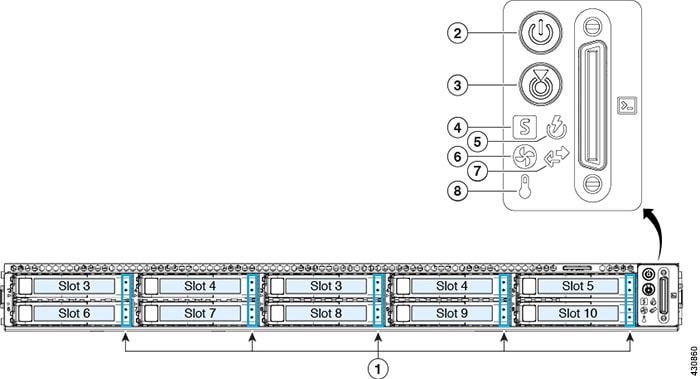
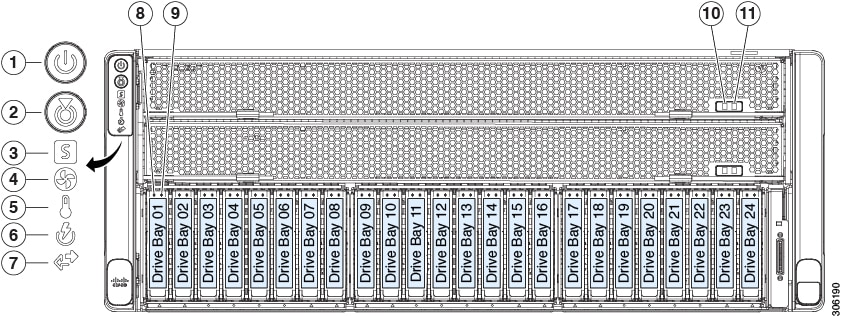
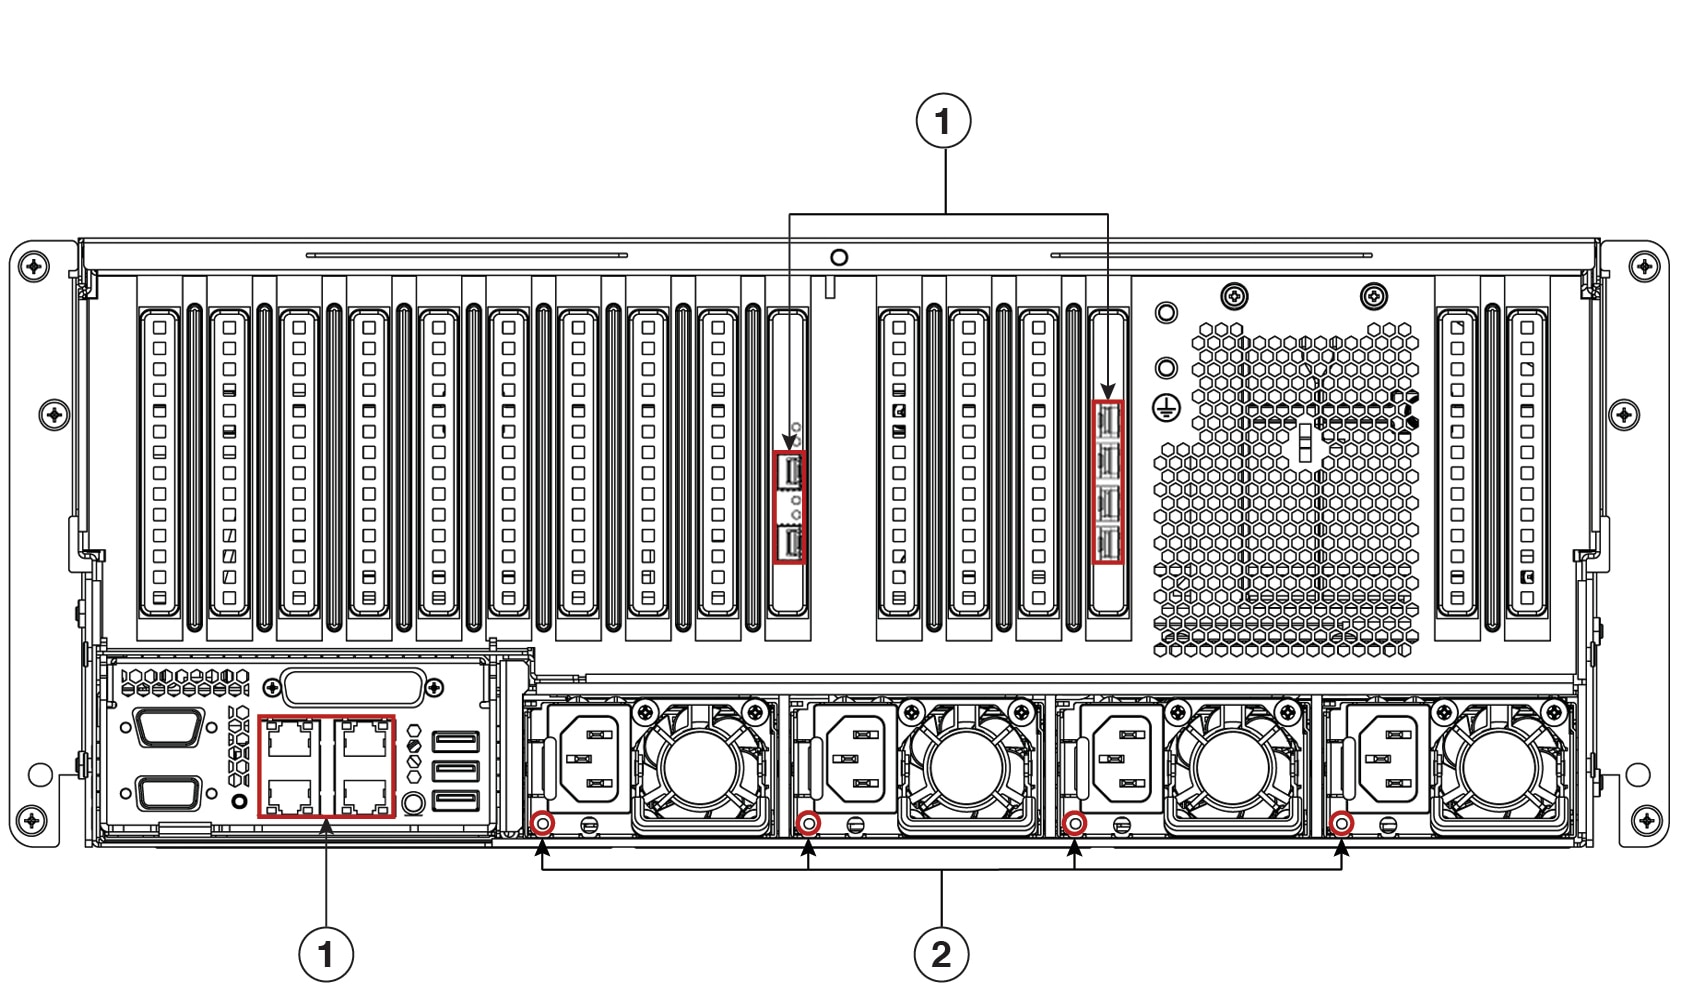
Complete the tasks described in this chapter to physically install your Catalyst Center appliance. Complete these tasks for each appliance you want to install, and be sure to install all of the appliances before configuring the primary node.

After you have completed all of these tasks successfully, continue with the steps described in Prepare for Appliance Configuration.

Unpack and inspect the appliance


Caution


When handling internal appliance components, wear an ESD strap and handle modules using only the edges of the carrier.

Procedure


Step 1

Remove the appliance from its cardboard container. Save all packaging material in case you need to ship the appliance in the future.

Step 2

Compare your shipment with the equipment list provided by your customer service representative. Confirm that you received all items.

Step 3

Check for any damage. Immediately report any missing items or damage to your customer service representative. Have this information ready:

  • Invoice number of the shipper as shown on the packing slip

  • Model number and serial number of the damaged unit

  • Description of damage

  • Effect of damage on the installation


Review the installation warnings and guidelines

When you install an appliance, follow these guidelines:

  • Plan your site configuration and prepare the site before installing the appliance. See the Cisco UCS Site Preparation Guide for help with the recommended site planning and preparation tasks.

  • Ensure that there is adequate space around the appliance to enable servicing, and for adequate airflow. The airflow in this appliance is from front to back.

  • Ensure that the site's air-conditioning meets the thermal requirements listed in Environmental specifications.

  • Ensure that the cabinet or rack meets the requirements listed in Review the rack requirements.

  • Ensure that the site's power meets the requirements listed in Power specifications. If available, use a UPS to protect against power failures.

  • Before you install, operate, or service a server, review the Regulatory Compliance and Safety Information for Cisco UCS C-Series Servers for important safety information.

  • Review the following cautions and warnings. Note that Statements 1024 and 1099 are specific to the 112-core Catalyst Center appliance.


Caution


To ensure proper airflow, it is necessary to rack the appliances using rail kits. Physically placing the units on top of one another or stacking without the rail kits blocks the air vents on top of the appliances, which could result in overheating, higher fan speeds, and higher power consumption. We recommend that you mount your appliances on rail kits when you are installing them into the rack because these rails provide the minimal spacing required between the appliances. No additional spacing between the appliances is required when you mount the units using rail kits.

Caution


Avoid UPS models that use ferroresonant technology. These UPS models can become unstable with systems such as the Cisco UCS, which can have substantial current-draw fluctuations because of fluctuating data traffic patterns.

Statement 1071—Warning Definition


Warning


IMPORTANT SAFETY INSTRUCTIONS

Before you work on any equipment, be aware of the hazards involved with electrical circuitry and be familiar with standard practices for preventing accidents. Read the installation instructions before using, installing, or connecting the system to the power source. Use the statement number at the beginning of each warning statement to locate its translation in the translated safety warnings for this device.

SAVE THESE INSTRUCTIONS


Statement 1005—Circuit Breaker


Warning


This product relies on the building’s installation for short-circuit (overcurrent) protection. To reduce risk of electric shock or fire, ensure that the protective device is rated not greater than:

250 V, 15 A.


Statement 1074—Comply with Local and National Electrical Codes


Warning


To reduce risk of electric shock or fire, installation of the equipment must comply with local and national electrical codes.


Statement 1017—Restricted Area


Warning


This unit is intended for installation in restricted access areas. Only skilled, instructed, or qualified personnel can access a restricted access area.


Statement 1024—Ground Conductor


Warning


This equipment must be grounded. To reduce the risk of electric shock, never defeat the ground conductor or operate the equipment in the absence of a suitably installed ground conductor. Contact the appropriate electrical inspection authority or an electrician if you are uncertain that suitable grounding is available.


Statement 1099—Before Connecting to System Power Supply


Warning


High touch/leakage current—Permanently connected protective earth ground is essential before connecting to the system power supply.


Review the rack requirements

For proper operation, the rack in which you install the appliance must meet the following requirements:

  • A standard 19-in. (48.3-cm) wide, four-post EIA rack, with mounting posts that conform to English universal hole spacing, per section 1 of ANSI/EIA-310-D-1992.

  • The rack post holes can be square 0.38-in. (9.6 mm), round 0.28-in. (7.1 mm), #12-24 UNC, or #10-32 UNC when you use the supplied slide rails.

  • The minimum vertical rack space per server must be:

    • For the 44 and 56-core appliance, one RU, which equals 1.75 in. (44.45 mm).

    • For the 112-core appliance, four RUs, which equals 7.0 in. (177.8 mm).

Connect and power on the appliance

Describes how to power on the appliance and check that it's functional.

Procedure


Step 1

Attach a supplied power cord to each power supply in the appliance and then attach the power cords to a grounded AC power outlet. See Power specifications for details.

Note


For the 44 and 56-core appliance, you can use either one or both of the power supplies that come with the appliance. For the 112-core appliance, use at least 3 of its 4 power supplies.

Wait for approximately two minutes to let the appliance boot into standby power mode during the first boot up.

The Power Status LED indicates the appliance's power status:

  • Off: There is no AC power present in the appliance.

  • Amber: The appliance is in standby power mode. Power is supplied only to the CIMC and some motherboard functions.

  • Green: The appliance is in main power mode. Power is supplied to all the appliance components.

For more information on these and other appliance LEDs, see Front and rear panels.

Step 2

Connect a USB keyboard and VGA monitor to the server, using the supplied KVM cable connected to the KVM connector on the front panel. Alternatively, you can use the VGA and USB ports on the rear panel. You can only connect to one VGA interface at a time.


Check the LEDs

After you have powered up the appliance, check the state of the front-panel and rear-panel LEDs and buttons to ensure it is functioning.

The following illustrations show the LEDs for a functional appliance after physical installation and first power-up and before configuration.

Figure 1. 44 and 56-core appliance front panel LEDs
Figure 9: Front panel LEDs on a 44 and 56-core appliance.
LED Desired Status Indicator

1

  • Drive Fault LEDs: Off

  • Drive Activity LEDs: Green

2

Power Status: Green

3

Unit identification: Off

4

System Status: Green

5

Power Supply Status: Green

6

Fan Status: Green

7

Network Link Activity: Off

8

Temperature Status: Green

Figure 2. 112-core appliance front panel LEDs
Figure 10: Front panel LEDs on a 112-core appliance.
LED Desired Status Indicator

1

Power Status: Green

2

Unit identification: Off

3

System Status: Green

4

Fan Status: Green

5

Temperature Status: Green

6

Power Supply Status: Green

7

Network Link Activity: Off

8

Drive Fault LEDs: Off

9

Drive Activity LEDs: Green

10

CPU module power status: Green

11

CPU module fault: Off

Figure 3. 44 and 56-core appliance rear panel LEDs
Figure 11: Rear panel LEDs on a 44 and 56-core appliance.
LED Desired Status Indicator

1

After initial power-up, all the ports should have their Link Status and Link Speed LEDs showing as off.

After network settings are configured and tested using either the Maglev Configuration wizard (see Configure the primary node using the Maglev wizard and Configure add-on nodes using the Maglev wizard) or browser-based configuration wizard (see Configure the primary node using the Advanced Install configuration wizard and Configure a secondary node using the Advanced Install configuration wizard), the Link Status and Link Speed LEDs for all cabled ports should be green. The LED for all uncabled ports should remain unchanged.

2

AC Power Supply Status LEDs: Green

Figure 4. 112-core appliance rear panel LEDs
Figure 12: Rear panel LEDs on a 112-core appliance.
LED Desired Status Indicator

1

After initial power-up, all the ports should have their Link Status and Link Speed LEDs showing as off.

After network settings are configured and tested using either the Maglev Configuration wizard (see Configure the primary node using the Maglev wizard and Configure a secondary node using the Maglev wizard) or browser-based configuration wizard (see Configure the primary node using the Advanced Install configuration wizard and Configure a secondary node using the Advanced Install configuration wizard), the Link Status and Link Speed LEDs for all cabled ports should be green. All uncabled port LEDs should be unchanged.

2

AC Power Supply Status LEDs: Green

If you see LEDs with colors other than those shown above, you may have a problem condition. See Front and rear panels for details on the likely causes of the status. Be sure to correct any problem conditions before proceeding to configure the appliance.