Installation workflow
Complete the following tasks,to install Workflow Automation on Cisco Crosswork Network Controller (CNC):
The documentation set for this product strives to use bias-free language. For the purposes of this documentation set, bias-free is defined as language that does not imply discrimination based on age, disability, gender, racial identity, ethnic identity, sexual orientation, socioeconomic status, and intersectionality. Exceptions may be present in the documentation due to language that is hardcoded in the user interfaces of the product software, language used based on RFP documentation, or language that is used by a referenced third-party product. Learn more about how Cisco is using Inclusive Language.
This section covers the following topics:
Complete the following tasks,to install Workflow Automation on Cisco Crosswork Network Controller (CNC):
To run CNC Workflow Automation, you must have previously installed Cisco Crosswork Network Controller (CNC), Crosswork Data Gateway (CDG), and Cisco Network Services Orchestrator (NSO). If you have not already installed these three foundational applications, or upgraded them to the required versions, you must to do so before continuing.
For help installing or upgrading to CNC 7.1 and CDG, see the Cisco Crosswork Network Controller 7.1 Installation Guide. Ensure that you perform a cluster install on one of the supported hypervisor platforms.
For help installing NSO, see the System Install documentation for NSO 6.4.1. For help upgrading to the required minimum version, see the 6.4.1 Upgrade NSO document.
This topic explains how to install CNC Workflow Automation on cluster installations of Cisco Crosswork Network Controller (CNC)
CNC applications are offered as packages. There are four packages, named Essentials, Advantage, Premierand Add-on. Each package contains one or more installable applications, stored in a format unique to Crosswork known as a CAPP (Crosswork APPlication).
To download and install the CAPPs in a CNC application package:
Download and decompress the signed version of the CNC application package file.
Use Python to verify the extracted files.
Add the CAPPs to CNC.
Install the CAPPs.
Activate the installed CAPPs.
The following steps provide detail on how to perform each of these tasks.
|
Step 1 |
Download and decompress the signed application package file: |
||
|
Step 2 |
Use Python to validate the extracted files:
If you are using Python 2.x, use the following command to validate the file: If you are using Python 3.x, use the following command to validate the file: |
||
|
Step 3 |
Add the CAPPs to CNC: |
||
|
Step 4 |
Install the CAPPs: Click on the Install prompt on each of the application tiles in the following sequence only:
You can also install by clicking the more icon Once an application is installed, you will see changes in the application tile. All the related resources, UI screens and menu options are dynamically loaded in the Crosswork UI. The 90-day evaluation period will also start. You can register the application with your Cisco Smart Account in the Smart License tab. |
||
|
Step 5 |
Activate the installed CAPPs: To become functional, an installed CAPP must be activated. Unless a problem occurs, activation is automatic the first time
you install a CAPP. Later re-installs (when, for example, upgrading to a higher license tier) require manual activation. To
manually activate a CAPP, click the more icon |
||
|
Step 6 |
(Optional) Once all CAPPs are installed and activated, check the health of the environment to make sure all the applications
are healthy. Click the more icon |
A Cisco Crosswork Network Controller (CNC) Provider is a helper application that lets CNC perform special functions. Cisco Network Services Orchestrator (NSO) is a type of CNC Provider. Its special function is accessing and controlling your network devices.
CNC Credential Profiles store login user names and passwords in a secure fashion. CNC uses them to let Workflow Automation authenticate with CNC Providers like NSO when they attempt to access your devices.
Before continuing, follow the instructions in the Cisco Crosswork Network Controller Administrator Guide topic Create Credential Profiles to create two or more CNC Credential Profiles like these:
NSO Credential Profile: Name it NSO-Credential or any other unique name you find meaningful. Give it a Connectivity type protocol of SSH, and a Username and Password that match the username and password of a user with administrator privileges on your NSO server.
Device Credential Profile: Name it devices-profile or any other unique name . Add to it as many Connectivity type protocols (SSH, NETCONF, HTTP, HTTPS, and so on), with corresponding usernames and passwords, as appropriate for the devices you intend to manage using Workflow Automation. You can create multiple device Credential Profiles if you have groups of devices using the same protocols but with different credentials.
Once you have created these Credential Profiles, follow the instructions in the Cisco Crosswork Network Controller Administrator Guide topic Add Cisco NSO Providers to add an NSO provider that uses the NSO credential profile you created above. This will allow Workflow Automation to authenticate with NSO.
If you already have created CNC Credential Profiles and an NSO Provider, consider modifying them to use the parameters given here.
Use the Crosswork Network Controller (CNC) NSO Deployment Manager to deploy the CNC Premier NSO function packs on NSO. These function packs will provide the basic inventory management and other NSO capabilities needed to use CNC Workflow Automation. You will also need to log in to NSO to ensure that NACM is enabled and that other NSO settings are properly configured.
Ensure you have added NSO as a provider as explained in Create CNC Providers and Credential Profiles
|
Step 1 |
Log in to CNC and choose . |
|
Step 2 |
Under NSO Deployment Manager, choose the NSO function pack bundles tab and click the check box next to CWM SOLUTIONS FP. Then click the Deploy button to start the deployment process.  |
|
Step 3 |
When prompted on the first Provide credentials page, provide the SSH User name, password and Sudo password credentials. 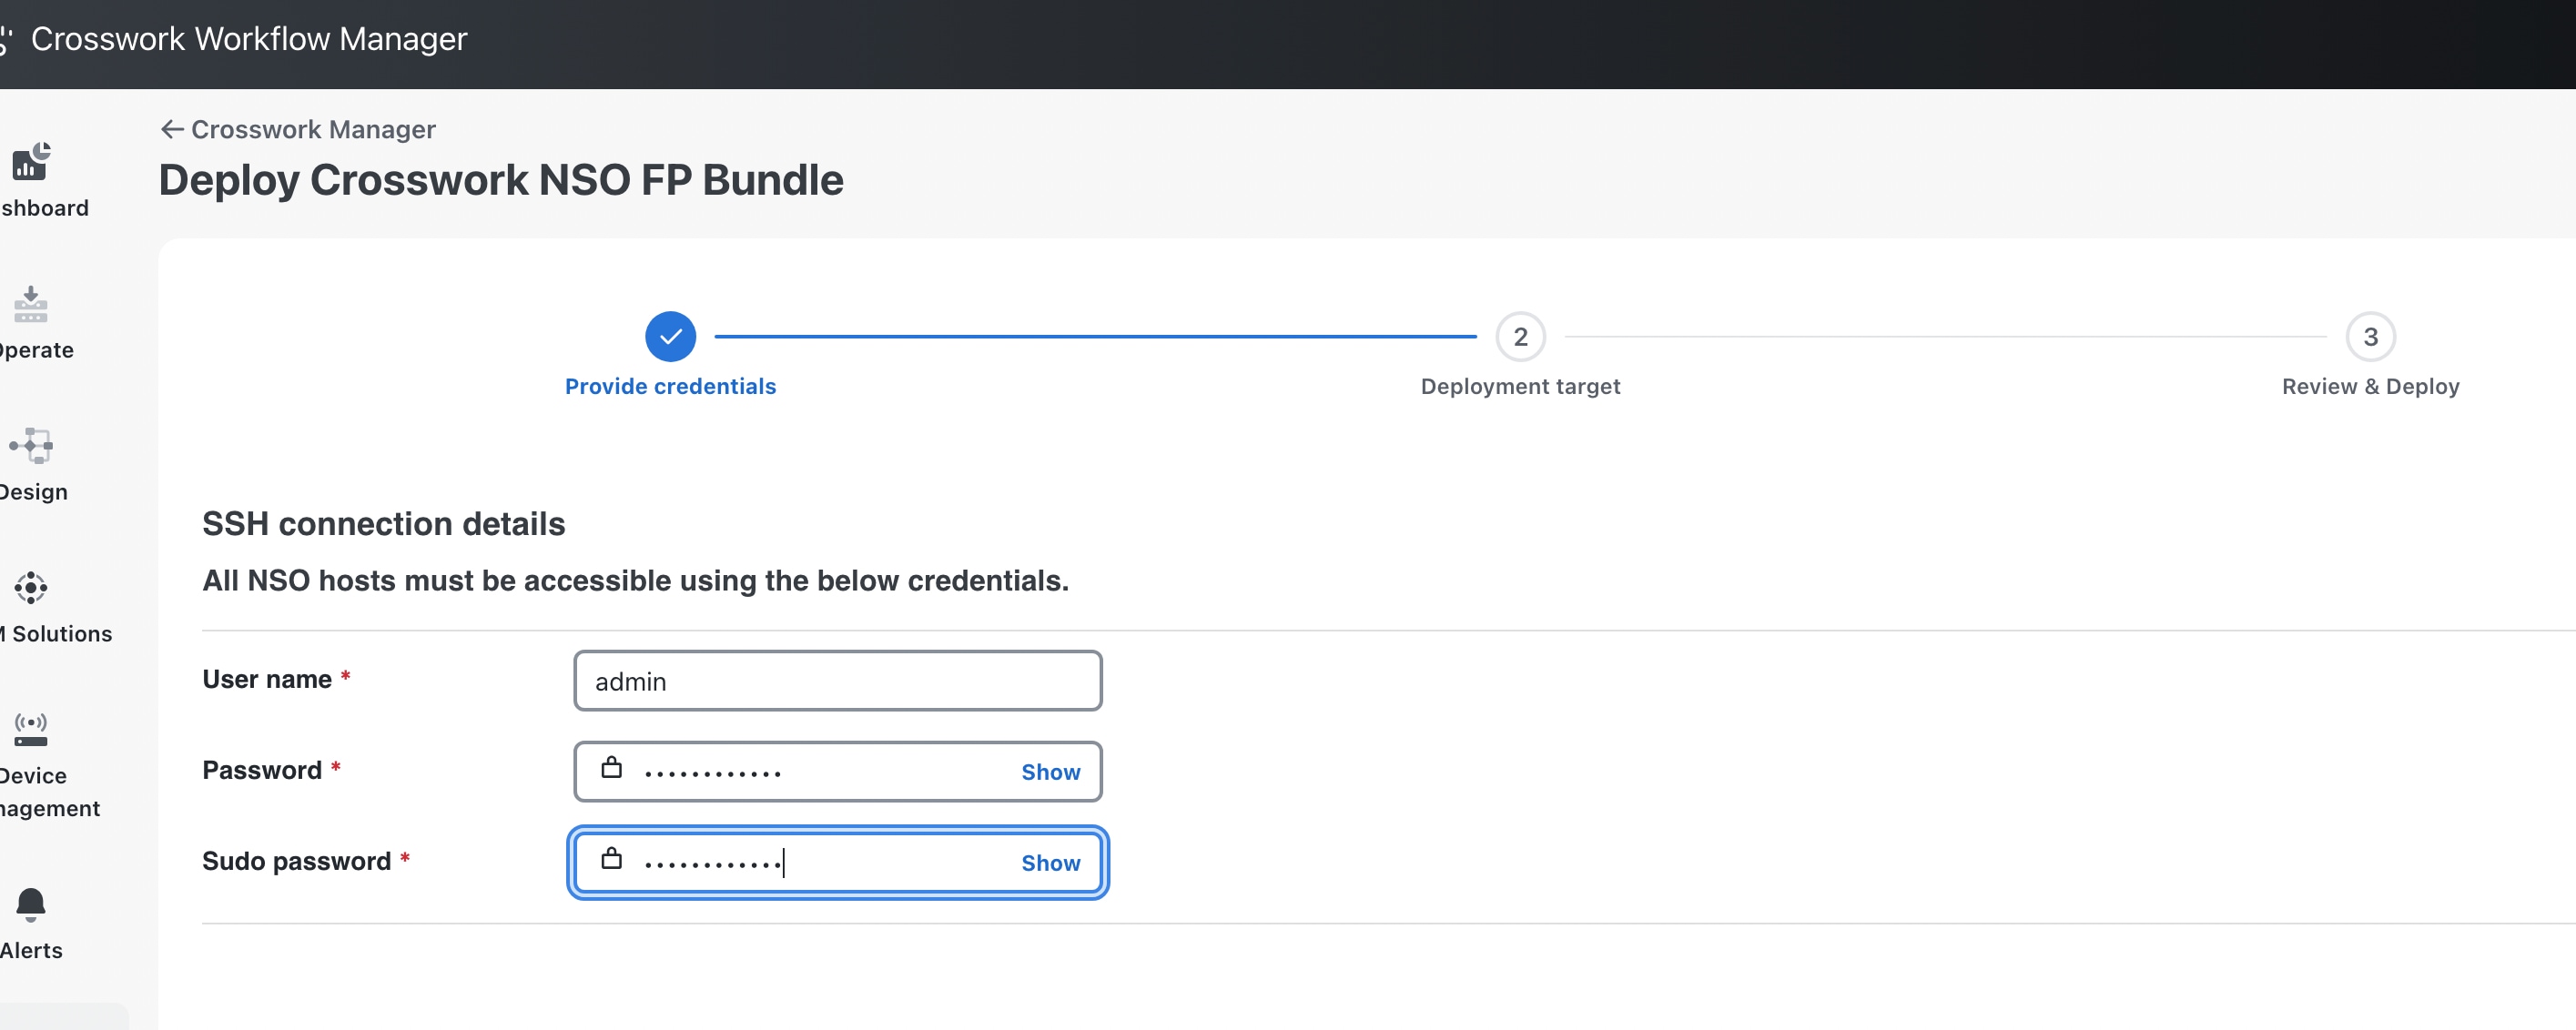 |
|
Step 4 |
On the Deployment target page, select Non-HA in the High Availability column, as shown below. 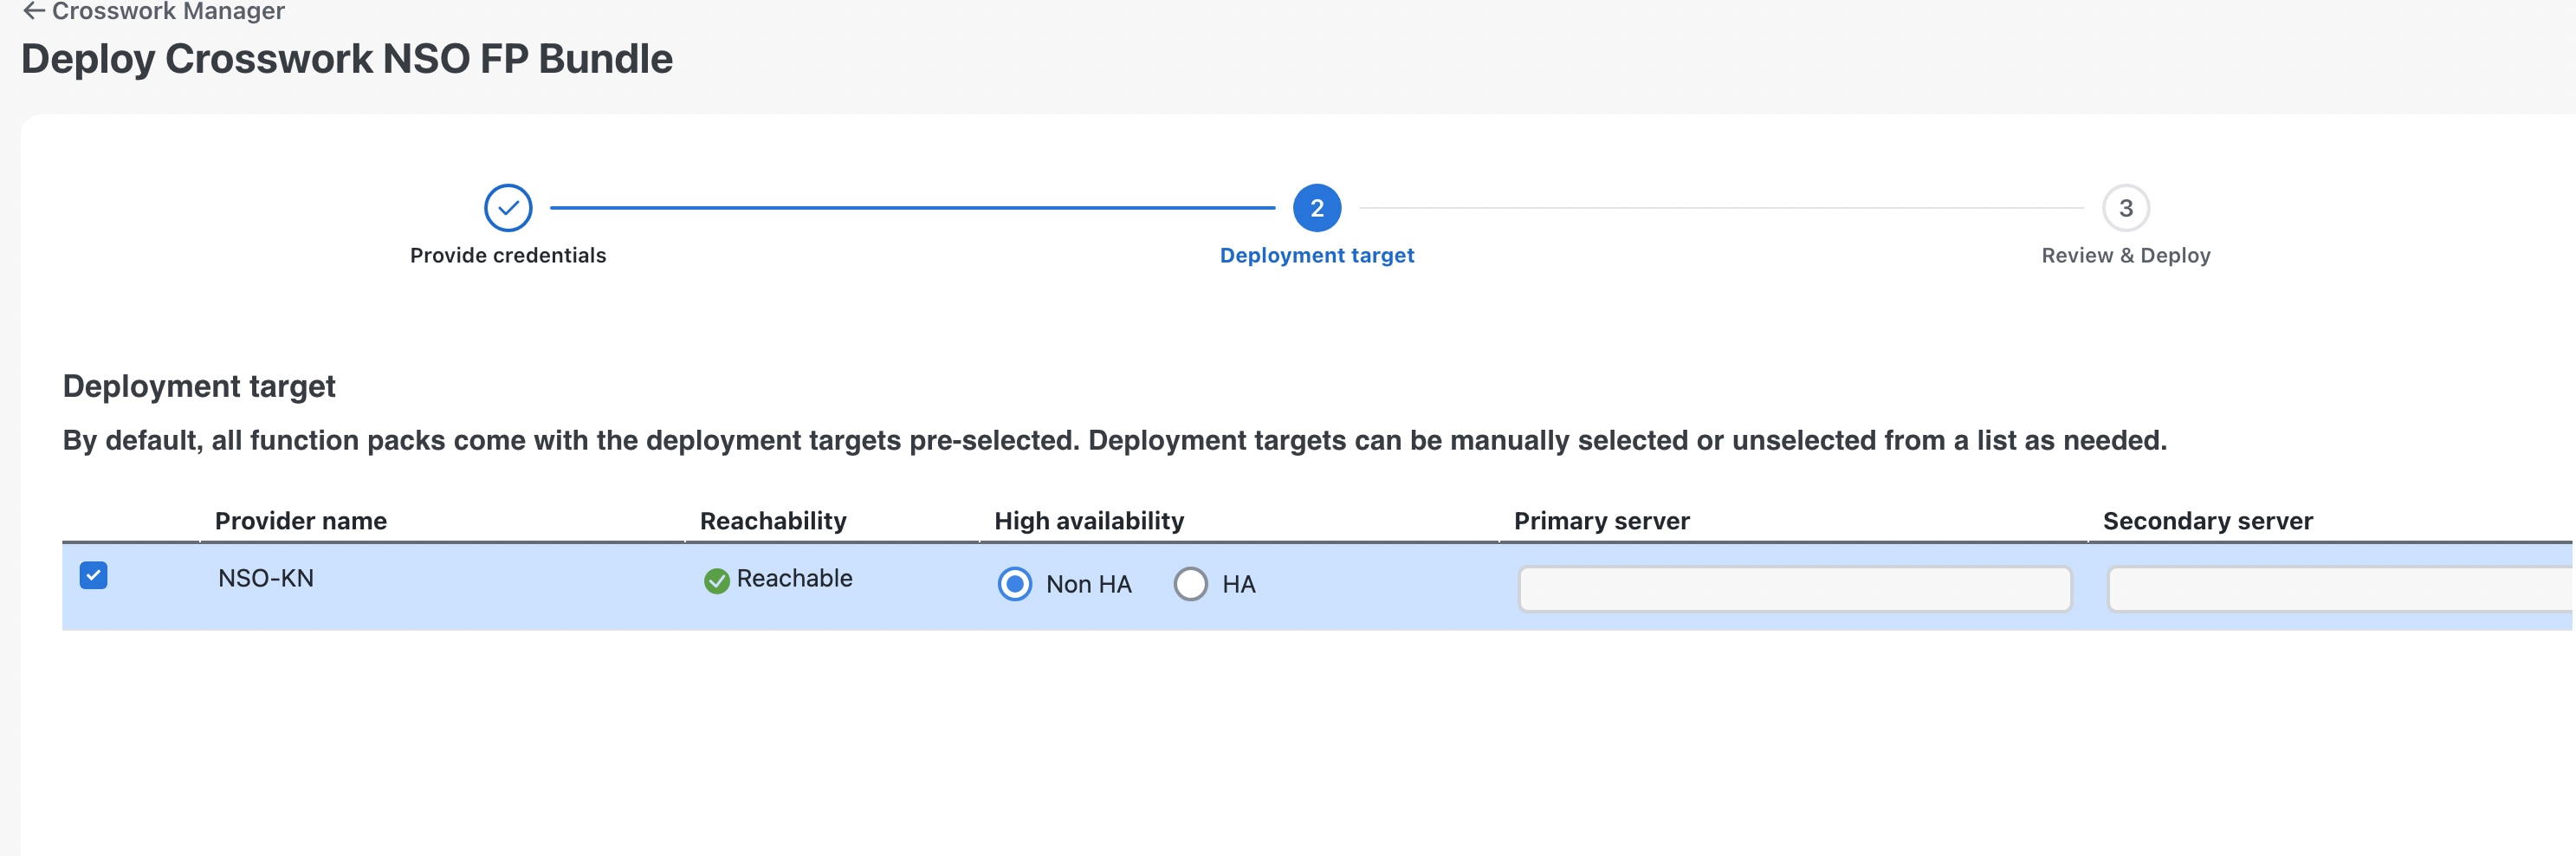 |
|
Step 5 |
When prompted on the Review & Deploy page, click Deploy. |
|
Step 6 |
Click the Job History tab to monitor the NSO deployment as it proceeds. You will see the packages listed in the Job Details window for the running job. 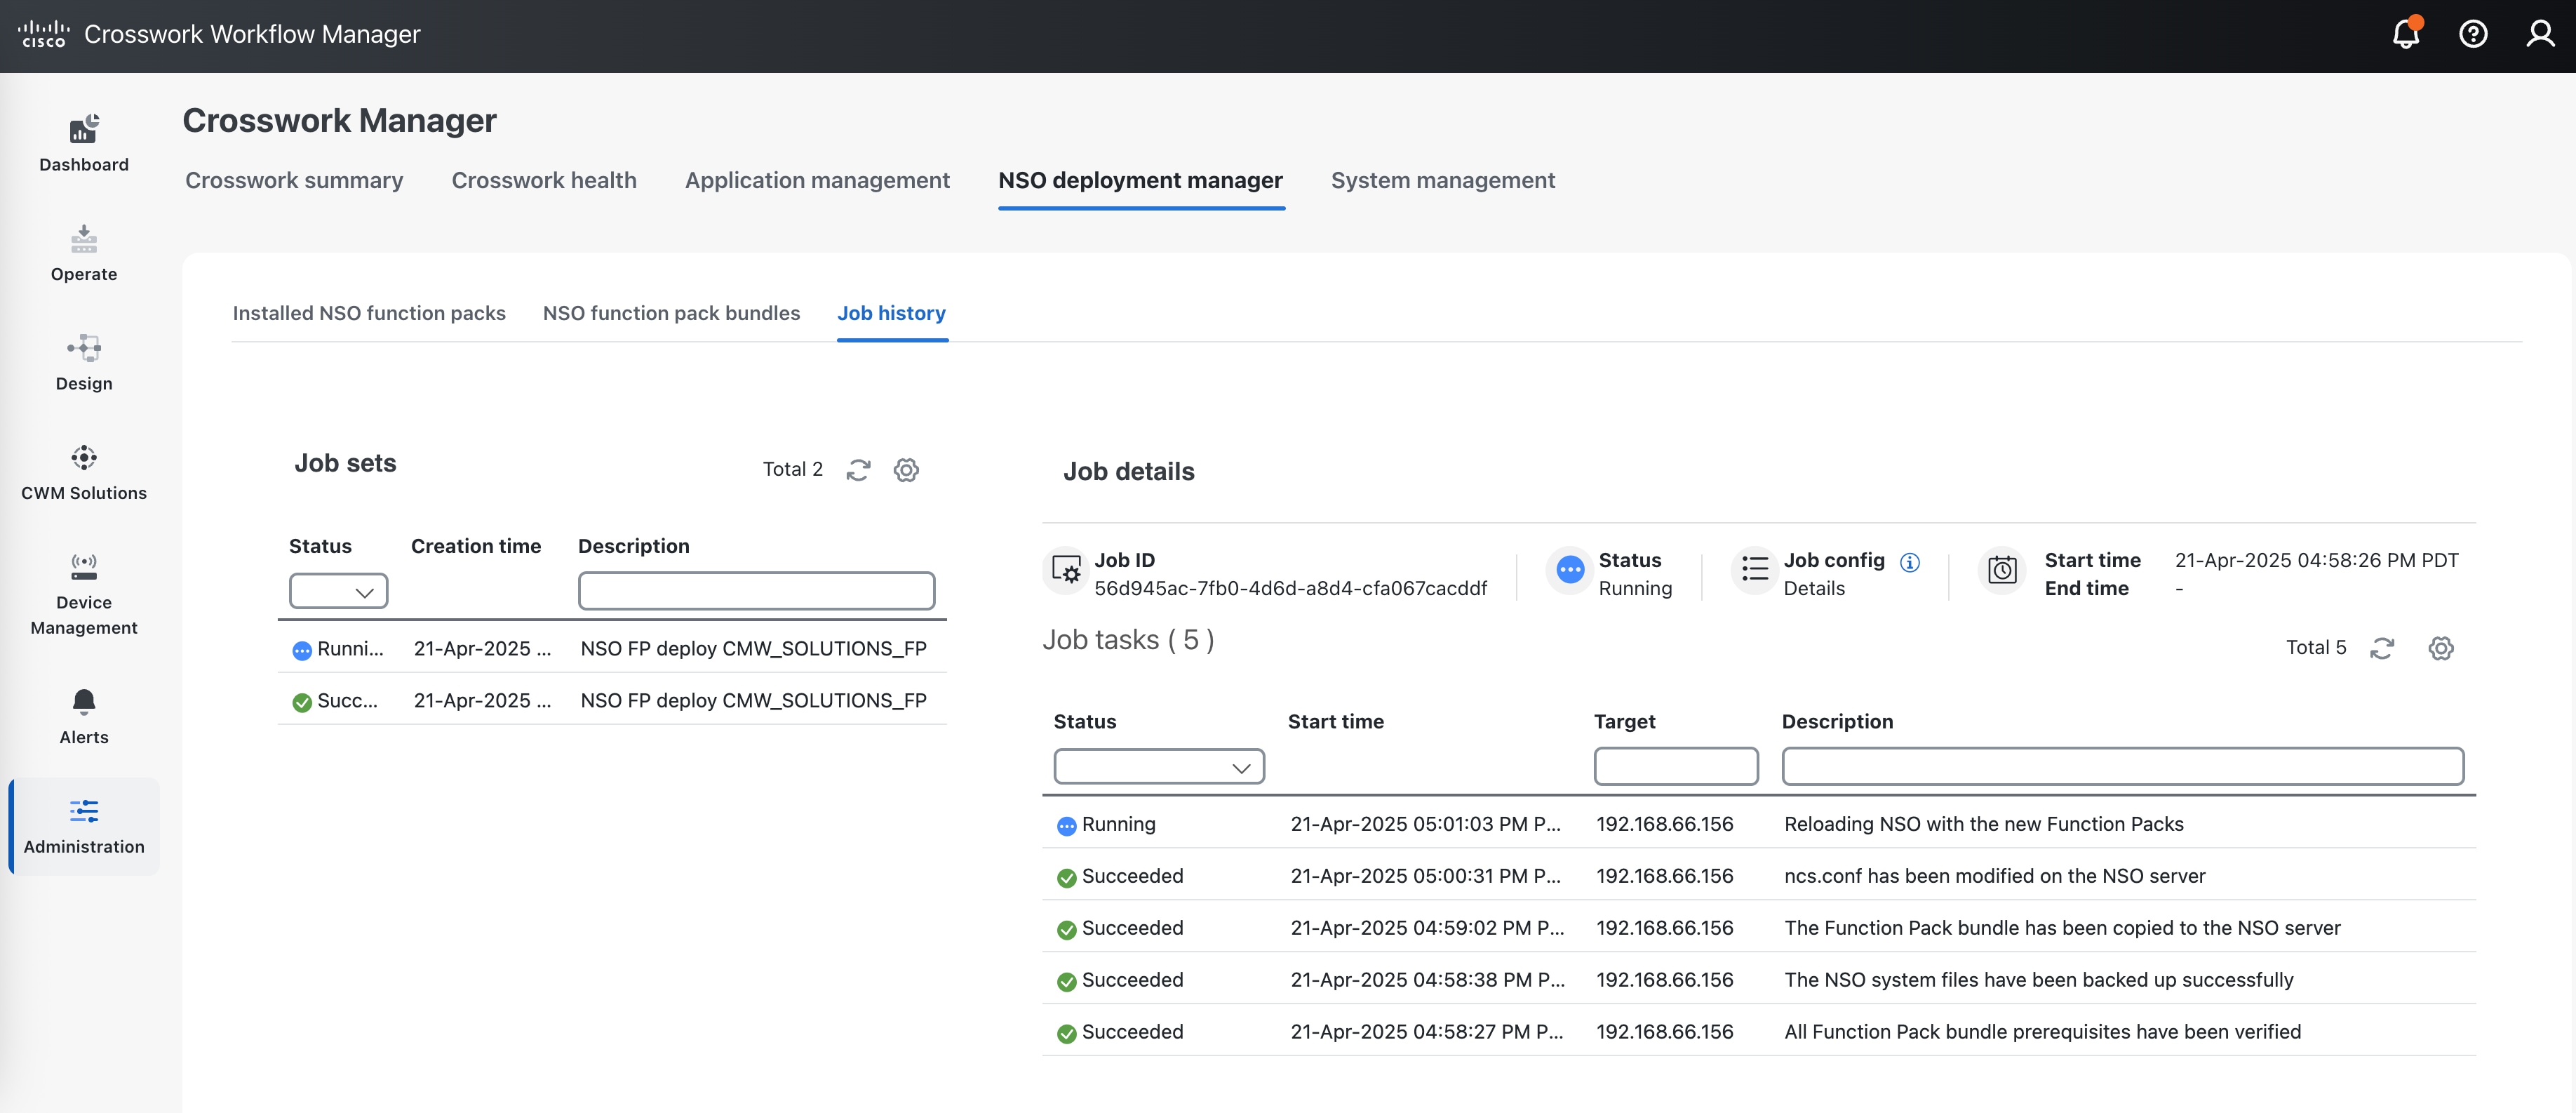 |
|
Step 7 |
When the job is listed as Succeeded, click the Installed NSO function packs tab and expand the NSO provider to verify that the packages are all installed. The package list should look like the illustration below. 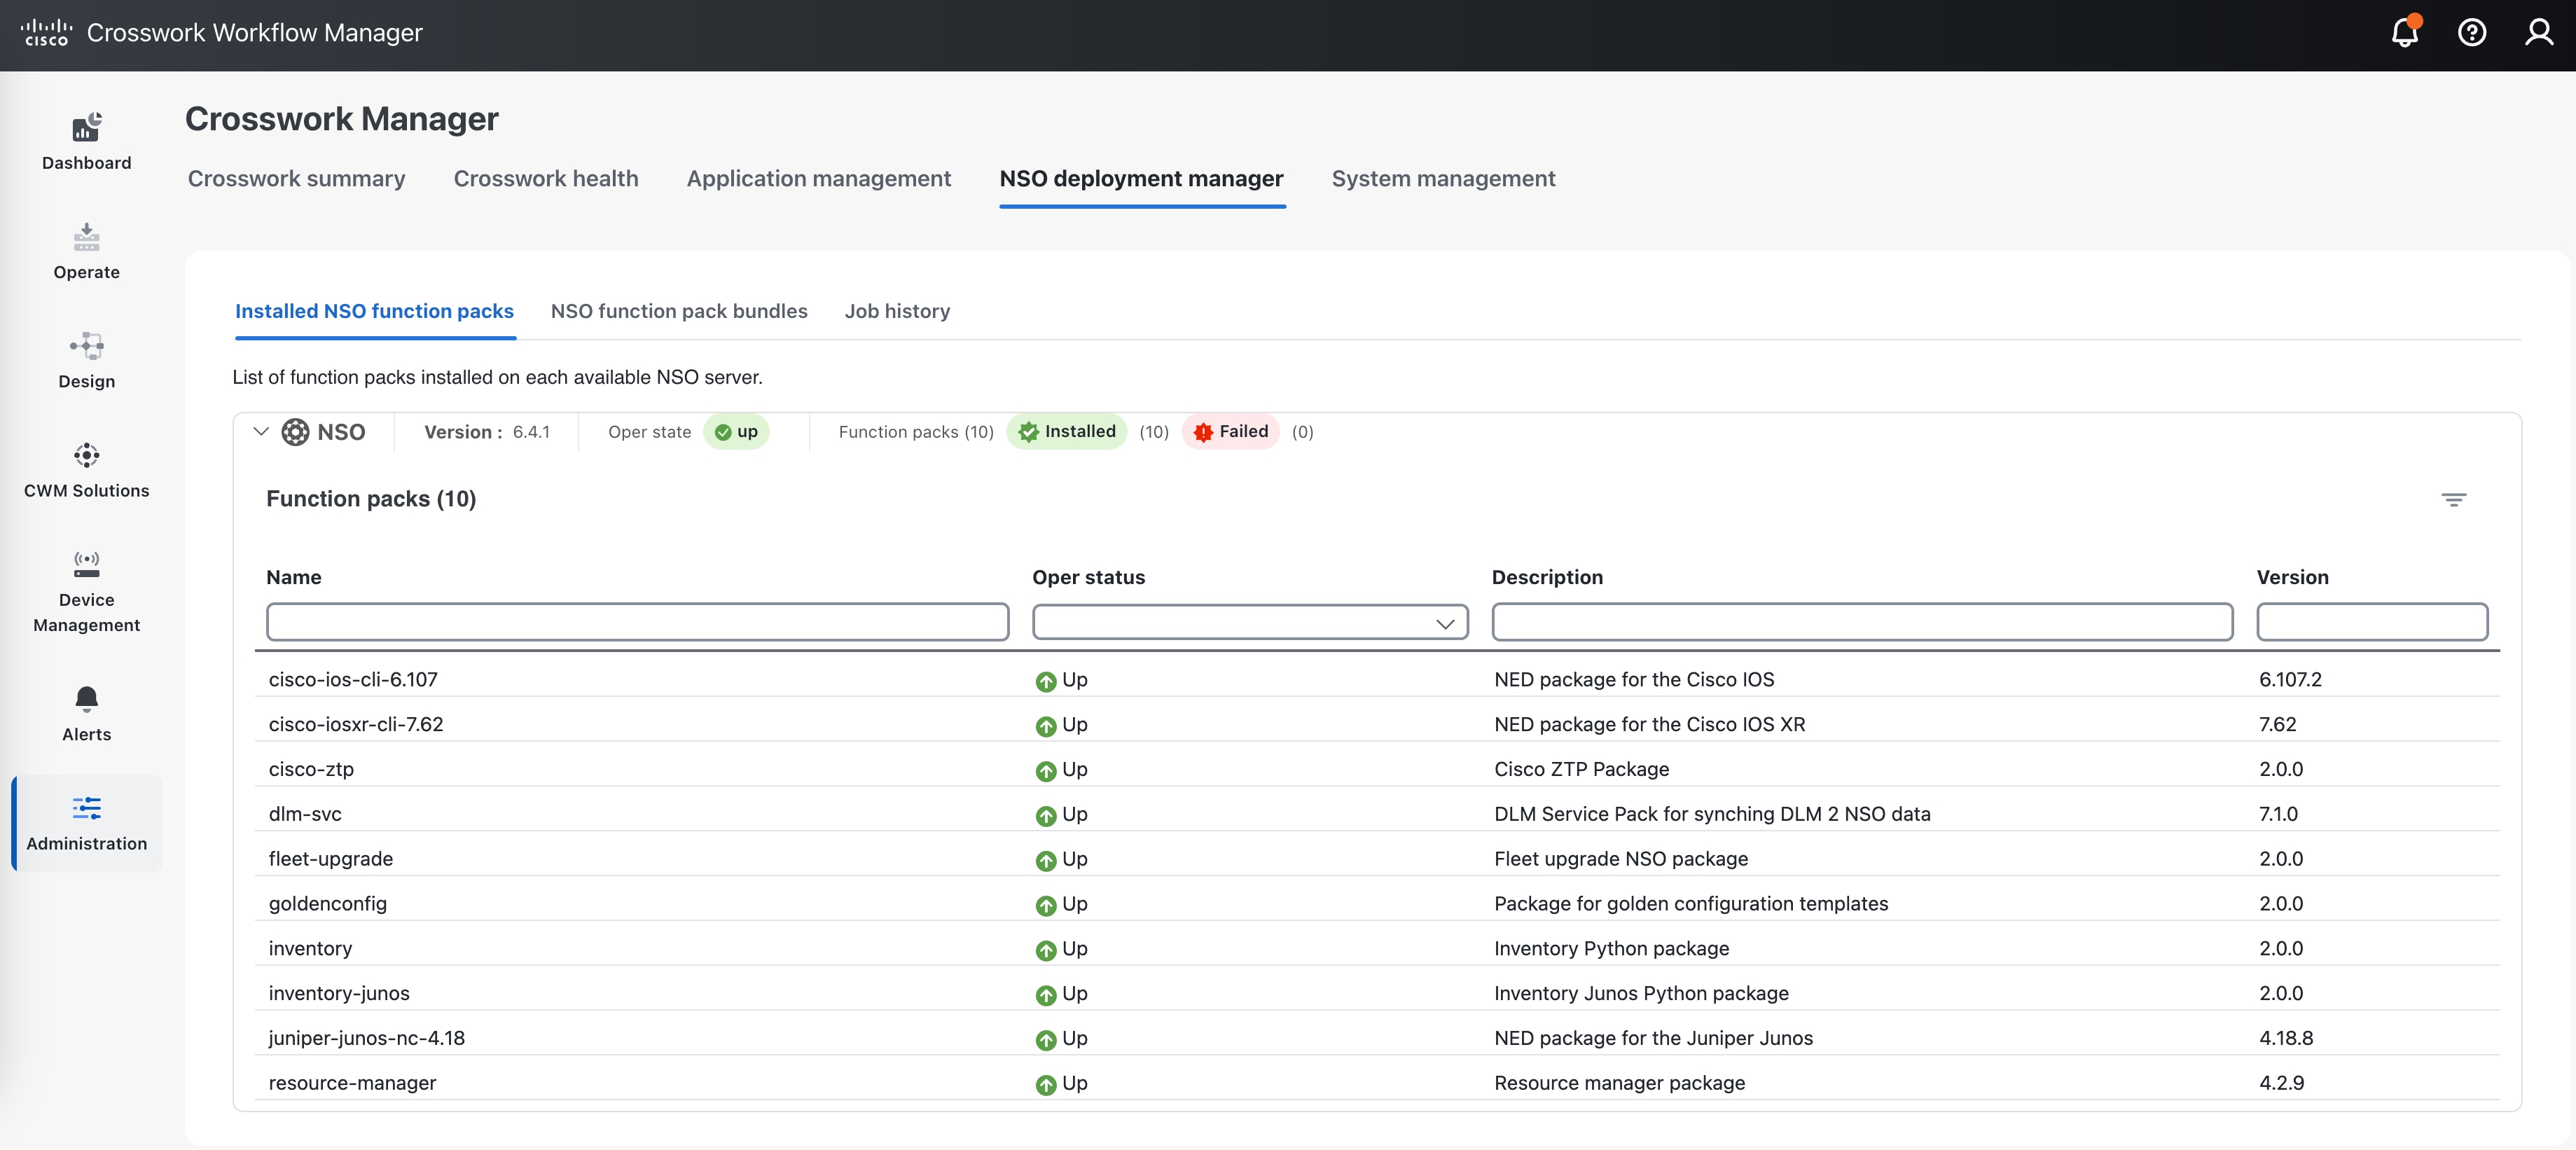 You can also verify that all the packages are installed correctly by running the |
|
Step 8 |
If you haven't already done so, log in to NSO and set the following device global settings in configuration mode. These NSO settings are required for Fleet Upgrade. |
|
Step 9 |
Note that NACM is required for NSO. Ensure the Linux user has ncsadmin rights to perform functions on NSO. |
|
Step 10 |
Copy the ncs_backup.sh, ncs_restore.sh and get_technical_support_data.sh scripts from the provided bundle to the scripts directory under the NCS_RUN_DIR, and update the permissions of the copied scripts to make them executable. |
 Feedback