- Cisco StadiumVision Director Software Installation and Upgrade Guide
- Preface
- Getting Started Installing or Upgrading Cisco StadiumVision Director
- Installing Cisco StadiumVision Director for the First Time on a Platform 3 Server
- Upgrading a Cisco StadiumVision Director Platform 2 Server from Release 3.0 SP2 to Release 3.1
- Using the TUI Upgrade Utility to Upgrade the Cisco StadiumVision Software
- Upgrading the DMP Firmware
- Appendix A: Post-Upgrade Checklist
- Appendix B: Port Reference
- Appendix C: Installing Additional Hard Drives in the Platform 2 Server to Prepare for Upgrade to Release 3.1
- Appendix D: CIMC Configuration and Firmware Upgrade Guidelines on the Cisco UCS C220 Server
Cisco StadiumVision Director Software Installation and Upgrade Guide, Release 3.1
Bias-Free Language
The documentation set for this product strives to use bias-free language. For the purposes of this documentation set, bias-free is defined as language that does not imply discrimination based on age, disability, gender, racial identity, ethnic identity, sexual orientation, socioeconomic status, and intersectionality. Exceptions may be present in the documentation due to language that is hardcoded in the user interfaces of the product software, language used based on RFP documentation, or language that is used by a referenced third-party product. Learn more about how Cisco is using Inclusive Language.
Chapter: Appendix D: CIMC Configuration and Firmware Upgrade Guidelines on the Cisco UCS C220 Server
Appendix D: CIMC Configuration and Firmware Upgrade Guidelines on the Cisco UCS C220 Server
First Published: March 27, 2013
This document provides guidelines for configuring the Cisco Integrated Management Controller (CIMC) interface and performing the initial configuration, and upgrading the CIMC/BIOS firmware on the Cisco UCS C220 servers for Cisco StadiumVision Director (SV-DIR-DIRECTOR-K9, SV-PLATFORM3=) .

Note Use the information in this appendix only as a guide to the tasks that you need to perform for CIMC configuration or upgrade, but follow the procedures in the referenced Cisco UCS documents.
This section includes the following topics:
- CIMC Initial Configuration (required)
- CIMC Firmware Upgrade Guidelines (as required)
CIMC Initial Configuration
This section includes the following topics:
Prerequisites
Be sure that the following requirements are met before you do the CIMC initial configuration:
- You have a monitor, keyboard, and mouse that you can connect to the server.
- You have the following information for configuring the internal Cisco Integrated Management Controller (CIMC) interface:
–![]() You have an additional IP address for static configuration.
You have an additional IP address for static configuration.

Tip This is a different IP address than the IP address that you configure for the eth0 network interface on the Cisco StadiumVision server.
–![]() You have the VLAN ID if the server will be installed on a network VLAN.
You have the VLAN ID if the server will be installed on a network VLAN.
–![]() You are prepared to change the default CIMC login password.
You are prepared to change the default CIMC login password.
- You have a laptop with access to the Cisco StadiumVision network.
- Your computer meets the minimum browser and Flash player requirements for the Cisco StadiumVision server, and also has Java 1.6 or later installed.
See the release notes for your Cisco StadiumVision product and release at:
http://www.cisco.com/en/US/products/ps11274/prod_release_notes_list.html
–![]() Cisco UCS C220 Server Installation and Service Guide
Cisco UCS C220 Server Installation and Service Guide
Familiarize yourself with the “Initial Server Setup” topic of the “Installing the Server” chapter.
–![]() Cisco UCS C-Series Servers Integrated Management Controller GUI Configuration Guide, Release 1.4
Cisco UCS C-Series Servers Integrated Management Controller GUI Configuration Guide, Release 1.4
(or the version that corresponds to your firmware release found at: http://www.cisco.com/en/US/products/ps10739/products_installation_and_configuration_guides_list.html .)
Familiarize yourself with the “Overview” chapter, and the “Managing the Server Boot Order” section of the “Managing the Server” chapter.
CIMC Initial Configuration Summary
This section provides an overview of the basic tasks to be completed when performing the initial CIMC configuration in standalone mode for a Cisco StadiumVision server after you have unpacked and inspected it and prepared it for installation.
To perform the CIMC initial configuration, complete the following tasks:
| . | |
During bootup, press F8 when prompted to open the BIOS CIMC Configuration Utility. |
|
| . | |
From a laptop with access to the Cisco StadiumVision network, use a browser and type the IP address that you configured for the CIMC interface to connect to the CIMC console. |
|
Log into the CIMC console with username admin and the password that you configured in Step 2. |
|
From the Admin tab, click Network , and go to the Network Settings page. In the NIC Properties box configure the following settings and save your changes: |
|
CIMC Firmware Upgrade Guidelines
This section includes the following topics:
Before You Begin
See the release notes for your Cisco StadiumVision product and release at:
http://www.cisco.com/en/US/products/ps11274/prod_release_notes_list.html
- Find the minimum CIMC/BIOS versions tested for your Cisco StadiumVision Director (SV-DIR-DIRECTOR-K9, SV-PLATFORM3=) platform.
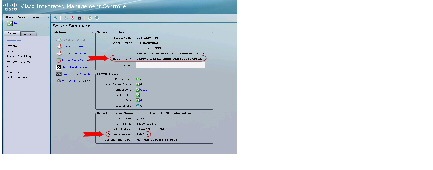
- From your Cisco StadiumVision platform, verify the CIMC and BIOS firmware versions in the CIMC console (Figure 1).
Figure 1 Firmware Verification From the CIMC Console


Note Unless there is another reason why an upgrade has been found to be needed, no upgrade should be needed if your server firmware is at the minimum tested version (or later) for the Cisco StadiumVision release that you are running.
Prerequisites
Be sure that the following requirements are met before you perform a CIMC/BIOS firmware upgrade:
–![]() Release Notes for Cisco UCS C-Series Software, Release 1.4(6)
Release Notes for Cisco UCS C-Series Software, Release 1.4(6)
(or the version that corresponds to your firmware release found at: http://www.cisco.com/en/US/products/ps10739/prod_release_notes_list.html )
–![]() Cisco Host Upgrade Utility Release 1.4(6) Quick Start Guide
Cisco Host Upgrade Utility Release 1.4(6) Quick Start Guide
(or the version that corresponds to your firmware release found at: http://www.cisco.com/en/US/products/ps10493/products_user_guide_list.html )
Familiarize yourself with all of the requirements in these documents to perform your CIMC/BIOS firmware upgrade.
CIMC/BIOS Firmware Upgrade Summary

To perform the CIMC/BIOS firmware upgrade, complete the following tasks:
 Feedback