Introduction
This document describes how to Deploy SSM On-Prem on ESXI and register Catalyst 9000 Series Switches.
Prerequisites
Requirements
Cisco recommends that you have knowledge of these topics:
Components Used
The information in this document is based on these software and hardware versions:
- C9200
- C9300
- C9400
- C9500
- C9600
- Cisco IOS® XE &17.X software
The information in this document was created from the devices in a specific lab environment. All of the devices used in this document started with a cleared (default) configuration. If your network is live, ensure that you understand the potential impact of any command.
Configure
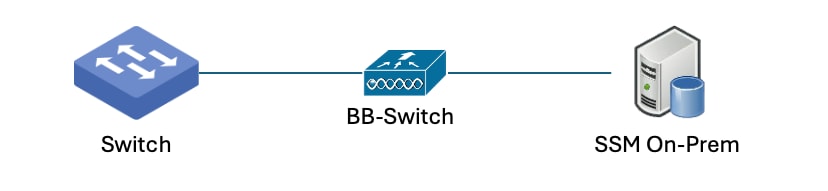
Network Diagram
Configurations
Deploy SSM On-Prem on ESXI
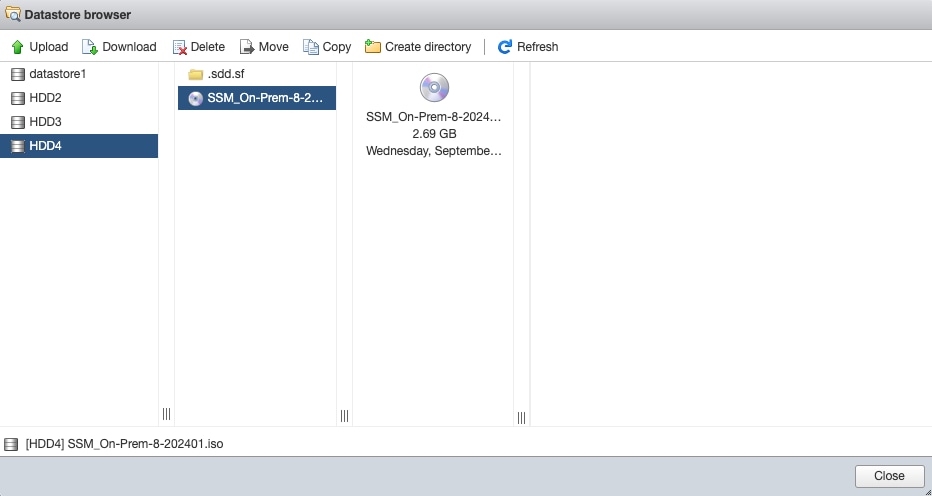
1. Download the ISO image from CCO and upload it to the ESXi datastore.
Image Link: Smart Software Manager On-Prem - 8-202401
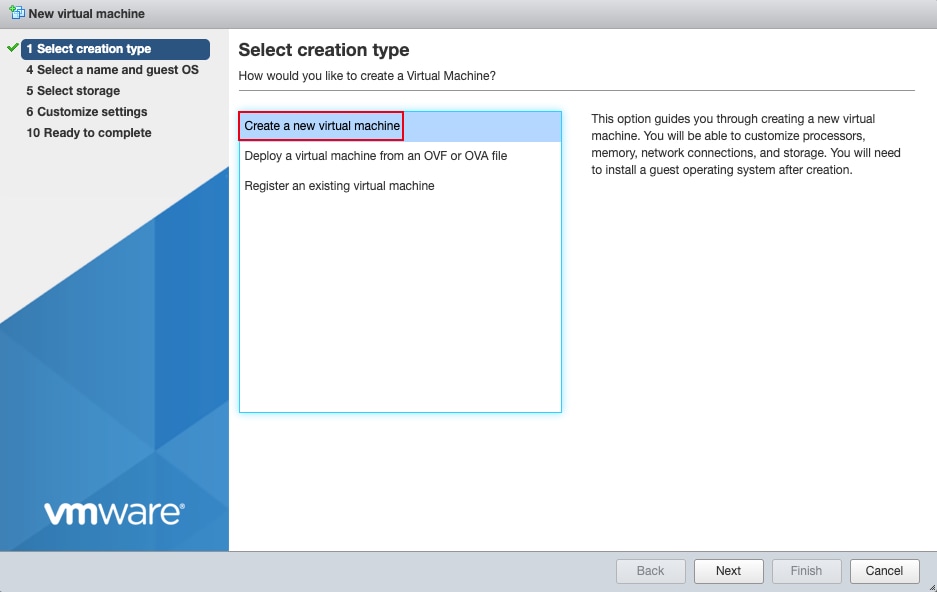
2. Click Create / Register VM in the upper left corner of ESXI to create a virtual machine.

3. On the Select creation type page, select Create a new virtual machine and click next to proceed to the next step.
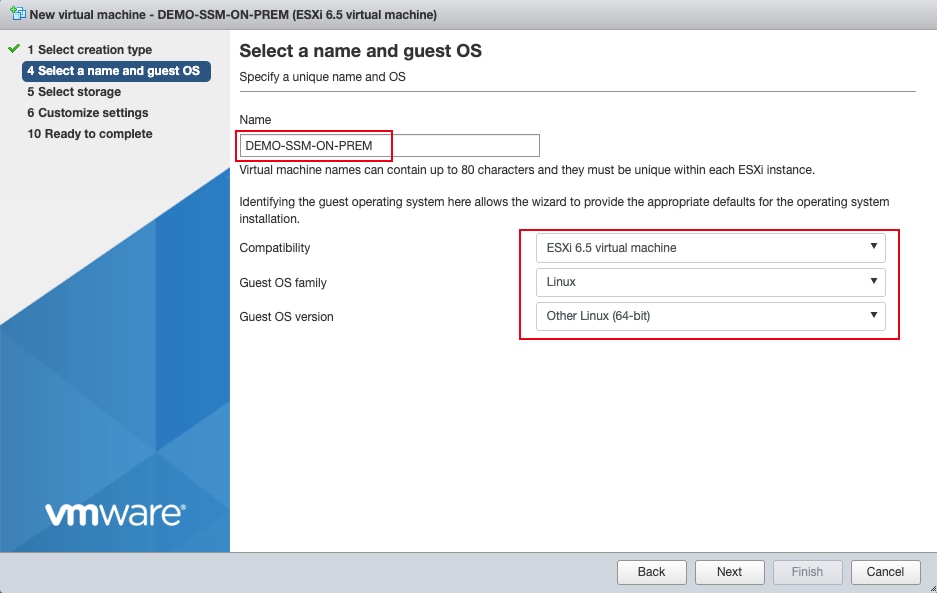
4. Select a VM name and guest OS, ensure the OS type is set to Linux and the Guest-OS is set to either CentOS 7 64 bit or Linux Other 64 bit.
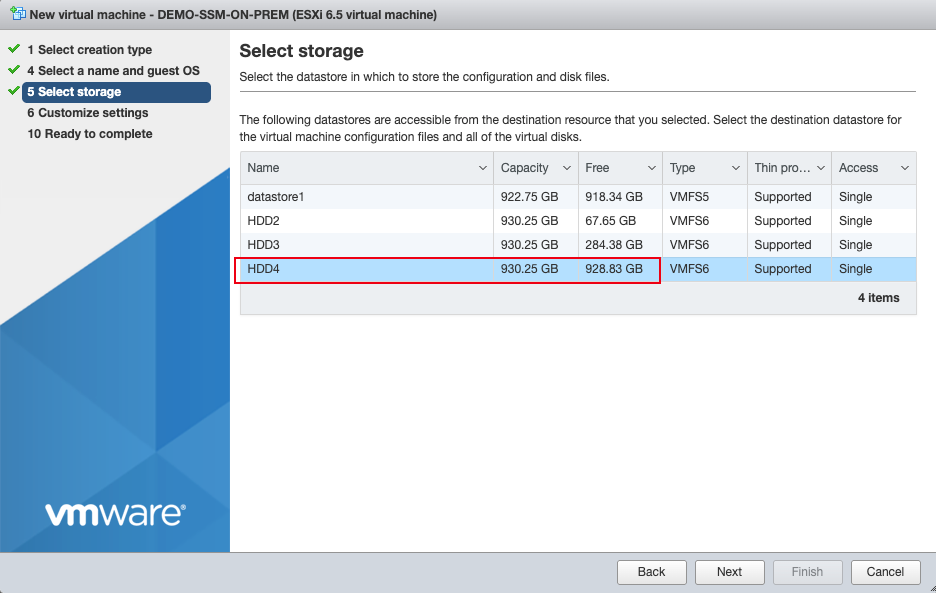
5. Select storage for On-Prem deployment. Please ensure that there is sufficient space.
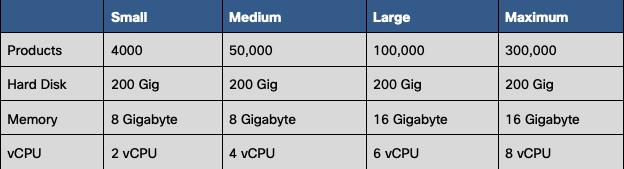
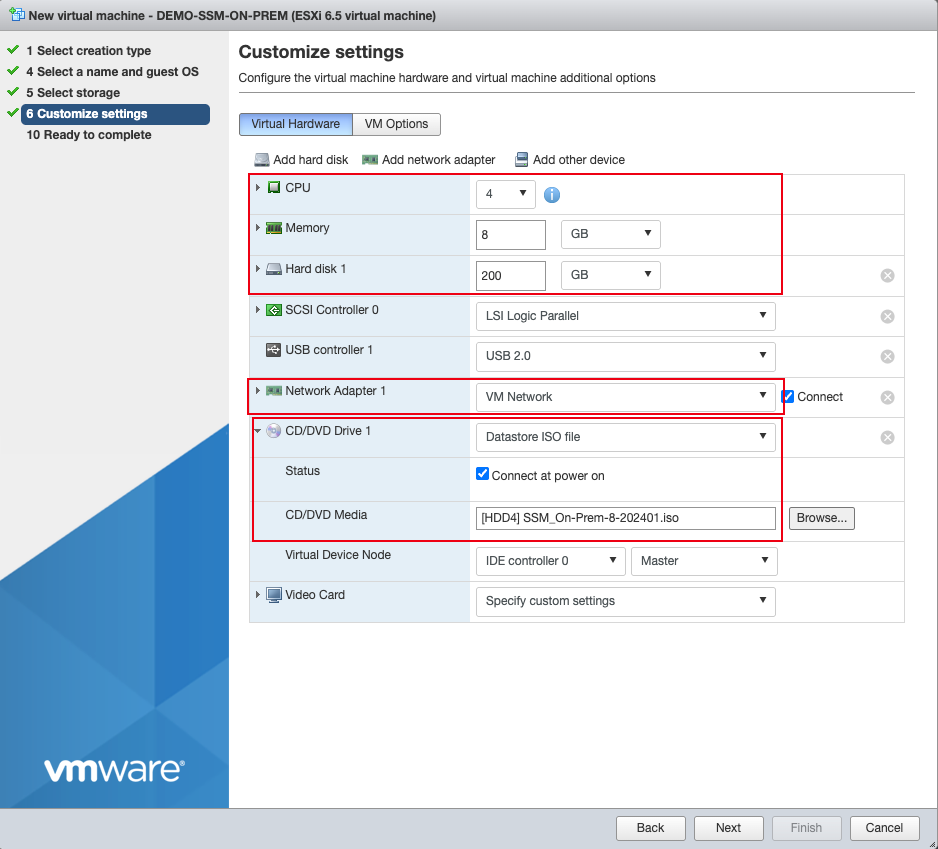
6. Configure the virtual machine hardware and virtual machine additional options, the configuration of the virtual machine must meet these configuration requirements as listed in the table.
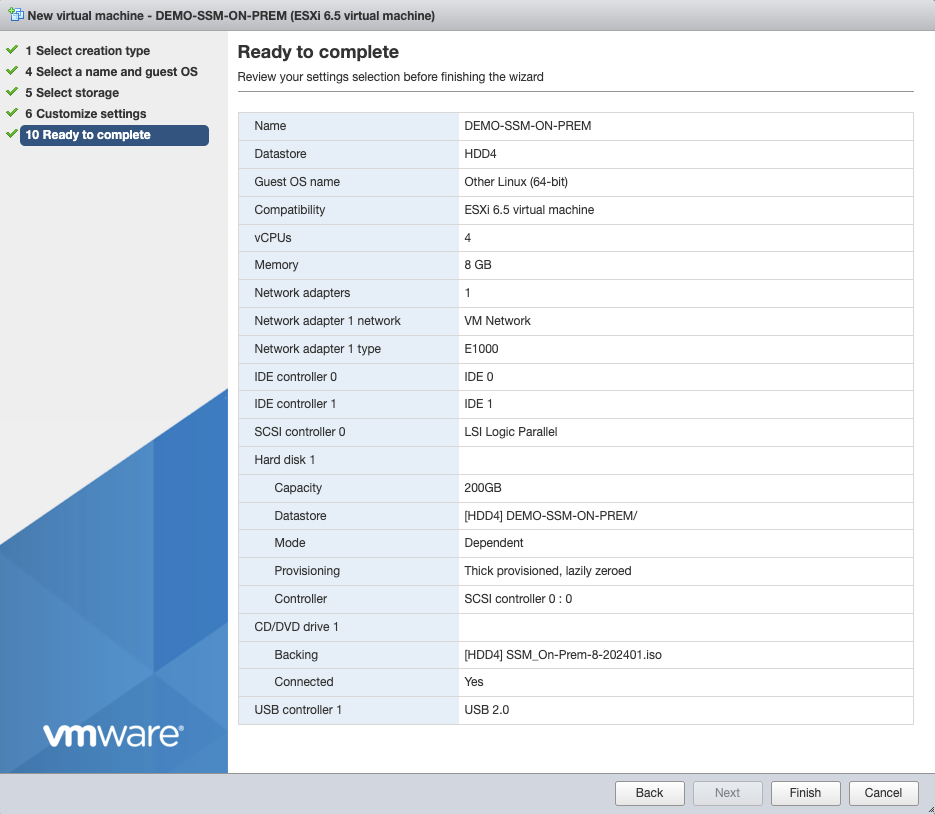
7. Review your settings selection before finishing the wizard. After confirmation, click the Finish button to complete the deployment of the virtual machine.
8. Next, please power on the newly deployed virtual machine to start the installation process. Find the VM you just created in Virtual Machines in ESXI, select it and click Power On above.

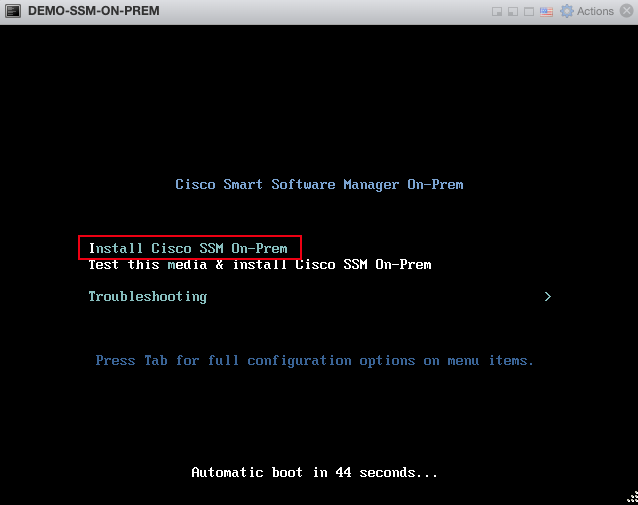
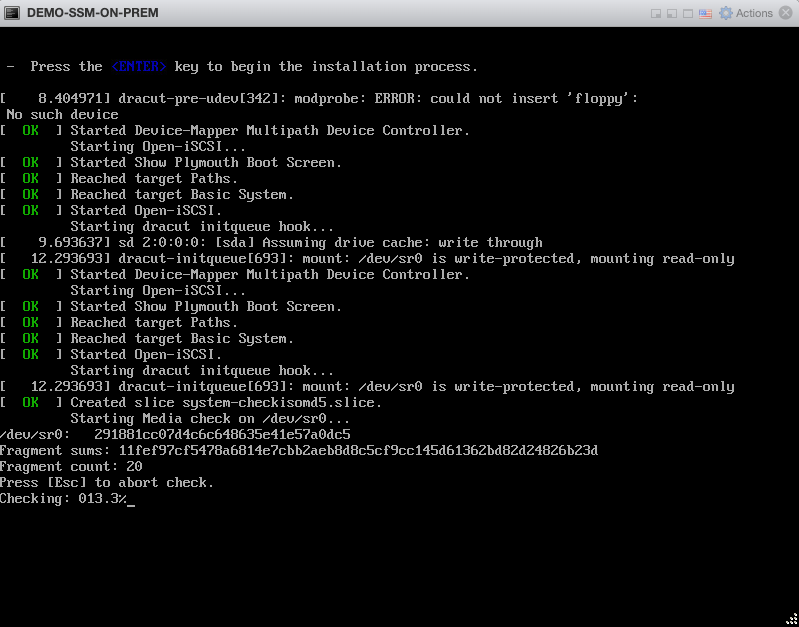
9. Open console for VM and choose Install Cisco SSm On-Prem. This state stays for about 1 minute, and then it enters the basic settings page.
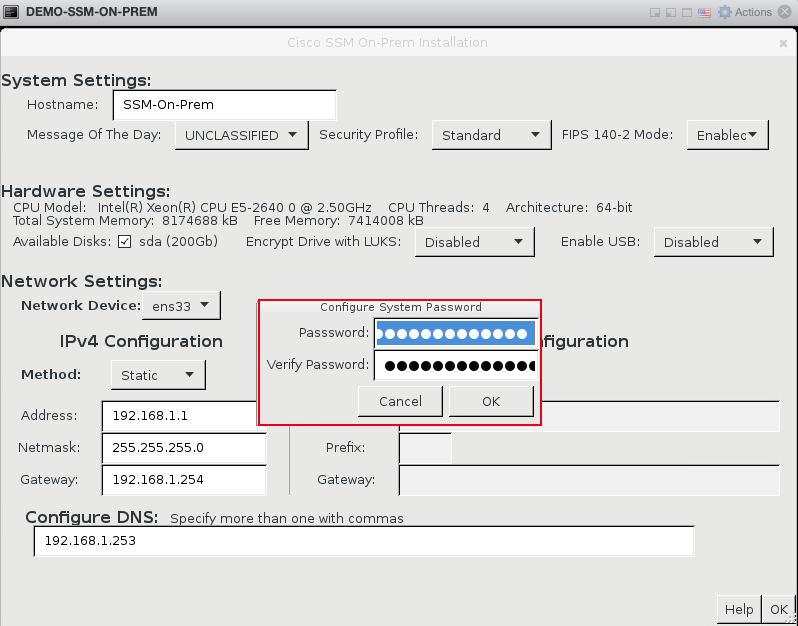
10. On this page, you need to fill in some SSM On-Prem configurations such as hostname, ip, dns and so on.

11. After clicking OK, the system asks you to set a password. The passwords you enter twice must be the same. This password is used to log in to the CLI later.
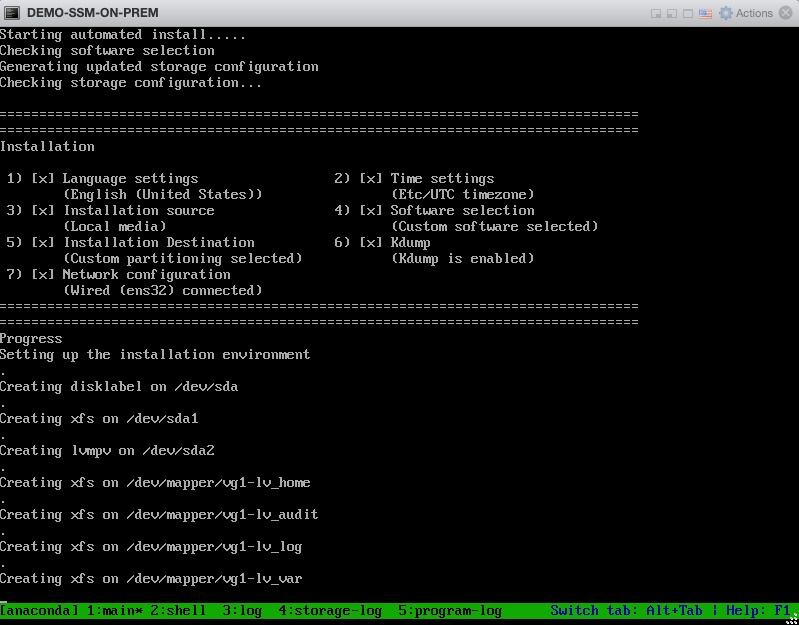
12. Then SSM On-Prem continues to install. The whole process takes about 30 minutes. Once completed, the VM automatically starts. Then, SSM On-Prem continues to install.
13. After the restart is complete, you can log in to the CLI to verify. The username is admin and the password is the one you just set.

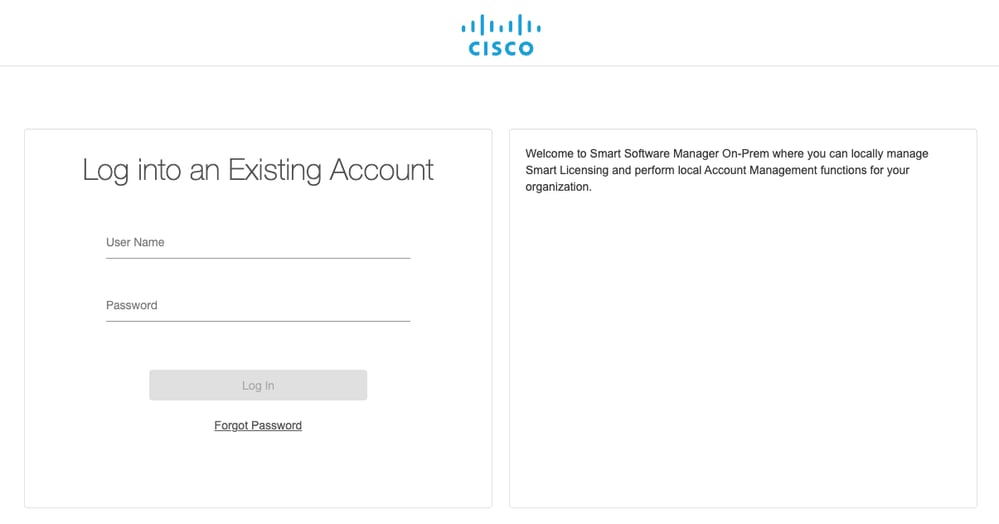
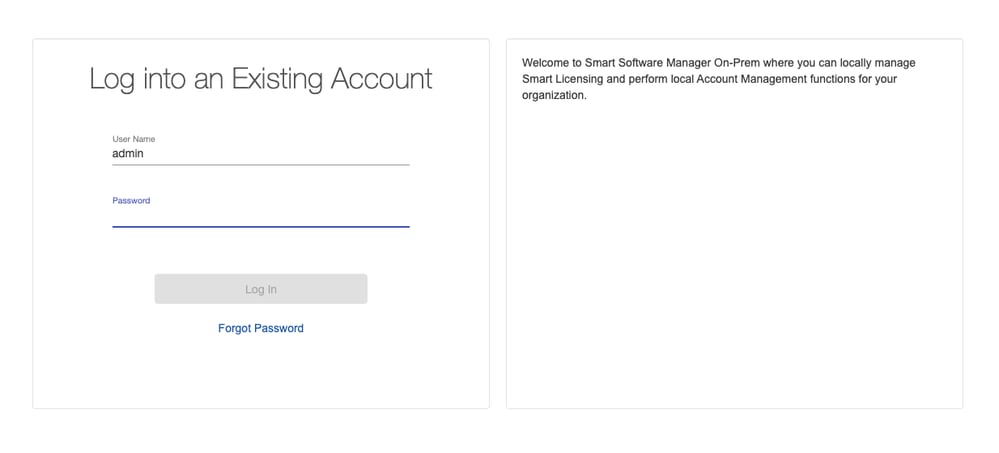
14.After the installation is complete, you can use your browser to log in to https://x.x.x.x:8443 and proceed to the next step. When the login screen displays, login using these credentials---admin/CiscoAdmin!2345, This is the initial password for the first login to On-Prem.
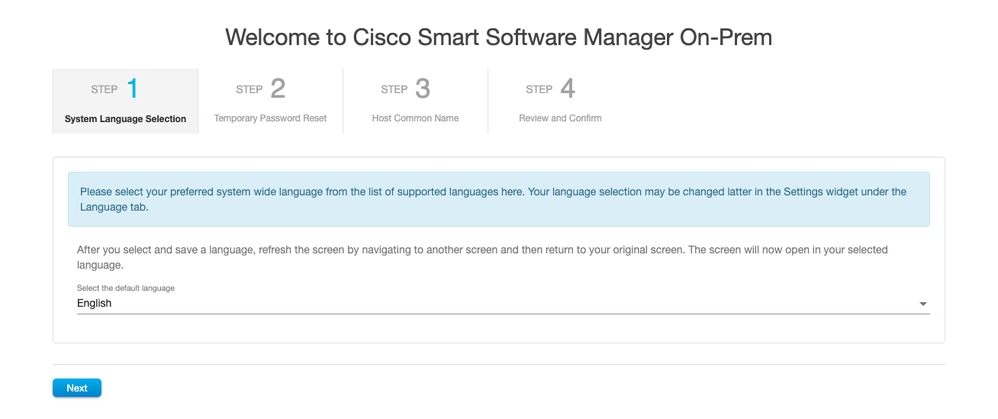
15. After clicking Log In, the On-Prem deployment enters the next stage, starting with System Language Selection.
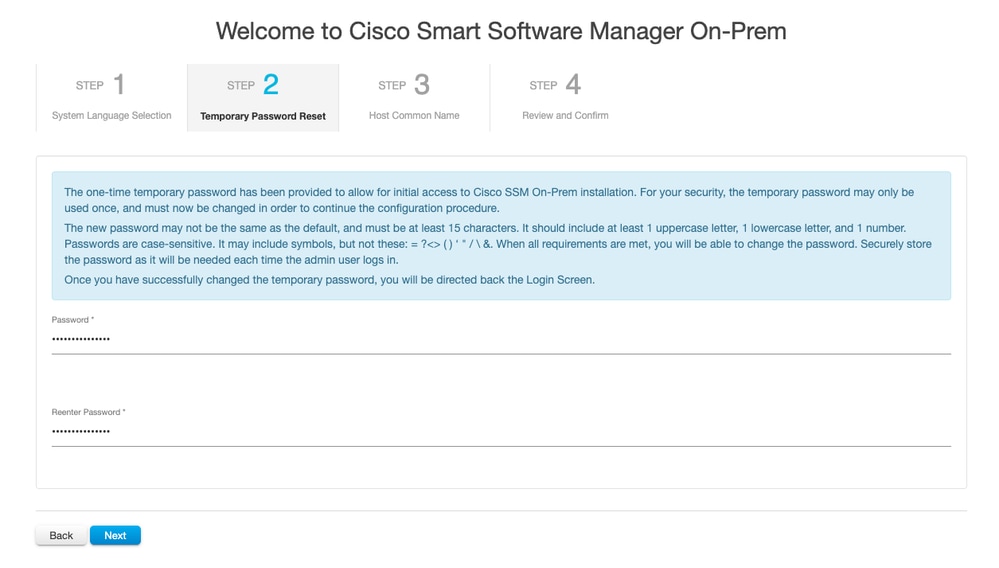
16. On the Temporary Password Reset page, this step resets the GUI password.
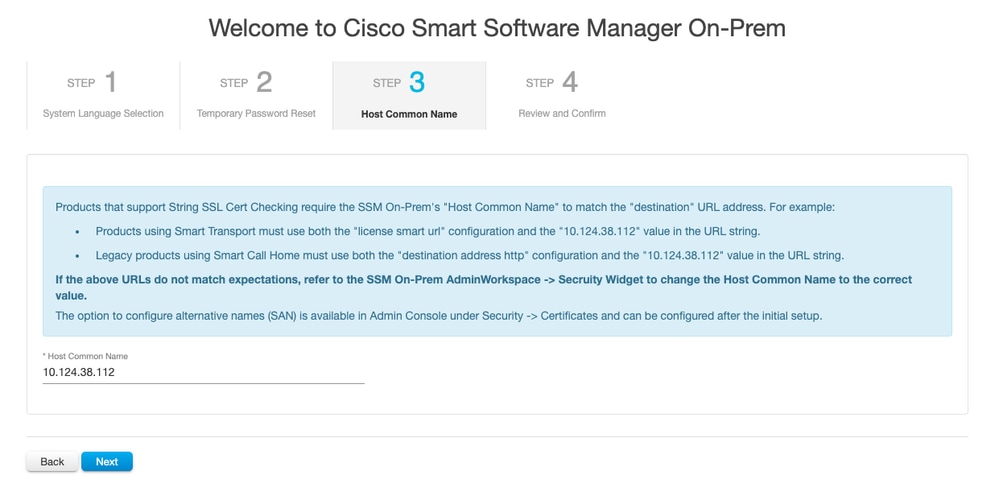
17. Next, please set the Host Common Name.
18. Finally, on the Review and Confirm page, please review the configuration just made.
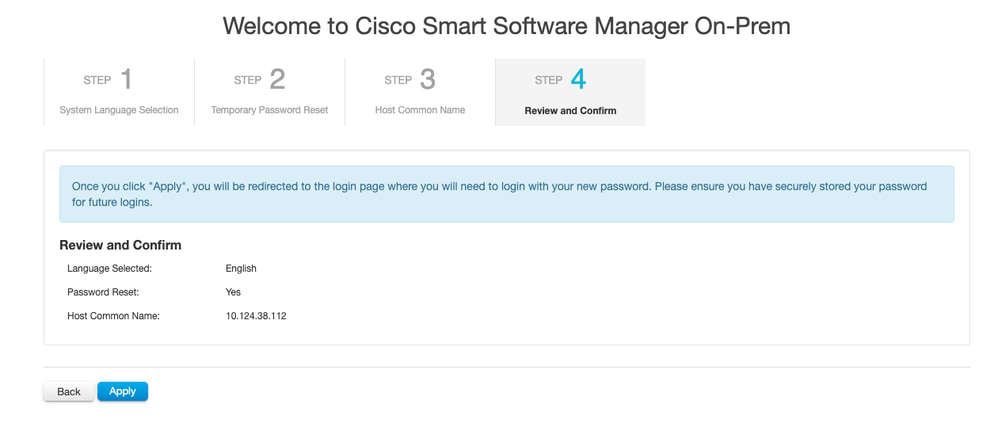
19. Once you click the Apply button, the page jumps. Please log in with your new password. The installation of SSM On-Prem is now complete.
Register Catalyst 9000 Series Switches
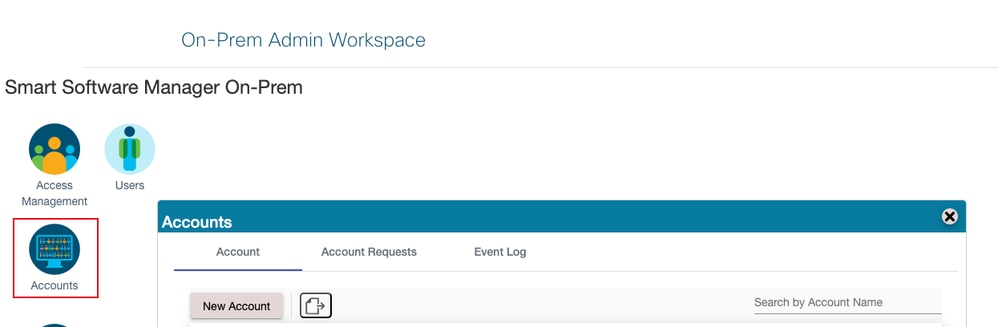
1. Click on Admin Workspace in the upper right corner to enter the On-Prem Admin Workspace.

2. Click Accounts on the left, create an account and activate it, please make sure the account status is Active. For information on how to Create a New Local Account and Re-Registering an Account, please refer to pages 77 to 82 of Cisco Smart Software Manager On-Prem User Guide .

3. Ensure network reachability for product instance-initiated communication.
#conf t
(config)#ip http server
(config)#ip http secure-server
(config)#ip http secure-trustpoint SLA-TrustPoint
(config)#ip http client source-interface g x/x/x
(config)#ip name-server x.x.x.x
(config)#ip domain lookup source-interface g x/x/x
(config)#ip domain name xxx

(config)#crypto pki trustpoint SLA-TrustPoint
(ca-trustpoint)#enrollment terminal
(ca-trustpoint)#revocation-check none

(config)#exit
#copy running-config startup-config
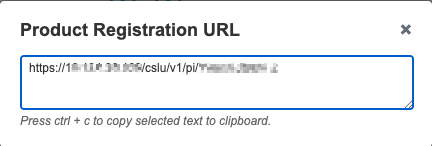
4. Retrieve the Transport URL from Smart Software Manager On-Prem > Smart Licensing > Inventory > General.
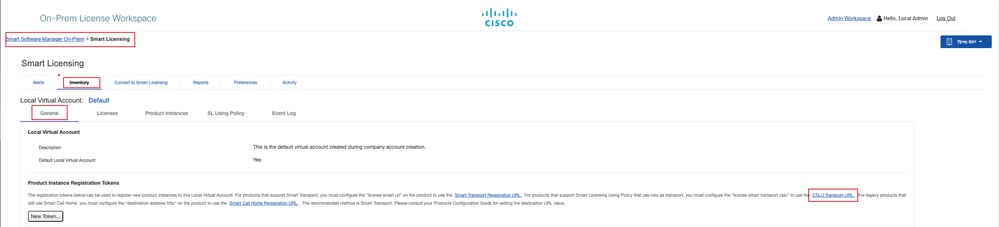
When you click the CSLU Transport URL, On-Prem returns this Product Registration URL.
5. Setting the Transport Type, URL on Catalyst switch.
#conf t
(config)#license smart transport cslu
(config)#license smart url cslu https://x.x.x.x/cslu/v1/pi/xxxxx%xxxx-x
(config)#exit
#copy running-config startup-config
6. Synchronize the product instance with SSM On-Prem, the switch actively initiates synchronization with SSM On-Prem.
#license smart sync all
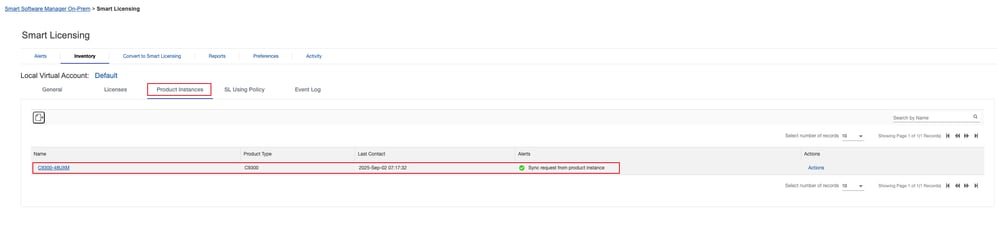
7. Check Product Instances for SSM On-Prem, The switch information can be observed, which means that the switch is synchronized with SSM On-Prem successfully.
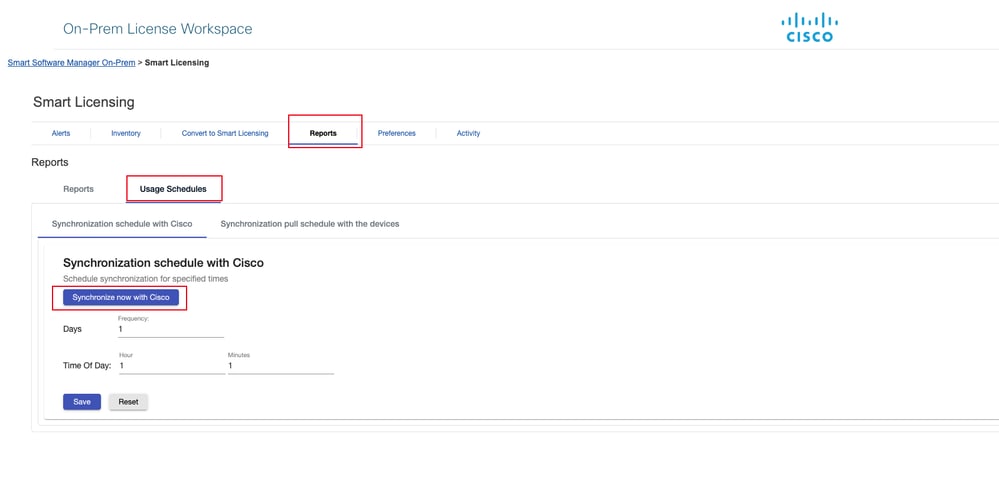
8. Next, synchronize the usage information on the SSM On-Prem with the Cisco SSM (CSSM) in Smart Software Manager On-Prem > Smart Licensing > Reports > Usage Schedules.
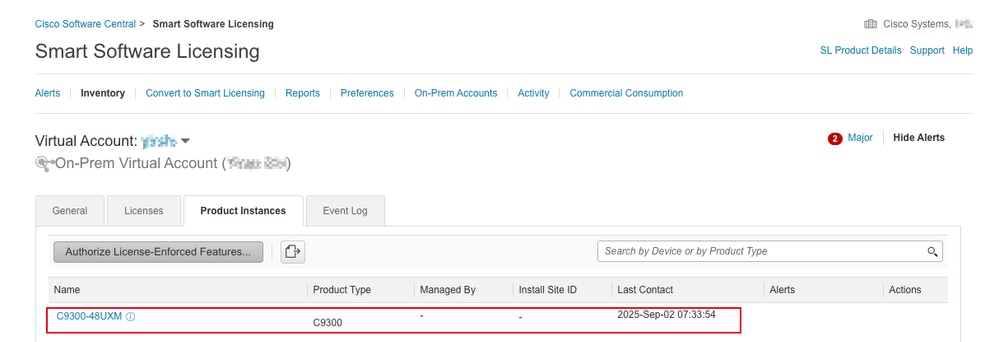
9. Log in to Smart Software Manager and check whether the synchronization with SSM On-Prem is successful.
Related Information
 Feedback