Introduction
This document describes the process of configuring Configure Microsoft O365 Tenant Restriction in Secure Web Appliance (SWA).
Prerequisites
Requirements
Cisco recommends knowledge of these topics:
- Access ToGraphic User Interface (GUI)of SWA
- Administrative Access to the SWA.
Components Used
This document is not restricted to specific software and hardware versions.
The information in this document was created from the devices in a specific lab environment. All of the devices used in this document started with a cleared (default) configuration. If your network is live, ensure that you understand the potential impact of any command.
Configuration Steps
|
Step 1. Create a Custom URL Category for the website.
|
Step 1.1. From the GUI Navigate to Web Security Manager and choose Custom and External URL Categories.
Step 1.2. Click Add Category to create a new Custom URL Category.
Step 1.3. Enter Name for the new category.
Step 1.4. Define these URLs in the Sites section:
login.microsoft.com, login.microsoftonline.com, login.windows.net
Step 1.5.Submit the changes.
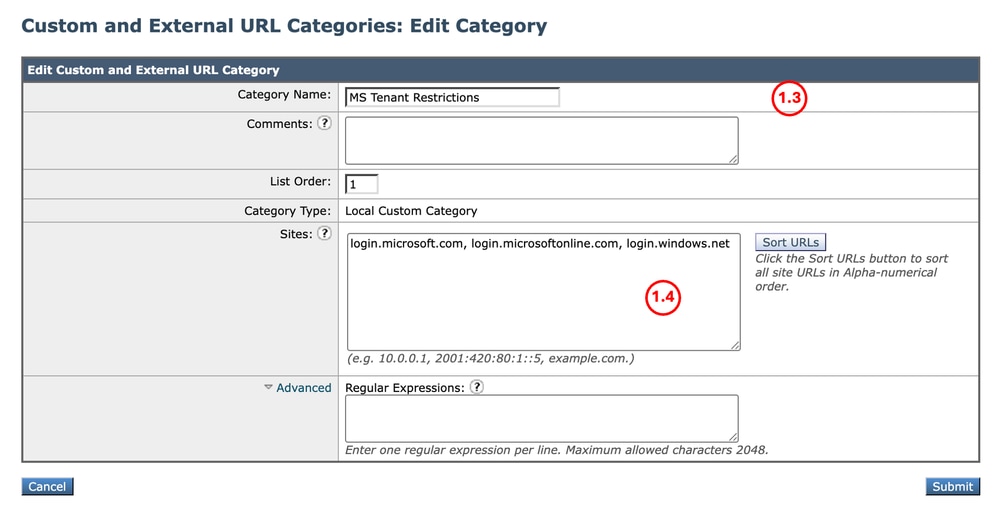 Image - Custom URL Category Image - Custom URL Category
Tip: For more information about how to configure Custom URL Categories, kindly visit: https://www.cisco.com/c/en/us/support/docs/security/secure-web-appliance-virtual/220557-configure-custom-url-categories-in-secur.html
|
|
Step 2. Decrypt the traffic.
|
Step 2.1. From the GUI, Navigate to Web Security Manager and choose Decryption Policies
Step 2.2. Click Add Policy.
Step 2.3. Enter Name for the new policy.
Step 2.4. Select the Identification Profile that you need this policy applies to.
Tip: If you bypassed the Authentications for Microsoft URLs and you are configuring this policy for All users, choose: All Identification Profiles > All Users
Step 2.5. From Policy Member Definition section, Click URL Categories links to add the Custom URL Category.
Step 2.6. Select the URL Category that was created in Step 1.
Step 2.7. Click Submit.
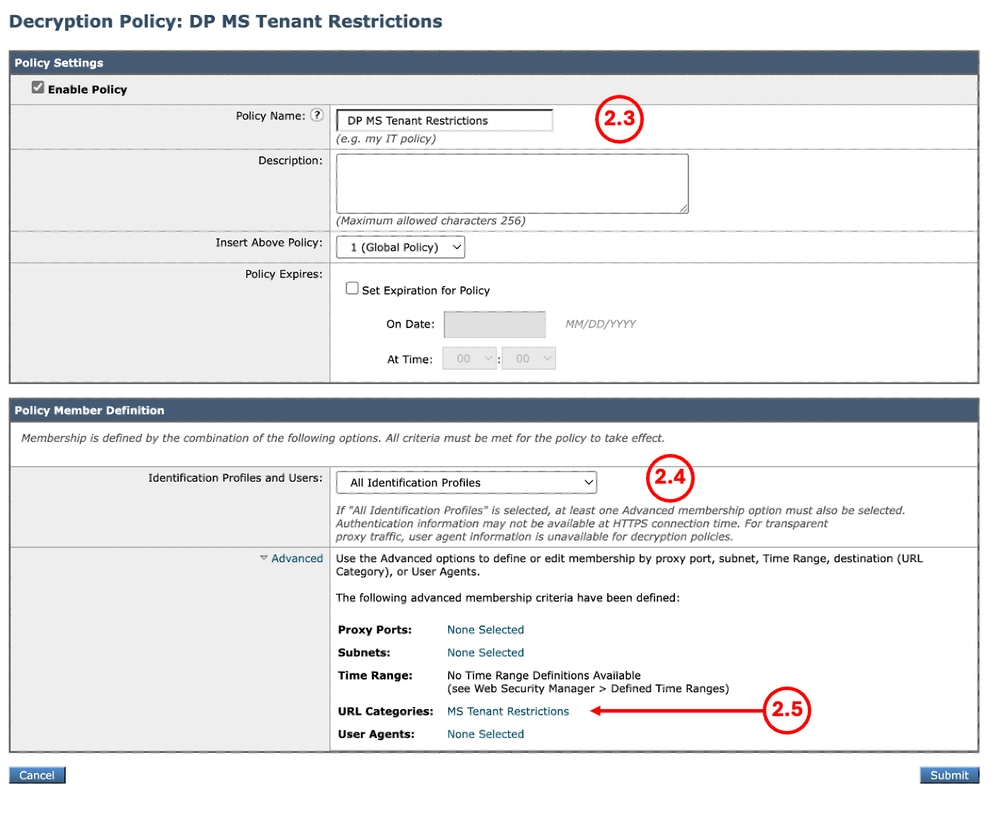 Image - Configure Decryption Policy Image - Configure Decryption Policy
Step 2.8. In Decryption Policies page, click the link from URL Filtering for the new policy.
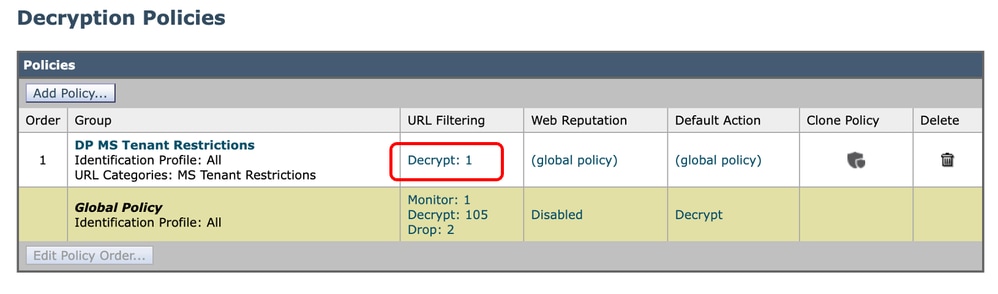 Image - Edit URL Filtering Action Image - Edit URL Filtering Action
Step 2.9. Choose Decrypt as the action for Custom URL Category.
Step 2.10. Click Submit.
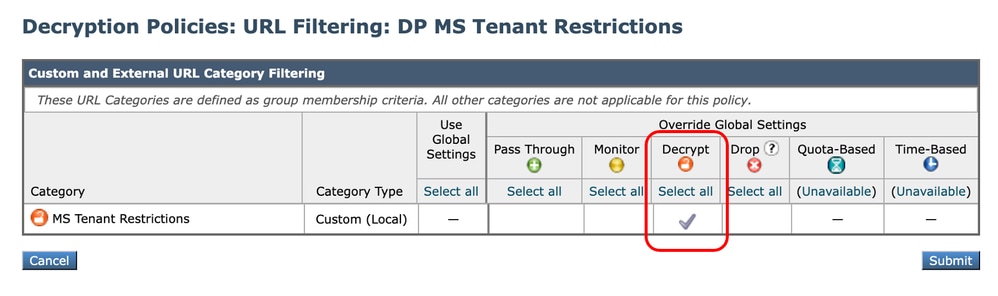 Image - Decrypt the Custom URL Category Image - Decrypt the Custom URL Category
|
|
Step 3. Create HTTP Rewrite Profile.
|
Step 3.1. From the GUI, Navigate to Web Security Manager and choose HTTP ReWrite Profiles.
Step 3.2. Click Add Profile.
Step 3.3. Enter Name for the new profile.
Step 3.4. Use Restrict-Access-To-Tenants for the first Header Name.
Step 3.5. For the Restrict-Access-To-Tenants setting, use a value of <permitted tenant list>, which must be a comma-separated list of the tenants that users are allowed to access.
Step 3.6. Click Add Row
Step 3.7. Use Restrict-Access-Context as the second Header Name.
Step 3.8. For the Restrict-Access-Context setting, use the value of a single directory ID to specify the tenant that is defining the tenant restrictions..
Step 3.9. Click Submit.
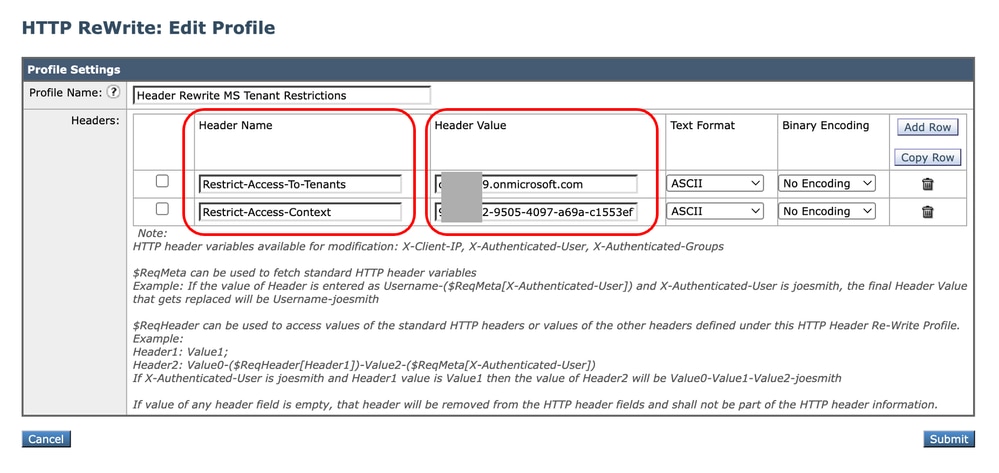 Image - Add HTTP ReWrite Profile Image - Add HTTP ReWrite Profile
Tip: For more information about Tenant Restriction and how to collect your tenant information, kindly visit: Microsoft Learn - Restrict access to a tenant.
|
|
Step 4. Create Access Policy.
|
Step 4.1. From the GUI, Navigate to Web Security Manager and choose Access Policies
Step 4.2. Click Add Policy.
Step 4.3. Enter Name for the new policy.
Step 4.4. Select the Identification Profile that you need this policy applies to.
Tip: If you bypassed the Authentications for Microsoft URLs and you are configuring this policy for All users, choose: All Identification Profiles > All Users.
Step 4.5. From Policy Member Definition section, Click URL Categories links to add the Custom URL Category.
Step 4.6. Select the URL Category that was created in Step 1.
Step 4.7. Click Submit.
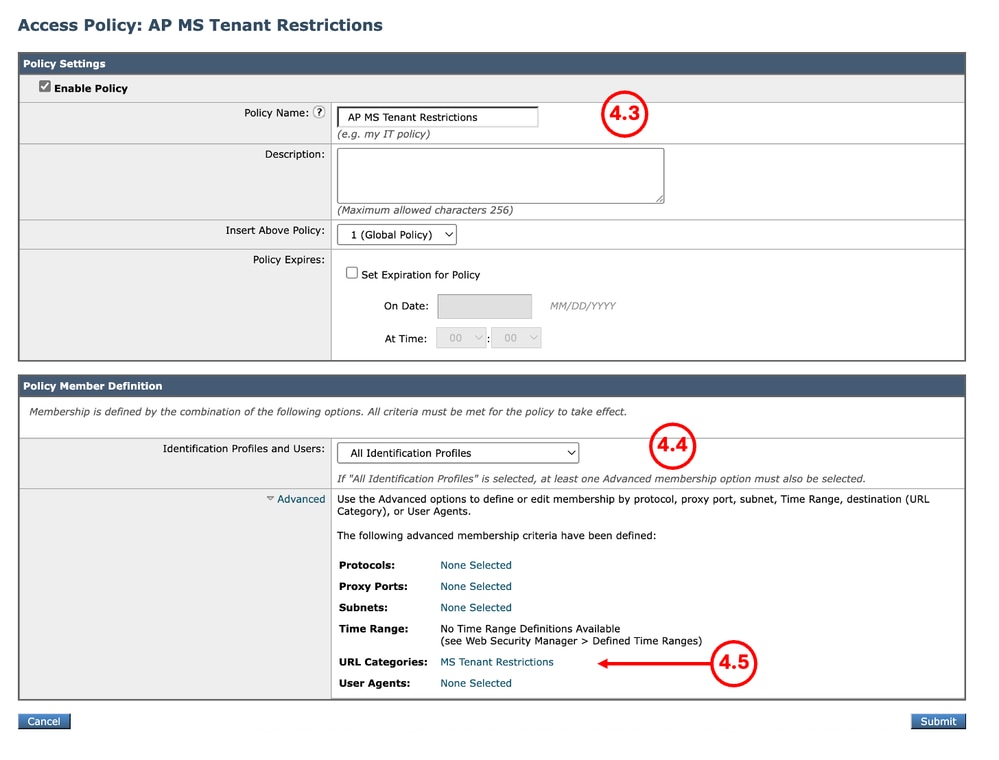 Image - Create Access Policy Image - Create Access Policy
Step 4.8. In Access Policies page, make sure the action of the URL Filtering is set to Monitor.
Step 4.9. Click on the link in HTTP ReWrite Profile to add the HTTP Header Profile to this policy.
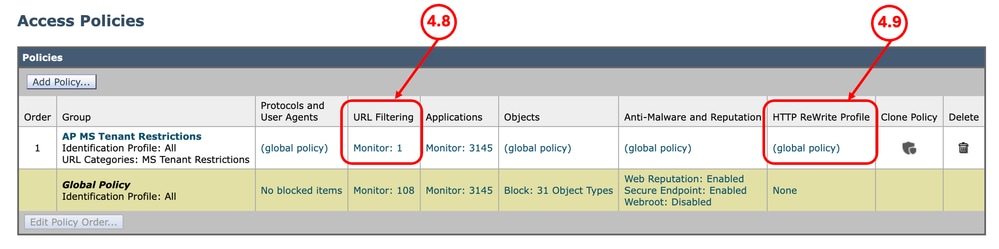 Image - Access Policy Properties Image - Access Policy Properties
Step 4.10. Choose the HTTP ReWrite Profiles, created in Step [3].
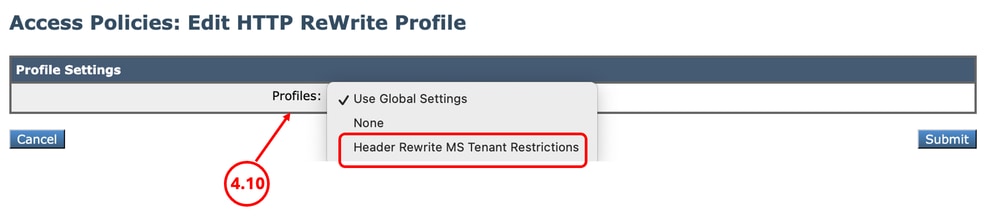 Image - Add HTTP ReWrite Profile Image - Add HTTP ReWrite Profile
Step 4.11. Click Submit.
Step 4.12. Commit Changes.
|
Reporting and Logs
Logs
You can add custom field to the access logs or the W3C logs to view the HTTP header rewrite profile name.
| Format Specifier in Access Logs |
Log Field in W3C Logs |
Description |
| %] |
x-http-rewrite-profile-name |
HTTP header rewrite profile name. |
Reporting
You can generate Web Tracking report to view the reports of the traffic by the AccessPolicy name.
Use these steps to generate the reports:
Step 1. From the GUI, select Reporting and choose Web Tracking.
Step 2. Choose your desired Time Range.
Step 3. Click the Advanced link to search transactions using advanced criteria.
Step 4. In the Policy section, select Filter by Policy and type the name of the Access Policy that was created previously.
Step 5. Click Search to review the report.
 Image - Web Tracking Report
Related Information
 Feedback