Introduction
This document describes how to configure Cisco Identity Services Engine (ISE) to authenticate administrator logins on Arista switches using RADIUS.
Prerequisites
Requirements
Before proceeding, ensure that:
- Cisco ISE (version 3.x recommended) is installed and operational.
- Arista switch running EOS with RADIUS support.
- Active Directory (AD) or Internal User Database configured in ISE.
Components Used
The information in this document is based on these software and hardware versions:
- Arista switch Software image version: 4.33.2F
- Cisco Identity Services Engine (ISE) version 3.3 Patch 4
The information in this document was created from the devices in a specific lab environment. All of the devices used in this document started with a cleared (default) configuration. If your network is live, ensure that you understand the potential impact of any command.
Network Diagram
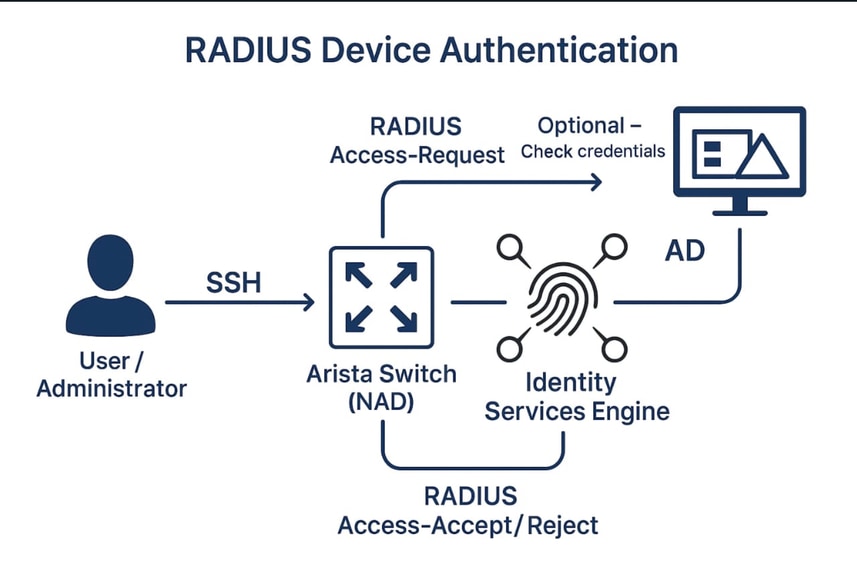
Here is a network diagram illustrating RADIUS-based device authentication for an Arista switch using Cisco ISE, with Active Directory (AD) as an optional authentication source.
The diagram includes:
-
Arista Switch (acting as the Network Access Device, NAD)
-
Cisco ISE (acting as the RADIUS server)
-
Active Directory (AD) [Optional] (used for identity verification)
-
User/Administrator (who logs in via SSH)
Configure
Configuring Cisco ISE
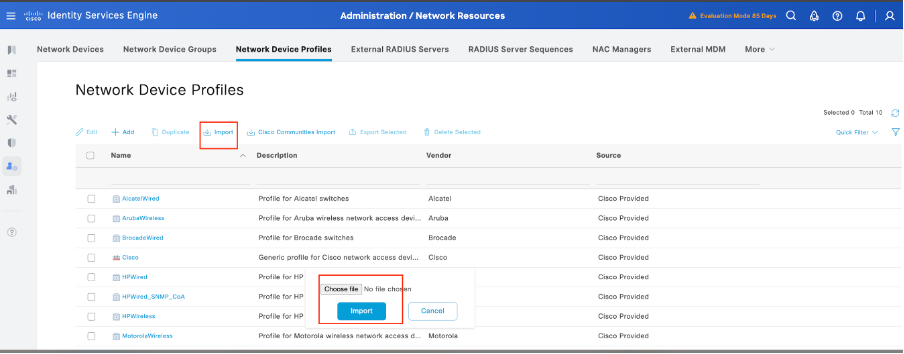
Step 1. Obtaining the Arista Network Device Profile for Cisco ISE
The Cisco Community has shared a dedicated NAD profile for Arista devices. This profile, along with the necessary dictionary files, can be found in the article Arista CloudVision WiFi Dictionary and NAD Profile for ISE Integration. Downloading and importing this profile into your ISE setup facilitates smoother integration.
These are the steps to Import the Arista NAD Profile into Cisco ISE:
- Download the Profile:
- Obtain the Arista NAD profile from the Cisco Community link provided above.Cisco Community.
- Access Cisco ISE:
- Log in to your Cisco ISE administrative console.
- Import the NAD Profile:
- Navigate to Administration > Network Resources > Network Device Profiles.
- Click on the Import button.
- Upload the downloaded Arista NAD profile file.
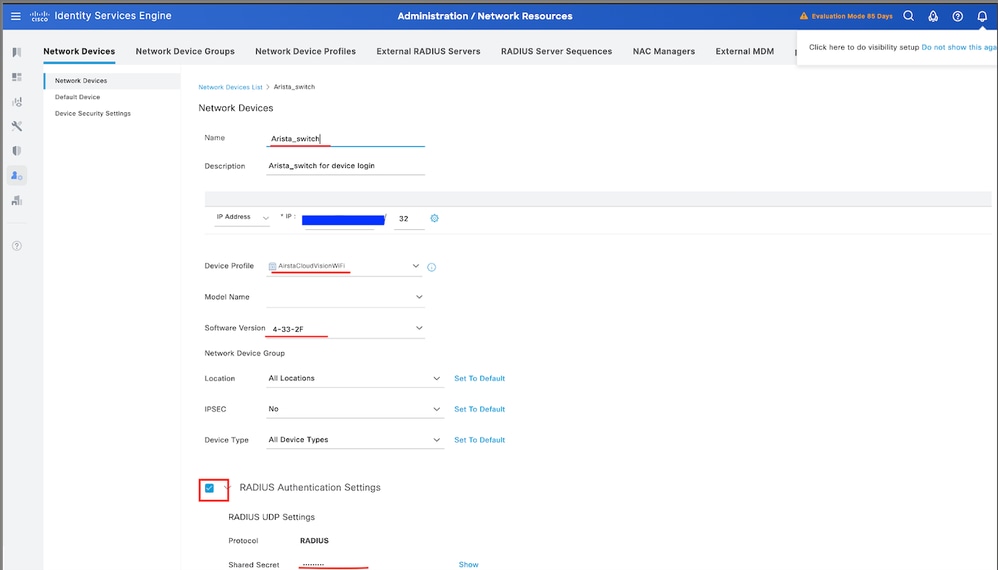
Step 2. Add Arista Switch as a Network Device
- Navigate to Administration > Network Resources > Network Devices> +Add.

2. Click Add and enter these details:
- Name: Arista-Switch
- IP Address: <Switch-IP>
- Device Type: Choose Other Wired
- Network Device Profile: select AirstaCloudVisionWiFi.
- RADIUS Authentication Settings:
- Enable RADIUS Authentication
- Enter the Shared Secret (must match switch configuration).
3. Click Save.
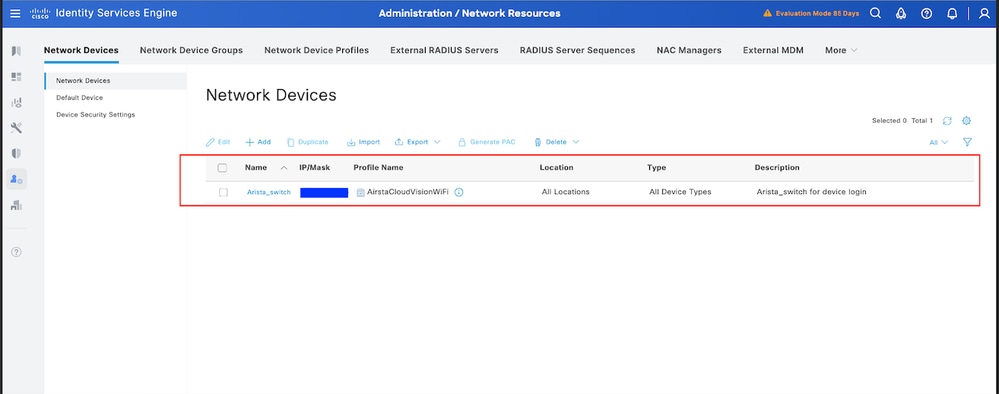
Step 3. Validate the New Device is Shown under Network Devices
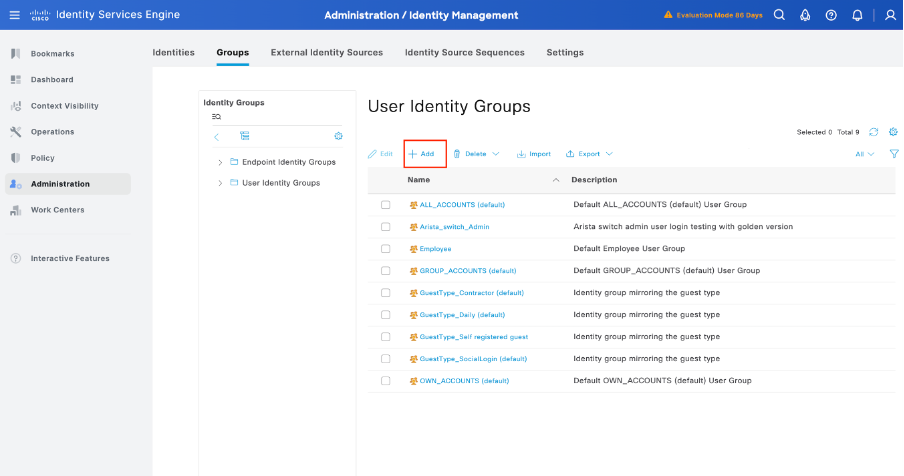
Step 4. Create the Required User Identity Groups
Navigate to Administration > Identity Management > Groups > User Identity Groups > + Add:
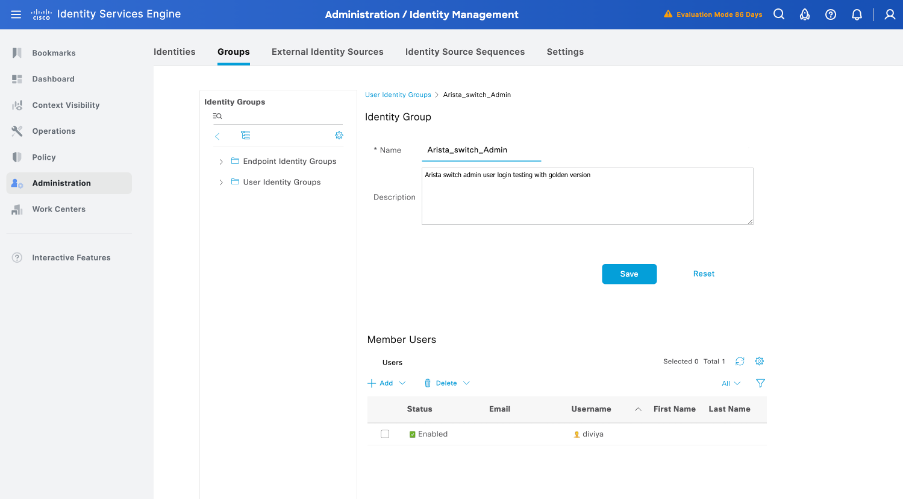
Step 5. Set a name for the Admin User Identity Group
Click Submit in order to save the configuration:
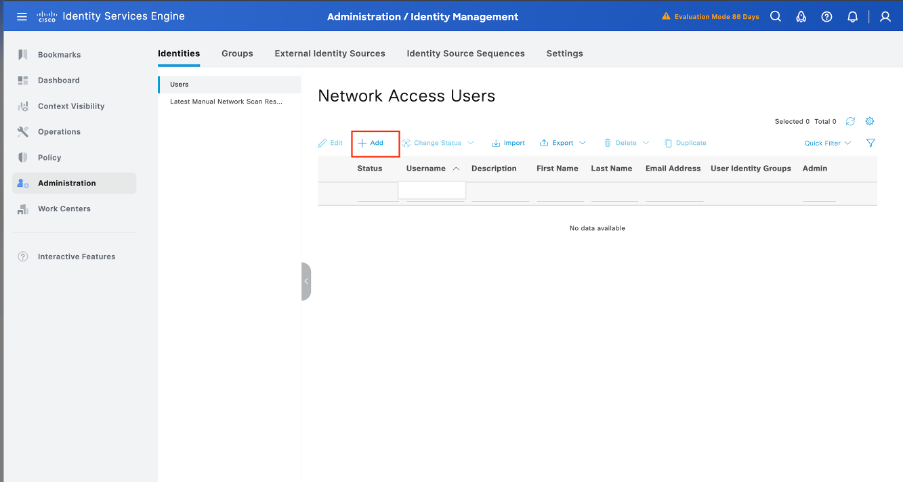
Step 6. Create the Local Users and Add them to their Correspondent Group
Navigate to Administration > Identity Management > Identities > + Add:
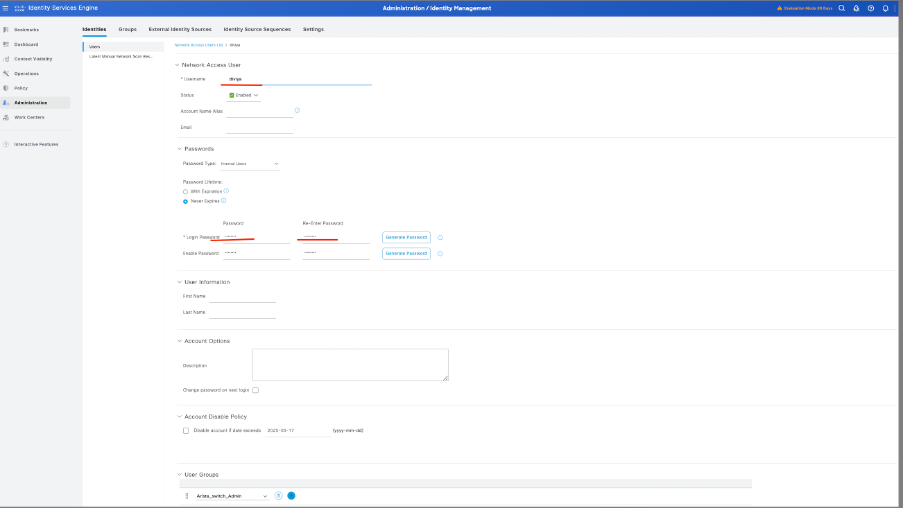
6.1. Add the user with Administrator rights. Set a name, password, and assign it to Arista_switch_Admin, scroll down and click Submit to save the changes.
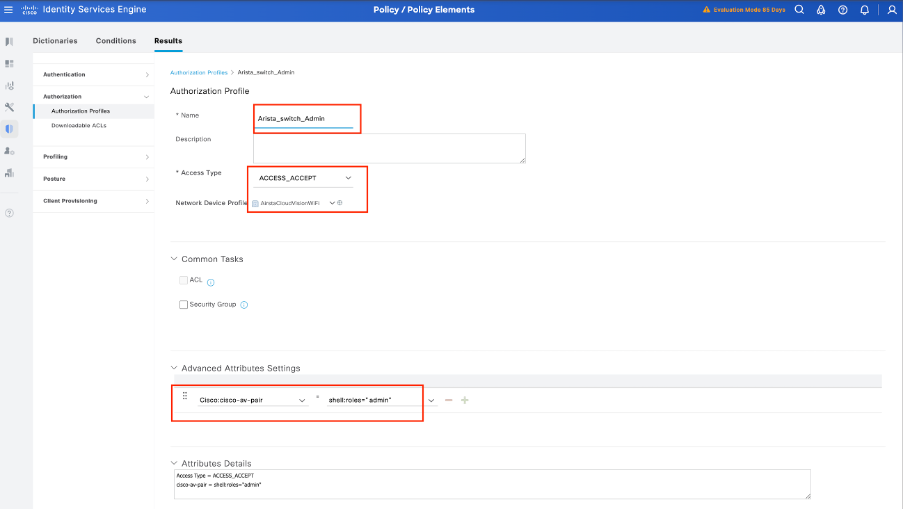
Step 7. Create the Authorization Profile for the Admin User
Navigate to Policy > Policy Elements > Results > Authorization > Authorization Profiles > +Add.
Define a name for the Authorization Profile, leave Access Type as ACCESS_ACCEPT and under Advanced Attributes Settings add cisco-av-pair=shell:roles="admin" with and click Submit.
Step 8. Create a Policy Set Matching the Arista Switch IP Address
This is to prevent other devices from granting access to the users.
Navigate to Policy > Policy Sets >Add icon sign at the upper left corner.
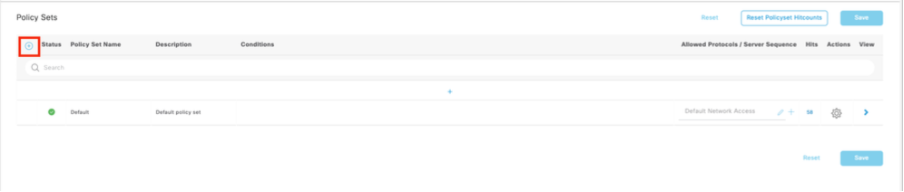
8.1 A new line is placed at the top of your Policy Sets. Click the Add icon to configure a new condition.

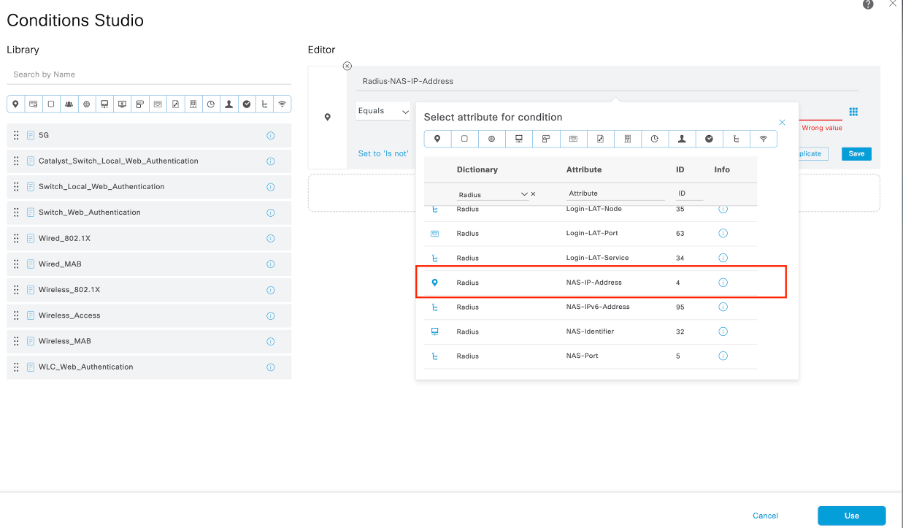
8.2 Add a top condition for RADIUS NAS-IP-Address attribute matching the Arista switch IP address, then click Use.
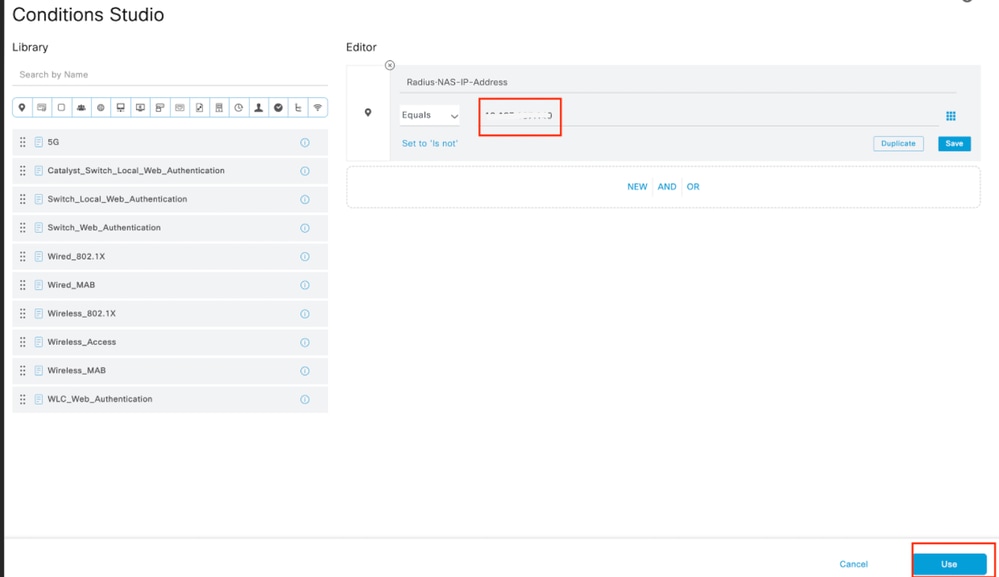
8.3 Once completed, click Save:
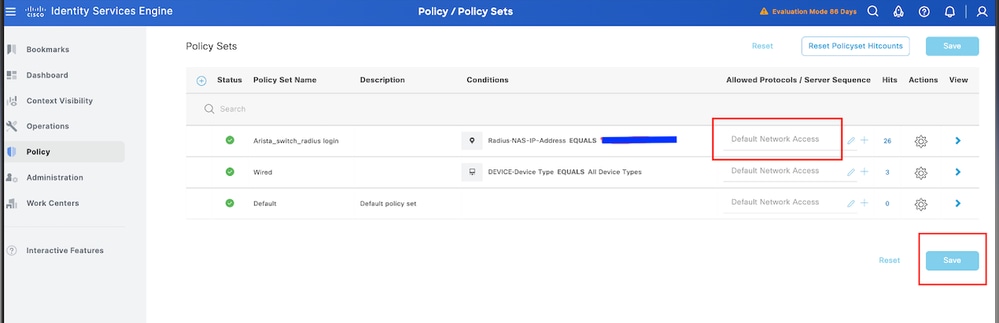

Tip: For this exercise we have allowed the Default Network Access Protocols list. You can create a new list and narrow it down as needed.
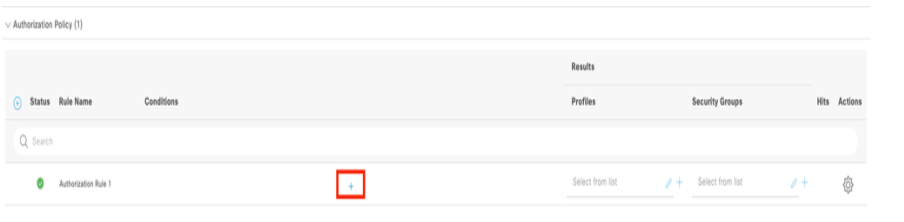
Step 9. View the New Policy Set
Click the > icon placed at the end of the row:

9.1 Expand the Authorization Policy menu and click in (+) to add a new condition.
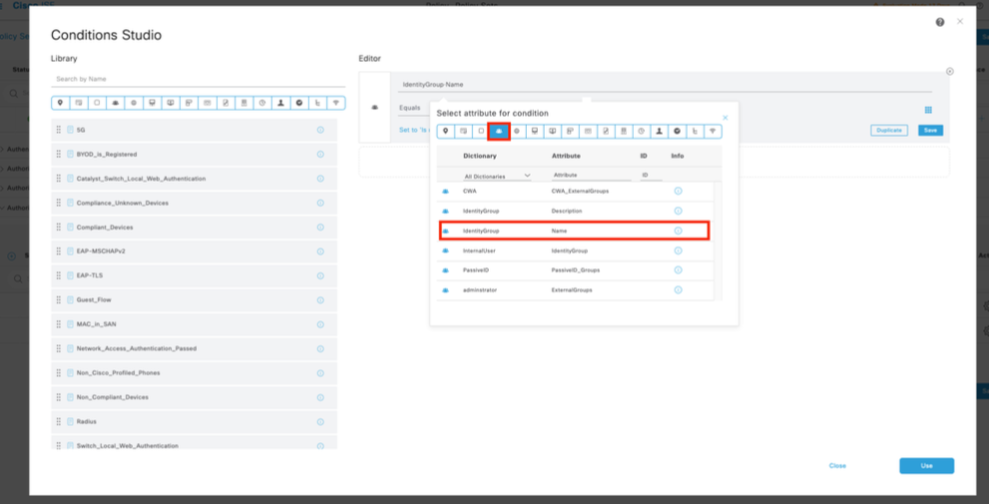
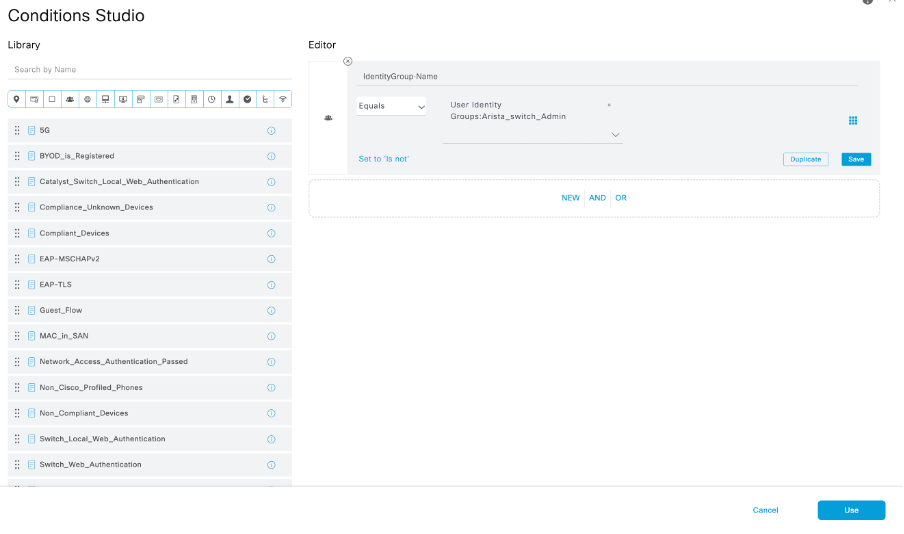
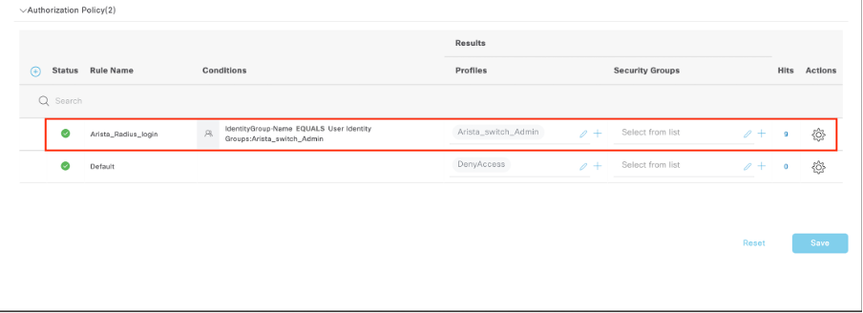
9.2 Set the conditions to match the Dictionary Identity Group with Attribute Name Equals User Identity Groups: Arista_switch_Admin (the group name created in Step 7) and click Use.
9.3 Validate the new condition is configured in the Authorization policy, then add a User profile under Profiles:
Configuring Arista Switch
Step 1. Enable RADIUS Authentication
Log in to the Arista switch and enter configuration mode:
configure
!
radius-server host <ISE-IP> key <RADIUS-SECRET>
radius-server timeout 5
radius-server retransmit 3
radius-server deadtime 30
!
aaa group server radius ISE
server <ISE-IP>
!
aaa authentication login default group ISE local
aaa authorization exec default group ISE local
aaa accounting exec default start-stop group ISE
aaa accounting commands 15 default start-stop group ISE
aaa accounting system default start-stop group ISE
!
end
Step 2. Save Configuration
To persist settings across reboots:
write memory
or
copy running-config startup-config
Verify
ISE Review
1. Attempt to log into the Arista Switch using the new Radius credentials:
1.1 Navigate to Operations > Radius > Live logs.
1.2 The information displayed shows if a user logged successfully.
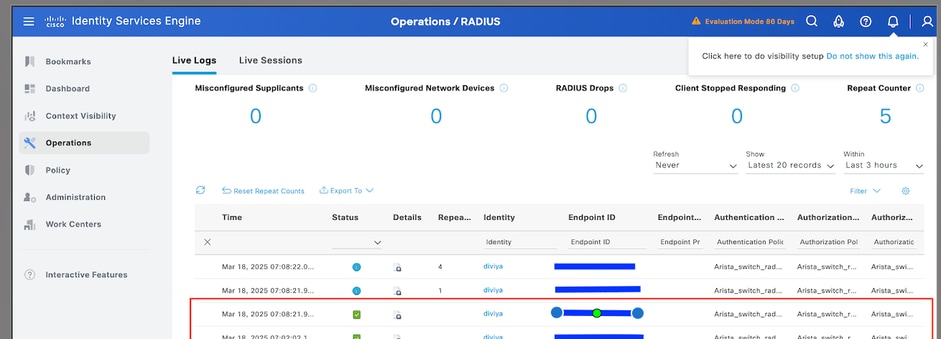
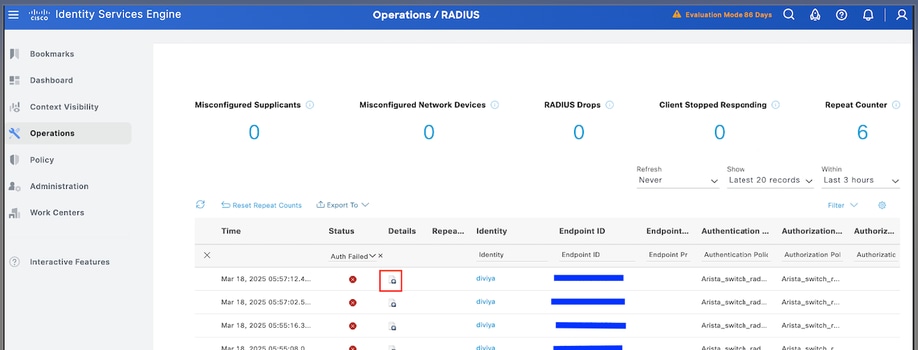
2. For failed status, review the details of the session:
3. For requests not showing in Radius Live logs , review if UDP request is reaching the ISE node through a packet capture.
3.1. Navigate to Operations > Troubleshoot > Diagnostic Tools > TCP dump.
3.2. Add a new capture and download the file to your local machine in order to review if the UDP packets are arriving to the ISE node.
3.3. Fill the requested information, scroll down and click Save.

3.4. Select and start the capture.
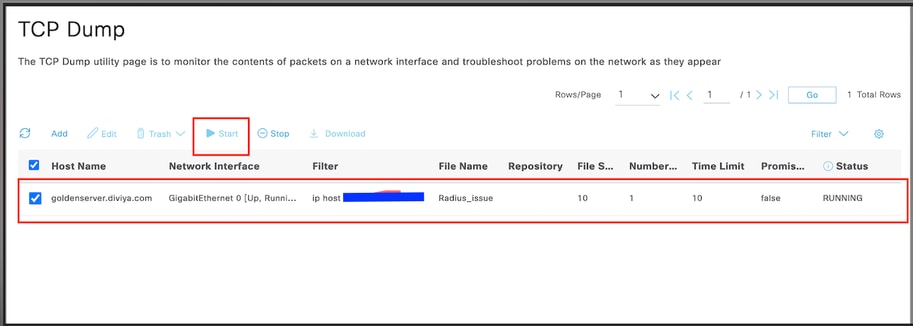
3.5. Attempt to log to the Arista Switch while the ISE capture is running.
3.6. Stop the TCP Dump in ISE and download the file to a local machine.
3.7. Review traffic output.
Expected output:
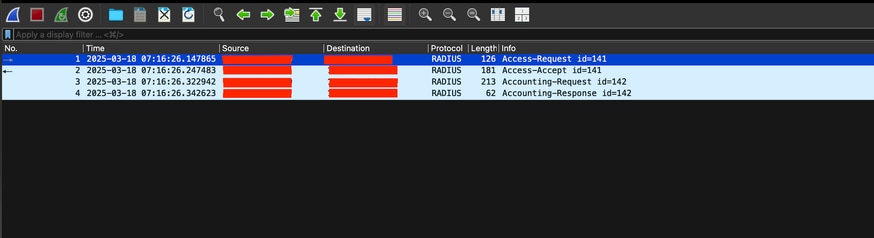
Packet No1. Request from the Arista Switch to the ISE server through Port 1812 (RADIUS).
Packet No2. ISE server reply accepting the initial request.
Troubleshooting
Scenario 1. "5405 RADIUS Request dropped"
Problem
This scenario involves troubleshooting a "5405 RADIUS Request dropped" error with the reason "11007 Could not locate Network Device or AAA Client" in Cisco ISE when a network device (such as an Arista switch) tries to authenticate.
Possible Causes
-
The Cisco Identity Services Engine (ISE) cannot identify the Arista switch because its IP address is not listed among known network devices.
-
The RADIUS request comes from an IP address that ISE does not recognize as a valid network device or AAA client.
-
There can be a mismatch in configuration between the switch and the ISE (such as an incorrect IP or shared secret).
Solution
-
Add the switch to the Cisco ISE list of network devices with the correct IP address.
-
Verify that the IP address and shared secret configured in ISE match exactly what is set on the switch.
-
Once corrected, the RADIUS request must be properly recognized and processed.
Scenario 2: Arista Switch Fails to Failover to Backup ISE PSN
Problem
An Arista switch is configured to use Cisco ISE for RADIUS authentication. When the primary ISE Policy Service Node (PSN) becomes unavailable, the switch does not automatically fail over to a backup PSN. As a result, authentication logs only appear from the primary ISE PSN, and there are no logs from the secondary/backup PSN when the primary is down.
Possible Causes
-
The RADIUS server configuration of the Arista switch only points to the primary ISE node, so backup servers are not used.
-
RADIUS server priority is not properly set, or the backup ISE IP is missing from the configuration.
-
Timeout and retransmit settings on the switch are set too low, preventing successful fallback to the backup PSN.
-
The switch uses a FQDN for the PSN, but DNS resolution does not return all A-records, causing only the primary server to be contacted.
Solution
- Ensure that multiple ISE PSN IPs are entered in the RADIUS server group configuration of the switch. This allows the switch to use the backup ISE PSN if the primary is unreachable.
Example configuration:
radius-server host <ISE1-IP> key <secret>
radius-server host <ISE2-IP> key <secret>
 Feedback