Introduction
This document describes how to reset SSH keys for Azure ISE VMs.
Prerequisites
- Basic ISE knowledge
- Access to ISE Console through Microsoft Azure
- Access to ISE GUI
- Privileges to create new key pairs in Microsoft Azure
Requirements
Components Used
The information in this document was created from the devices in a specific lab environment. All of the devices used in this document started with a cleared (default) configuration. If your network is live, ensure that you understand the potential impact of any command.
Configure
-
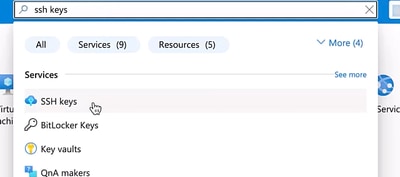
In Microsoft Azure, look for SSH keys service.
-
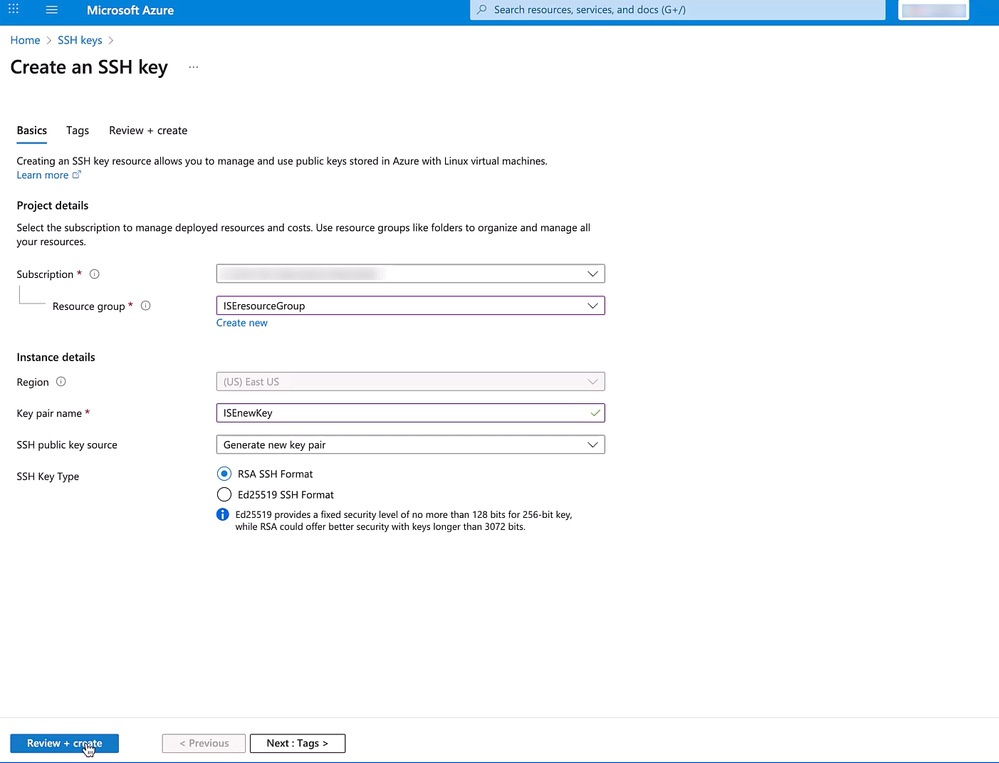
Click Create to create a new SSH key. Select your Subscription and your Resource Group. Specify a custom name for your new SSH key. For the SSH public key source field, select the option for Generate new key pair and for SSH Key Type select RSA SSH Format. Finally, click Review + Create to validate and create the key.
- When the key is created, a new window appears. Click Download private key and create resource.
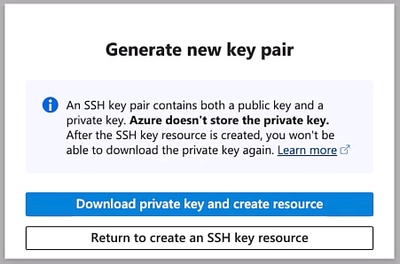

Caution: It is important to keep this private key safely as this is the only moment in which Azure allows you to download this private key. Azure does not store this private key and cannot be downloaded from anywhere else.
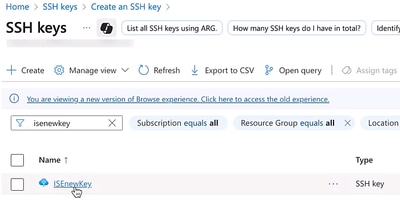
- Now, navigate back to the SSH Keys service and look for your newly created key and click it to see its overview.
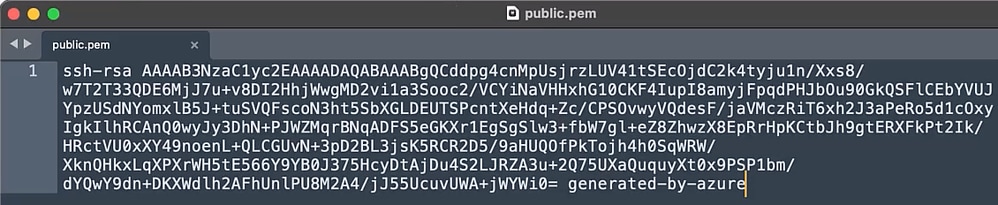
- On the overview of the key, you see the Public key. Copy this text and paste it on a text editor so you can save it as a local file with .pem extension. In this guide, the file is saved as public.pem .


Tip: You can click the Copy to clipboard button to copy the public key string.
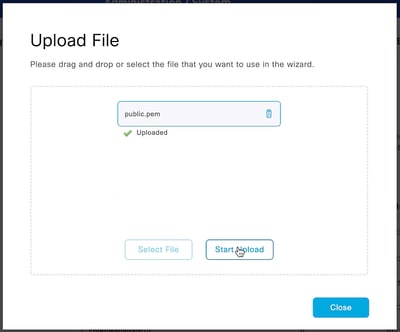
- Upload this public key to ISE localdisk. To do so, navigate to ISE > Administration > System > Maintenance > Local Disk Management. Click your ISE Hostname, then click Upload and then click Select File and locate and select the public key in your local computer. Finally click Start Upload .
- Create a repository that points to ISE local disk so you can use it to install the public key, in this example our repository is called local.
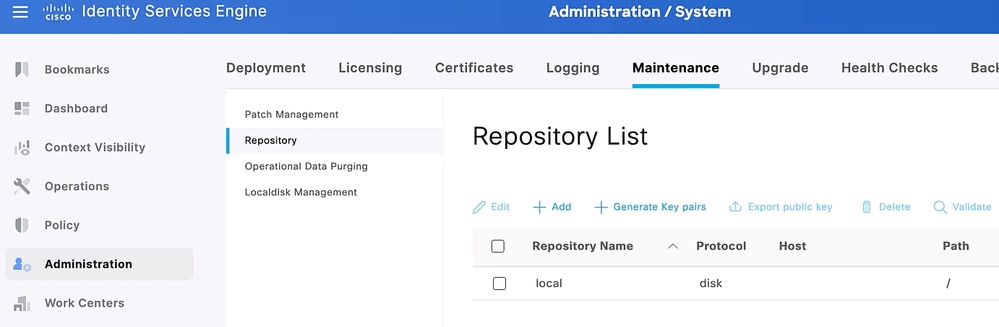

Note: If you wish you can upload the public key file to a different repository that is already created on ISE, it is not required to be local disk.
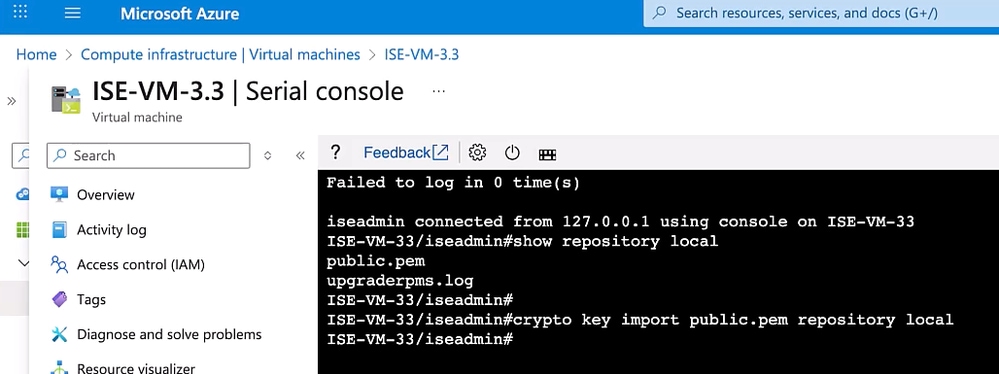
- Log in into ISE Serial Console from Azure using the username for which you want to reset the SSH key.
9. Verify that public key (.pem file) is located properly in the repository and install the key with the command crypto key import { name of the public key file } repository { name of the repository }.
Verify
To SSH into ISE using the new key pairs, you need to use the private key as your identification while loging in.
- Assign proper permissions to the private key (the one downloaded in Step 3)
From macOS terminal:
chmod 600 { private key file }
From Windows:
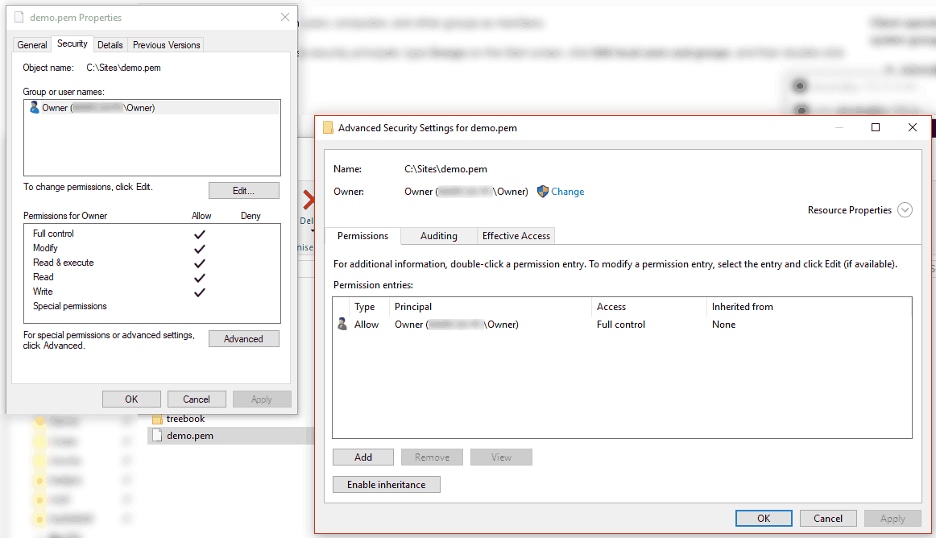
Locate the file in Windows Explorer, right-click on it then select Properties. Navigate to the Security tab and click Advanced.
Change the owner to you, disable inheritance and delete all permissions. Then grant yourself Full control and save the permissions.
- SSH into ISE using the new private key, the ISE username, and the ISE IP address or FQDN.
From macOS terminal:
ssh -I { private key file } { username }@{ ISE IP or FQDN }
From Windows CMD:
ssh -i "{ private key file }" { username }@{ ISE IP or FQDN }
Troubleshoot
- Ensure to copy the complete text of the public key file into your .pem file.
- Ensure the repository contains the public key file.
- If the crypto command fails to install the public key on ISE, raise a ticket with Cisco TAC so the key can be manually installed from root. Common error for this operation is "% Error: Unable to update authorized key file."
 Feedback