-
Cisco MDS 9000 Family Fabric Manager Quick Configuration Guide
-
Index
-
Preface
-
Overview
-
Initial Switch Configuration
-
Installing Fabric Manager
-
Fabric Manager Client
-
Configuring VSANs and Interfaces
-
Configuring Zones and Zone Sets
-
Launching Fabric Manager in Cisco SAN-OS Releases Prior to 3.2(1)
-
Quick Config Wizard
-
Configuring Static Domain IDs and Persistent FC IDs
-
Configuration Files
-
 Feedback
Table Of Contents
Quick Config Wizard
As of Cisco SAN-OS Release 3.1(1) and later, you can use the Quick Config Wizard on the Cisco MDS 9124 Switch to add or remove zone members per VSAN. You can use the Quick Config Wizard to perform interface-based zoning and to assign zone members for multiple VSANs using Device Manager.
Note
The Quick Config Wizard is supported on the Cisco MDS 9124 Switch only.
Caution
Adding or Removing Zone Ports
To add or remove ports from a zone and to zone only the devices within a specific VSAN using Device Manager on the Cisco MDS 9124 Switch, follow these steps:
Step 1
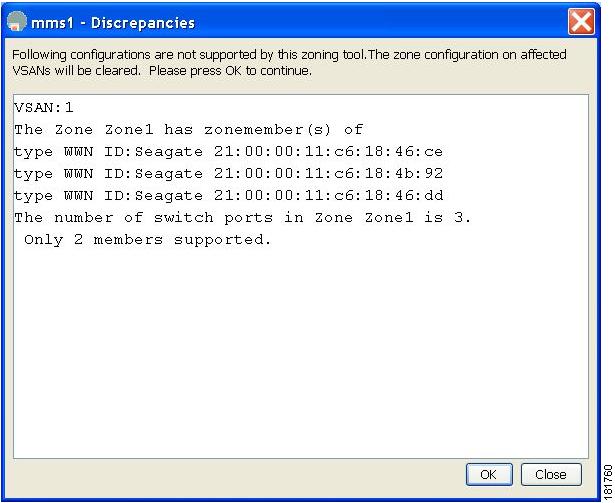
You see the Quick Config Wizard (see Figure B-2) with all controls disabled and the Discrepancies dialog box (see Figure B-1), which shows all unsupported configurations.
Note
Figure B-1 Discrepancies Dialog Box
Step 2
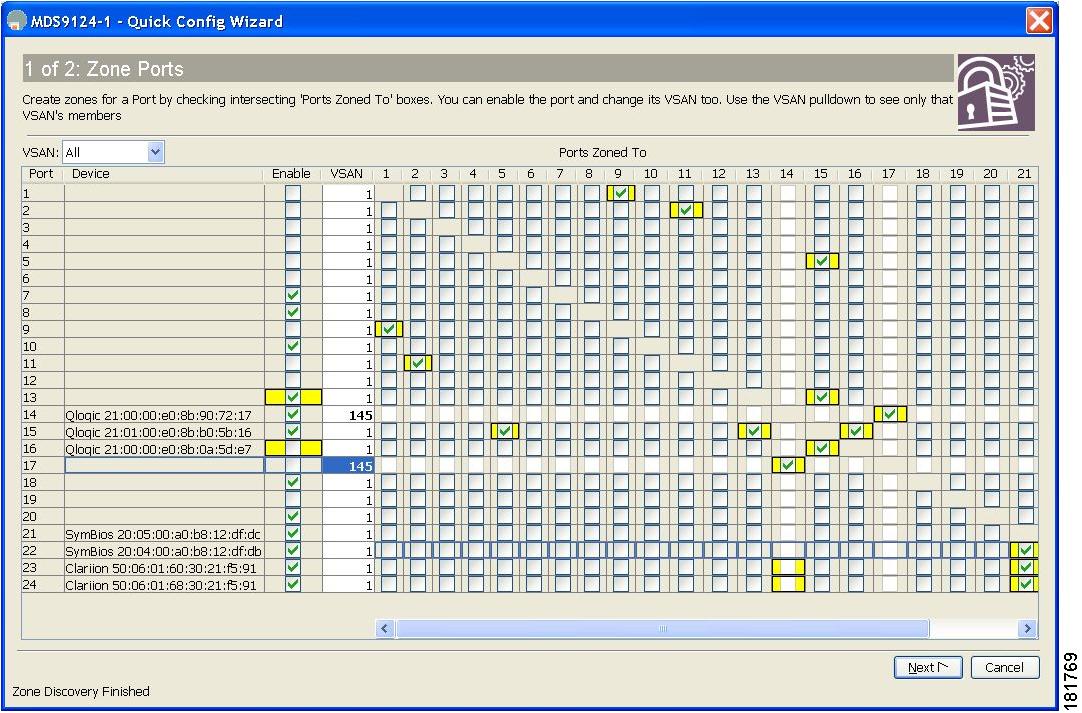
You see the Quick Config Wizard dialog box shown in Figure B-2.
Caution
Figure B-2 Quick Config Wizard
Step 3
The VSAN pull-down menu provides a filter that enables you to zone only those devices within a selected VSAN.
Step 4
Step 5
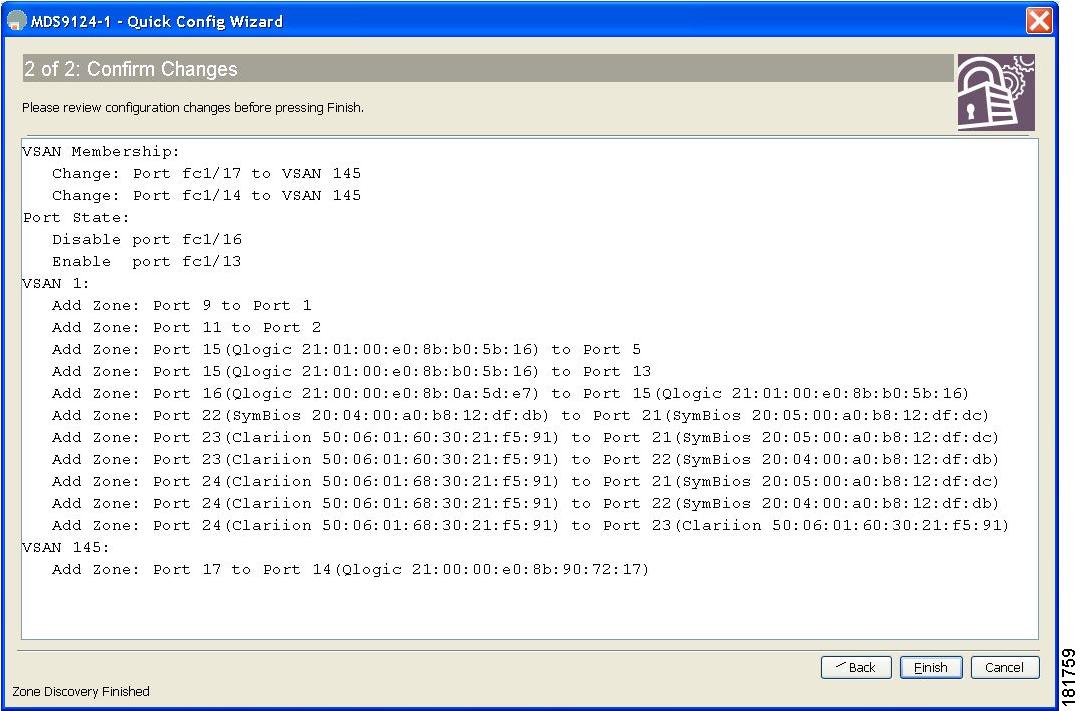
You see the Confirm Changes dialog box shown in Figure B-3.
Figure B-3 Confirm Changes Dialog Box
Step 6
Step 7