Cisco MDS 9000 Family Fabric Manager Quick Configuration Guide
Installing Fabric Manager

Table Of Contents

Installing Fabric Manager

Installing Cisco Fabric Manager

Installing the Database

Installing Oracle

Installing PostgreSQL

Installing Fabric Manager

Creating Startup Files in Solaris

Installing Device Manager


Installing Fabric Manager


Before installing Fabric Manager, make sure that the hardware setup and initial configuration using the CLI is completed. See Chapter 2, "Initial Switch Configuration," for details.

The Cisco Fabric Manager software executable files reside on every supervisor module of each Cisco MDS 9000 Family switch in your network. The supervisor module provides an HTTP server that responds to browser requests and distributes the software to Windows or UNIX network management stations.

This chapter includes the following sections:

Installing Cisco Fabric Manager

Installing the Database

Installing Fabric Manager

Installing Device Manager

Installing Cisco Fabric Manager

Cisco Fabric Manager has been tested with the following software:

Operating Systems

Windows 2000 SP4, 2003 SP2, XP SP2

Redhat Linux 7.2

Solaris (SPARC) 8 and 10

Java

Sun JRE and JDK 1.5(x) is supported

Java Web Start 1.2 and 1.0.1

Browsers

Internet Explorer 5.5, 6.x and 7.0

Netscape 6, Mozilla 1.0, or Firefox 2.0

Installing the Database

Before you install Fabric Manager, you must install a database. As of Cisco SAN-OS Release 3.1(2b), you can use Oracle Database 10g Express. Your other choice is PostgreSQL.

Installing Oracle


Note If you want to use Oracle Database 10g Express, you must install the database and create a user name and password before continuing with the Fabric Manager installation.


Note We recommend the Oracle Database 10g Express option for all users who are running Performance Manager on large fabrics (1000 or more end devices).


To install the Oracle database, follow these steps:


Step 1 Click the following link to install Oracle Database 10g Express.

http://www.oracle.com/technology/software/products/database/xe/index.html


Note If you have another instance of Oracle already installed on a PC, we recommend that you do not install the Oracle database on the same PC. In such cases, Fabric Manager can only use the PostgreSQL database.


Step 2 Run OracleXE.exe to install the Oracle database. Set the password for the system user. The database administrator uses the password to manage and administer Oracle Database 10g Express server, which is installed by the Oracle installer.

Step 3 Finish the installation and verify that both services (OracleServiceXE and OracleXETNSListener) are running from the Services window.

Step 4 Run the following script to change the default Oracle admin port and to create a database account.

C:\> cd c:\oraclexe\app\oracle\product\10.2.0\server\bin
C:\oraclexe\app\oracle\product\10.2.0\server\bin>sqlplus / as sysdba
SQL> exec dbms_xdb.sethttpport(8082);
SQL> GRANT CONNECT,RESOURCE,UNLIMITED TABLESPACE TO SCOTT IDENTIFIED BY
TIGER;
SQL> EXIT;


Note The Oracle Database 10g Express option is only supported on Microsoft Windows. It is not supported on UNIX systems.


Installing PostgreSQL


Note If you choose to install PostgreSQL, you must disable any security software you are running, as PostgreSQL may not install certain folders or users.


To install the PostgreSQL database on Windows, follow the instructions in the "Installing Fabric Manager" section.

Before installing PostgreSQL on Solaris 8, you might have to complete the following steps in order for PostgreSQL to install correctly:


Step 1 Set the load library path.

crle -c /var/ld/ld.config -l 
/lib:/usr/lib/:/usr/local/lib:/{pg_install_dir}/usr/local/pgsql/lib:/{pg_install_dir}/usr/
local/lib

Step 2 Set the following two properties in /etc/system.

set semsys:seminfo_semmni=512
set semsys:seminfo_semmns=512

Step 3 Once you complete Step 2, reboot your Solaris workstation after you sync.

Step 4 Launch the installer script.

./install.sh {pg_install_dir}

Note If you monitor a large fabric on the solaris, then manually copy $INSTALLDIR/conf/postgresql_sol_big.conf to $INSTALLDIR/db/data/postgresql.conf, and restart the Postgres server with the new configuration.


Note Before starting the installation, ensure that you have logged in as a Superuser.


To install the PostgreSQL database on Solaris, follow these steps:


Step 1 To install PostgreSQL, run the following commands:

cd /tmp/pginstall
./install.sh

Step 2 When you install PostgreSQL, all the libraries in /usr/local/lib and pgsql are stored in /usr/local/bin. There might be conflicting libraries or dependencies that can cause an incorrect or incomplete PostgreSQL installation. For more information, go to http://www.postgresql.org.

Step 3 When the installation is finished, you must create a database user to login to the database. To create a database user, run the following command:

createuser -s -d -r -l -P -U postgres admin

Step 4 Enter the database User in the DB User field.

Step 5 Enter database password for new role in the DB Password field.

Step 6 Repeat the password in the Confirm DB Password field.


Note The installer does not permit any password less than six characters. Choose a strong password that includes both uppercase and lowercase letters, special characters, and numbers. For example, testABC#136.


Note Before starting the installation, make sure that you have logged in as a Superuser.


To install the PostgreSQL database on Linux, follow these steps:


Step 1 To install PostgreSQL, run the following commands:

cd /tmp/pginstall
./install.sh

Step 2 When you install PostgreSQL, all the libraries and binaries are stored in /usr/lib and /usr/bin, respectively. There might be conflicting libraries or dependencies that can cause an incorrect or incomplete PostgreSQL installation. For more information, go to http://www.postgresql.org.

Step 3 When the installation is finished, you must a create a database user to login to the databases. To create a database user, run the following command:

createuser -s -d -r -l -P -U postgres admin

Step 4 Enter a password for the new role.

Step 5 Re-enter the password.

The database user ID must be provided in the Fabric Manager Installer.

Step 6 To stop and start the postmaster (PostgreSQL Database Server), run the following command:

/etc/init.d/postgresql [stop|start]

Installing Fabric Manager

As of Cisco SAN-OS Release 3.2(1), Fabric Manager is no longer packaged with a Cisco MDS 9000 Family switch. Install Fabric Manager from the CD-ROM or from Cisco.com.

For switches running Cisco MDS 9000 FabricWare, install Fabric Manager from the CD-ROM included with your switch, or you can download Fabric Manager from Cisco.com.

To download the software from Cisco.com, go to the following website:

http://cisco.com/cgi-bin/tablebuild.pl/mds-fm

To install Fabric Manager on Solaris, follow these steps:


Step 1 Set Java 1.5 to the path that is to be used for installing Fabric Manager.

Step 2 Install the database that is to be used with Fabric Manager by following the instructions in the "Installing the Database" section.

Step 3 Copy the Fabric Manager jar file m9000-fm-3.2.0.136.jar from the CD-ROM to a folder on the Solaris workstation.

Step 4 Launch the installer using the following command:

java -Xms512m -Xmx512m m9000-fm-3.2.2.jar

Step 5 Follow the on-screen instructions provided in the Fabric Manager management software setup wizard.


Note Cisco Fabric Manager requires a 32-bit Windows platform. It will not install on a 64-bit Windows platform.


When you connect to the server for the first time, Fabric Manager checks to see if you have the correct Sun Java Virtual Machine version installed on your workstation. Fabric Manager looks for version 1.5(x) during installation. If required, install the Sun Java Virtual Machine software.


Note You can run CiscoWorks on the same PC as Fabric Manager, even though the Java requirements are different. When installing the later Java version for Fabric Manager, make sure it does not overwrite the earlier Java version required for CiscoWorks. Both versions of Java can coexist on your PC.


Creating Startup Files in Solaris

The Postgre SQL and Fabric Manager does not automatically start-up in Solaris after the installation.

The init files should be created in /etc/init.d, and the following commands should be included in the files.

To start Postgre SQL and FM:

$INSTALL/db/bin/DB start

$INSTALL/bin/FMServer.sh start

To stop Postgre SQL and FM:

$INSTALL/db/bin/DB stop

$INSTALL/bin/FMServer.sh stop

To install Fabric Manager on Windows, follow these steps:


Step 1 Click the Install Management Software link.

Step 2 Choose Management Software > Cisco Fabric Manager.

Step 3 Click the Installing Fabric Manager link.

Step 4 Select the drive for your CD-ROM.

Step 5 Click the FM Installer link.

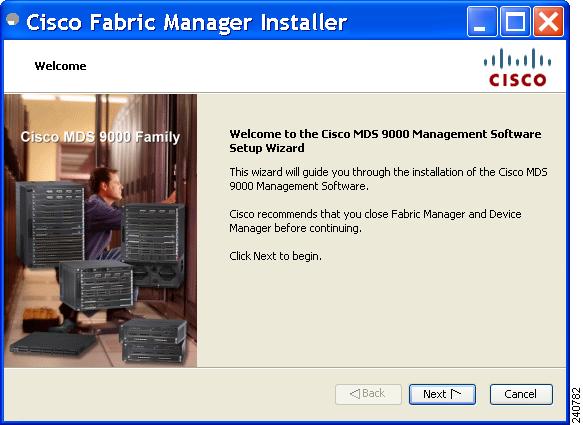
You see the welcome to the management software setup wizard message in the Cisco Fabric Manager Installer window shown in Figure 3-1.

Figure 3-1 Welcome to the Management Software Setup Wizard

Step 6 Click Next to begin the installation.

Step 7 Check the I accept the terms of the License Agreement check box and click Next.

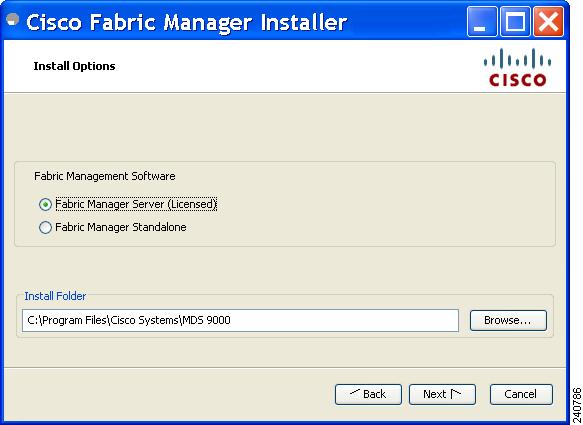
You see the Install Options dialog box shown in Figure 3-2.

Figure 3-2 Install Options Dialog Box

Step 8 Click the radio button for either:

a. Fabric Manager Server to install Fabric Manager Client and Fabric Manager Server.

b. Fabric Manager Standalone to only install Fabric Manager Client.

Step 9 Select an installation folder on your workstation for Fabric Manager. On Windows, the default location is C:\Program Files\Cisco Systems\MDS 9000. On a UNIX (Solaris or Linux) machine, the installation path name is /usr/local/cisco_mds9000 or $HOME/cisco_mds9000, depending on the permissions of the user doing the installation.

Step 10 Click Next.

You see the Database Options dialog box shown in Figure 3-3.

Figure 3-3 Database Options Dialog Box

Step 11 Click the radio button for either Install PostgreSQL or Use existing database and enter a database user name and password.

Step 12 If you select Use existing database, click the radio button for PostgreSQL or Oracle.

Step 13 Click Next in the Database Options dialog box.

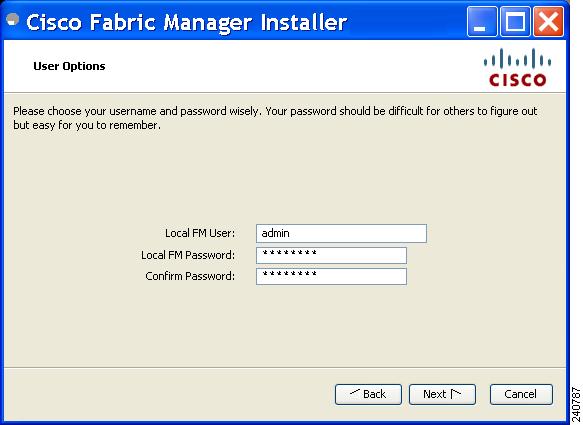
You see the User Options dialog box shown in Figure 3-4.

Figure 3-4 User Options Dialog Box

Step 14 Enter a user name and password and click Next.

You see the Authentication Options dialog box shown in Figure 3-5.

Figure 3-5 Authentication Options Dialog Box

Step 15 Choose an authentication mode (Local, RADIUS, TACACS or MDS) and click Next.


Note When MDS radio button is selected, the FM authentication uses the user database in the switch for authentication.


Step 16 Click Verify to test your login.

You see the Configuration Options dialog box shown in Figure 3-6.

Figure 3-6 Configuration Options Dialog Box for Fabric Manager Standalone

Step 17 Click Install if you are installing Fabric Manager Standalone.

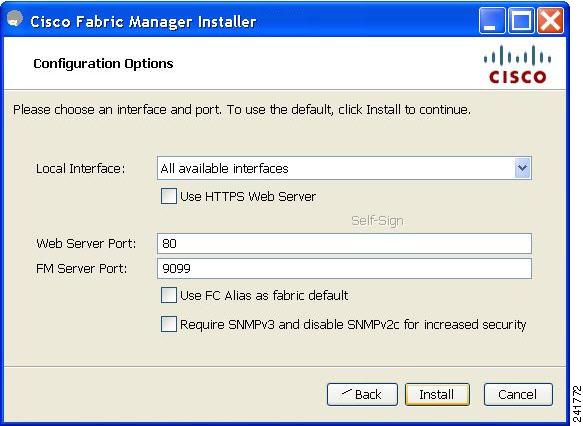
You see the Configuration Options dialog box for Fabric Manager Server shown in Figure 3-7.

Figure 3-7 Configuration Options Dialog Box

Step 18 Select the local interface, web server port or fm server port and check the FC Alias and SNMPv3 check boxes as desired and click Install if you are installing Fabric Manager Server.


Note You can change the FM Server Port number, to a port that is not used by any other application.


Note If you check the Use HTTPS Web Server check box, the Web Server Port field is grayed out and the default port is 443.


Note If you select a specific IP address during installation and change the server host IP address, you must modify the following two files which are all located in the $INSTALL/conf directory. Change server.bindaddrs to the new IP address in the server.properties file and change wrapper.app.parameter.4 to the new IP address in the FMServer.conf file.


Step 19 Click Cancel to stop the installation. You see the installation progress in the Cisco Fabric Manager Installer window shown in Figure 3-8.

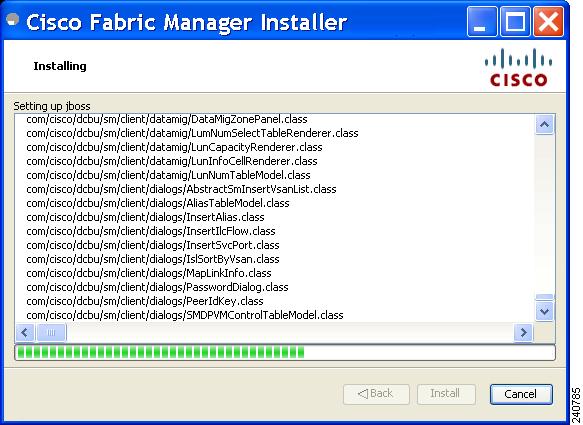
Figure 3-8 Progress of Installation

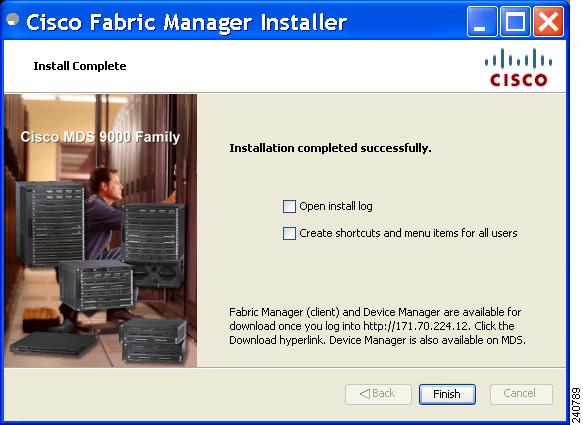
Once the installation is finished, you see an installation completed message in the Cisco Fabric Manager Installer window shown in Figure 3-9.

Figure 3-9 Install Complete


Note If you installed Fabric Manager Standalone, launch Fabric Manager or Device Manager by checking the Launch Fabric Manager or Launch Device Manager check boxes. Icons for Fabric Manager and Device Manager are automatically created on the desktop.


Step 20 Click Finish to close the Cisco Fabric Manager Installer window.

If you installed Fabric Manager Server, icons for Fabric Manager and Device Manager are not created on the desktop until you launch Fabric Manager Client. Follow the instructions in the "Launching Fabric Manager Client in Cisco SAN-OS Release 3.2(1) and Later" section on page 4-1 to launch Fabric Manager Client.


If you checked the Create shortcuts check box, a Cisco MDS 9000 program group is created under Start > Programs on Windows. This program group contains shortcuts to batch files in the install directory. Three services are started: Fabric Manager Server, Database, and Web Server. The Performance Manager server is installed but the service is not started upon installation, because certain setup steps must be completed first.

On a UNIX (Solaris or Linux) machine, shell scripts are created in the install directory. The shell scripts that run the programs equivalent to the Windows services are: FMServer.sh, FMPersist.sh, PMCollector.sh, and FMWebClient.sh. All server-side data and Performance Manager data are stored in the install directory.

Fabric Manager Client cannot run without Fabric Manager Server. The server component is downloaded and installed when you download and install Fabric Manager. On a Windows machine you install the Fabric Manager Server as a service. This service can then be administered using Services in the Microsoft Windows Control Panel. The default setting for the Fabric Manager Server service is that the server is automatically started when the machine is rebooted. You can change this behavior by modifying the properties in Services.

Installing Device Manager

To install Device Manager on your workstation, follow these steps:


Step 1 Enter the IP address of the switch in the Address field of your browser.

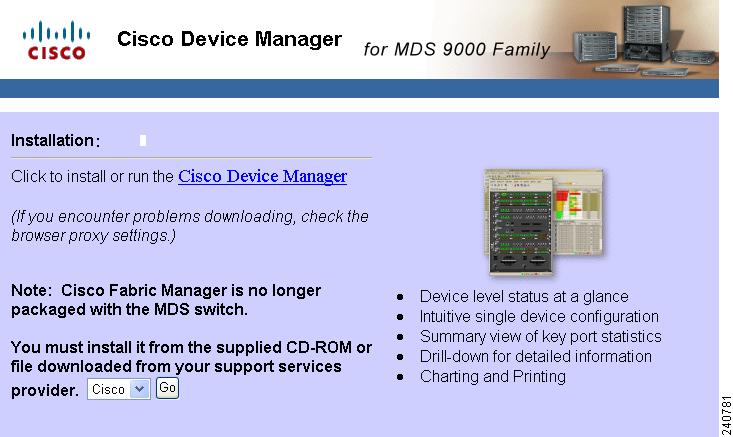
You see the Installation window for Device Manager shown in Figure 3-10.

Figure 3-10 Device Manager Installation Window

Step 2 Click the Cisco Device Manager link.

You see the welcome to the management software setup wizard message in the Cisco Device Manager Installer window shown in Figure 3-11.

Figure 3-11 Welcome to the Management Software Setup Wizard Window

Step 3 Click Next to begin the Installation.

Step 4 Check the I accept the terms of the License Agreement check box and click Next.

Step 5 Select an installation folder on your workstation for Device Manager. On Windows, the default location is C:\Program Files\Cisco Systems\MDS 9000. On a UNIX (Solaris or Linux) machine, the installation path name is /usr/local/cisco_mds9000 or $HOME/cisco_mds9000, depending on the permissions of the user doing the installation.

Step 6 Click Install.

You see the installation progress in the Cisco Device Manager Installer window shown in Figure 3-12.

Figure 3-12 Progress of Installation

Once the installation is finished, you see an installation completed message in the Cisco Device Manager Installer window shown in Figure 3-13.

Figure 3-13 Install Complete

Step 7 Click Finish to close the Cisco Device Manager Installer window.