Cisco Service Portal インストレーション ガイド リリース 9.3.2
偏向のない言語
この製品のマニュアルセットは、偏向のない言語を使用するように配慮されています。このマニュアルセットでの偏向のない言語とは、年齢、障害、性別、人種的アイデンティティ、民族的アイデンティティ、性的指向、社会経済的地位、およびインターセクショナリティに基づく差別を意味しない言語として定義されています。製品ソフトウェアのユーザーインターフェイスにハードコードされている言語、RFP のドキュメントに基づいて使用されている言語、または参照されているサードパーティ製品で使用されている言語によりドキュメントに例外が存在する場合があります。シスコのインクルーシブランゲージに対する取り組みの詳細は、こちらをご覧ください。
翻訳について
このドキュメントは、米国シスコ発行ドキュメントの参考和訳です。リンク情報につきましては、日本語版掲載時点で、英語版にアップデートがあり、リンク先のページが移動/変更されている場合がありますことをご了承ください。あくまでも参考和訳となりますので、正式な内容については米国サイトのドキュメントを参照ください。
- Updated:
- 2017年6月9日
章のタイトル: インストールおよび設定ガイド
- 概要
- 前提条件とインストールの概要
- データベースの設定
- JBoss のインストール前の設定
- WebLogic のインストール前の設定
- WebSphere のインストール前の設定
- Service Portal インストーラの実行
- JBoss のインストール後の設定
- WebLogic のインストール後の設定
- WebSphere のインストール後の設定
インストールおよび設定ガイド
概要
Cisco Service Portal のインストールおよび設定ガイドは次の項で構成されています。
•![]() 「前提条件とインストールの概要」:ソフトウェアとハードウェアの要件の要約です。
「前提条件とインストールの概要」:ソフトウェアとハードウェアの要件の要約です。
•![]() 「データベースの設定」:Service Portal で使用するデータベースの設定手順です。
「データベースの設定」:Service Portal で使用するデータベースの設定手順です。
•![]() 「JBoss のインストール前の設定」:Service Portal と JBoss アプリケーション サーバをインストールするコンピュータの準備手順です。
「JBoss のインストール前の設定」:Service Portal と JBoss アプリケーション サーバをインストールするコンピュータの準備手順です。
•![]() 「WebLogic のインストール前の設定」:Service Portal インストール前に行う WebLogic アプリケーション サーバの設定手順です。
「WebLogic のインストール前の設定」:Service Portal インストール前に行う WebLogic アプリケーション サーバの設定手順です。
•![]() 「WebSphere のインストール前の設定」:Service Portal インストール前に行う WebSphere アプリケーション サーバの設定手順です。
「WebSphere のインストール前の設定」:Service Portal インストール前に行う WebSphere アプリケーション サーバの設定手順です。
•![]() 「Service Portal インストーラの実行」:Service Portal Setup プログラムの実行手順です。
「Service Portal インストーラの実行」:Service Portal Setup プログラムの実行手順です。
•![]() 「JBoss のインストール後の設定」:JBoss マシンでのインストール後の作業の手順です。
「JBoss のインストール後の設定」:JBoss マシンでのインストール後の作業の手順です。
•![]() 「WebLogic のインストール後の設定」:WebLogic アプリケーション サーバへの Service Portal EAR ファイルの導入手順です。
「WebLogic のインストール後の設定」:WebLogic アプリケーション サーバへの Service Portal EAR ファイルの導入手順です。
•![]() 「WebSphere のインストール後の設定」:WebSphere アプリケーション サーバへの Service Portal EAR ファイルの導入手順です。
「WebSphere のインストール後の設定」:WebSphere アプリケーション サーバへの Service Portal EAR ファイルの導入手順です。
関連資料
アップグレード インストール手順については、「アップグレードについて」を参照してください。
IBM Cognos ソフトウェアのインストールについては、「Advanced Reporting について」を参照してください。
Directory Integration と Service Link(LDAP を含む)の設定については、『Cisco Service Portal Integration Guide』を参照してください。
Service Portal スタイルシートのカスタマイズについては、『Cisco Service Portal Configuration Guide』を参照してください。
前提条件とインストールの概要
配置トポロジ
Service Portal の標準的な配置トポロジを次の図に示します。
WebLogic クラスタ環境または WebSphere クラスタ環境では、複数のアプリケーション マシンがトポロジに含まれることがあります。2 つのノードを含むクラスタの例を以下に示します。
ソフトウェア要件
この Cisco Service Portal リリースでサポートされているサードパーティ ソフトウェアを次の表に示します。
ソフトウェアの設定に関する前提条件
ブラウザ
Service Portal アプリケーションへの接続に使用する Web ブラウザを次のように設定する必要があります。
•![]() Internet Explorer の場合、[Privacy Option] を [Medium High] 以下に設定します。
Internet Explorer の場合、[Privacy Option] を [Medium High] 以下に設定します。
•![]() アジア言語バージョンを実行する場合は、Web ブラウザのベンダーから東アジア言語サポートを入手してインストールする必要があります。
アジア言語バージョンを実行する場合は、Web ブラウザのベンダーから東アジア言語サポートを入手してインストールする必要があります。
•![]() レポートを表示、印刷するには、Web ブラウザを実行するマシンに Adobe Reader® が必要です。
レポートを表示、印刷するには、Web ブラウザを実行するマシンに Adobe Reader® が必要です。

(注) Mozzila Firefox ブラウザは Service Portal 製品の My Services モジュールと Portal Manager モジュールでのみサポートされています。したがって、Administration や Service Link などその他のモジュールにアクセスする必要がある管理ユーザは、Internet Explorer(IE)7 または 8 を使用してください。またインストール確認プロセスで作業を行うためにも IE 7 または 8 が必要です。これについては後述します。
Web サーバ
前提条件として Web サーバがすでにインストールされ、稼動している必要があります。Web サーバをインストールするマシンは、アプリケーション サーバと同じマシンまたは Service Portal インストーラを実行する予定のマシンにする必要はありません。
また、Web サーバではアプリケーション サーバと通信するために必要なプラグイン設定が行われている必要があります。たとえば、配置トポロジに Apache Web サーバと WebLogic アプリケーション サーバを使用する場合、前提条件として、WebLogic サーバに接続できるように Apache サーバのプラグインを手動で設定する必要があります。Service Portal インストーラでは Web サーバとアプリケーション サーバ間のプラグインは設定されません。
(注) 唯一の例外としては、Windows オペレーティング システムで Microsoft Internet Information Services(IIS)Web サーバと JBoss アプリケーション サーバを組み合わせて使用する予定であり、IIS Web サーバが Service Portal インストーラを実行するマシンにインストールされている場合、Service Portal インストーラの実行中に [Configure Web Server?] オプションに対して [Yes] と答えると IIS と JBoss の間のプラグインが自動的にインストールおよび設定されます。
Solaris オペレーティング システムで稼動する Apache Web サーバを使用する場合は、Apache のインストール時に Apache Web サーバのオプション モジュールをすべてインストールする必要があります。
Web サーバが稼動しているかどうかを確認するため、ブラウザを開いて URL http://<webserver_host>:<webserver_port> に接続します。この <webserver_host> は Web サーバのホスト名、<webserver_port> は Web サーバが使用するポート番号です。<webserver_host> と <webserver_port> の値を書きとめておいてください。インストールの段階でこれらの値を指定する必要があります。
アプリケーション サーバ
アプリケーション サーバとして JBoss を選択した場合は、前提条件としての JBoss アプリケーション サーバをインストールする必要はありません。インストーラにより JBoss ソフトウェアが自動的にマシンにインストールされます。「JBoss のインストール前の設定」に、Service Portal と JBoss アプリケーション サーバのインストールに向けてマシンを準備する手順を説明しています。
アプリケーション サーバとして WebLogic を選択した場合は、前提条件として Oracle WebLogic アプリケーション サーバ ソフトウェアをマシンにインストールする必要があります。このマニュアルでは、WebLogic ソフトウェアのインストール手順については説明しません。ただし「WebLogic のインストール前の設定」の手順に従い、Service Portal で使用できるように WebLogic サーバを準備する必要があります。
アプリケーション サーバとして WebSphere を選択した場合は、前提条件として IBM WebSphere アプリケーション サーバ ソフトウェアをマシンにインストールする必要があります。このマニュアルでは、WebSphere ソフトウェアのインストール手順については説明しません。ただし「WebSphere のインストール前の設定」の手順に従い、Service Portal で使用できるように WebSphere Server を準備する必要があります。
クラスタ化に関する考慮事項
クラスタ WebLogic または WebSphere 環境に Cisco Service Portal を導入する場合は、Cisco Service Portal をインストールする前にクラスタ化設定で WebLogic または WebSphere アプリケーション サーバを設定する必要があります。また、完全なフェールオーバー機能を実現するには、1 つ以上のクラスタ ノードでクラスタ化可能なセッションを設定する必要があります。クラスタ設定については、ご使用のアプリケーション サーバのマニュアルを参照してください。
(注) JBoss アプリケーション サーバではクラスタ設定はサポートされていません。
Java Development Kit
Java Development Kit は、アプリケーション サーバ マシンの前提条件ソフトウェアです。 表 2-1 に示すように、アプリケーション サーバのタイプごとに特定バージョンの Java Development Kit のバージョン(およびベンダー)のみがサポートされています。ご使用のアプリケーション サーバに合わせて Java を設定する手順については、「JBoss のインストール前の設定」、「WebLogic のインストール前の設定」、および「WebSphere のインストール前の設定」を参照してください。
データベース
RDBMS として SQL Server 2008 R2 を選択した場合は、前提条件として Microsoft SQL Server 2008 R2 ソフトウェアをインストールする必要があります(特定のバージョンについては 表 2-1 を参照してください)。アプリケーション サーバ マシンに SQL Server クライアント接続ソフトウェアをインストールする必要はありません。Cisco Service Portal のインストーラにより、データベース サーバとの通信に必要な JDBC ドライバが自動的にインストールされます。
RDBMS として Oracle 11g を選択した場合、前提条件として Oracle 11g データベース サーバ ソフトウェアをインストールする必要があります(具体的なバージョンについては 表 2-1 を参照してください)。アプリケーション サーバ マシンに Oracle クライアント接続ソフトウェアをインストールする必要はありません。Cisco Service Portal のインストーラにより、データベース サーバとの通信に必要な JDBC ドライバが自動的にインストールされます。
クライアント接続で TCP/IP を有効にするようにデータベースを設定する必要があります。Service Portal で使用するデータベースまたはスキーマの作成手順については、「データベースの設定」で説明します。
LDAP
社内の従業員ディレクトリにアクセスできるように、Cisco Service Portal を社内の LDAP サーバと統合できます。この統合機能はオプションで、LDAP サーバは Service Portal をインストールするうえでの前提条件ソフトウェアではありません。
LDAP 統合機能を使用する場合は、『Cisco Service Portal Integration Guide』を参照してください。 表 2-1 に示すサポートされている LDAP ソフトウェアのみを使用してください。
IBM Cognos
Service Portal には IBM Cognos ソフトウェアの OEM バージョンがバンドルされています。Cognos ソフトウェアは Advanced Reporting モジュール(オプション)に使用されます。Service Portal アプリケーションの Reporting および Advanced Reporting のすべての機能を使用可能にするには、Cognos ソフトウェアを配置トポロジにインストールする必要があります。このソフトウェアは Service Portal ソフトウェアのインストール後にインストールできます。Cognos ソフトウェアのインストールと設定の手順については、「Advanced Reporting について」を参照してください。
その他の設定
X-Window または Xvfb
UNIX または Linux オペレーティング システムでは、Advanced Reporting モジュールに含まれている KPI チャートが Service Portal UI に正しく表示されるようにするために、X-Window サーバまたは Xvfb(仮想フレームバッファ X サーバ)がインストールされ動作している必要があります。Service Portal で KPI チャート機能を使用しない場合は X-Window サーバは不要です。
Unzip ユーティリティ
Cisco Service Portal ソフトウェア インストーラ パッケージを解凍するために、Unzip プログラム(Windows)または tar コマンド(UNIX または Linux)が必要です。
ネットワーク - TCP/IP
SMTP
電子メール通知のために SMTP サーバをセットアップし、Service Portal システムがシステム管理者にシステム アラートを送信するときに使用する有効な電子メール アドレスを設定する必要があります。Service Portal ソフトウェアのインストール時に SMTP アドレスと有効な電子メール アドレスを指定する必要があります。
MSXML
Expat ライブラリ
Expat ライブラリは Service Portal インストーラ プログラムの前提条件です。Linux または UNIX マシンで Service Portal インストーラを実行する場合は、Linux または UNIX マシンに適切な Expat ライブラリ パッケージがすでにインストールされていることを確認してください。
•![]() (Linux)Expat バージョン 1.95.x が必要です
(Linux)Expat バージョン 1.95.x が必要です
•![]() (AIX)Expat バージョン 2.0.x が必要です。
(AIX)Expat バージョン 2.0.x が必要です。
マシンに Expat ライブラリがインストールされているかどうかを確認するには、「root」ユーザとして次のコマンドを実行します。
ハードウェアの要件
サイジング
標準的な(非クラスタ)配置トポロジでは少なくとも 3 台のコンピュータを使用することを推奨します。
正確なハードウェア設定は、サイト固有の条件によって異なります。 サイジングに関するその他の推奨事項が必要な場合は、Cisco Technical Assistance Center(TAC)にご連絡ください。
アプリケーション サーバ ホストの最小ハードウェア要件
アプリケーション サーバ マシンの最小ハードウェア要件を以下に示します。
•![]() Intel Core 2 Duo プロセッサ(またはこれに相当する他のプロセッサ)
Intel Core 2 Duo プロセッサ(またはこれに相当する他のプロセッサ)
(注) クラスタ アプリケーション サーバ環境を使用している場合は、上記のハードウェア要件はクラスタ環境内の各ノード(各マシン)に適用されます。
Web サーバ ホストの最小ハードウェア要件
Web サーバがアプリケーション サーバとは異なるマシンにインストールされている場合の Web サーバ マシンの最小ハードウェア要件を以下に示します。
データベース ホストの最小ハードウェア要件
データベース サーバ マシンの最小ハードウェア要件を以下に示します。
•![]() Intel Core 2 Duo プロセッサ(またはこれに相当する他のプロセッサ)
Intel Core 2 Duo プロセッサ(またはこれに相当する他のプロセッサ)
•![]() 50 GB の空きハードディスク領域(ディスク領域所要量は、時間の経過に伴うユーザ データ、サービス定義データ、トランザクション データ、レポート データの増加を反映した Service Portal データベースの予測サイズに基づいています)。
50 GB の空きハードディスク領域(ディスク領域所要量は、時間の経過に伴うユーザ データ、サービス定義データ、トランザクション データ、レポート データの増加を反映した Service Portal データベースの予測サイズに基づいています)。
レポーティング サーバ ホストの最小ハードウェア要件
Cognos マシンの最小ハードウェア要件を以下に示します。
•![]() Intel Core 2 Duo プロセッサ(またはこれに相当する他のプロセッサ)
Intel Core 2 Duo プロセッサ(またはこれに相当する他のプロセッサ)
(注) Service Portal にバンドルされている IBM Cognos 8.4.1 ソフトウェアをインストールできるオペレーティング システムは Microsoft Windows Server 2008 R2(64 ビット)だけです。
インストール プロセスの概要
この項では、Service Portal のインストール プロセスのロード マップを説明します。
ステップ 1![]() この項の説明に従い、ハードウェアおよびソフトウェアの最小要件に適切に対応しており、前提条件ソフトウェアがインストールされていることを確認します。
この項の説明に従い、ハードウェアおよびソフトウェアの最小要件に適切に対応しており、前提条件ソフトウェアがインストールされていることを確認します。
ステップ 2![]() 「データベースの設定」の説明に従って RequestCenter データベースと Datamart データベースを作成します。この項の終わりにある「データベース情報ワークシート」に情報を記入します。この情報は Service Portal セットアップ プログラムの実行時に必要になります。
「データベースの設定」の説明に従って RequestCenter データベースと Datamart データベースを作成します。この項の終わりにある「データベース情報ワークシート」に情報を記入します。この情報は Service Portal セットアップ プログラムの実行時に必要になります。
ステップ 3![]() 次のいずれかの項で説明する手順に従って、Service Portal で使用するアプリケーション サーバを準備します。
次のいずれかの項で説明する手順に従って、Service Portal で使用するアプリケーション サーバを準備します。
a.![]() JBoss の場合は「JBoss のインストール前の設定」を参照してください。
JBoss の場合は「JBoss のインストール前の設定」を参照してください。
b.![]() WebLogic の場合は「WebLogic のインストール前の設定」を参照してください。
WebLogic の場合は「WebLogic のインストール前の設定」を参照してください。
c.![]() WebSphere の場合は「WebSphere のインストール前の設定」を参照してください。
WebSphere の場合は「WebSphere のインストール前の設定」を参照してください。
この項の終わりにある「アプリケーション サーバ情報ワークシート」に情報を記入します。この情報はセットアップ プログラムの実行時に必要になります。
ステップ 4![]() 「Service Portal インストーラの実行」の説明に従い、アプリケーション サーバ マシンでセットアップ プログラムを実行します。古いリリースからのアップグレード インストールを実行する場合は、この項と併せて「アップグレードについて」も参照してください。
「Service Portal インストーラの実行」の説明に従い、アプリケーション サーバ マシンでセットアップ プログラムを実行します。古いリリースからのアップグレード インストールを実行する場合は、この項と併せて「アップグレードについて」も参照してください。
ステップ 5![]() アプリケーション サーバのインストール後の作業を行い、次のいずれかの項の説明に従ってインストールした内容を確認します。
アプリケーション サーバのインストール後の作業を行い、次のいずれかの項の説明に従ってインストールした内容を確認します。
a.![]() JBoss の場合は「JBoss のインストール後の設定」を参照してください。
JBoss の場合は「JBoss のインストール後の設定」を参照してください。
b.![]() WebLogic の場合は「WebLogic のインストール後の設定」を参照してください。
WebLogic の場合は「WebLogic のインストール後の設定」を参照してください。
c.![]() WebSphere の場合は「WebSphere のインストール後の設定」を参照してください。
WebSphere の場合は「WebSphere のインストール後の設定」を参照してください。
Reporting の機能を完全に使用可能にするには、Cognos ソフトウェアをインストールし、Cognos Server を Service Portal アプリケーションと統合するように設定する必要もあります。この作業ができる状態になったら、「Advanced Reporting について」の手順に従って作業してください。
データベースの設定
Cisco Service Portal 製品を使用するには、RequestCenter と Datamart という 2 つのデータベースが必要です。この 2 つのデータベースは同じタイプおよびバージョンの RDBMS でなければなりませんが、異なる 2 つのデータベース インスタンスにインストールできます。たとえばこの 2 つのデータベースは同一バージョンの SQL Server 2008 または同一バージョンの Oracle 11g 上に存在している必要があります。SQL Server データベースと Oracle データベースを混在させることはできません。
(注) IBM Cognos ソフトウェアには ContentStore と呼ばれる専用のデータベースが必要ですが、この章ではこのデータベースについては説明しません。ContentStore データベースの設定手順については、「Advanced Reporting について」を参照してください。ContentStore データベースは RequestCenter および Datamart データベースと同じタイプおよびバージョンの RDBMS でなければなりません。
Oracle の設定
Oracle データベースを使用する場合は、この項の手順に従って Oracle サーバを準備し、2 つの Oracle ユーザ(RequestCenter データベース スキーマ用のユーザと Datamart データベース スキーマ用のユーザ)を作成します。
catcio.sql パッケージ
ステップ 1![]() 次の SQL コマンドを Oracle「sys」ユーザとして実行して、catcio.sql パッケージが Oracle データベースにインストールされているかどうか確認します。
次の SQL コマンドを Oracle「sys」ユーザとして実行して、catcio.sql パッケージが Oracle データベースにインストールされているかどうか確認します。
select count(*) from all_tables where owner='SYS' and table_name like ‘IND_ONLINE$';
ステップ 2![]() 戻り値がゼロの場合は「sys」ユーザとして Oracle データベースにログインし(「sysdba」として接続)、catcio.sql パッケージをインストールします。この操作は、Service Portal インストールの実行前に行う必要があります。catcio.sql スクリプトは通常 $ORACLE_HOME/rdbms/admin ディレクトリにあります。
戻り値がゼロの場合は「sys」ユーザとして Oracle データベースにログインし(「sysdba」として接続)、catcio.sql パッケージをインストールします。この操作は、Service Portal インストールの実行前に行う必要があります。catcio.sql スクリプトは通常 $ORACLE_HOME/rdbms/admin ディレクトリにあります。
REDO ログ
RequestCenter データベースのテーブルスペースとユーザの作成
(注) テーブルスペースとデータベース ユーザ アカウントを作成できない場合は、データベース管理者に連絡し、このマニュアルに記載されているデータベース要件を説明してください。
ステップ 1![]() テーブルスペース REQUESTCENTER を新規に作成し、初期サイズ 500 MB と AUTOEXTEND ON を設定します。
テーブルスペース REQUESTCENTER を新規に作成し、初期サイズ 500 MB と AUTOEXTEND ON を設定します。
ステップ 2![]() 一時テーブルスペース REQUESTCENTER_TEMP を新規に作成し、初期サイズ 30 MB と AUTOEXTEND ON を設定します。
一時テーブルスペース REQUESTCENTER_TEMP を新規に作成し、初期サイズ 30 MB と AUTOEXTEND ON を設定します。
ステップ 3![]() データベース ユーザ RCUser を作成し、デフォルト テーブルスペースを REQUESTCENTER に設定し、一時テーブルスペースを REQUESTCENTER_TEMP に設定します。RCUser に、REQUESTCENTER テーブルスペースに対する QUOTA UNLIMITED を付与する必要があります。
データベース ユーザ RCUser を作成し、デフォルト テーブルスペースを REQUESTCENTER に設定し、一時テーブルスペースを REQUESTCENTER_TEMP に設定します。RCUser に、REQUESTCENTER テーブルスペースに対する QUOTA UNLIMITED を付与する必要があります。
Datamart データベースのテーブルスペースとユーザの作成
ステップ 1![]() テーブルスペース DATAMART を新規に作成し、初期サイズ 500 MB と AUTOEXTEND ON を設定します。
テーブルスペース DATAMART を新規に作成し、初期サイズ 500 MB と AUTOEXTEND ON を設定します。
ステップ 2![]() 一時テーブルスペース DATAMART_TEMP を新規に作成し、初期サイズ 30 MB と AUTOEXTEND ON を設定します。
一時テーブルスペース DATAMART_TEMP を新規に作成し、初期サイズ 30 MB と AUTOEXTEND ON を設定します。
ステップ 3![]() データベース ユーザ DMUser を作成し、デフォルト テーブルスペースを DATAMART に設定し、一時テーブルスペースを DATAMART_TEMP に設定します。DMUser に、DATAMART テーブルスペースに対する QUOTA UNLIMITED を付与する必要があります。
データベース ユーザ DMUser を作成し、デフォルト テーブルスペースを DATAMART に設定し、一時テーブルスペースを DATAMART_TEMP に設定します。DMUser に、DATAMART テーブルスペースに対する QUOTA UNLIMITED を付与する必要があります。
DBMS_LOB に対する実行権限の付与
「RCUser」に、DBMS_LOB パッケージ(SYS ユーザが所有するパッケージ)内のすべての機能を実行できる権限を付与します。
•![]() Oracle データベースに SYS ユーザとしてログインします(例:sqlplus sys/<pwd>@<ORACLE_SID> as sysdba)。
Oracle データベースに SYS ユーザとしてログインします(例:sqlplus sys/<pwd>@<ORACLE_SID> as sysdba)。
SQL サーバの設定
データベースに SQL サーバを使用する場合は、この項の以下の手順に従って SQL サーバを準備し、2 つのデータベース(RequestCenter と Datamart)を作成します。
デフォルト インスタンス
SQL サーバをデフォルト インスタンス として設定する必要があります。名前付きインスタンス SQL サーバはサポートされていません。
混合モード認証
混合モード認証を許可するように SQL サーバを設定する必要があります。また、Cisco Service Portal のインストール時に「sa」アカウントのユーザ名とパスワードが必要になります。
RequestCenter データベースとユーザの作成
ステップ 1![]() RequestCenter という名前のデータベースを SQL サーバの デフォルト インスタンス に作成し、初期サイズとして 500 MB を設定します。
RequestCenter という名前のデータベースを SQL サーバの デフォルト インスタンス に作成し、初期サイズとして 500 MB を設定します。
ステップ 2![]() RequestCenter データベースをシングルユーザ モードに切り替え、次のコマンドを実行します。
RequestCenter データベースをシングルユーザ モードに切り替え、次のコマンドを実行します。
ALTER DATABASE RequestCenter SET READ_COMMITTED_SNAPSHOT ON.
ステップ 3![]() RequestCenter データベースをマルチユーザ モードに戻します。
RequestCenter データベースをマルチユーザ モードに戻します。
ステップ 4![]() SQL Server ログイン RCUser を作成し、[Default Database] プロパティを「RequestCenter」に設定します。
SQL Server ログイン RCUser を作成し、[Default Database] プロパティを「RequestCenter」に設定します。
(注) RCUser は、Windows 認証方式ではなく SQL サーバ認証方式で SQL Server に対して認証される SQL サーバ ログイン アカウントでなければなりません。
ステップ 5![]() RCUser の [Security setting] プロパティの [Enforce Password Policy] オプションが選択されていないことを確認します。また RCUser のパスワードには英字(大文字または小文字)と数字を組み合わせて使用する必要がありあす。下線文字、アスタリスク、かっこなどの特殊文字は使用しないでください。このような特殊文字の組み合わせによっては、製品インストール中にインストーラが失敗し、「Database Connection Test failed」というエラー メッセージが表示されることがあります。
RCUser の [Security setting] プロパティの [Enforce Password Policy] オプションが選択されていないことを確認します。また RCUser のパスワードには英字(大文字または小文字)と数字を組み合わせて使用する必要がありあす。下線文字、アスタリスク、かっこなどの特殊文字は使用しないでください。このような特殊文字の組み合わせによっては、製品インストール中にインストーラが失敗し、「Database Connection Test failed」というエラー メッセージが表示されることがあります。
ステップ 6![]() RCUser を「RequestCenter」データベースの db_owner として割り当てます。
RCUser を「RequestCenter」データベースの db_owner として割り当てます。
Datamart データベースとユーザの作成
ステップ 1![]() Datamart という名前のデータベースを SQL サーバの デフォルト インスタンス に作成し、初期サイズとして 500 MB を設定します。
Datamart という名前のデータベースを SQL サーバの デフォルト インスタンス に作成し、初期サイズとして 500 MB を設定します。
ステップ 2![]() SQL Server ログイン DMUser を作成し、[Default Database] プロパティを「Datamart」に設定します。
SQL Server ログイン DMUser を作成し、[Default Database] プロパティを「Datamart」に設定します。
(注) DMUser は、Windows 認証方式ではなく SQL Server 認証方式で SQL Server に対して認証される SQL サーバ ログイン アカウントでなければなりません。
ステップ 3![]() DMUser の [Security setting] プロパティの [Enforce Password Policy] オプションが選択されていないことを確認します。また DMUser のパスワードには英字(大文字または小文字)と数字を組み合わせて使用する必要がありあす。下線文字、アスタリスク、かっこなどの特殊文字は使用しないでください。このような特殊文字の組み合わせによっては、製品インストール中にインストーラが失敗し、「Database Connection Test failed」というエラー メッセージが表示されることがあります。
DMUser の [Security setting] プロパティの [Enforce Password Policy] オプションが選択されていないことを確認します。また DMUser のパスワードには英字(大文字または小文字)と数字を組み合わせて使用する必要がありあす。下線文字、アスタリスク、かっこなどの特殊文字は使用しないでください。このような特殊文字の組み合わせによっては、製品インストール中にインストーラが失敗し、「Database Connection Test failed」というエラー メッセージが表示されることがあります。
ステップ 4![]() DMUser を「Datamart」データベースの db_owner として割り当てます。
DMUser を「Datamart」データベースの db_owner として割り当てます。
データベース情報ワークシート
以下の「データベース情報ワークシート」の「値」列に設定値を記入してください。このワークシートに記入した情報は、後で Service Portal セットアップ プログラムを実行する際に必要になります。
JBoss のインストール前の設定
この項では、Service Portal のセットアップ プログラムを実行する前にアプリケーション サーバ マシンを準備します。
このリリースの Service Portal では、以下のオペレーティング システム、Web サーバ、および Java Development Kit で JBoss アプリケーション サーバがサポートされています。
|
|
|
|
|
JBoss アプリケーション サーバ ソフトウェアを事前にインストールする必要はありません。Service Portal のインストール時にアプリケーション サーバとして JBoss を選択した場合は、Service Portal セットアップ プログラムにより JBoss アプリケーション サーバ ソフトウェアがマシンに自動的にインストールされます。
Service Portal ソフトウェア イメージのダウンロード
この項では、Cisco Service Portal の電子ソフトウェア ディストリビューションをダウンロードします。
ステップ 1![]() Cisco 製品ダウンロード Web サイトにアクセスし、各自に割り当てられたユーザ名とパスワードを使用して認証します。
Cisco 製品ダウンロード Web サイトにアクセスし、各自に割り当てられたユーザ名とパスワードを使用して認証します。
ステップ 2![]() 製品名で検索するか、または製品セレクター内を移動して購入したポータル ソリューションを見つけます。(操作方法:[Products] > [Network Management and Automation] > [Data Center Management and Automation] > [Intelligent Automation] > [Cisco Cloud Portal] または [Cisco Workplace Portal])。
製品名で検索するか、または製品セレクター内を移動して購入したポータル ソリューションを見つけます。(操作方法:[Products] > [Network Management and Automation] > [Data Center Management and Automation] > [Intelligent Automation] > [Cisco Cloud Portal] または [Cisco Workplace Portal])。
ステップ 3![]() [Product Install] を選択し、該当するオペレーティング システムのリンクをクリックします。
[Product Install] を選択し、該当するオペレーティング システムのリンクをクリックします。
ステップ 4![]() 入手可能なリリース別のフォルダのリストが表示されます。リリース 9.3.2 を見つけてクリックします。
入手可能なリリース別のフォルダのリストが表示されます。リリース 9.3.2 を見つけてクリックします。
ステップ 5![]() ファイル RCInstall-win-*.zip(Windows オペレーティング システム)またはファイル RCInstall-unix-*.tar.gz(UNIX/Linux オペレーティング システム)をダウンロードします。
ファイル RCInstall-win-*.zip(Windows オペレーティング システム)またはファイル RCInstall-unix-*.tar.gz(UNIX/Linux オペレーティング システム)をダウンロードします。
ステップ 6![]() インストーラ プログラムは製品ファミリ内のすべての製品で共通です。Cloud または Workplace Portal の他に Reporting または Demand Center を購入している場合、インストーラを再ダウンロードする必要はありません。
インストーラ プログラムは製品ファミリ内のすべての製品で共通です。Cloud または Workplace Portal の他に Reporting または Demand Center を購入している場合、インストーラを再ダウンロードする必要はありません。
ステップ 7![]() ソフトウェア イメージをアプリケーション サーバ マシンのディレクトリに解凍します。たとえば C:¥CSP_Download(Windows)または /opt/CSP_Download(UNIX/Linux)にソフトウェアを解凍します。このマニュアルのこれ以降の部分では、このディレクトリを <ServicePortal_Software_Dir> と記述します。
ソフトウェア イメージをアプリケーション サーバ マシンのディレクトリに解凍します。たとえば C:¥CSP_Download(Windows)または /opt/CSP_Download(UNIX/Linux)にソフトウェアを解凍します。このマニュアルのこれ以降の部分では、このディレクトリを <ServicePortal_Software_Dir> と記述します。
Sun JDK のインストール
この項では、Sun JDK 6 をダウンロードしてインストールします。
ステップ 1![]() Oracle Sun JDK 6 ダウンロード Web サイトにアクセスして Sun JDK 6 をダウンロードします。
Oracle Sun JDK 6 ダウンロード Web サイトにアクセスして Sun JDK 6 をダウンロードします。
ステップ 2![]() ご使用の OS プラットフォームに対応した正しいバージョンの Sun JDK 6 をダウンロードしてください。サポートされている JDK 6 Update バージョンについては、 表 2-5 を参照してください。
ご使用の OS プラットフォームに対応した正しいバージョンの Sun JDK 6 をダウンロードしてください。サポートされている JDK 6 Update バージョンについては、 表 2-5 を参照してください。
ステップ 3![]() Service Portal のセットアップ プログラムを実行するマシンに Sun JDK 6 をインストールします。
Service Portal のセットアップ プログラムを実行するマシンに Sun JDK 6 をインストールします。
(注) 注:マシンに古いバージョンの Sun JDK がインストールされている場合は、最初にこの Sun JDK をアンインストールしてから、新しい Sun JDK 6 をインストールしてください。
Web サーバ
Service Portal インストーラでは、Apache Web サーバのプラグインは自動的には設定されません。Service Portal 製品のインストールが完了したら、JBoss サーバを指し示すように Apache Web サーバを手動で設定する必要があります。
Microsoft Internet Information Services(IIS)Web サーバが JBoss サーバと同じマシンにインストールされていない場合、Service Portal インストーラでは IIS Web サーバのプラグインは自動的には設定されません。Service Portal 製品のインストールが完了したら、JBoss サーバを指し示すように IIS Web サーバを手動で設定する必要があります。ただし Service Portal インストーラ プログラムを実行するマシンに IIS Web サーバがインストールされている場合は、次の項で詳しい情報を参照してください。
IIS の自動設定
「ソフトウェアの設定に関する前提条件」で説明したように、次の条件を満たす場合にのみ Service Portal インストーラは IIS Web サーバと JBoss アプリケーション サーバ間のプラグインを自動的に設定します。
•![]() Service Portal セットアップ プログラムを実行する Windows マシンに IIS がインストールされている。
Service Portal セットアップ プログラムを実行する Windows マシンに IIS がインストールされている。
•![]() Service Portal セットアップ プログラムの実行中に [Configure Web Server?] オプションに対して [Yes] と答えている。
Service Portal セットアップ プログラムの実行中に [Configure Web Server?] オプションに対して [Yes] と答えている。
Service Portal インストーラによって IIS Web サーバのプラグインが同じ Windows マシンの JBoss アプリケーション サーバを指し示すように自動的に設定されるようにするには、前提条件としてマシンに IIS がすでにインストールされ、動作している必要があります。また、最新の Microsoft Update を実行し、Windows オペレーティング システムの必須の重要な更新すべてをインストールします。最新の Microsoft Update のインストールが完了したら、IIS サーバが正しく動作しているかどうかを確認します。
ポート設定
JBoss サーバに必要なポート番号を以下に示します。ご使用のマシンではこれらのポート番号を使用しないでください。
•![]() 「CiscoServicePortal Request Center」サービス:4099、8084、4098、4444、4445、8088、8999、8093。
「CiscoServicePortal Request Center」サービス:4099、8084、4098、4444、4445、8088、8999、8093。
•![]() 「CiscoServicePortal Service Link」サービス:5099、8085、5098、5554、5555、8089、8998、8063。
「CiscoServicePortal Service Link」サービス:5099、8085、5098、5554、5555、8089、8998、8063。
アプリケーション サーバ情報ワークシート
以下の「アプリケーション サーバ情報ワークシート」の「値」列に設定値を記入してください。このワークシートに記入した情報は、後で Service Portal セットアップ プログラムを実行する際に必要になります。
WebLogic のインストール前の設定
この項では、Service Portal をインストールする前に Oracle WebLogic アプリケーション サーバを設定する手順を説明します。
このリリースの Service Portal では、次のオペレーティング システムと Java Development Kit で WebLogic アプリケーション サーバがサポートされています。
|
|
|
|
(注) Oracle JRockit はサポートされません。
サポートされているいずれかのオペレーティング システムに WebLogic アプリケーション サーバ 10.3 ソフトウェアをすでにインストールしていることを前提としています。この項で説明する手順に従い、Cisco Service Portal アプリケーション専用の管理対象 WebLogic サーバを新規に作成して設定します。
Sun JDK のインストール
WebLogic ソフトウェア インストールには特定バージョンの JRockit または Sun Java が組み込まれていますが、これらの JRockit や Java は使用しません。代わりに Sun JDK 6 をダウンロードしてインストールする必要があります。次の項では、このバージョンの Sun JDK 6 を使用するように WebLogic サーバを設定します。
ステップ 1![]() Oracle Sun JDK 6 ダウンロード Web サイトにアクセスして Sun JDK 6 をダウンロードします。
Oracle Sun JDK 6 ダウンロード Web サイトにアクセスして Sun JDK 6 をダウンロードします。
ステップ 2![]() ご使用の OS プラットフォームに対応した正しいバージョンの Sun JDK 6 をダウンロードしてください。サポートされている JDK 6 Update バージョンについては、 表 2-5 を参照してください。
ご使用の OS プラットフォームに対応した正しいバージョンの Sun JDK 6 をダウンロードしてください。サポートされている JDK 6 Update バージョンについては、 表 2-5 を参照してください。
ステップ 3![]() WebLogic ソフトウェアがインストールされているマシンに Sun JDK 6 をインストールします。
WebLogic ソフトウェアがインストールされているマシンに Sun JDK 6 をインストールします。
ステップ 4![]() Sun JDK 6 のインストール後に <WL_HOME>¥common¥bin ディレクトリに移動します。
Sun JDK 6 のインストール後に <WL_HOME>¥common¥bin ディレクトリに移動します。
(Windows)commEnv.cmd を次のように変更します。
a.![]() set JAVA_HOME="<Sun JDK 6 のインストール ディレクトリ>"
set JAVA_HOME="<Sun JDK 6 のインストール ディレクトリ>"
(UNIX または Linux)commEnv.sh を次のように変更します。
a.![]() JAVA_HOME="<Sun JDK 6 のインストール ディレクトリ>"
JAVA_HOME="<Sun JDK 6 のインストール ディレクトリ>"
ステップ 6![]() すべての WebLogic サーバ(WebLogic Administration Server と Node Manager を含む)を再起動します。
すべての WebLogic サーバ(WebLogic Administration Server と Node Manager を含む)を再起動します。
(注) WebLogic クラスタ環境を使用している場合は、クラスタの各ノードでステップ 3 ~ 6 を実行します。
Service Portal ソフトウェア イメージのダウンロード
この項では、Service Portal の電子ソフトウェア ディストリビューションをダウンロードします。
ステップ 1![]() Cisco 製品ダウンロード Web サイトにアクセスし、各自に割り当てられたユーザ名とパスワードを使用して認証します。
Cisco 製品ダウンロード Web サイトにアクセスし、各自に割り当てられたユーザ名とパスワードを使用して認証します。
ステップ 2![]() 製品名で検索するか、または製品セレクター内を移動して購入したポータル ソリューションを見つけます。(操作方法:[Products] > [Network Management and Automation] > [Data Center Management and Automation] > [Intelligent Automation])
製品名で検索するか、または製品セレクター内を移動して購入したポータル ソリューションを見つけます。(操作方法:[Products] > [Network Management and Automation] > [Data Center Management and Automation] > [Intelligent Automation])
ステップ 3![]() [Product Install] を選択し、該当するオペレーティング システムのリンクをクリックします。
[Product Install] を選択し、該当するオペレーティング システムのリンクをクリックします。
ステップ 4![]() 入手可能なリリース別のフォルダのリストが表示されます。リリース 9.3.2 を見つけてクリックします。
入手可能なリリース別のフォルダのリストが表示されます。リリース 9.3.2 を見つけてクリックします。
ステップ 5![]() ファイル RCInstall-win-*.zip(Windows オペレーティング システム)またはファイル RCInstall-unix-*.tar.gz(UNIX/Linux オペレーティング システム)をダウンロードします。
ファイル RCInstall-win-*.zip(Windows オペレーティング システム)またはファイル RCInstall-unix-*.tar.gz(UNIX/Linux オペレーティング システム)をダウンロードします。
ステップ 6![]() インストーラ プログラムはポータル製品ファミリ内のすべての製品で共通です。Cloud または Workplace Portal の他に Reporting または Demand Center を購入している場合、インストーラを再ダウンロードする必要はありません。
インストーラ プログラムはポータル製品ファミリ内のすべての製品で共通です。Cloud または Workplace Portal の他に Reporting または Demand Center を購入している場合、インストーラを再ダウンロードする必要はありません。
ステップ 7![]() ソフトウェア イメージをアプリケーション サーバ マシンのディレクトリに解凍します。WebLogic クラスタ環境を使用している場合は、Cisco Service Portal ソフトウェアを WebLogic Administration Server が稼動しているマシンに解凍します。たとえば C:¥CSP_Download(Windows)または /opt/CSP_Download(UNIX/Linux)にソフトウェアを解凍します。この項の以降の部分では、このディレクトリを <ServicePortal_Software_Dir> と記述します。
ソフトウェア イメージをアプリケーション サーバ マシンのディレクトリに解凍します。WebLogic クラスタ環境を使用している場合は、Cisco Service Portal ソフトウェアを WebLogic Administration Server が稼動しているマシンに解凍します。たとえば C:¥CSP_Download(Windows)または /opt/CSP_Download(UNIX/Linux)にソフトウェアを解凍します。この項の以降の部分では、このディレクトリを <ServicePortal_Software_Dir> と記述します。
カスタム Java ライブラリのインストール
この項では、複数の Java ライブラリ ファイルを <ServicePortal_Software_Dir> から <WL_HOME> ディレクトリにコピーし、クラス パスにこれらの jar ファイルを追加します。新しい Java ライブラリを反映するため、この作業の後に WebLogic サーバを再起動する必要があります。
ステップ 1![]() WebLogic マシンの「<JAVA_HOME>/jre/lib」ディレクトリの中に endorsed という名前のサブディレクトリを作成します。
WebLogic マシンの「<JAVA_HOME>/jre/lib」ディレクトリの中に endorsed という名前のサブディレクトリを作成します。
ステップ 2![]() 次の jar ファイルを「<ServicePortal_Software_Dir>/Third/endorsed」ディレクトリから「<JAVA_HOME>/jre/lib/endorsed」ディレクトリにコピーします。
次の jar ファイルを「<ServicePortal_Software_Dir>/Third/endorsed」ディレクトリから「<JAVA_HOME>/jre/lib/endorsed」ディレクトリにコピーします。
ステップ 3![]() <WL_HOME> ディレクトリの中に「cisco_lib」という名前のサブディレクトリを作成します。
<WL_HOME> ディレクトリの中に「cisco_lib」という名前のサブディレクトリを作成します。
ステップ 4![]() 次の jar ファイルを「<ServicePortal_Software_Dir>/Image/b8b/dist/common」ディレクトリから「<WL_HOME>/cisco_lib」ディレクトリにコピーします。
次の jar ファイルを「<ServicePortal_Software_Dir>/Image/b8b/dist/common」ディレクトリから「<WL_HOME>/cisco_lib」ディレクトリにコピーします。
•![]() geronimo-ccpp_1.0_spec-1.0-beta.jar
geronimo-ccpp_1.0_spec-1.0-beta.jar
•![]() pluto-container-api-2.0.2.jar
pluto-container-api-2.0.2.jar
•![]() pluto-container-driver-api-2.0.2.jar
pluto-container-driver-api-2.0.2.jar
•![]() portlet-api_2.0_spec-1.0.jar
portlet-api_2.0_spec-1.0.jar
ステップ 5![]() 「<WL_HOME>/common/bin」ディレクトリに移動します。
「<WL_HOME>/common/bin」ディレクトリに移動します。
(Windows)commEnv.cmd を次のように変更します。
a.![]() パラメータ「WEBLOGIC_CLASSPATH=」が含まれている行を見つけます。
パラメータ「WEBLOGIC_CLASSPATH=」が含まれている行を見つけます。
b.![]() 値「;%WL_HOME%¥cisco_lib¥newscale_drivers.jar」をこの行の末尾に追加します。必ずセミコロン文字を含めてください。たとえば、値を追加した後の行は次のようになります。
値「;%WL_HOME%¥cisco_lib¥newscale_drivers.jar」をこの行の末尾に追加します。必ずセミコロン文字を含めてください。たとえば、値を追加した後の行は次のようになります。
(UNIX または Linux)commEnv.sh を次のように変更します。
a.![]() パラメータ「WEBLOGIC_CLASSPATH=」が含まれている行を見つけます。
パラメータ「WEBLOGIC_CLASSPATH=」が含まれている行を見つけます。
b.![]() 値「${CLASSPATHSEP}${WL_HOME}/cisco_lib/newscale_drivers.jar」をこの行の末尾の二重引用符の前に追加します。たとえば、値を追加した後の行は次のようになります。
値「${CLASSPATHSEP}${WL_HOME}/cisco_lib/newscale_drivers.jar」をこの行の末尾の二重引用符の前に追加します。たとえば、値を追加した後の行は次のようになります。
ステップ 7![]() WebLogic Administration Server と WebLogic Node Manager を再起動します。インストールしたカスタム Java ライブラリを反映するため、すべての WebLogic サーバを再起動する必要があります。
WebLogic Administration Server と WebLogic Node Manager を再起動します。インストールしたカスタム Java ライブラリを反映するため、すべての WebLogic サーバを再起動する必要があります。
(注) WebLogic クラスタ環境を使用している場合は、クラスタの各ノードでステップ 1 ~ 7 を実行します。
管理対象 WebLogic サーバの作成
この項では、Server Portal 専用の管理対象 WebLogic サーバを新規に作成します。
ステップ 1![]() WebLogic Administration Console にログインします。
WebLogic Administration Console にログインします。
ステップ 2![]() WebLogic が PRODUCTION モードでインストールされている場合は、変更できるようにするため [Lock & Edit] ボタンをクリックします。それ以外の場合は、このステップを省略できます。
WebLogic が PRODUCTION モードでインストールされている場合は、変更できるようにするため [Lock & Edit] ボタンをクリックします。それ以外の場合は、このステップを省略できます。
ステップ 3![]() [Environment] を展開して [Servers] をクリックします。
[Environment] を展開して [Servers] をクリックします。
ステップ 4![]() [New] ボタンをクリックします。[Create a New Server] ページが表示されます。
[New] ボタンをクリックします。[Create a New Server] ページが表示されます。
ステップ 5![]() サーバ名を入力します(例:「server1」)。7001 以外のポート番号(例:8001)を入力します。これは、ポート 7001 は WebLogic Administration Server によってすでに使用されている可能性が最も高いポート番号であるためです。[No, this is a stand-alone server] オプションを選択します。
サーバ名を入力します(例:「server1」)。7001 以外のポート番号(例:8001)を入力します。これは、ポート 7001 は WebLogic Administration Server によってすでに使用されている可能性が最も高いポート番号であるためです。[No, this is a stand-alone server] オプションを選択します。
ステップ 6![]() [Finish] をクリックします。新規に作成した WebLogic サーバがリストに表示されます。
[Finish] をクリックします。新規に作成した WebLogic サーバがリストに表示されます。
ステップ 7![]() 新規に作成したサーバ「 server1 」をクリックしてそのプロパティを表示します。
新規に作成したサーバ「 server1 」をクリックしてそのプロパティを表示します。
ステップ 8![]() [Configuration] > [General] タブを開きます。
[Configuration] > [General] タブを開きます。
図 2-4 [Configuration] - [General Settings]
ステップ 9![]() [Machine] ドロップダウン リストから、WebLogic サーバが稼動するマシン(またはクラスタ)を選択します。
[Machine] ドロップダウン リストから、WebLogic サーバが稼動するマシン(またはクラスタ)を選択します。
ステップ 11![]() [Configuration] > [Keystores] タブを開きます。
[Configuration] > [Keystores] タブを開きます。
ステップ 12![]() [Keystores] ドロップダウン リストから [Custom Identity and Java Standard Trust] を選択します。
[Keystores] ドロップダウン リストから [Custom Identity and Java Standard Trust] を選択します。
Java 仮想マシンの引数の設定
ステップ 1![]() [Configuration] > [Server Start] タブを開きます。
[Configuration] > [Server Start] タブを開きます。
図 2-5 [Server Start] - [Arguments]
•![]() Arguments = -server -Xms1024m -Xmx1024m -XX:PermSize=256m
Arguments = -server -Xms1024m -Xmx1024m -XX:PermSize=256m
-XX:NewRatio=3 -Dweblogic.ext.dirs=<WL_HOME>/cisco_lib
-XX:CompileCommand=exclude,com/newscale/bfw/signon/filters/AuthenticationFilter,doFilter
-XX:CompileCommand=exclude,org/apache/xml/dtm/ref/sax2dtm/SAX2DTM,startElement
-XX:CompileCommand=exclude,org/exolab/castor/xml/Marshaller,marshal
-XX:CompileCommand=exclude,org/apache/xpath/compiler/XPathParser,UnionExpr
-XX:CompileCommand=exclude,org/apache/oro/text/regex/Perl5Compiler,__parseAtom
(<WL_HOME>/cisco_lib は「カスタム Java ライブラリのインストール」で説明するディレクトリ)。
•![]() Password = <ユーザ名「weblogic」のパスワード>
Password = <ユーザ名「weblogic」のパスワード>
•![]() Confirm Password = <ユーザ名「weblogic」のパスワードを再入力する>
Confirm Password = <ユーザ名「weblogic」のパスワードを再入力する>
ステップ 4![]() WebLogic が PRODUCTION モードでインストールされている場合は [Activate Changes] をクリックします。それ以外の場合は、このステップを省略できます。
WebLogic が PRODUCTION モードでインストールされている場合は [Activate Changes] をクリックします。それ以外の場合は、このステップを省略できます。
ステップ 6![]() WebLogic サーバ「 server1 」を選択し、[Start] ボタンをクリックします。「State=RUNNING」と表示されるまで待ちます。
WebLogic サーバ「 server1 」を選択し、[Start] ボタンをクリックします。「State=RUNNING」と表示されるまで待ちます。
これで、新規 WebLogic サーバが、Sun JDK 6 とこの項でインストールしたカスタム Java ライブラリを使用するように設定されました。
WebLogic クラスタの設定
Service Portal 製品は、「RequestCenter」および「ServiceLink」という 2 つのエンタープライズ アプリケーションで構成されます。ただし Service Portal インストーラでは RequestCenter と ServiceLink アプリケーションは WebLogic サーバに自動的に導入されません。インストーラ プログラムは RequestCenter アプリケーションの EAR ファイル(RequestCenter.ear)と ServiceLink アプリケーションの WAR ファイル(ISEE.war)を生成するだけです。これらのファイルは WebLogic 環境に合わせてカスタマイズされています。Service Portal インストーラの実行後に、この章で後述する手順に従って RequestCenter.ear と ISEE.war を WebLogic サーバに手動で導入する必要があります。
RequestCenter.ear ファイルと ISEE.war ファイルは 2 つの異なるエンタープライズ アプリケーションですが、同一 WebLogic サーバに導入できます。ただし複数のノードからなる WebLogic クラスタ環境(各ノードが個々のコンピュータ)をセットアップする場合には、次のように追加の設定を行う必要があります。
ステップ 1![]() クラスタの各ノード(各コンピュータ)で、「Sun JDK のインストール」と「カスタム Java ライブラリのインストール」で説明する作業を実行します。
クラスタの各ノード(各コンピュータ)で、「Sun JDK のインストール」と「カスタム Java ライブラリのインストール」で説明する作業を実行します。
ステップ 2![]() 「管理対象 WebLogic サーバの作成」の説明に従い、各ノードで WebLogic サーバを作成し、サーバをクラスタに追加する前に各サーバの JVM 引数を設定します。
「管理対象 WebLogic サーバの作成」の説明に従い、各ノードで WebLogic サーバを作成し、サーバをクラスタに追加する前に各サーバの JVM 引数を設定します。
ステップ 3![]() 同一ポート番号を使用するようにクラスタ内の各 WebLogic サーバを設定する必要があります。たとえばクラスタに 2 つのノードが含まれているとします。ノード 1 の WebLogic サーバがポート 8001 を使用して稼動する場合、ノード 2 の WebLogic サーバもポート 8001 を使用して稼動する必要があります。
同一ポート番号を使用するようにクラスタ内の各 WebLogic サーバを設定する必要があります。たとえばクラスタに 2 つのノードが含まれているとします。ノード 1 の WebLogic サーバがポート 8001 を使用して稼動する場合、ノード 2 の WebLogic サーバもポート 8001 を使用して稼動する必要があります。
ステップ 4![]() RequestCenter.ear ファイルは WebLogic クラスタに導入されます。ただし ISEE.war ファイルを同じクラスタに導入することはできません。このファイルは、いずれのクラスタのメンバでもないスタンドアロン WebLogic サーバに導入する必要があります。したがってクラスタ WebLogic 環境を使用している場合は ISEE.war ファイルに使用するスタンドアロン WebLogic サーバ(クラスタ メンバではないサーバ)を追加で作成する必要があります。このマニュアルのこれ以降の部分では、このスタンドアロン WebLogic サーバを「Service Link WebLogic サーバ」と呼びます。このスタンドアロン「Service Link WebLogic サーバ」の JVM 引数を次のように設定できます。
RequestCenter.ear ファイルは WebLogic クラスタに導入されます。ただし ISEE.war ファイルを同じクラスタに導入することはできません。このファイルは、いずれのクラスタのメンバでもないスタンドアロン WebLogic サーバに導入する必要があります。したがってクラスタ WebLogic 環境を使用している場合は ISEE.war ファイルに使用するスタンドアロン WebLogic サーバ(クラスタ メンバではないサーバ)を追加で作成する必要があります。このマニュアルのこれ以降の部分では、このスタンドアロン WebLogic サーバを「Service Link WebLogic サーバ」と呼びます。このスタンドアロン「Service Link WebLogic サーバ」の JVM 引数を次のように設定できます。
ステップ 5![]() スタンドアロン「Service Link WebLogic サーバ」が別のマシンにインストールされている場合は、「Sun JDK のインストール」と「カスタム Java ライブラリのインストール」で説明する作業をその WebLogic マシンで実行してください。「Service Link WebLogic サーバ」のポート番号は、クラスタ内の WebLogic サーバのポート番号と同一である必要はありません。
スタンドアロン「Service Link WebLogic サーバ」が別のマシンにインストールされている場合は、「Sun JDK のインストール」と「カスタム Java ライブラリのインストール」で説明する作業をその WebLogic マシンで実行してください。「Service Link WebLogic サーバ」のポート番号は、クラスタ内の WebLogic サーバのポート番号と同一である必要はありません。
JMS Server の設定
この項では、JMS サーバと、Service Portal により使用される JMS キューを設定します。
(注) RequestCenter.ear と ISEE.war を同じ非クラスタ WebLogic サーバに導入する場合、その WebLogic サーバでもこの項で説明する JMS 設定が実行されます。ただし WebLogic クラスタ環境を使用している場合は、「Service Link WebLogic サーバ」に対して JMS 設定が実行されます。
永続ストアの作成
ステップ 1![]() ご使用のコンピュータで <WL_HOME> ディレクトリに移動します。
ご使用のコンピュータで <WL_HOME> ディレクトリに移動します。
ステップ 2![]() サブディレクトリ CiscoFileStore を作成します。
サブディレクトリ CiscoFileStore を作成します。
ステップ 3![]() WebLogic Administration Console にログインします。
WebLogic Administration Console にログインします。
ステップ 4![]() WebLogic が PRODUCTION モードでインストールされている場合は [Lock & Edit] ボタンをクリックします。それ以外の場合は、このステップを省略できます。
WebLogic が PRODUCTION モードでインストールされている場合は [Lock & Edit] ボタンをクリックします。それ以外の場合は、このステップを省略できます。
ステップ 5![]() [Services] を展開し、[Persistent Stores] をクリックします。
[Services] を展開し、[Persistent Stores] をクリックします。
ステップ 6![]() [New] > [Create FileStore] を選択します。[Create a New File Store] ページが表示されます。
[New] > [Create FileStore] を選択します。[Create a New File Store] ページが表示されます。
ステップ 7![]() [Name] フィールドに CiscoFileStore と入力します。
[Name] フィールドに CiscoFileStore と入力します。
ステップ 8![]() [Target] ドロップダウン リストでご使用の WebLogic サーバを選択します。
[Target] ドロップダウン リストでご使用の WebLogic サーバを選択します。
ステップ 9![]() [Directory] テキスト ボックスに、ステップ 2 で作成した CiscoFileStore ディレクトリのフルパス(例:/opt/bea/wlserver_10.3/CiscoFileStore)を入力します。
[Directory] テキスト ボックスに、ステップ 2 で作成した CiscoFileStore ディレクトリのフルパス(例:/opt/bea/wlserver_10.3/CiscoFileStore)を入力します。
JMS サーバの作成
ステップ 1![]() WebLogic Administration Console で [Services] > [Messaging] を展開し、[JMS Servers] をクリックします。
WebLogic Administration Console で [Services] > [Messaging] を展開し、[JMS Servers] をクリックします。
ステップ 2![]() [New] ボタンをクリックします。[Create a New JMS Server] ページが表示されます。
[New] ボタンをクリックします。[Create a New JMS Server] ページが表示されます。
ステップ 3![]() [Name] フィールドに CiscoJMSServer と入力します。
[Name] フィールドに CiscoJMSServer と入力します。
ステップ 4![]() [Persistent Store] ドロップダウン リストから CiscoFileStore という名前の永続ストアを選択します。
[Persistent Store] ドロップダウン リストから CiscoFileStore という名前の永続ストアを選択します。
ステップ 6![]() [Target] ドロップダウン リストでご使用の WebLogic サーバを選択します。(WebLogic クラスタ環境を使用している場合は [Service Link WebLogic Server] を選択します)。
[Target] ドロップダウン リストでご使用の WebLogic サーバを選択します。(WebLogic クラスタ環境を使用している場合は [Service Link WebLogic Server] を選択します)。
JMS モジュールの作成
ステップ 1![]() WebLogic Administration Console で [Services] > [Messaging] を展開し、[JMS Modules] をクリックします。
WebLogic Administration Console で [Services] > [Messaging] を展開し、[JMS Modules] をクリックします。
ステップ 2![]() [New] ボタンをクリックします。[Create JMS System Module] ページが表示されます。
[New] ボタンをクリックします。[Create JMS System Module] ページが表示されます。
ステップ 3![]() [Name] フィールドに CiscoJMSModule と入力します。
[Name] フィールドに CiscoJMSModule と入力します。
ステップ 5![]() ご使用の WebLogic サーバをターゲットとして選択します。(WebLogic クラスタ環境を使用している場合は Service Link WebLogic サーバ を選択します)。
ご使用の WebLogic サーバをターゲットとして選択します。(WebLogic クラスタ環境を使用している場合は Service Link WebLogic サーバ を選択します)。
ステップ 8![]() 新規に作成した JMS モジュール CiscoJMSModule をクリックし、そのプロパティを表示します。
新規に作成した JMS モジュール CiscoJMSModule をクリックし、そのプロパティを表示します。
ステップ 9![]() [Subdeployments] タブを開きます。
[Subdeployments] タブを開きます。
ステップ 11![]() [Subdeployment Name] フィールドに「 CiscoSubdeployment 」と入力します。
[Subdeployment Name] フィールドに「 CiscoSubdeployment 」と入力します。
ステップ 13![]() JMS サーバ CiscoJMSServer を選択します。
JMS サーバ CiscoJMSServer を選択します。
接続ファクトリの作成
ステップ 1![]() WebLogic Administration Console で [Services] > [Messaging] を展開し、[JMS Modules] をクリックします。
WebLogic Administration Console で [Services] > [Messaging] を展開し、[JMS Modules] をクリックします。
ステップ 2![]() JMS モジュール CiscoJMSModule をクリックし、そのプロパティを表示します。
JMS モジュール CiscoJMSModule をクリックし、そのプロパティを表示します。
ステップ 3![]() [Configuration] タブを開きます。
[Configuration] タブを開きます。
ステップ 5![]() [Connection Factory] オプションを選択します。
[Connection Factory] オプションを選択します。
ステップ 7![]() [JNDI Name] フィールドと [Name] フィールドに NSConnectionFactory と入力します。
[JNDI Name] フィールドと [Name] フィールドに NSConnectionFactory と入力します。
ステップ 9![]() [Advanced Targeting] ボタンをクリックします。
[Advanced Targeting] ボタンをクリックします。
ステップ 10![]() [Subdeployments] ドロップダウン リストから [CiscoSubdeployment] を選択します。画面が更新され、JMS サーバ CiscoJMSServer がすでに選択されていることが示されます。
[Subdeployments] ドロップダウン リストから [CiscoSubdeployment] を選択します。画面が更新され、JMS サーバ CiscoJMSServer がすでに選択されていることが示されます。
JMS テンプレートの作成
ステップ 1![]() WebLogic Administration Console で [Services] > [Messaging] を展開し、[JMS Modules] をクリックします。
WebLogic Administration Console で [Services] > [Messaging] を展開し、[JMS Modules] をクリックします。
ステップ 2![]() JMS モジュール CiscoJMSModule をクリックし、そのプロパティを表示します。
JMS モジュール CiscoJMSModule をクリックし、そのプロパティを表示します。
ステップ 3![]() [Configuration] タブを開きます。
[Configuration] タブを開きます。
ステップ 5![]() [JMS Template] オプションを選択します。
[JMS Template] オプションを選択します。
ステップ 7![]() [Name] フィールドに ISEEInboundQueueTemplate と入力します。
[Name] フィールドに ISEEInboundQueueTemplate と入力します。
ステップ 9![]() ステップ 4 ~ 8 をさらに 4 回繰り返し、次の名前の 4 つの JMS テンプレートを作成します。
ステップ 4 ~ 8 をさらに 4 回繰り返し、次の名前の 4 つの JMS テンプレートを作成します。
•![]() BEEERequisitionsQueueTemplate
BEEERequisitionsQueueTemplate
•![]() BEEEAuthorizationsQueueTemplate
BEEEAuthorizationsQueueTemplate
キューの作成
ステップ 1![]() WebLogic Administration Console で [Services] > [Messaging] を展開し、[JMS Modules] をクリックします。
WebLogic Administration Console で [Services] > [Messaging] を展開し、[JMS Modules] をクリックします。
ステップ 2![]() JMS モジュール CiscoJMSModule をクリックし、そのプロパティを表示します。
JMS モジュール CiscoJMSModule をクリックし、そのプロパティを表示します。
ステップ 3![]() [Configuration] タブを開きます。
[Configuration] タブを開きます。
ステップ 7![]() [JNDI Name] フィールドと [Name] フィールドに ISEEInboundQueue と入力します。
[JNDI Name] フィールドと [Name] フィールドに ISEEInboundQueue と入力します。
ステップ 8![]() [Template] ドロップダウン リストから、作成した ISEEInboundQueueTemplate を選択します。
[Template] ドロップダウン リストから、作成した ISEEInboundQueueTemplate を選択します。
ステップ 10![]() [Subdeployments] ドロップダウン リストから [CiscoSubdeployment] を選択します。画面が更新され、JMS サーバ CiscoJMSServer がすでに選択されていることが示されます。
[Subdeployments] ドロップダウン リストから [CiscoSubdeployment] を選択します。画面が更新され、JMS サーバ CiscoJMSServer がすでに選択されていることが示されます。
ステップ 12![]() ステップ 4 ~ 11 をさらに 4 回繰り返し、次の名前の 4 つの JMS キューを作成します。
ステップ 4 ~ 11 をさらに 4 回繰り返し、次の名前の 4 つの JMS キューを作成します。
|
|
|
|
ステップ 13![]() WebLogic が PRODUCTION モードでインストールされている場合は [Activate Changes] をクリックします。それ以外の場合は、このステップを省略できます。
WebLogic が PRODUCTION モードでインストールされている場合は [Activate Changes] をクリックします。それ以外の場合は、このステップを省略できます。
JDBC データ ソースの設定
この項では、2 つの JDBC データ ソースが「データベースの設定」で作成した RequestCenter データベースと Datamart データベースを指し示すように設定します。
「データベースの設定」の終わりで記入したワークシートから、データベースに関する必要な情報を取得します。
ステップ 1![]() WebLogic Administration Console にログインします。
WebLogic Administration Console にログインします。
ステップ 2![]() WebLogic が PRODUCTION モードでインストールされている場合は [Lock & Edit] ボタンをクリックします。それ以外の場合は、このステップを省略できます。
WebLogic が PRODUCTION モードでインストールされている場合は [Lock & Edit] ボタンをクリックします。それ以外の場合は、このステップを省略できます。
ステップ 3![]() [Services] > [JDBC] を展開して [Data Sources] をクリックします。
[Services] > [JDBC] を展開して [Data Sources] をクリックします。
ステップ 5![]() [Name] フィールドに REQUESTCENTERDS と入力します。
[Name] フィールドに REQUESTCENTERDS と入力します。
ステップ 6![]() [JNDI Name] フィールドに eis/REQUESTCENTERDS と入力します。
[JNDI Name] フィールドに eis/REQUESTCENTERDS と入力します。
ステップ 7![]() [Database Type] ドロップダウン リストから [Other] を選択します。
[Database Type] ドロップダウン リストから [Other] を選択します。
ステップ 9![]() 次のページで [Next] をクリックします。
次のページで [Next] をクリックします。
ステップ 10![]() [Database Name] フィールドに、「データベースの設定」で作成した RequestCenter データベースの名前を入力します。
[Database Name] フィールドに、「データベースの設定」で作成した RequestCenter データベースの名前を入力します。
ステップ 11![]() [Host Name] フィールドにデータベース サーバ名を入力します。
[Host Name] フィールドにデータベース サーバ名を入力します。
ステップ 12![]() [Port] フィールドにデータベース ポート番号を入力します。
[Port] フィールドにデータベース ポート番号を入力します。
ステップ 13![]() [Database User Name] フィールドに RequestCenter データベースの db_owner(またはスキーマ ユーザ)を入力します。(たとえば RCUser と入力します)。
[Database User Name] フィールドに RequestCenter データベースの db_owner(またはスキーマ ユーザ)を入力します。(たとえば RCUser と入力します)。
ステップ 14![]() [Password] フィールドと [Confirm Password] フィールドに、[Database User Name] に入力したユーザのパスワードを入力します。
[Password] フィールドと [Confirm Password] フィールドに、[Database User Name] に入力したユーザのパスワードを入力します。
ステップ 16![]() [Driver Class Name] フィールドに次の値を(1 つのストリングとして)入力します。
[Driver Class Name] フィールドに次の値を(1 つのストリングとして)入力します。
com.newscale.jdbc.UnifiedDriver
ステップ 17![]() [URL] フィールドに次の値を(1 つのストリングとして)入力します。
[URL] フィールドに次の値を(1 つのストリングとして)入力します。
jdbc:newscale:sqlserver://<db_server>:<db_port>
(例:jdbc:newscale:sqlserver://stan.celosis.com:1433)
jdbc:newscale:oracle://<db_server>:<db_port>;SID=<oracle_sid>
(例:jdbc:newscale:oracle://sam.celosis.com:1521;SID=rosewood)
ステップ 18![]() [Database User Name] フィールドに RequestCenter データベースの db_owner(またはスキーマ ユーザ)を入力します。(たとえば RCUser と入力します)。
[Database User Name] フィールドに RequestCenter データベースの db_owner(またはスキーマ ユーザ)を入力します。(たとえば RCUser と入力します)。
ステップ 19![]() [Password] フィールドと [Confirm Password] フィールドに、[Database User Name] に入力したユーザのパスワードを入力します。
[Password] フィールドと [Confirm Password] フィールドに、[Database User Name] に入力したユーザのパスワードを入力します。
ステップ 20![]() [Properties] フィールドに、次の名前と値のペアを(1 行に 1 つずつ)入力します。
[Properties] フィールドに、次の名前と値のペアを(1 行に 1 つずつ)入力します。
alwaysReportTriggerResults=true
insensitiveResultSetBufferSize=16384
useServerSideUpdatableCursors=false
SendStringParametersAsUnicode=true
SendStringParametersAsUnicode=true
ステップ 21![]() ([Test Configuration] ボタンをクリックしないでください)。[Next] をクリックします。
([Test Configuration] ボタンをクリックしないでください)。[Next] をクリックします。
ステップ 22![]() ご使用の WebLogic サーバをターゲットとして選択します。
ご使用の WebLogic サーバをターゲットとして選択します。
(注) 注:WebLogic クラスタ環境を使用している場合は、クラスタ名と「Service Link WebLogic サーバ」の両方をこのデータ ソースのターゲットとして選択します。
ステップ 24![]() 新規に作成されたデータ ソース「REQUESTCENTERDS」が [Summary of JDBC Data Sources] ページに表示されます。表示されるこのデータ ソースの JNDI 名とターゲットの情報が正しいかどうかを確認します。
新規に作成されたデータ ソース「REQUESTCENTERDS」が [Summary of JDBC Data Sources] ページに表示されます。表示されるこのデータ ソースの JNDI 名とターゲットの情報が正しいかどうかを確認します。
ステップ 25![]() [REQUESTCENTERDS] をクリックしてそのプロパティを表示します。
[REQUESTCENTERDS] をクリックしてそのプロパティを表示します。
ステップ 26![]() [Configuration] > [Connection Pool] タブを開きます。
[Configuration] > [Connection Pool] タブを開きます。
ステップ 29![]() [Connection Pool] タブを表示した状態で、ページ下部にある [Advanced] を展開します。
[Connection Pool] タブを表示した状態で、ページ下部にある [Advanced] を展開します。
図 2-7 [Connection Pool] - [Advanced Settings]

ステップ 30![]() [Test Connections On Reserve] オプションを選択します。
[Test Connections On Reserve] オプションを選択します。
ステップ 31![]() [Test Table Name] フィールドに次の値を(1 つのストリングとして)入力します。
[Test Table Name] フィールドに次の値を(1 つのストリングとして)入力します。
ステップ 33![]() Datamart データベースのデータ ソースを新規に作成します。このため、ステップ 4 ~ 32 を繰り返し、RequestCenter データベースの代わりに Datamart データベースに該当する値を設定します。
Datamart データベースのデータ ソースを新規に作成します。このため、ステップ 4 ~ 32 を繰り返し、RequestCenter データベースの代わりに Datamart データベースに該当する値を設定します。
•![]() Target = <クラスタ WebLogic 環境を使用している場合は、このデータ ソースのターゲットとしてクラスタ名を選択する必要があります。ターゲットとして「Service Link WebLogic サーバ」を使用する必要はありません。>
Target = <クラスタ WebLogic 環境を使用している場合は、このデータ ソースのターゲットとしてクラスタ名を選択する必要があります。ターゲットとして「Service Link WebLogic サーバ」を使用する必要はありません。>
•![]() Test Table name = SQL select * from DM_DIRPERSON
Test Table name = SQL select * from DM_DIRPERSON
ステップ 34![]() WebLogic が PRODUCTION モードでインストールされている場合は [Activate Changes] をクリックします。それ以外の場合は、このステップを省略できます。
WebLogic が PRODUCTION モードでインストールされている場合は [Activate Changes] をクリックします。それ以外の場合は、このステップを省略できます。
WebLogic サーバの再起動
新しい JMS 設定とデータ ソース設定を反映するため、WebLogic サーバを再起動する必要があります。
(注) WebLogic クラスタ環境を使用している場合は、クラスタ内のすべての WebLogic サーバと「Service Link WebLogic サーバ」を再起動します。
ステップ 2![]() WebLogic サーバが正常に起動したら、このサーバの [Configuration] > [General] タブに移動します。
WebLogic サーバが正常に起動したら、このサーバの [Configuration] > [General] タブに移動します。

ステップ 3![]() [Name] フィールドのすぐ上にある [View JNDI Tree] というリンクをクリックします。[JNDI Viewer] ウィンドウが表示されます。
[Name] フィールドのすぐ上にある [View JNDI Tree] というリンクをクリックします。[JNDI Viewer] ウィンドウが表示されます。
ステップ 4![]() 左側の [JNDI Tree Structure] で次のエントリを見つけます。
左側の [JNDI Tree Structure] で次のエントリを見つけます。
ステップ 5![]() クラスタ WebLogic 環境を使用している場合は、WebLogic クラスタの JNDI ツリーには次の 2 つのエントリのみが含まれている必要があります。
クラスタ WebLogic 環境を使用している場合は、WebLogic クラスタの JNDI ツリーには次の 2 つのエントリのみが含まれている必要があります。
「Service Link WebLogic サーバ」の JNDI ツリーには次のエントリが含まれている必要があります。
アプリケーション サーバ情報ワークシート
以下の「アプリケーション サーバ情報ワークシート」の「値」列に設定値を記入してください。このワークシートに記入した情報は、後でセットアップ プログラムを実行する際に必要になります。
WebSphere のインストール前の設定
この項では、Cisco Service Portal をインストールする前に IBM WebSphere Application Server を設定する手順を説明します。
このリリースの Cisco Service Portal では、以下のオペレーティング システムおよび Java Development Kit で WebSphere アプリケーション サーバがサポートされています。
|
|
|
|
サポートされているいずれかのオペレーティング システムに WebSphere Application Server 7.0.0 ソフトウェアをすでにインストールしていることを前提としています。この項で説明する手順に従い、Cisco Service Portal アプリケーション専用の WebSphere サーバを新規に作成して設定します。
Service Portal ソフトウェア イメージのダウンロード
この項では、Cisco Service Portal の電子ソフトウェア ディストリビューションをダウンロードします。
ステップ 1![]() Cisco 製品ダウンロード Web サイトにアクセスし、各自に割り当てられたユーザ名とパスワードを使用して認証します。
Cisco 製品ダウンロード Web サイトにアクセスし、各自に割り当てられたユーザ名とパスワードを使用して認証します。
ステップ 2![]() 製品名で検索するか、または製品セレクター内を移動して購入したポータル ソリューションを見つけます。(操作方法:[Products] > [Network Management and Automation] > [Data Center Management and Automation] > [Intelligent Automation])
製品名で検索するか、または製品セレクター内を移動して購入したポータル ソリューションを見つけます。(操作方法:[Products] > [Network Management and Automation] > [Data Center Management and Automation] > [Intelligent Automation])
ステップ 3![]() [Product Install] を選択し、該当するオペレーティング システムのリンクをクリックします。
[Product Install] を選択し、該当するオペレーティング システムのリンクをクリックします。
ステップ 4![]() 入手可能なリリース別のフォルダのリストが表示されます。リリース 9.3.2 を見つけてクリックします。
入手可能なリリース別のフォルダのリストが表示されます。リリース 9.3.2 を見つけてクリックします。
ステップ 5![]() ファイル RCInstall-win-*.zip(Windows オペレーティング システム)またはファイル RCInstall-unix-*.tar.gz(UNIX/Linux オペレーティング システム)をダウンロードします。
ファイル RCInstall-win-*.zip(Windows オペレーティング システム)またはファイル RCInstall-unix-*.tar.gz(UNIX/Linux オペレーティング システム)をダウンロードします。
ステップ 6![]() インストーラ プログラムはポータル製品ファミリ内のすべての製品で共通です。Cloud または Workplace Portal の他に Reporting または Demand Center を購入している場合、インストーラを再ダウンロードする必要はありません。
インストーラ プログラムはポータル製品ファミリ内のすべての製品で共通です。Cloud または Workplace Portal の他に Reporting または Demand Center を購入している場合、インストーラを再ダウンロードする必要はありません。
ステップ 7![]() ソフトウェア イメージをアプリケーション サーバ マシンのディレクトリに解凍します。クラスタ WebSpher 環境を使用している場合は、Cisco Service Portal ソフトウェアを WebSphere Deployment Manager が稼動しているマシンに解凍します。たとえば C:¥CSP_Download(Windows)または /opt/CSP_Download(UNIX/Linux)にソフトウェアを解凍します。この項の以降の部分では、このディレクトリを <ServicePortal_Software_Dir> と記述します。
ソフトウェア イメージをアプリケーション サーバ マシンのディレクトリに解凍します。クラスタ WebSpher 環境を使用している場合は、Cisco Service Portal ソフトウェアを WebSphere Deployment Manager が稼動しているマシンに解凍します。たとえば C:¥CSP_Download(Windows)または /opt/CSP_Download(UNIX/Linux)にソフトウェアを解凍します。この項の以降の部分では、このディレクトリを <ServicePortal_Software_Dir> と記述します。
カスタム Java ライブラリのインストール
この項では、複数のカスタム Java ライブラリ ファイルを <ServicePortal_Software_Dir> ディレクトリから <WAS_INSTALL_ROOT> ディレクトリにコピーします。この <ServicePortal_Software_Dir> は Cisco Service Portal の電子ソフトウェア ディストリビューションの解凍先(例:C:¥CSP_Download または /opt/CSP_Download)、<WAS_INSTALL_ROOT> は WebSphere Application Server のインストール ディレクトリ(例:C:¥IBM¥WebSphere¥AppServer または /opt/IBM/WebSphere/AppServer)です。
ステップ 1![]() 次のファイルを「<ServicePortal_Software_Dir>/Image/b8b/ dist/common」ディレクトリから「<WAS_INSTALL_ROOT>/lib/ext」ディレクトリにコピーします。
次のファイルを「<ServicePortal_Software_Dir>/Image/b8b/ dist/common」ディレクトリから「<WAS_INSTALL_ROOT>/lib/ext」ディレクトリにコピーします。
•![]() geronimo-ccpp_1.0_spec-1.0-beta.jar
geronimo-ccpp_1.0_spec-1.0-beta.jar
•![]() newscale_ws_jdbc_provider.jar
newscale_ws_jdbc_provider.jar
•![]() pluto-container-api-2.0.2.jar
pluto-container-api-2.0.2.jar
•![]() pluto-container-driver-api-2.0.2.jar
pluto-container-driver-api-2.0.2.jar
ステップ 2![]() 次のファイルを「<ServicePortal_Software_Dir>/Image/b8b/ dist/common」ディレクトリから「<WAS_INSTALL_ROOT>/java/jre/lib/ext」ディレクトリにコピーします。
次のファイルを「<ServicePortal_Software_Dir>/Image/b8b/ dist/common」ディレクトリから「<WAS_INSTALL_ROOT>/java/jre/lib/ext」ディレクトリにコピーします。
•![]() portlet-api_2.0_spec-1.0.jar
portlet-api_2.0_spec-1.0.jar
ステップ 3![]() WebSphere Deployment Manager サーバと WebSphere Node Manager を再起動します。インストールしたカスタム Java ライブラリが反映されるようにするため、すべての WebSphere サーバを再起動する必要があります。
WebSphere Deployment Manager サーバと WebSphere Node Manager を再起動します。インストールしたカスタム Java ライブラリが反映されるようにするため、すべての WebSphere サーバを再起動する必要があります。
(注) WebSphere クラスタ環境を使用している場合は、クラスタの各ノード(WebSphere Deployment Manager のホスト マシンを含む)でステップ 1 ~ 3 を実行する必要があります。
WebSphere サーバの作成
この項では、Cisco Server Portal 専用の WebSphere サーバを新規に作成します。
ステップ 1![]() WebSphere Administration Console にログインします。
WebSphere Administration Console にログインします。
ステップ 2![]() [Servers] > [Server Types] を展開して [WebSphere application servers] をクリックします。
[Servers] > [Server Types] を展開して [WebSphere application servers] をクリックします。
ステップ 3![]() 右側のパネルで [New] ボタンをクリックします。[Create a new application server] ページが表示されます。
右側のパネルで [New] ボタンをクリックします。[Create a new application server] ページが表示されます。
ステップ 4![]() ドロップダウン リストからノード名を選択し、サーバ名(例: server1 )を入力して [Next] をクリックします。
ドロップダウン リストからノード名を選択し、サーバ名(例: server1 )を入力して [Next] をクリックします。
ステップ 5![]() デフォルト テンプレートを選択して [Next] をクリックします。
デフォルト テンプレートを選択して [Next] をクリックします。
ステップ 6![]() [Generate Unique Ports] オプションを選択して [Next] をクリックします。
[Generate Unique Ports] オプションを選択して [Next] をクリックします。
ステップ 8![]() [Save] をクリックしてマスタ設定に直接保存します。
[Save] をクリックしてマスタ設定に直接保存します。
Java 仮想マシンの引数の設定
ステップ 1![]() 新規に作成した WebSphere サーバ( server1 )をクリックして [Configuration] タブを開きます。
新規に作成した WebSphere サーバ( server1 )をクリックして [Configuration] タブを開きます。
ステップ 2![]() 右側のパネルの [Server Infrastructure] セクションで [Java and Process Management] を展開し、[Process Definition] をクリックします。
右側のパネルの [Server Infrastructure] セクションで [Java and Process Management] を展開し、[Process Definition] をクリックします。
ステップ 3![]() 右側のパネルの [Additional Properties] セクションで [Java Virtual Machine] をクリックします。
右側のパネルの [Additional Properties] セクションで [Java Virtual Machine] をクリックします。
•![]() [Debug Mode] オプションが選択されている場合は選択解除します
[Debug Mode] オプションが選択されている場合は選択解除します
•![]() Generic JVM arguments = -Djava.net.preferIPv4Stack=true -Dclient.encoding.override=UTF-8
Generic JVM arguments = -Djava.net.preferIPv4Stack=true -Dclient.encoding.override=UTF-8
ステップ 6![]() [Save] をクリックしてマスタ設定に直接保存します。
[Save] をクリックしてマスタ設定に直接保存します。
[DISPLAY] プロパティの設定(UNIX および Linux のみ)
次の手順に従って、Service Portal UI に KPI チャートを表示できるようにします。アプリケーション サーバ マシンで稼動しているオペレーティング システムが UNIX または Linux の場合、前提条件セクションで説明したように、X-Window Server または Xvfp(仮想フレームバッファ X Server)がご使用のマシンにインストールされ動作していることを確認します。これにより、WebSphere が KPI チャートを表示するために X-Windows サーバまたは Xvfb と通信できます。
[DISPLAY] プロパティを設定するには、次の手順を実行します。
ステップ 1![]() 新規に作成した WebSphere サーバ( server1 )をクリックして [Configuration] タブを開きます。
新規に作成した WebSphere サーバ( server1 )をクリックして [Configuration] タブを開きます。
ステップ 2![]() 右側のパネルの [Server Infrastructure] セクションで [Java and Process Management] を展開し、[Process Definition] をクリックします。
右側のパネルの [Server Infrastructure] セクションで [Java and Process Management] を展開し、[Process Definition] をクリックします。
ステップ 3![]() 右側のパネルの [Additional Properties] セクションで [Environment Entries] をクリックします。
右側のパネルの [Additional Properties] セクションで [Environment Entries] をクリックします。
ステップ 7![]() [Save] をクリックしてマスタ設定に直接保存します。
[Save] をクリックしてマスタ設定に直接保存します。
ポート番号の確認
ステップ 1![]() 新規に作成した WebSphere サーバ( server1 )をクリックして [Configuration] タブを開きます。
新規に作成した WebSphere サーバ( server1 )をクリックして [Configuration] タブを開きます。
ステップ 2![]() 右側のパネルの [Communication] セクションで [Ports] を展開します。ポート名とポート番号を示す表が表示されます。
右側のパネルの [Communication] セクションで [Ports] を展開します。ポート名とポート番号を示す表が表示されます。
ステップ 3![]() 次のポート名のポート番号を書きとめておきます。この情報は、この項の終わりにあるワークシートに記入する必要があります。
次のポート名のポート番号を書きとめておきます。この情報は、この項の終わりにあるワークシートに記入する必要があります。
これらのポート番号を変更する必要がある場合は、次の手順を実行します。
a.![]() [Ports] 表の右側の [Details] ボタンをクリックします。
[Ports] 表の右側の [Details] ボタンをクリックします。
b.![]() BOOTSTRAP_ADDRESS または WC_defaulthost のリンクをクリックしてそのリンクの [General Properties] ページを表示します。
BOOTSTRAP_ADDRESS または WC_defaulthost のリンクをクリックしてそのリンクの [General Properties] ページを表示します。
e.![]() [Save] をクリックしてマスタ設定に直接保存します。
[Save] をクリックしてマスタ設定に直接保存します。
WebSphere クラスタの設定
Service Portal 製品は「RequestCenter」および「ServiceLink」という 2 つのエンタープライズ アプリケーションで構成されます。ただし Service Portal インストーラでは RequestCenter アプリケーションと ServiceLink アプリケーションは WebSphere サーバに自動的に導入されません。インストーラ プログラムは RequestCenter アプリケーションの EAR ファイル(RequestCenter.ear)と ServiceLink アプリケーションの WAR ファイル(ISEE.war)を生成するだけです。これらのファイルは WebSphere 環境に合わせてカスタマイズされています。Service Portal インストーラの実行後に、後述する手順に従って RequestCenter.ear と ISEE.war を WebSphere サーバに手動で展開する必要があります。
RequestCenter.ear ファイルと ISEE.war ファイルは、2 つの異なるエンタープライズ アプリケーションですが同じ WebSphere サーバに展開できます。ただし複数のノードからなる WebSphere クラスタ環境(各ノードが個々のコンピュータ)をセットアップする場合には、次のように追加の設定を行う必要があります。
ステップ 1![]() クラスタの各ノード(各コンピュータ)で、「カスタム Java ライブラリのインストール」で説明する作業を実行します。
クラスタの各ノード(各コンピュータ)で、「カスタム Java ライブラリのインストール」で説明する作業を実行します。
ステップ 2![]() 「WebSphere サーバの作成」の説明に従い、各ノードで WebSphere サーバを作成し、作成したサーバをクラスタに追加する前に各サーバの JVM 引数を設定します。
「WebSphere サーバの作成」の説明に従い、各ノードで WebSphere サーバを作成し、作成したサーバをクラスタに追加する前に各サーバの JVM 引数を設定します。
ステップ 3![]() クラスタ内の各 WebSphere サーバは、同じ BOOTSTRAP_ADDRESS ポート番号と WC_defaulthost ポート番号を使用するように設定されている必要があります。たとえばクラスタに 2 つのノードが含まれているとします。ノード 1 の WebSphere サーバの設定が BOOTSTRAP_ADDRESS=2810 および WC_defaulthost=9080 の場合、ノード 2 の WebSphere サーバでも BOOTSTRAP_ADDRESS=2810 および WC_defaulthost=9080 を設定する必要があります。必要に応じて「ポート番号の確認」の手順に従いクラスタ内のすべての WebSphere サーバの BOOTSTRAP_ADDRESS または WC_defaulthost ポート番号(あるいはこの両方)を同一に設定します。
クラスタ内の各 WebSphere サーバは、同じ BOOTSTRAP_ADDRESS ポート番号と WC_defaulthost ポート番号を使用するように設定されている必要があります。たとえばクラスタに 2 つのノードが含まれているとします。ノード 1 の WebSphere サーバの設定が BOOTSTRAP_ADDRESS=2810 および WC_defaulthost=9080 の場合、ノード 2 の WebSphere サーバでも BOOTSTRAP_ADDRESS=2810 および WC_defaulthost=9080 を設定する必要があります。必要に応じて「ポート番号の確認」の手順に従いクラスタ内のすべての WebSphere サーバの BOOTSTRAP_ADDRESS または WC_defaulthost ポート番号(あるいはこの両方)を同一に設定します。
ステップ 4![]() RequestCenter.ear ファイルは WebSphere クラスタに導入されます。ただし ISEE.war ファイルを同じクラスタに導入することはできません。このファイルは、いずれのクラスタのメンバでもないスタンドアロン WebSphere サーバに導入する必要があります。したがってクラスタ WebSphere 環境を使用している場合は ISEE.war ファイルに使用するスタンドアロン WebSphere サーバ(クラスタ メンバではないサーバ)を追加で作成する必要があります。このマニュアルのこれ以降の部分では、このスタンドアロン WebSphere サーバを「Service Link WebSphere サーバ」と呼びます。このスタンドアロン「Service Link WebSphere サーバ」の JVM 引数を次のように設定できます。
RequestCenter.ear ファイルは WebSphere クラスタに導入されます。ただし ISEE.war ファイルを同じクラスタに導入することはできません。このファイルは、いずれのクラスタのメンバでもないスタンドアロン WebSphere サーバに導入する必要があります。したがってクラスタ WebSphere 環境を使用している場合は ISEE.war ファイルに使用するスタンドアロン WebSphere サーバ(クラスタ メンバではないサーバ)を追加で作成する必要があります。このマニュアルのこれ以降の部分では、このスタンドアロン WebSphere サーバを「Service Link WebSphere サーバ」と呼びます。このスタンドアロン「Service Link WebSphere サーバ」の JVM 引数を次のように設定できます。
•![]() [Debug Mode] オプションが選択されている場合は選択解除します
[Debug Mode] オプションが選択されている場合は選択解除します
•![]() Generic JVM arguments = -Djava.net.preferIPv4Stack=true
Generic JVM arguments = -Djava.net.preferIPv4Stack=true
ステップ 5![]() スタンドアロンの「Service Link WebSphere サーバ」が別のマシンにインストールされている場合は、「カスタム Java ライブラリのインストール」の説明に従ってカスタム Java ライブラリをそのマシンにもインストールしてください。「Service Link WebSphere サーバ」の BOOTSTRAP_ADDRESS と WC_defaulthost ポート番号は、クラスタ内の WebSphere サーバのポート番号と一致している必要はありません。
スタンドアロンの「Service Link WebSphere サーバ」が別のマシンにインストールされている場合は、「カスタム Java ライブラリのインストール」の説明に従ってカスタム Java ライブラリをそのマシンにもインストールしてください。「Service Link WebSphere サーバ」の BOOTSTRAP_ADDRESS と WC_defaulthost ポート番号は、クラスタ内の WebSphere サーバのポート番号と一致している必要はありません。
仮想ホストの設定
ステップ 1![]() WebSphere Administration Console にログインします。
WebSphere Administration Console にログインします。
ステップ 2![]() [Environment] を展開して [Virtual hosts] をクリックします。
[Environment] を展開して [Virtual hosts] をクリックします。
ステップ 3![]() 右側のパネルで [New] ボタンをクリックします。[Virtual Hosts] > [New] ページが表示されます。
右側のパネルで [New] ボタンをクリックします。[Virtual Hosts] > [New] ページが表示されます。
ステップ 4![]() [Name] フィールドに ns_host と入力します。
[Name] フィールドに ns_host と入力します。
ステップ 6![]() [Save] をクリックしてマスタ設定に直接保存します。
[Save] をクリックしてマスタ設定に直接保存します。
ステップ 7![]() 新規に作成した ns_host をクリックします。そのプロパティ ページが表示されます。
新規に作成した ns_host をクリックします。そのプロパティ ページが表示されます。
ステップ 8![]() [Additional Properties] の [Host Aliases] リンクをクリックします。
[Additional Properties] の [Host Aliases] リンクをクリックします。
•![]() Port = <WebSphere サーバが使用する WC_defaulthost のポート番号を入力します。たとえば 9080 と入力します。 >
Port = <WebSphere サーバが使用する WC_defaulthost のポート番号を入力します。たとえば 9080 と入力します。 >
ステップ 12![]() 別のエントリを追加するため、[New] ボタンをもう一度クリックします。
別のエントリを追加するため、[New] ボタンをもう一度クリックします。
•![]() Port = <Web サーバが使用するポート番号を入力します。たとえば 80 と入力します。Web サーバ(IBM HTTP Server、IIS など)は、必要な WebSphere プラグインですでに設定されている必要があります。>
Port = <Web サーバが使用するポート番号を入力します。たとえば 80 と入力します。Web サーバ(IBM HTTP Server、IIS など)は、必要な WebSphere プラグインですでに設定されている必要があります。>
ステップ 15![]() [Save] をクリックしてマスタ設定に直接保存します。
[Save] をクリックしてマスタ設定に直接保存します。
(注) WebSphere クラスタ環境を使用している場合、作成した仮想ホスト「ns_host」は WebSphere クラスタ専用です。スタンドアロン Service Link WebSphere サーバに使用する仮想ホスト「sl_host」を作成する必要があります。前述の手順に従って仮想ホスト sl_host を作成します。この場合ステップ 10(ポート番号の入力)で「Service Link WebSphere サーバ」が使用する WC_defaulthost ポート番号を入力します。
JMS サーバの設定
この項では、JMS サーバと、Service Portal により使用される JMS キューを設定します。
(注) RequestCenter.ear と ISEE.war を同じ非クラスタ WebSphere サーバに導入する場合、その WebSphere サーバでもこの項で説明する JMS 設定が行われます。ただし WebSphere クラスタ環境を使用している場合は、「Service Link WebSphere サーバ」に対して JMS 設定が行われます。
バスの作成
ステップ 1![]() WebSphere Administration Console にログインします。
WebSphere Administration Console にログインします。
ステップ 2![]() [Service integration] を展開して [Buses] をクリックします。
[Service integration] を展開して [Buses] をクリックします。
ステップ 3![]() 右側のパネルで [New] ボタンをクリックします。[Create a new bus] ページが表示されます。
右側のパネルで [New] ボタンをクリックします。[Create a new bus] ページが表示されます。
ステップ 4![]() 次に示す値を入力して [Next] をクリックします。
次に示す値を入力して [Next] をクリックします。
•![]() [Bus security] オプションが選択されている場合は選択解除します
[Bus security] オプションが選択されている場合は選択解除します
ステップ 6![]() [Save] をクリックしてマスタ設定に直接保存します。
[Save] をクリックしてマスタ設定に直接保存します。
ステップ 7![]() 新規に作成した nsbus をクリックします。その [Configuration] ページが表示されます。
新規に作成した nsbus をクリックします。その [Configuration] ページが表示されます。
ステップ 8![]() [Topology] セクションの [Bus members] リンクをクリックします。
[Topology] セクションの [Bus members] リンクをクリックします。
ステップ 10![]() [Server] オプションを選択し、その横のドロップダウン リストから ISEE.war を導入する WebSphere サーバを選択します。(たとえば WebSphere クラスタ環境を使用している場合はドロップダウン リストから Service Link WebSphere サーバを選択します)。
[Server] オプションを選択し、その横のドロップダウン リストから ISEE.war を導入する WebSphere サーバを選択します。(たとえば WebSphere クラスタ環境を使用している場合はドロップダウン リストから Service Link WebSphere サーバを選択します)。
ステップ 12![]() [File store] オプションを選択して [Next] をクリックします。
[File store] オプションを選択して [Next] をクリックします。
ステップ 13![]() [Configure file store] ページの内容は変更しないでください。[Next] をクリックします。
[Configure file store] ページの内容は変更しないでください。[Next] をクリックします。
ステップ 14![]() [Tune performance parameters] ページの内容は変更しないでください。[Next] をクリックします。
[Tune performance parameters] ページの内容は変更しないでください。[Next] をクリックします。
ステップ 15![]() [Summary] ページで [Finish] をクリックします。
[Summary] ページで [Finish] をクリックします。
ステップ 16![]() [Save] をクリックしてマスタ設定に直接保存します。
[Save] をクリックしてマスタ設定に直接保存します。
ステップ 17![]() [nsbus] をもう一度クリックします。[Configuration] ページが再び表示されます。
[nsbus] をもう一度クリックします。[Configuration] ページが再び表示されます。
ステップ 18![]() [Destination resources] セクションで [Destinations] リンクをクリックします。
[Destination resources] セクションで [Destinations] リンクをクリックします。
ステップ 20![]() [Queue] オプションを選択して [Next] をクリックします。
[Queue] オプションを選択して [Next] をクリックします。
ステップ 21![]() [Identifier] フィールドに ISEEInboundQueue と入力して [Next] をクリックします。
[Identifier] フィールドに ISEEInboundQueue と入力して [Next] をクリックします。
ステップ 22![]() 次のページで、前のステップで作成したバス メンバを選択します。[Next] をクリックします。
次のページで、前のステップで作成したバス メンバを選択します。[Next] をクリックします。
ステップ 24![]() ([Save] はまだクリックしないでください)。ステップ 19 ~ 23 をさらに 4 回繰り返し、次の名前の 4 つのキューを作成します。
([Save] はまだクリックしないでください)。ステップ 19 ~ 23 をさらに 4 回繰り返し、次の名前の 4 つのキューを作成します。
ステップ 25![]() 5 つ目のキューの作成が完了したら、[Save] をクリックしてマスタ設定に直接保存します。
5 つ目のキューの作成が完了したら、[Save] をクリックしてマスタ設定に直接保存します。
キュー接続ファクトリの作成
ステップ 1![]() WebSphere Administration Console で [Resources] > [JMS] を展開します。
WebSphere Administration Console で [Resources] > [JMS] を展開します。
ステップ 2![]() [Queue connection factories] をクリックします。
[Queue connection factories] をクリックします。
ステップ 3![]() [Scope] ドロップダウン リストからご使用の WebSphere サーバを選択します。(たとえば [Scope] から値「Node=<node_name>, Server=server1」を選択します)。
[Scope] ドロップダウン リストからご使用の WebSphere サーバを選択します。(たとえば [Scope] から値「Node=<node_name>, Server=server1」を選択します)。
(注) WebSphere クラスタ環境を使用している場合は、[Scope] ドロップダウン リストから Service Link WebSphere サーバを選択します。作成するキュー接続ファクトリは、ISEE.war を導入する WebSphere サーバに対してのみ可視にする必要があります。
ステップ 5![]() [Default messaging provider] オプションを選択して [OK] をクリックします。[New Queue Connection Factory] ページが表示されます。
[Default messaging provider] オプションを選択して [OK] をクリックします。[New Queue Connection Factory] ページが表示されます。
•![]() JNDI Name = NSConnectionFactory
JNDI Name = NSConnectionFactory
ステップ 8![]() 右側の [Additional Properties] セクションで [Connection pool properties] リンクをクリックします。
右側の [Additional Properties] セクションで [Connection pool properties] リンクをクリックします。
(注) 「Maximum connections」はピーク トラフィックでのみ使用されます。クラスタ WebSphere 環境を使用している場合は、[Maximum connections] の設定値を大きくする必要があることがあります。
ステップ 11![]() [Additional Properties] セクションで [Advanced connection pool properties] リンクをクリックします。
[Additional Properties] セクションで [Advanced connection pool properties] リンクをクリックします。
ステップ 13![]() [Save] をクリックしてマスタ設定に直接保存します。
[Save] をクリックしてマスタ設定に直接保存します。
キューの作成
ステップ 1![]() WebSphere Administration Console で [Resources] > [JMS] を展開します。
WebSphere Administration Console で [Resources] > [JMS] を展開します。
ステップ 3![]() [Scope] ドロップダウン リストからご使用の WebSphere サーバを選択します。(たとえば [Scope] から値「Node=<node_name>, Server=server1」を選択します)。
[Scope] ドロップダウン リストからご使用の WebSphere サーバを選択します。(たとえば [Scope] から値「Node=<node_name>, Server=server1」を選択します)。
(注) WebSphere クラスタ環境を使用している場合は、[Scope] ドロップダウン リストから Service Link WebSphere サーバを選択します。作成するキューは、ISEE.war を導入する WebSphere サーバに対してのみ可視にする必要があります。
ステップ 5![]() [Default messaging provider] オプションを選択して [OK] をクリックします。[New Queue] ページが表示されます。
[Default messaging provider] オプションを選択して [OK] をクリックします。[New Queue] ページが表示されます。
•![]() JNDI Name = ISEEInboundQueue
JNDI Name = ISEEInboundQueue
•![]() Queue name = ISEEInboundQueue
Queue name = ISEEInboundQueue
ステップ 8![]() ([Save] はまだクリックしないでください)。ステップ 4 ~ 7 をさらに 4 回繰り返し、次の名前の 4 つのキューを作成します。
([Save] はまだクリックしないでください)。ステップ 4 ~ 7 をさらに 4 回繰り返し、次の名前の 4 つのキューを作成します。
ステップ 9![]() 5 つ目のキューの作成が完了したら、[Save] をクリックしてマスタ設定に直接保存します。
5 つ目のキューの作成が完了したら、[Save] をクリックしてマスタ設定に直接保存します。
J2C 認証データの設定
「データベースの設定」では、2 つのデータベース ユーザ(RequestCenter データベースのスキーマ所有者(RCUser)と Datamart データベースのスキーマ所有者(DMUser))を作成しました。この項では、この 2 つのデータベース ユーザを J2C 認証データに追加します。
ステップ 1![]() WebSphere Administration Console で [Security] を展開して [Global security] をクリックします。
WebSphere Administration Console で [Security] を展開して [Global security] をクリックします。
ステップ 2![]() 右側のパネルの [Authentication] セクションで [Java Authentication and Authorization Service] を展開します。
右側のパネルの [Authentication] セクションで [Java Authentication and Authorization Service] を展開します。
ステップ 3![]() [J2C authentication data] をクリックします。
[J2C authentication data] をクリックします。
ステップ 5![]() 画面に次の値を入力します(「RCUser」は RequestCenter データベースのスキーマ所有者として作成した実際の ID に置き換えてください)。
画面に次の値を入力します(「RCUser」は RequestCenter データベースのスキーマ所有者として作成した実際の ID に置き換えてください)。
•![]() Password = <データベース ユーザ RCUser のパスワードを入力します。>
Password = <データベース ユーザ RCUser のパスワードを入力します。>
ステップ 7![]() 別のエントリを作成するため、[New] ボタンをもう一度クリックします。
別のエントリを作成するため、[New] ボタンをもう一度クリックします。
ステップ 8![]() 画面に次の値を入力します(「DMUser」は Datamart データベースのスキーマ所有者として作成した実際の ID に置き換えてください)。
画面に次の値を入力します(「DMUser」は Datamart データベースのスキーマ所有者として作成した実際の ID に置き換えてください)。
•![]() Password = <データベース ユーザ DMUser のパスワードを入力します。>
Password = <データベース ユーザ DMUser のパスワードを入力します。>
ステップ 10![]() [Save] をクリックしてマスタ設定に直接保存します。
[Save] をクリックしてマスタ設定に直接保存します。
JDBC データ ソースの設定
この項では、2 つの JDBC データ ソース(RequestCenter データベースと Datamart データベースのデータ ソース)を設定します。
「データベースの設定」の終わりで記入したワークシートから、データベースに関する必要な情報を取得します。
JDBC プロバイダーの作成
ステップ 1![]() WebSphere Administration Console で [Resources] > [JDBC] を展開し、[JDBC Providers] をクリックします。
WebSphere Administration Console で [Resources] > [JDBC] を展開し、[JDBC Providers] をクリックします。
ステップ 2![]() [Scope] ドロップダウン リストからご使用の WebSphere サーバを選択します。(たとえば [Scope] から値「Node=<node_name>, Server=server1」を選択します)。
[Scope] ドロップダウン リストからご使用の WebSphere サーバを選択します。(たとえば [Scope] から値「Node=<node_name>, Server=server1」を選択します)。
(注) WebSphere クラスタ環境を使用している場合は、[Scope] ドロップダウン リストから WebSphere クラスタの名前を選択します。作成する JDBC プロバイダーは、このクラスタ内のすべての WebSphere サーバに対して可視にする必要があります。
ステップ 3![]() [New] ボタンをクリックします。[Create new JDBC provider] ページが表示されます。
[New] ボタンをクリックします。[Create new JDBC provider] ページが表示されます。
•![]() Database Type = User-defined
Database Type = User-defined
•![]() Implementation class name = <次のいずれかの値を入力します。>
Implementation class name = <次のいずれかの値を入力します。>
–![]() (Oracle:) com.newscale.jdbcx.oracle.OracleDataSource
(Oracle:) com.newscale.jdbcx.oracle.OracleDataSource
–![]() (SQL Server:) com.newscale.jdbcx.sqlserver.SQLServerDataSource
(SQL Server:) com.newscale.jdbcx.sqlserver.SQLServerDataSource
•![]() Name = Cisco JDBC Driver for <database_type>
Name = Cisco JDBC Driver for <database_type>
•![]() Description = Cisco JDBC Driver for <database_type>
Description = Cisco JDBC Driver for <database_type>
ステップ 5![]() [Next] をクリックします。[Enter database class path information] ページが表示されます。
[Next] をクリックします。[Enter database class path information] ページが表示されます。
ステップ 6![]() 「Class path」を次の 2 行に置き換えます。
「Class path」を次の 2 行に置き換えます。
${WAS_INSTALL_ROOT}/lib/ext/newscale_ws_jdbc_provider.jar
${WAS_INSTALL_ROOT}/lib/ext/newscale_drivers.jar
ステップ 7![]() [Next] をクリックします。[Summary] ページが表示されます。
[Next] をクリックします。[Summary] ページが表示されます。
ステップ 8![]() [Summary] ページの情報を確認します。すべての情報が正しい場合は [Finish] をクリックします。
[Summary] ページの情報を確認します。すべての情報が正しい場合は [Finish] をクリックします。
ステップ 9![]() [Save] をクリックしてマスタ設定に直接保存します。
[Save] をクリックしてマスタ設定に直接保存します。
(注) WebSphere クラスタ環境を使用している場合は、作成した JDBC プロバイダーはスタンドアロン「Service Link WebSphere サーバ」に対して可視になりません。これは、このサーバがクラスタに属していないためです。したがってステップ 1 ~ 9 を繰り返して同じ JDBC ドライバを作成する必要があります。このときステップ 2 で [Scope] に Service Link WebSphere サーバを設定します。
REQUESTCENTERDS データ ソースの作成
ステップ 1![]() 新規に作成した JDBC プロバイダーをクリックします。その [Configuration] ページが表示されます。
新規に作成した JDBC プロバイダーをクリックします。その [Configuration] ページが表示されます。
ステップ 2![]() [Additional Properties] セクションで [Data sources] リンクをクリックします。
[Additional Properties] セクションで [Data sources] リンクをクリックします。
ステップ 3![]() [New] ボタンをクリックします。[Enter basic data source information] ページが表示されます。
[New] ボタンをクリックします。[Enter basic data source information] ページが表示されます。
•![]() Data source name = REQUESTCENTERDS
Data source name = REQUESTCENTERDS
•![]() JNDI name = eis/REQUESTCENTERDS
JNDI name = eis/REQUESTCENTERDS
ステップ 6![]() [Data store helper class name] フィールドに次の値を入力します。
[Data store helper class name] フィールドに次の値を入力します。
com.newscale.jdbc.websphere.NSDataStoreHelper
ステップ 8![]() [Component-managed authentication alias] フィールドのドロップダウン リストから、前のセクションで J2C 認証データに作成したエイリアス「RCUser」を選択します(たとえば値「<host>CellManager01/RCUser」を選択します)。
[Component-managed authentication alias] フィールドのドロップダウン リストから、前のセクションで J2C 認証データに作成したエイリアス「RCUser」を選択します(たとえば値「<host>CellManager01/RCUser」を選択します)。
ステップ 10![]() [Summary] ページの情報を確認します。すべての情報が正しい場合は [Finish] をクリックします。
[Summary] ページの情報を確認します。すべての情報が正しい場合は [Finish] をクリックします。
ステップ 11![]() [Save] をクリックしてマスタ設定に直接保存します。
[Save] をクリックしてマスタ設定に直接保存します。
ステップ 12![]() 新規に作成したデータ ソース REQUESTCENTERDS をクリックします。その [General Properties] ページが開きます。
新規に作成したデータ ソース REQUESTCENTERDS をクリックします。その [General Properties] ページが開きます。
ステップ 13![]() [Additional Properties] セクションで [Connection pool properties] リンクをクリックします。
[Additional Properties] セクションで [Connection pool properties] リンクをクリックします。
ステップ 16![]() ([Save] はまだクリックしないでください)。[Additional Properties] セクションの [Custom properties] リンクをクリックします。表示されるページに、約 50 のプロパティが示されます。(プロパティが複数のページにわたって表示されることがあります)。
([Save] はまだクリックしないでください)。[Additional Properties] セクションの [Custom properties] リンクをクリックします。表示されるページに、約 50 のプロパティが示されます。(プロパティが複数のページにわたって表示されることがあります)。
ステップ 17![]() 現行ページのプロパティ エントリをすべて選択するため、[Select All] アイコン(
現行ページのプロパティ エントリをすべて選択するため、[Select All] アイコン(![]() )をクリックします。次に [Delete] ボタンをクリックします。すべてのプロパティ エントリが完全に削除されるまでこのステップを
)をクリックします。次に [Delete] ボタンをクリックします。すべてのプロパティ エントリが完全に削除されるまでこのステップを![]() 繰り返します。
繰り返します。
ステップ 18![]() 新しいプロパティ エントリを追加するため [New] ボタンをクリックします。
新しいプロパティ エントリを追加するため [New] ボタンをクリックします。
ステップ 19![]() 画面に次の情報を入力します(『データベース情報ワークシート』を参照してください)。
画面に次の情報を入力します(『データベース情報ワークシート』を参照してください)。
ステップ 21![]() 別のエントリを追加するため、[New] ボタンをクリックします。
別のエントリを追加するため、[New] ボタンをクリックします。
ステップ 22![]() 画面に次の情報を入力します(「データベース情報ワークシート」を参照してください)。
画面に次の情報を入力します(「データベース情報ワークシート」を参照してください)。
ステップ 24![]() データベースが Oracle の場合:ステップ 21 ~ 23 を繰り返し、次のエントリを追加します(「データベース情報ワークシート」を参照してください)。
データベースが Oracle の場合:ステップ 21 ~ 23 を繰り返し、次のエントリを追加します(「データベース情報ワークシート」を参照してください)。
|
|
|
|
作業が完了したら、Oracle データ ソースのカスタム プロパティのリストは次のスクリーンショットのようになります。
図 2-9 Oracle データ ソース - カスタム プロパティ
ステップ 25![]() データベースが SQL Server の場合:ステップ 21 ~ 23 を繰り返し、次のエントリを追加します(「データベース情報ワークシート」を参照してください)。
データベースが SQL Server の場合:ステップ 21 ~ 23 を繰り返し、次のエントリを追加します(「データベース情報ワークシート」を参照してください)。
|
|
|
|
作業が完了したら、SQL サーバ データ ソースのカスタム プロパティのリストは次のスクリーンショットのようになります。
図 2-10 SQL サーバ データ ソース - カスタム プロパティ
ステップ 26![]() [Save] をクリックしてマスタ設定に直接保存します。
[Save] をクリックしてマスタ設定に直接保存します。
(注) WebSphere Cluster 環境を使用している場合は、Scope=<Cluster> と Scope=<Service Link WebSphere Server> の 2 つの JDBC プロバイダーが作成されています。Scope=<Cluster> の JDBC プロバイダーの REQUESTCENTERDS データ ソースを作成した場合は、同じ手順を繰り返して Scope=<Service Link WebSphere Server> の JDBC プロバイダーの REQUESTCENTERDS データ ソースを作成します。これは、スタンドアロン <Service Link WebSphere Server> で実行される Service Link アプリケーションも実行時に RequestCenter データベースへの JDBC 接続が必要であるためです。
ステップ 27![]() REQUESTCENTERDS データ ソースをテストするには、次の手順を実行します。
REQUESTCENTERDS データ ソースをテストするには、次の手順を実行します。
a.![]() 新規に作成したデータ ソース REQUESTCENTERDS をクリックします。その [General Properties] ページが開きます。
新規に作成したデータ ソース REQUESTCENTERDS をクリックします。その [General Properties] ページが開きます。
b.![]() [Test Connection] ボタンをクリックします。
[Test Connection] ボタンをクリックします。
図 2-11 REQUESTCENTERDS Connection Successful Message
DATAMARTDS データ ソースの作成
ステップ 1![]() 新規に作成した JDBC プロバイダーをクリックします。その [Configuration] ページが表示されます。同じ JDBC プロバイダー内に 2 つ目のデータ ソースを作成します。
新規に作成した JDBC プロバイダーをクリックします。その [Configuration] ページが表示されます。同じ JDBC プロバイダー内に 2 つ目のデータ ソースを作成します。
(注) WebSphere Cluster 環境を使用している場合は、Scope=<Cluster> の JDBC プロバイダーを選択します。Datamart データベースに対して作成するデータ ソースは WebSphere クラスタでのみ必要です。<Service Link WebSphere Server> ではこのデータ ソースは不要です。
ステップ 2![]() [Additional Properties] セクションで [Data sources] リンクをクリックします。
[Additional Properties] セクションで [Data sources] リンクをクリックします。
ステップ 3![]() [New] ボタンをクリックします。[Enter basic data source information] ページが表示されます。
[New] ボタンをクリックします。[Enter basic data source information] ページが表示されます。
•![]() Data source name = DATAMARTDS
Data source name = DATAMARTDS
ステップ 6![]() [Data store helper class name] フィールドに次の値を入力します。
[Data store helper class name] フィールドに次の値を入力します。
c om.newscale.jdbc.websphere.NSDataStoreHelper
ステップ 8![]() [Component-managed authentication alias] フィールドのドロップダウン リストから、前のセクションで J2C 認証データに作成したエイリアス「DMUser」を選択します(たとえば値「<host>CellManager01/DMUser」を選択します)。
[Component-managed authentication alias] フィールドのドロップダウン リストから、前のセクションで J2C 認証データに作成したエイリアス「DMUser」を選択します(たとえば値「<host>CellManager01/DMUser」を選択します)。
ステップ 10![]() [Summary] ページの情報を確認します。すべての情報が正しい場合は [Finish] をクリックします。
[Summary] ページの情報を確認します。すべての情報が正しい場合は [Finish] をクリックします。
ステップ 11![]() [Save] をクリックしてマスタ設定に直接保存します。
[Save] をクリックしてマスタ設定に直接保存します。
ステップ 12![]() 新規に作成したデータ ソース DATAMARTDS をクリックします。その [General Properties] ページが開きます。
新規に作成したデータ ソース DATAMARTDS をクリックします。その [General Properties] ページが開きます。
ステップ 13![]() [Additional Properties] セクションで [Connection pool properties] リンクをクリックします。
[Additional Properties] セクションで [Connection pool properties] リンクをクリックします。
ステップ 16![]() ([Save] はまだクリックしないでください)。[Additional Properties] セクションの [Custom properties] リンクをクリックします。表示されるページに、約 50 のプロパティが示されます。(プロパティが複数のページにわたって表示されることがあります)。
([Save] はまだクリックしないでください)。[Additional Properties] セクションの [Custom properties] リンクをクリックします。表示されるページに、約 50 のプロパティが示されます。(プロパティが複数のページにわたって表示されることがあります)。
ステップ 17![]() 現行ページのプロパティ エントリをすべて選択するため、[Select All] アイコン(
現行ページのプロパティ エントリをすべて選択するため、[Select All] アイコン(![]() )をクリックします。次に [Delete] ボタンをクリックします。すべてのプロパティ エントリが完全に削除されるまでこのステップを
)をクリックします。次に [Delete] ボタンをクリックします。すべてのプロパティ エントリが完全に削除されるまでこのステップを![]() 繰り返します。
繰り返します。
ステップ 18![]() 新しいプロパティ エントリを追加するため [New] ボタンをクリックします。
新しいプロパティ エントリを追加するため [New] ボタンをクリックします。
ステップ 19![]() 画面に次の情報を入力します(「データベース情報ワークシート」を参照してください)。
画面に次の情報を入力します(「データベース情報ワークシート」を参照してください)。
ステップ 21![]() 別のエントリを追加するため、[New] ボタンをクリックします。
別のエントリを追加するため、[New] ボタンをクリックします。
ステップ 22![]() 画面に次の情報を入力します(「データベース情報ワークシート」を参照してください)。
画面に次の情報を入力します(「データベース情報ワークシート」を参照してください)。
ステップ 24![]() データベースが Oracle の場合:ステップ 21 ~ 23 を繰り返し、次のエントリを追加します(「データベース情報ワークシート」を参照してください)。
データベースが Oracle の場合:ステップ 21 ~ 23 を繰り返し、次のエントリを追加します(「データベース情報ワークシート」を参照してください)。
|
|
|
|
作業が完了したら、Oracle データ ソースのカスタム プロパティのリストは次のスクリーンショットのようになります。
図 2-12 Oracle DATAMARTDS - カスタム プロパティ
ステップ 25![]() データベースが SQL Server の場合:ステップ 21 ~ 23 を繰り返し、次のエントリを追加します(「データベース情報ワークシート」を参照してください)。
データベースが SQL Server の場合:ステップ 21 ~ 23 を繰り返し、次のエントリを追加します(「データベース情報ワークシート」を参照してください)。
|
|
|
|
作業が完了したら、SQL サーバ データ ソースのカスタム プロパティのリストは次のスクリーンショットのようになります。
図 2-13 SQL サーバ DATAMARTDS - カスタム プロパティ
ステップ 26![]() [Save] をクリックしてマスタ設定に直接保存します。
[Save] をクリックしてマスタ設定に直接保存します。
ステップ 27![]() DATAMARTDS データ ソースをテストするには、次の手順を実行します。
DATAMARTDS データ ソースをテストするには、次の手順を実行します。
a.![]() 新規に作成したデータ ソース DATAMARTDS をクリックします。その [General Properties] ページが開きます。
新規に作成したデータ ソース DATAMARTDS をクリックします。その [General Properties] ページが開きます。
b.![]() [Test Connection] ボタンをクリックします。
[Test Connection] ボタンをクリックします。
図 2-14 DATAMARTDS Connection Successful Message

WebSphere サーバの起動
前のセクションで設定したすべての設定を反映するため、WebSphere サーバを再起動する必要があります。
(注) WebSphere Cluster 環境を使用している場合は、クラスタと「Service Link WebSphere サーバ」を再起動する必要があります。
WebSphere サーバの再起動後に、バスが動作していることを確認します。
ステップ 1![]() WebSphere Administration Console にログインします。
WebSphere Administration Console にログインします。
ステップ 2![]() [Service integration] を展開して [Buses] をクリックします。
[Service integration] を展開して [Buses] をクリックします。
ステップ 3![]() [nsbus] をクリックします。[Configuration] ページが表示されます。
[nsbus] をクリックします。[Configuration] ページが表示されます。
ステップ 4![]() [Topology] セクションの [Messaging engines] リンクをクリックします。
[Topology] セクションの [Messaging engines] リンクをクリックします。
ステップ 5![]() メッセージ エンジンのステータスが「Started」であること(以下のスクリーンショットに示されている緑色の矢印)を確認します。
メッセージ エンジンのステータスが「Started」であること(以下のスクリーンショットに示されている緑色の矢印)を確認します。

アプリケーション サーバ情報ワークシート
以下の「アプリケーション サーバ情報ワークシート」の「値」列に設定値を記入してください。このワークシートに記入した情報は、後で Service Portal セットアップ プログラムを実行する際に必要になります。
Service Portal インストーラの実行
この項では、Service Portal インストーラ プログラムの実行手順を説明します。
はじめる前に
「前提条件とインストールの概要」を注意して読み、システムの実行に必要なハードウェアとソフトウェアの最小要件に適切に対応していることを確認します。
「データベースの設定」で説明されているデータベース関連作業が完了しており、「データベース情報ワークシート」に情報を記入していることを確認します。
アプリケーション サーバのタイプに対応したインストール前の作業が完了しており、「アプリケーション サーバ情報ワークシート」に情報を記入していることを確認します。
インストーラの使用方法
セットアップ プログラムはインタラクティブなコマンド ライン ユーティリティです。この項では、コマンド ライン ウィンドウからセットアップ プログラムを実行して Service Portal をインストールします。コマンド ライン ウィンドウとは、コンソール、コマンド プロンプト ウィンドウ(Windows オペレーティング システム)、SSH ウィンドウ(Linux オペレーティング システム)、または Telnet ウィンドウ(UNIX オペレーティング システム)です。
ほとんどの画面では、番号が付いたオプションと設定がステータス情報と共に表に表示されます。選択または変更するオプションまたは設定に対応する番号を入力し、Enter キーを押します。
•![]() 「モジュール」または「コンポーネント」に対応する番号を入力すると、そのモジュールまたはコンポーネントをインストール対象として選択または選択解除したことになります。
「モジュール」または「コンポーネント」に対応する番号を入力すると、そのモジュールまたはコンポーネントをインストール対象として選択または選択解除したことになります。
•![]() モジュールまたはコンポーネントを選択しているかどうかを確認するには、[Install] 列に表示される値を確認します。[ Yes ] は続行するとそのモジュールまたはコンポーネントがインストールされることを示し、[ No ] は続行するとそのモジュールまたはコンポーネントがインストールされないことを示します。オプションを選択するたびに、[Install] 列の値が変化します。
モジュールまたはコンポーネントを選択しているかどうかを確認するには、[Install] 列に表示される値を確認します。[ Yes ] は続行するとそのモジュールまたはコンポーネントがインストールされることを示し、[ No ] は続行するとそのモジュールまたはコンポーネントがインストールされないことを示します。オプションを選択するたびに、[Install] 列の値が変化します。
•![]() インストール オプションに対応する番号を入力すると、設定を入力するためのプロンプトが表示されます。
インストール オプションに対応する番号を入力すると、設定を入力するためのプロンプトが表示されます。
選択内容またはデフォルト設定の確認を求められることがよくあります。プロンプトが表示されたら、次のようにします。
•![]() 取り消す場合は 値を変更するオプションの横の番号 を入力します。その後、画面で設定を変更できます。
取り消す場合は 値を変更するオプションの横の番号 を入力します。その後、画面で設定を変更できます。
•![]() セットアップ プログラムを中止または終了するには、 Control-C を入力します。
セットアップ プログラムを中止または終了するには、 Control-C を入力します。
•![]() [Module:] プロンプトに 1 ~ 4 の番号を入力します。モジュールの [Install] 列の値が [Yes] から [ No ] に変わります。
[Module:] プロンプトに 1 ~ 4 の番号を入力します。モジュールの [Install] 列の値が [Yes] から [ No ] に変わります。
•![]() 一度に複数のオプションを選択するには、番号をカンマで区切って入力して Enter を押します。
一度に複数のオプションを選択するには、番号をカンマで区切って入力して Enter を押します。
•![]() たとえば 2,3,4 と入力して Enter を押すと、最後の 3 つのモジュールの [Install] の値が [ No ] に変わります。つまり、続行すると「Demand Center」、「Advanced Reporting」、「Service Link」の各モジュールはインストールされません。
たとえば 2,3,4 と入力して Enter を押すと、最後の 3 つのモジュールの [Install] の値が [ No ] に変わります。つまり、続行すると「Demand Center」、「Advanced Reporting」、「Service Link」の各モジュールはインストールされません。
•![]() [Module] の [Install] の値を変更したら、 C を入力して続行します。
[Module] の [Install] の値を変更したら、 C を入力して続行します。
•![]() セットアップ プログラムを中止または終了するには、 Control-C を入力します。
セットアップ プログラムを中止または終了するには、 Control-C を入力します。
インストール オプション設定では大文字と小文字が区別されるので、データベース名や JMS キュー名などの値を入力するときには大文字と小文字を区別してください。このようにしないとインストールが失敗することがあります。
セットアップの実行
ステップ 1![]() アプリケーション サーバ マシンにログインします。Windows オペレーティング システムを使用している場合は、マシンの管理者権限が付与されている必要があります。
アプリケーション サーバ マシンにログインします。Windows オペレーティング システムを使用している場合は、マシンの管理者権限が付与されている必要があります。
セットアップ プログラムの実行中に、マシンの TEMP ディレクトリに一部のファイルが一時的に解凍されることがあります。このため空き領域が 500 MB 以上ある TEMP ディレクトリへの読み取り/書き込み権限があることを確認してください。セットアップ プログラムは TEMP ディレクトリの位置を判別するため、システム環境変数 TMPDIR、TMP、または TEMP をこの順序で検索します。セットアップ プログラムは、a)前述のシステム環境変数すべてが存在していない場合、b)TEMP ディレクトリ自体が存在していない場合、または c)TEMP ディレクトリが読み取り専用の場合に中止します。
ステップ 2![]() Cisco Web サイトからダウンロードした電子ソフトウェア ディストリビューション ファイルをアプリケーション サーバ マシンの <ServicePortal_Software_Dir> にまだ解凍していない場合は、解凍します。
Cisco Web サイトからダウンロードした電子ソフトウェア ディストリビューション ファイルをアプリケーション サーバ マシンの <ServicePortal_Software_Dir> にまだ解凍していない場合は、解凍します。
ステップ 3![]() コマンド ライン ウィンドウで <ServicePortal_Software_Dir>¥Installer ディレクトリを開きます。
コマンド ライン ウィンドウで <ServicePortal_Software_Dir>¥Installer ディレクトリを開きます。
ステップ 4![]() 次の表から適切なコマンドを入力して、Enter を押します。
次の表から適切なコマンドを入力して、Enter を押します。
|
|
|
ステップ 5![]() Java Home ディレクトリの入力が求められます。アプリケーション サーバ マシンの Java のディレクトリ パスを入力し、Enter を押します。たとえばアプリケーション サーバ マシンの Sun JDK の場所の場合は「C:¥jdk1.6.0_30」と入力し、WebSphere マシンの IBM Java の場所の場合は「C:¥IBM¥WebSphere¥AppServer¥java」と入力します。
Java Home ディレクトリの入力が求められます。アプリケーション サーバ マシンの Java のディレクトリ パスを入力し、Enter を押します。たとえばアプリケーション サーバ マシンの Sun JDK の場所の場合は「C:¥jdk1.6.0_30」と入力し、WebSphere マシンの IBM Java の場所の場合は「C:¥IBM¥WebSphere¥AppServer¥java」と入力します。
マシンで JAVA_HOME 環境変数が設定されている場合、セットアップ プログラムはこの環境変数を無視します。セットアップ プログラムの Java プロセスの実行には、ここで指定される Java のみが使用されます。この Java Home の値は JBoss アプリケーション サーバにも使用されます。WebLogic または WebSphere の場合、この項より前の段階で特定の Java を使用するようにアプリケーション サーバが設定されています。
ステップ 6![]() 次にインストール タイプの選択が求められます。
次にインストール タイプの選択が求められます。
•![]() 新規インストールの場合は 1 を入力して Enter を押します。
新規インストールの場合は 1 を入力して Enter を押します。
•![]() 既存のインストールをアップグレードするには、最初に既存のインストールを検証します。「アップグレードについて」の手順に従って作業します。「 アップグレードについて 」には、Service Portal を検証してリリース 9.3.2 にアップグレードする手順が記載されています。以前のリリースでは、検証は Validate プログラムから実行し、修復は Repair プログラムから実行し、またアップグレードは検証が正常に完了した後でのみ実行できました。
既存のインストールをアップグレードするには、最初に既存のインストールを検証します。「アップグレードについて」の手順に従って作業します。「 アップグレードについて 」には、Service Portal を検証してリリース 9.3.2 にアップグレードする手順が記載されています。以前のリリースでは、検証は Validate プログラムから実行し、修復は Repair プログラムから実行し、またアップグレードは検証が正常に完了した後でのみ実行できました。
[New Installation] を選択すると既存の製品データベースが上書きされ、既存のデータが消去されます。[Upgrade] インストールでは、既存のデータベースが変更されますが上書きは行われません。
ステップ 7![]() 次に宛先ディレクトリの入力が求められます。ディレクトリ名(例:C:¥CiscoServicePortal、/opt/ciscoserviceportal など)を入力してから Enter を押します。プロンプトが出されたら、ディレクトリを作成するため Y を押します。
次に宛先ディレクトリの入力が求められます。ディレクトリ名(例:C:¥CiscoServicePortal、/opt/ciscoserviceportal など)を入力してから Enter を押します。プロンプトが出されたら、ディレクトリを作成するため Y を押します。
WebLogic または WebSphere の場合、アプリケーション サーバのインストール ディレクトリを入力しないでください。アプリケーション サーバ ディレクトリの外部に「宛先ディレクトリ」を作成することを推奨します。つまり、<WL_HOME> または <WAS_ROOT> の中に宛先ディレクトリを作成しないでください。
(注) 重要!「宛先ディレクトリ」のパス名にはスペースを使用しないでください。
このマニュアルでは宛先ディレクトリは <ServicePortal_Install_Dir> と示されています。JBoss の場合、このディレクトリにはセットアップ プログラムによって JBoss アプリケーション サーバ全体がインストールされ、Service Portal アプリケーションが自動的に導入されます。WebLogic または WebSphere の場合、このディレクトリにはセットアップ プログラムによって Service Portal アプリケーションに対して生成される EAR ファイルと WAR ファイルのみが保管されます。
ステップ 8![]() 次にインストールするモジュールを選択するよう求められます。
次にインストールするモジュールを選択するよう求められます。
モジュール番号を入力して [Yes] と [No] を切り替えます。[Yes] は、モジュールがインストールされることを示します。モジュール番号 1(RequestCenter)は常に [Yes] です。続行できる準備ができたら C と入力して Enter を押します。
ステップ 9![]() 次にインストールするコンポーネントを選択するよう求められます。この画面に表示されるコンポーネントのリストは、直前の画面で選択したモジュールの数に基づいています。
次にインストールするコンポーネントを選択するよう求められます。この画面に表示されるコンポーネントのリストは、直前の画面で選択したモジュールの数に基づいています。
コンポーネント番号を入力して [Yes] と [No] を切り替えます。[Yes] は、コンポーネントがインストールされることを示します。一般に、この画面に表示されるすべてのコンポーネントについて [Yes] を選択します。(コンポーネントについて [No] を選択する操作は、実行するインストール オプションを十分に理解している上級ユーザのみが行ってください)。続行できる準備ができたら、C と入力して Enter を押します。
ステップ 10![]() 次にアプリケーション サーバのタイプを選択するよう求められます。アプリケーション サーバに対応する番号を入力し、Enter を押します。
次にアプリケーション サーバのタイプを選択するよう求められます。アプリケーション サーバに対応する番号を入力し、Enter を押します。
ステップ 11![]() 次に、データベース プラットフォームを選択するよう求められます。ご使用のデータベースの番号を入力し、Enter を押します。
次に、データベース プラットフォームを選択するよう求められます。ご使用のデータベースの番号を入力し、Enter を押します。
ステップ 12![]() 次に、Web サーバ ホスト名を入力するよう求められます。画面に表示されるデフォルト値は、現在使用しているマシンのホスト名です。Web サーバのホスト名を入力し、Enter を押します。(インストール環境で Web サーバを使用していない場合は、アプリケーション サーバのホスト名を入力します)。
次に、Web サーバ ホスト名を入力するよう求められます。画面に表示されるデフォルト値は、現在使用しているマシンのホスト名です。Web サーバのホスト名を入力し、Enter を押します。(インストール環境で Web サーバを使用していない場合は、アプリケーション サーバのホスト名を入力します)。
ステップ 13![]() 次に、Web サーバ ポート番号を入力するよう求められます。画面に表示されるデフォルト値はポート 80 です。Web サーバにより使用されるポート番号を入力し、Enter を押します。(インストール環境で Web サーバを使用していない場合は、アプリケーション サーバの HTTP ポート番号を入力します)。
次に、Web サーバ ポート番号を入力するよう求められます。画面に表示されるデフォルト値はポート 80 です。Web サーバにより使用されるポート番号を入力し、Enter を押します。(インストール環境で Web サーバを使用していない場合は、アプリケーション サーバの HTTP ポート番号を入力します)。
ステップ 14![]() セットアップ プログラムにより Web サーバとの通信テストが実行されます。セットアップ プログラムが Web サーバと通信できない場合、または使用されている Web サーバのタイプを確認できない場合には、画面に次のようなメッセージが表示されます。
セットアップ プログラムにより Web サーバとの通信テストが実行されます。セットアップ プログラムが Web サーバと通信できない場合、または使用されている Web サーバのタイプを確認できない場合には、画面に次のようなメッセージが表示されます。
このようなメッセージが画面に表示される場合は、(スキップを意味する) S と入力して Enter を押し、操作を続行します。
ステップ 15![]() 直前の画面で S を入力した場合、次の画面で Web サーバ タイプを選択するよう求められます。ご使用の Web サーバ タイプに対応する番号を入力し、Enter を押します。画面に表示される Web サーバ タイプのリストは、前のステップで
直前の画面で S を入力した場合、次の画面で Web サーバ タイプを選択するよう求められます。ご使用の Web サーバ タイプに対応する番号を入力し、Enter を押します。画面に表示される Web サーバ タイプのリストは、前のステップで![]() 選択したアプリケーション サーバのタイプに応じて異なる点に注意してください。
選択したアプリケーション サーバのタイプに応じて異なる点に注意してください。
ステップ 16![]() 次に [Database Component Options] 画面が表示されます。前の項で記入した「データベース情報ワークシート」と「アプリケーション サーバ情報ワークシート」を使用して、この画面に入力する設定値を確認します。RequestCenter データベースと Datamart データベースの両方の情報を入力するように求められます。
次に [Database Component Options] 画面が表示されます。前の項で記入した「データベース情報ワークシート」と「アプリケーション サーバ情報ワークシート」を使用して、この画面に入力する設定値を確認します。RequestCenter データベースと Datamart データベースの両方の情報を入力するように求められます。
図 2-24 [Database Component Options] 画面

セットアップ プログラムでは、すでにデフォルト値が設定されている場合でもアスタリスク(*)の付いたオプションを選択して値を入力するように求められます。
•![]() JBoss の場合は [Datasource JNDI Name] の設定値にプレフィクス「java:/」が含まれている必要があります(例:「java:/REQUESTCENTERDS」、「java:/DATAMARTDS」など)。
JBoss の場合は [Datasource JNDI Name] の設定値にプレフィクス「java:/」が含まれている必要があります(例:「java:/REQUESTCENTERDS」、「java:/DATAMARTDS」など)。
•![]() WebLogic または WebSphere の場合は [Datasource JNDI Name] の設定値にプレフィクス「eis/」が含まれている必要があります(例:「eis/REQUESTCENTERDS」、「eis/DATAMARTDS」など)。
WebLogic または WebSphere の場合は [Datasource JNDI Name] の設定値にプレフィクス「eis/」が含まれている必要があります(例:「eis/REQUESTCENTERDS」、「eis/DATAMARTDS」など)。
•![]() この画面で入力するすべてのオプション値(Yes/No 値を除く)では大文字と小文字が区別されます。
この画面で入力するすべてのオプション値(Yes/No 値を除く)では大文字と小文字が区別されます。
[Database Component Installation Options] 画面に必須値をすべて入力したら、C と入力して Enter を押し、操作を続行します。
ステップ 17![]() セットアップ プログラムにより、入力した情報を使用して Service Portal データベースと Data Mart データベースに対する一連の接続テストが実行されます。接続テストが失敗すると、セットアップ プログラムにより「ERROR! Verification Failed for the Database User」というメッセージが画面に表示されます。
セットアップ プログラムにより、入力した情報を使用して Service Portal データベースと Data Mart データベースに対する一連の接続テストが実行されます。接続テストが失敗すると、セットアップ プログラムにより「ERROR! Verification Failed for the Database User」というメッセージが画面に表示されます。
このメッセージが表示されたら、データベース情報を必要に応じて変更するため Enter を押して [Database Component Installation Options] 画面に戻ります。この時点でセットアップ プログラムを中止する場合は Q と入力します。この時点までに入力した情報は「<ServicePortal_Install_Dir>¥etc」ディレクトリ内のプロパティ ファイルに保存されます。次回セットアップ プログラムを起動して宛先ディレクトリとして同じ <ServicePortal_Install_Dir> を指定すると、以前入力したデータが各インストール画面に再び表示されます。
ステップ 18![]() すべてのデータベース接続テストが正常に完了したら、アプリケーション コンポーネント オプション画面が表示されます。前の項で記入した「アプリケーション サーバ情報ワークシート」を使用して、この画面に入力する設定値を確認します。
すべてのデータベース接続テストが正常に完了したら、アプリケーション コンポーネント オプション画面が表示されます。前の項で記入した「アプリケーション サーバ情報ワークシート」を使用して、この画面に入力する設定値を確認します。
図 2-25 アプリケーション コンポーネント オプション画面
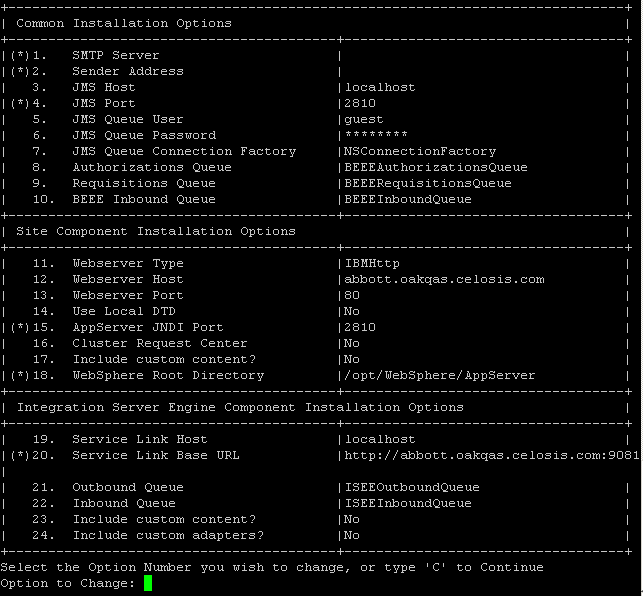
この画面に表示されるオプションは、前のステップで選択したアプリケーション サーバのタイプに応じて多少異なります。ほとんどのオプションはすべてのアプリケーション サーバ タイプで同一ですが、一部の特定タイプのアプリケーション サーバには固有のオプションが 1 つまたは 2 つあります。
JBoss をアプリケーション サーバとして選択しており Windows オペレーティング システムを使用している場合には、[Install as Service?] というオプションが表示されます。[Yes] に設定すると、2 つの Windows NT サービス(「CiscoServicePortal Request Center」と「CiscoServicePortal Service Link」)がセットアップ プログラムによりコンピュータに自動的に登録されます。
WebSphere の場合、[WebSphere Root Directory] オプションの値を入力する必要があります。
WebLogic または WebSphere の場合、クラスタ環境に Service Portal をインストールするには [Cluster RequestCenter] オプションで [Yes] を選択する必要があります。[Cluster RequestCenter] オプションが自動的に展開され、ユーザからの入力が必要な追加オプションが表示されます。
アプリケーション コンポーネント オプション画面に必須値をすべて入力したら、C と入力して Enter を押し、操作を続行します。
ステップ 19![]() 次に [Advanced Reporting Component Installation Options] 画面が表示されます。この画面は、[Module] 画面で [Advanced Reporting] モジュールについて [Yes] を選択した場合にのみ表示されます。
次に [Advanced Reporting Component Installation Options] 画面が表示されます。この画面は、[Module] 画面で [Advanced Reporting] モジュールについて [Yes] を選択した場合にのみ表示されます。
図 2-26 [Advanced Reporting Component Options] 画面
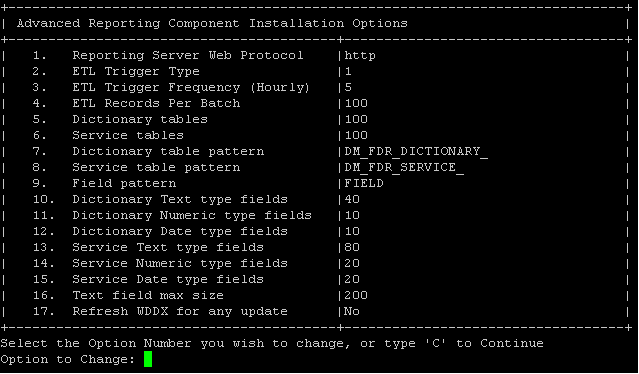
この画面に表示されるデフォルト設定値は、Service Portal の新規インストールでの標準的な Reporting の設定に対応しています。「Advanced Reporting」モジュールを使い慣れているユーザの場合は、後述の 表 2-10 で Advanced Reporting のオプションの説明を参照し、各自のレポート ニーズに基づいて値を調整する方法を確認してください。それ以外の場合は、画面に表示されている標準的な新規インストールの設定値を一切変更せずに C と入力し、Enter を押して続行します。
表 2-10 に、Reporting の各オプションの簡単な説明を示します。インストール後に Reporting の設定を変更する必要があると判断した場合のための手順とユーティリティがあります。詳細については、「Advanced Reporting について」を参照してください。
ステップ 20![]() [Advanced Reporting Component Installation Options] 画面の処理が完了すると、インストール プロセスを開始するための十分な情報がセットアップ プログラムに収集されます。実行される一連のデータベース スクリプトとインストール タスクが画面に表示されます。このプロセスには最大 20 分かかります。このプロセスの実行中にセットアップ プログラムを中断しないでください。
[Advanced Reporting Component Installation Options] 画面の処理が完了すると、インストール プロセスを開始するための十分な情報がセットアップ プログラムに収集されます。実行される一連のデータベース スクリプトとインストール タスクが画面に表示されます。このプロセスには最大 20 分かかります。このプロセスの実行中にセットアップ プログラムを中断しないでください。
ステップ 21![]() セットアップ プログラムの処理が正常に完了すると、[Installation has completed to <ServicePortal_Install_Dir>] というメッセージが表示されます。この時点で Enter を押してセットアップ プログラムを終了できます。
セットアップ プログラムの処理が正常に完了すると、[Installation has completed to <ServicePortal_Install_Dir>] というメッセージが表示されます。この時点で Enter を押してセットアップ プログラムを終了できます。
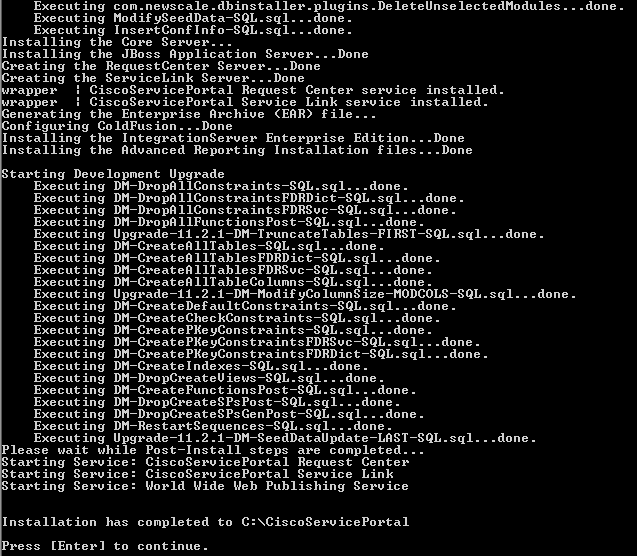
ステップ 22![]() 次のディレクトリのバックアップを作成します。
次のディレクトリのバックアップを作成します。
•![]() <ServicePortal_Software_Dir>:Service Portal ソフトウェアの電子ディストリビューションを解凍した場所です。
<ServicePortal_Software_Dir>:Service Portal ソフトウェアの電子ディストリビューションを解凍した場所です。
•![]() <ServicePortal_Install_Dir>:Service Portal ソフトウェアの宛先ディレクトリです。このディレクトリにはアプリケーション用に生成された EAR ファイルと WAR ファイル、およびインストール時に選択したインストール オプションが記述されているプロパティ ファイルが保管されます。JBoss の場合、このディレクトリには JBoss アプリケーション サーバもインストールされます。
<ServicePortal_Install_Dir>:Service Portal ソフトウェアの宛先ディレクトリです。このディレクトリにはアプリケーション用に生成された EAR ファイルと WAR ファイル、およびインストール時に選択したインストール オプションが記述されているプロパティ ファイルが保管されます。JBoss の場合、このディレクトリには JBoss アプリケーション サーバもインストールされます。
JBoss のインストール後の設定
Service Portal インストーラによってすでに JBoss アプリケーション サーバがインストールおよび設定され、アプリケーションが自動的に導入されています。また、IIS Web サーバが JBoss サーバと同じ Windows マシン上にある場合は、IIS Web サーバも設定されています。
JBoss サーバの起動(Windows)
Windows オペレーティング システムに Service Portal をインストールしている場合、JBoss アプリケーション サーバが「<ServicePortal_Install_Dir>¥jboss-4.2.3.GA」ディレクトリにインストールされています。
Service Portal のインストール時に [Install as Service?] オプションで [Yes] を選択した場合は、次の手順でアプリケーションを起動します。
ステップ 1![]() ご使用のマシンで [Start] > [All Programs] > [Administrative Tools] > [Services] の順に選択し、[Services] ウィンドウを開きます。
ご使用のマシンで [Start] > [All Programs] > [Administrative Tools] > [Services] の順に選択し、[Services] ウィンドウを開きます。
ステップ 2![]() CiscoServicePortal Request Center という名前のサービスを選択し、[Start] ボタンをクリックします(このサービスがまだ開始されていない場合)。
CiscoServicePortal Request Center という名前のサービスを選択し、[Start] ボタンをクリックします(このサービスがまだ開始されていない場合)。
ステップ 3![]() CiscoServicePortal Service Link という名前のサービスを選択し、[Start] ボタンをクリックします(このサービスがまだ開始されていない場合)。
CiscoServicePortal Service Link という名前のサービスを選択し、[Start] ボタンをクリックします(このサービスがまだ開始されていない場合)。
ステップ 4![]() IIS Web サーバがまだ稼動していない場合は IIS Web サーバも起動します。
IIS Web サーバがまだ稼動していない場合は IIS Web サーバも起動します。
Service Portal のインストール時に [Install as Service?] オプションで [No] を選択した場合は、次の手順でアプリケーションを起動します。
ステップ 1![]() コマンド プロンプト ウィンドウを開き、「<ServicePortal_Install_Dir>¥bin」フォルダに移動します。
コマンド プロンプト ウィンドウを開き、「<ServicePortal_Install_Dir>¥bin」フォルダに移動します。
ステップ 2![]() コマンド プロンプト ウィンドウで startRequestCenter.cmd を実行し、Request Center アプリケーションを起動します。
コマンド プロンプト ウィンドウで startRequestCenter.cmd を実行し、Request Center アプリケーションを起動します。
ステップ 3![]() 「<ServicePortal_Install_Dir>¥jboss-4.2.3.GA¥server¥RequestCenter¥log」ディレクトリ内のログ ファイル「server.log」をモニタし、Request Center アプリケーションが起動しており例外が発生していないことを確認します。
「<ServicePortal_Install_Dir>¥jboss-4.2.3.GA¥server¥RequestCenter¥log」ディレクトリ内のログ ファイル「server.log」をモニタし、Request Center アプリケーションが起動しており例外が発生していないことを確認します。
ステップ 4![]() コマンド プロンプト ウィンドウで startServiceLink.cmd を実行し、Service Link アプリケーションを起動します。
コマンド プロンプト ウィンドウで startServiceLink.cmd を実行し、Service Link アプリケーションを起動します。
ステップ 5![]() 「<ServicePortal_Install_Dir>¥jboss-4.2.3.GA¥server¥ServiceLink¥log」ディレクトリ内のログ ファイル「server.log」をモニタし、Service Link アプリケーションが起動しており例外が発生していないことを確認します。
「<ServicePortal_Install_Dir>¥jboss-4.2.3.GA¥server¥ServiceLink¥log」ディレクトリ内のログ ファイル「server.log」をモニタし、Service Link アプリケーションが起動しており例外が発生していないことを確認します。
Windows サービスのインストール
Service Portal のインストール時に [Install as Service?] オプションに対して [No] を選択しており、この時点で 2 つのサービスを手動で登録するには、次の手順を実行します。
ステップ 1![]() コマンド プロンプト ウィンドウを開き、「<ServicePortal_Install_Dir>¥bin」フォルダに移動します。
コマンド プロンプト ウィンドウを開き、「<ServicePortal_Install_Dir>¥bin」フォルダに移動します。
ステップ 2![]() installRequestCenterService.cmd を実行します。
installRequestCenterService.cmd を実行します。
ステップ 3![]() installServiceLinkService.cmd を実行します。
installServiceLinkService.cmd を実行します。
JBoss サーバの起動(Linux)
Linux オペレーティング システムに Service Portal をインストールしている場合、JBoss アプリケーション サーバが「<ServicePortal_Install_Dir>/jboss-4.2.3.GA」ディレクトリにインストールされています。JBoss サーバを開始するには次の手順で操作します。
ステップ 1![]() Linux マシンに「root」ユーザとしてログインします。
Linux マシンに「root」ユーザとしてログインします。
ステップ 2![]() 「<ServicePortal_Install_Dir>/bin」ディレクトリに移動します。
「<ServicePortal_Install_Dir>/bin」ディレクトリに移動します。
ステップ 3![]() 「./startRequestCenter.sh &」を実行し、Request Center アプリケーションをバックグラウンド プロセスとして開始します。
「./startRequestCenter.sh &」を実行し、Request Center アプリケーションをバックグラウンド プロセスとして開始します。
ステップ 4![]() 「<ServicePortal_Install_Dir>/jboss-4.2.3.GA/server/RequestCenter/log」ディレクトリ内のログ ファイル「server.log」をモニタし、Request Center アプリケーションが起動しており例外が発生していないことを確認します。
「<ServicePortal_Install_Dir>/jboss-4.2.3.GA/server/RequestCenter/log」ディレクトリ内のログ ファイル「server.log」をモニタし、Request Center アプリケーションが起動しており例外が発生していないことを確認します。
ステップ 5![]() 「./startServiceLink.sh &」を実行し、Service Link アプリケーションをバックグラウンド プロセスとして起動します。
「./startServiceLink.sh &」を実行し、Service Link アプリケーションをバックグラウンド プロセスとして起動します。
ステップ 6![]() 「<ServicePortal_Install_Dir>/jboss-4.2.3.GA/server/ServiceLink/log」ディレクトリ内のログ ファイル「server.log」をモニタし、Service Link アプリケーションが起動しており例外が発生していないことを確認します。
「<ServicePortal_Install_Dir>/jboss-4.2.3.GA/server/ServiceLink/log」ディレクトリ内のログ ファイル「server.log」をモニタし、Service Link アプリケーションが起動しており例外が発生していないことを確認します。
インストールの確認
Service Portal が稼動していることを確認するには、次の手順を実行します。
ステップ 1![]() ブラウザ ウィンドウを開き、次の URL に接続します
ブラウザ ウィンドウを開き、次の URL に接続します
http://<hostname>:8088/RequestCenter
<hostname> は JBoss サーバのマシン名です。
インストール時に Service Portal インストールによって IIS のプラグインを自動的に設定することを選択した場合は、最初に IIS Web サーバが稼動していることを確認してから次の URL に接続し、インストールをテストします。
http://<hostname>:<webserver_port>/RequestCenter
<webserver_port> は IIS が使用するポート番号です。ポート番号が 80 の場合は <webserver_port> を省略できます。
ステップ 2![]() 管理者ユーザとしてログインします。(Service Portal を新規にインストールした場合、管理者ユーザのデフォルト ユーザ名は「admin」、デフォルト パスワードは「admin」です)。My Services ホーム ページが表示されます。
管理者ユーザとしてログインします。(Service Portal を新規にインストールした場合、管理者ユーザのデフォルト ユーザ名は「admin」、デフォルト パスワードは「admin」です)。My Services ホーム ページが表示されます。
ステップ 3![]() この時点で [Module] ドロップダウン リストから [Service Link] メニューを選択します。[Service Link] ホーム ページが表示されます。
この時点で [Module] ドロップダウン リストから [Service Link] メニューを選択します。[Service Link] ホーム ページが表示されます。
ステップ 4![]() ページ左側の [Service Link Status] で接続のステータスが緑色であることを確認します。
ページ左側の [Service Link Status] で接続のステータスが緑色であることを確認します。
これで、JBoss への Cisco Service Portal のインストールが完了しました。
WebLogic のインストール後の設定
セットアップ プログラムが完了すると、次の EAR ファイルと WAR ファイルが「<ServicePortal_Install_Dir>¥dist」ディレクトリの中に作成されます。
セットアップ プログラムでは、この EAR ファイルと WAR ファイルは WebLogic サーバに自動的には導入されません。この項で説明する手順に従ってこの EAR ファイルと WAR ファイルを手動で導入する必要があります。以前に記入した「アプリケーション サーバ情報ワークシート」を参照して、導入時に必要なパラメータの値を確認します。
EAR ファイルと WAR ファイルの解凍
ステップ 1![]() 「<BEA_HOME>¥ user_projects¥domain¥<your_domain>」ディレクトリの中に applications サブディレクトリがまだない場合は、このサブディレクトリを作成します。この操作は WebLogic Administration Server が稼動するコンピュータで実行する点に注意してください。
「<BEA_HOME>¥ user_projects¥domain¥<your_domain>」ディレクトリの中に applications サブディレクトリがまだない場合は、このサブディレクトリを作成します。この操作は WebLogic Administration Server が稼動するコンピュータで実行する点に注意してください。
ステップ 2![]() 「applications」の中に次の 2 つのサブディレクトリを作成します。
「applications」の中に次の 2 つのサブディレクトリを作成します。
ステップ 3![]() セットアップ プログラムにより生成された EAR ファイルと WAR ファイルを、作成した新しいディレクトリに解凍します。
セットアップ プログラムにより生成された EAR ファイルと WAR ファイルを、作成した新しいディレクトリに解凍します。
a.![]() 「<ServicePortal_Install_Dir>¥dist¥RequestCenter.ear」ファイルを「<BEA_HOME>¥user_projects¥domain¥<your_domain>¥applications¥RequestCenter」ディレクトリに解凍します。
「<ServicePortal_Install_Dir>¥dist¥RequestCenter.ear」ファイルを「<BEA_HOME>¥user_projects¥domain¥<your_domain>¥applications¥RequestCenter」ディレクトリに解凍します。
b.![]() 「<ServicePortal_Install_Dir>¥dist¥ISEE.war」ファイルを「<BEA_HOME>¥user_projects¥domain¥<your_domain>¥applications¥ServiceLink」ディレクトリに解凍します。
「<ServicePortal_Install_Dir>¥dist¥ISEE.war」ファイルを「<BEA_HOME>¥user_projects¥domain¥<your_domain>¥applications¥ServiceLink」ディレクトリに解凍します。
(注) 「<BEA_HOME>¥user_projects¥domain¥<your_domain>¥applications」ディレクトリの中の RequestCenter または ServiceLink サブディレクトリが空ではない場合は、新しい RequestCenter.ear または ISEE.war ファイルの内容を解凍する前にディレクトリ全体を空にします。これは、Unzip ユーティリティでは同名のファイルがすべて上書きされるためです。宛先ディレクトリに、誤って導入された可能性のある古いファイルの「残り」が含まれていることがあります。
RequestCenter.ear の導入
ステップ 1![]() WebLogic Administration Console にログインします。
WebLogic Administration Console にログインします。
ステップ 2![]() WebLogic サーバ(または WebLogic クラスタ)がまだ稼動していない場合は、WebLogic サーバを起動します。
WebLogic サーバ(または WebLogic クラスタ)がまだ稼動していない場合は、WebLogic サーバを起動します。
ステップ 3![]() WebLogic が PRODUCTION モードでインストールされている場合は、変更できるようにするため [Lock & Edit] ボタンをクリックします。それ以外の場合は、このステップを省略できます。
WebLogic が PRODUCTION モードでインストールされている場合は、変更できるようにするため [Lock & Edit] ボタンをクリックします。それ以外の場合は、このステップを省略できます。
ステップ 4![]() 左側のパネルで [Deployments] をクリックします。
左側のパネルで [Deployments] をクリックします。
ステップ 6![]() 「<BEA_HOME>¥user_projects¥domain¥<your_domain>¥applications」ディレクトリを参照します(またはフルパス名を入力します)。「RequestCenter」と「ServiceLink」という 2 つのサブディレクトリが表示されます。
「<BEA_HOME>¥user_projects¥domain¥<your_domain>¥applications」ディレクトリを参照します(またはフルパス名を入力します)。「RequestCenter」と「ServiceLink」という 2 つのサブディレクトリが表示されます。
ステップ 7![]() RequestCenter のオプション ボタンを選択して [Next] をクリックします。
RequestCenter のオプション ボタンを選択して [Next] をクリックします。
ステップ 8![]() [Install this deployment as an application] オプションを選択して [Next] をクリックします。
[Install this deployment as an application] オプションを選択して [Next] をクリックします。
ステップ 9![]() WebLogic サーバ(または WebLogic クラスタ)をターゲットとして選択し、[Next] をクリックします。
WebLogic サーバ(または WebLogic クラスタ)をターゲットとして選択し、[Next] をクリックします。
ステップ 10![]() [Name] フィールドに「RequestCenter」と入力し、[Next] をクリックします。
[Name] フィールドに「RequestCenter」と入力し、[Next] をクリックします。
ステップ 11![]() [No, I will review the configuration later] オプションを選択し、[Finish] をクリックします。進行状況インジケータが開始します。終了するまでに数分かかる場合があります。
[No, I will review the configuration later] オプションを選択し、[Finish] をクリックします。進行状況インジケータが開始します。終了するまでに数分かかる場合があります。
ステップ 12![]() 画面が更新され、「RequestCenter」アプリケーションの [State] が [Active]、[Health] が [OK] と表示されるまで待ちます。WebLogic アプリケーション サーバが PRODUCTION モードでインストールされている場合は、[Active Changes] ボタンをクリックするまでは [State] が [Prepared] に設定されていることがあります。
画面が更新され、「RequestCenter」アプリケーションの [State] が [Active]、[Health] が [OK] と表示されるまで待ちます。WebLogic アプリケーション サーバが PRODUCTION モードでインストールされている場合は、[Active Changes] ボタンをクリックするまでは [State] が [Prepared] に設定されていることがあります。
ISEE.war の導入
ステップ 1![]() WebLogic Administration Console にログインします。
WebLogic Administration Console にログインします。
ステップ 2![]() WebLogic サーバがまだ稼動していない場合は起動します。(WebLogic クラスタ環境を使用している場合は「Service Link WebLogic サーバ」を起動します。Service Link アプリケーションはクラスタに導入できません)。
WebLogic サーバがまだ稼動していない場合は起動します。(WebLogic クラスタ環境を使用している場合は「Service Link WebLogic サーバ」を起動します。Service Link アプリケーションはクラスタに導入できません)。
ステップ 3![]() WebLogic が PRODUCTION モードでインストールされている場合は、変更できるようにするため [Lock & Edit] ボタンをクリックします。それ以外の場合は、このステップを省略できます。
WebLogic が PRODUCTION モードでインストールされている場合は、変更できるようにするため [Lock & Edit] ボタンをクリックします。それ以外の場合は、このステップを省略できます。
ステップ 4![]() 左側のパネルで [Deployments] をクリックします。
左側のパネルで [Deployments] をクリックします。
ステップ 6![]() 「<BEA_HOME>¥user_projects¥domain¥<your_domain>¥applications」ディレクトリを参照します(またはフルパス名を入力します)。「RequestCenter」と「ServiceLink」という 2 つのサブディレクトリが表示されます。
「<BEA_HOME>¥user_projects¥domain¥<your_domain>¥applications」ディレクトリを参照します(またはフルパス名を入力します)。「RequestCenter」と「ServiceLink」という 2 つのサブディレクトリが表示されます。
ステップ 7![]() ServiceLink のオプション ボタンを選択して [Next] をクリックします。
ServiceLink のオプション ボタンを選択して [Next] をクリックします。
ステップ 8![]() [Install this deployment as an application] オプションを選択して [Next] をクリックします。
[Install this deployment as an application] オプションを選択して [Next] をクリックします。
ステップ 9![]() ご使用の WebLogic サーバをターゲットとして選択します。(WebLogic クラスタを使用している場合は、ターゲットとしてスタンドアロンの「Service Link WebLogic サーバ」を選択します)。次に [Next] をクリックします。
ご使用の WebLogic サーバをターゲットとして選択します。(WebLogic クラスタを使用している場合は、ターゲットとしてスタンドアロンの「Service Link WebLogic サーバ」を選択します)。次に [Next] をクリックします。
ステップ 10![]() [Name] フィールドに「 ServiceLink 」と入力し、[Next] をクリックします。
[Name] フィールドに「 ServiceLink 」と入力し、[Next] をクリックします。
ステップ 11![]() [No, I will review the configuration later] オプションを選択し、[Finish] をクリックします。進行状況インジケータが開始します。終了するまでに数分かかる場合があります。
[No, I will review the configuration later] オプションを選択し、[Finish] をクリックします。進行状況インジケータが開始します。終了するまでに数分かかる場合があります。
ステップ 12![]() 画面が更新され、「ServiceLink」アプリケーションの [State] が Active、[Health] が OK と表示されるまで待ちます。WebLogic アプリケーション サーバが PRODUCTION モードでインストールされている場合は、[Active Changes] ボタンをクリックするまでは [State] が [Prepared] に設定されていることがあります。
画面が更新され、「ServiceLink」アプリケーションの [State] が Active、[Health] が OK と表示されるまで待ちます。WebLogic アプリケーション サーバが PRODUCTION モードでインストールされている場合は、[Active Changes] ボタンをクリックするまでは [State] が [Prepared] に設定されていることがあります。
インストールの確認
ステップ 1![]() インストールをテストするため、ブラウザを新規に開いて次の URL に接続します。
インストールをテストするため、ブラウザを新規に開いて次の URL に接続します。
http://<AppServer_Host>:<Port>/RequestCenter
<AppServer_Host> は WebLogic サーバのホスト名、<Port> は WebLogic サーバにより使用されるポート番号です。
http://m1.cisco.com:8001/RequestCenter
ステップ 2![]() 管理者ユーザとしてログインします。(Service Portal を新規にインストールした場合、管理者ユーザのデフォルト ユーザ名は「admin」、デフォルト パスワードは「admin」です)。My Services ホーム ページが表示されます。
管理者ユーザとしてログインします。(Service Portal を新規にインストールした場合、管理者ユーザのデフォルト ユーザ名は「admin」、デフォルト パスワードは「admin」です)。My Services ホーム ページが表示されます。
ステップ 3![]() [Module] ドロップダウン リストから [Service Link] メニューを選択します。[Service Link] ホーム ページが表示されます。
[Module] ドロップダウン リストから [Service Link] メニューを選択します。[Service Link] ホーム ページが表示されます。
ステップ 4![]() ページ左側の [Service Link Status] で接続のステータスが緑色であることを確認します。
ページ左側の [Service Link Status] で接続のステータスが緑色であることを確認します。
これで、WebLogic への Cisco Service Portal のインストールが完了しました。
Web サーバの設定
次に、WebLogic サーバ(または WebLogic クラスタ)を指し示すように Web サーバのプラグインを設定します。WebLogic サーバでサポートされている Web サーバを以下に示します。
このマニュアルでは、Web サーバ プラグインの設定方法については説明しません。Service Portal インストーラ プログラムでは、Web サーバと WebLogic の間のプラグインの設定は行われません。Web サーバのインストール時にインストールまたは設定する必要がある Cisco ライブラリまたはバイナリはありません。Oracle(WebLogic プラグインの場合)またはご使用の Web ブラウザのベンダーから提供される指示に従ってください。
この項では、Web サーバ設定ファイルに追加できる設定の例のみを記載しています。
Apache 2.2 Web Server の設定例を次に示します。以下のエントリをファイル httpd.conf の終わりに追加します。
IIS 7.5 Web Server の設定例を次に示します。以下のエントリをファイル iisproxy.ini に追加します。
プラグインの設定が完了したら、Web サーバと WebLogic アプリケーション サーバの両方を再起動する必要があります。
「インストールの確認」で説明する手順を繰り返し、Web サーバ プラグインが WebLogic サーバを指し示すように正しく設定されていることを確認します。ただし、この場合は接続先 URL は次のようになります。
http://< WebServer_Host >:< WebServer_Port >/RequestCenter
<WebServer_Host> は Web サーバのホスト名、< WebServer_Port > は Web サーバにより使用されるポート番号(80 に設定されている場合はポート番号を省略)です。
WebSphere のインストール後の設定
Service Portal インストーラ プログラムが完了すると、EAR ファイルと WAR ファイルが 1 つずつ <ServicePortal_Install_Dir>/dist ディレクトリの中に作成されます。
インストーラ プログラムでは、この EAR ファイルと WAR ファイルは WebSphere サーバに自動的には導入されません。この項で説明する手順に従ってこの EAR ファイルと WAR ファイルを手動で導入する必要があります。以前に記入した「アプリケーション サーバ情報ワークシート」を参照して、導入時に必要なパラメータの値を確認します。
RequestCenter.ear の導入
ステップ 1![]() WebSphere Administration Console にログインします。
WebSphere Administration Console にログインします。
ステップ 2![]() WebSphere サーバ(または WebSphere クラスタ)がまだ稼動していない場合は、WebSphere サーバを起動します。
WebSphere サーバ(または WebSphere クラスタ)がまだ稼動していない場合は、WebSphere サーバを起動します。
ステップ 3![]() [Applications] > [Application Types] を展開して [WebSphere enterprise applications] をクリックします。
[Applications] > [Application Types] を展開して [WebSphere enterprise applications] をクリックします。
ステップ 4![]() 右側のパネルで [Install] ボタンをクリックします。[Path to the new application] ページが表示されます。
右側のパネルで [Install] ボタンをクリックします。[Path to the new application] ページが表示されます。
ステップ 5![]() <ServicePortal_Install_Dir> があるマシンでブラウザが実行されている場合は、[Local file system] オプションを選択します。それ以外の場合は [Remote file system] オプションを選択します。
<ServicePortal_Install_Dir> があるマシンでブラウザが実行されている場合は、[Local file system] オプションを選択します。それ以外の場合は [Remote file system] オプションを選択します。
ステップ 6![]() [Browse] ボタンをクリックし、「<ServicePortal_Install_Dir>/dist」ディレクトリに移動します。
[Browse] ボタンをクリックし、「<ServicePortal_Install_Dir>/dist」ディレクトリに移動します。
ステップ 7![]() RequestCenter.ear を選択し、[OK] をクリックします。
RequestCenter.ear を選択し、[OK] をクリックします。
ステップ 8![]() [Next] をクリックします。[How do you want to install the application?] ページが表示されます。
[Next] をクリックします。[How do you want to install the application?] ページが表示されます。
b.![]() [Choose to generate default bindings and mappings] を展開します。
[Choose to generate default bindings and mappings] を展開します。
c.![]() [Generate Default Bindings] オプションを選択します。
[Generate Default Bindings] オプションを選択します。
d.![]() [Use default virtual host name for Web and SIP modules] オプションを選択します。
[Use default virtual host name for Web and SIP modules] オプションを選択します。
e.![]() [Host Name] フィールドに ns_host と入力します。
[Host Name] フィールドに ns_host と入力します。
ステップ 10![]() [Next] をクリックします。[Step 1: Select installation options] ページが表示されます。
[Next] をクリックします。[Step 1: Select installation options] ページが表示されます。
ステップ 11![]() 変更しないでください。[Next] をクリックします。[Step 2: Map modules to servers] ページが表示されます。
変更しないでください。[Next] をクリックします。[Step 2: Map modules to servers] ページが表示されます。
a.![]() 最初に [Clusters and servers] ドロップダウン リストから WebSphere サーバ名(または WebSphere クラスタ名)を選択します。
最初に [Clusters and servers] ドロップダウン リストから WebSphere サーバ名(または WebSphere クラスタ名)を選択します。
b.![]() 次にテーブル ヘッダーの [Select All] アイコンをクリックします。これによりテーブルのすべての行が自動的に選択されます。
次にテーブル ヘッダーの [Select All] アイコンをクリックします。これによりテーブルのすべての行が自動的に選択されます。
c.![]() 次に [Clusters and servers] ドロップダウン リストの横にある [Apply] ボタンをクリックします。これにより、選択した WebSphere サーバの名前(または WebSphere クラスタの名前)がテーブルの [Server] 列の値として自動的に設定されます。
次に [Clusters and servers] ドロップダウン リストの横にある [Apply] ボタンをクリックします。これにより、選択した WebSphere サーバの名前(または WebSphere クラスタの名前)がテーブルの [Server] 列の値として自動的に設定されます。
ステップ 14![]() ステップ 3 ~ 6 を省略してステップ 7 に進むため、左側のパネルの [Step 7: Map virtual hosts for Web modules] リンクをクリックします。
ステップ 3 ~ 6 を省略してステップ 7 に進むため、左側のパネルの [Step 7: Map virtual hosts for Web modules] リンクをクリックします。
ステップ 15![]() [Virtual host] ドロップダウン リストから [ns_host] を選択します。
[Virtual host] ドロップダウン リストから [ns_host] を選択します。
ステップ 17![]() [Step 8: Map context roots for Web modules] ページで [Context Root] の値が /RequestCenter に設定されていることを確認します。このページの内容は変更しないでください。[Next] をクリックします。
[Step 8: Map context roots for Web modules] ページで [Context Root] の値が /RequestCenter に設定されていることを確認します。このページの内容は変更しないでください。[Next] をクリックします。
ステップ 18![]() [Step 9: Summary] ページで [Finish] をクリックします。
[Step 9: Summary] ページで [Finish] をクリックします。
ステップ 19![]() 「RequestCenter.ear」のインストール プロセスが開始されます。このプロセスが完了するまでには数分かかることがあります。「Application RequestCenter installed successfully」というメッセージが画面に表示されたら、[Save] をクリックしてマスタ設定に直接保存します。
「RequestCenter.ear」のインストール プロセスが開始されます。このプロセスが完了するまでには数分かかることがあります。「Application RequestCenter installed successfully」というメッセージが画面に表示されたら、[Save] をクリックしてマスタ設定に直接保存します。
ステップ 20![]() [Enterprise Applications] ページで、新規に作成した [RequestCenter] のリンクをクリックしてその設定ページを表示します。
[Enterprise Applications] ページで、新規に作成した [RequestCenter] のリンクをクリックしてその設定ページを表示します。
ステップ 21![]() [Detail Properties] セクションで [Class loading and update detection] リンクをクリックします。[RequestCenter> Class loader] ページが表示されます。
[Detail Properties] セクションで [Class loading and update detection] リンクをクリックします。[RequestCenter> Class loader] ページが表示されます。
ステップ 22![]() [Single class loader for application] オプションを選択します。
[Single class loader for application] オプションを選択します。
ステップ 24![]() [Save] をクリックしてマスタ設定に直接保存します。
[Save] をクリックしてマスタ設定に直接保存します。
ISEE.war の導入
ステップ 1![]() WebSphere Administration Console にログインします。
WebSphere Administration Console にログインします。
ステップ 2![]() [Applications] > [Application Types] を展開して [WebSphere enterprise applications] をクリックします。
[Applications] > [Application Types] を展開して [WebSphere enterprise applications] をクリックします。
ステップ 3![]() 右側のパネルで [Install] ボタンをクリックします。[Path to the new application] ページが表示されます。
右側のパネルで [Install] ボタンをクリックします。[Path to the new application] ページが表示されます。
ステップ 4![]() <ServicePortal_Install_Dir> があるマシンでブラウザが実行されている場合は、[Local file system] オプションを選択します。それ以外の場合は [Remote file system] オプションを選択します。
<ServicePortal_Install_Dir> があるマシンでブラウザが実行されている場合は、[Local file system] オプションを選択します。それ以外の場合は [Remote file system] オプションを選択します。
ステップ 5![]() [Browse] ボタンをクリックし、「<ServicePortal_Install_Dir>/dist」ディレクトリに移動します。
[Browse] ボタンをクリックし、「<ServicePortal_Install_Dir>/dist」ディレクトリに移動します。
ステップ 6![]() ISEE.war を選択して [OK] をクリックします。
ISEE.war を選択して [OK] をクリックします。
ステップ 7![]() [Next] をクリックします。[How do you want to install the application?] ページが表示されます。
[Next] をクリックします。[How do you want to install the application?] ページが表示されます。
•![]() [Choose to generate default bindings and mappings] を展開します。
[Choose to generate default bindings and mappings] を展開します。
•![]() [Generate Default Bindings] オプションを選択します。
[Generate Default Bindings] オプションを選択します。
•![]() [Use default virtual host name for Web and SIP modules] オプションを選択します。
[Use default virtual host name for Web and SIP modules] オプションを選択します。
•![]() [Host Name] フィールドに ns_host と入力します。
[Host Name] フィールドに ns_host と入力します。
(注) WebSphere クラスタ環境を使用している場合は [Host Name] で「ns_host」の代わりに sl_host を選択してください。これは、「ns_host」は WebSphere クラスタに、「sl_host」は「Service Link WebSphere サーバ」にマップされるためです。
ステップ 10![]() 次に示す [Application Security Warnings] ページが表示される場合、このページは安全に無視できます。このページを無視して [Continue] をクリックします。
次に示す [Application Security Warnings] ページが表示される場合、このページは安全に無視できます。このページを無視して [Continue] をクリックします。
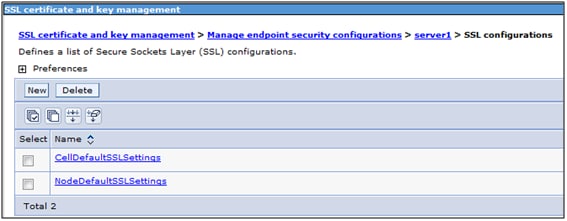
ステップ 11![]() [Step 1: Select installation options] ページの [Application name] フィールドに ServiceLink と入力します。これにより既存の値が上書きされます。
[Step 1: Select installation options] ページの [Application name] フィールドに ServiceLink と入力します。これにより既存の値が上書きされます。
ステップ 12![]() [Next] をクリックします。[Step 2: Map modules to servers] ページが表示されます。
[Next] をクリックします。[Step 2: Map modules to servers] ページが表示されます。

•![]() 最初に [Clusters and servers] ドロップダウン リストから WebSphere サーバ名を選択します。WebSphere Cluster 環境を使用している場合は、「Service Link WebSphere サーバ」を選択してください。
最初に [Clusters and servers] ドロップダウン リストから WebSphere サーバ名を選択します。WebSphere Cluster 環境を使用している場合は、「Service Link WebSphere サーバ」を選択してください。
•![]() 次にテーブル ヘッダーの [Select All] アイコンをクリックします。これによりテーブルのすべての行が自動的に選択されます。
次にテーブル ヘッダーの [Select All] アイコンをクリックします。これによりテーブルのすべての行が自動的に選択されます。
•![]() 次に [Clusters and servers] ドロップダウン リストの横にある [Apply] ボタンをクリックします。これにより、選択した WebSphere サーバの名前がテーブルの [Server] 列の値として自動的に設定されます。
次に [Clusters and servers] ドロップダウン リストの横にある [Apply] ボタンをクリックします。これにより、選択した WebSphere サーバの名前がテーブルの [Server] 列の値として自動的に設定されます。
ステップ 15![]() ステップ 3 ~ 6 を省略してステップ 7 に進むため、左側のパネルの [Step 7: Map virtual hosts for Web modules] リンクをクリックします。
ステップ 3 ~ 6 を省略してステップ 7 に進むため、左側のパネルの [Step 7: Map virtual hosts for Web modules] リンクをクリックします。
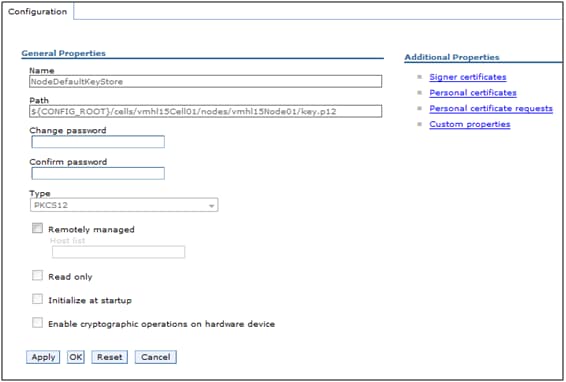
ステップ 16![]() [Virtual host] ドロップダウン リストから [ns_host] を選択します。WebSphere Cluster 環境を使用している場合は、「ns_host」の代わりに sl_host を選択します。
[Virtual host] ドロップダウン リストから [ns_host] を選択します。WebSphere Cluster 環境を使用している場合は、「ns_host」の代わりに sl_host を選択します。
ステップ 18![]() [Step 8: Map context roots for Web modules] ページの [Context Root] フィールドに値 /IntegrationServer を入力します。次に、[Next] をクリックします。
[Step 8: Map context roots for Web modules] ページの [Context Root] フィールドに値 /IntegrationServer を入力します。次に、[Next] をクリックします。
ステップ 19![]() [Step 9: Summary] ページで [Finish] をクリックします。
[Step 9: Summary] ページで [Finish] をクリックします。
ステップ 20![]() 「ISEE.war」のインストール プロセスが開始します。このプロセスが完了するまでには数分かかることがあります。「Application ServiceLink installed successfully」というメッセージが画面に表示されたら、[Save] をクリックしてマスタ設定に直接保存します。
「ISEE.war」のインストール プロセスが開始します。このプロセスが完了するまでには数分かかることがあります。「Application ServiceLink installed successfully」というメッセージが画面に表示されたら、[Save] をクリックしてマスタ設定に直接保存します。
Service Portal アプリケーションの起動
ステップ 1![]() WebSphere Administration Console にログインします。
WebSphere Administration Console にログインします。
ステップ 2![]() [Applications] > [Application Types] を展開して [WebSphere enterprise applications] をクリックします。右側のパネルに、新規に作成したアプリケーション [RequestCenter] と [ServiceLink] が表示されます。
[Applications] > [Application Types] を展開して [WebSphere enterprise applications] をクリックします。右側のパネルに、新規に作成したアプリケーション [RequestCenter] と [ServiceLink] が表示されます。
ステップ 3![]() 両方のアプリケーションを選択して [Start] ボタンをクリックします。
両方のアプリケーションを選択して [Start] ボタンをクリックします。
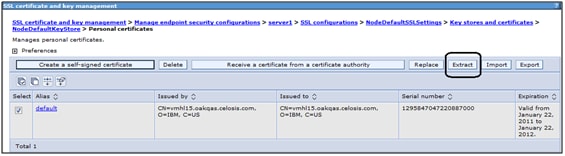
ステップ 4![]() 両方のアプリケーションの [Application Status] が緑色であることを確認します。
両方のアプリケーションの [Application Status] が緑色であることを確認します。
インストールの確認
ステップ 1![]() インストールをテストするため、ブラウザを新規に開いて次の URL に接続します。
インストールをテストするため、ブラウザを新規に開いて次の URL に接続します。
http://<AppServer_Host>:<Port>/RequestCenter
<AppServer_Host> は WebSphere サーバ マシンの名前です。
<Port> は RequestCenter.ear が導入された WebSphere サーバの WC_defaulthost ポート番号です。
ステップ 2![]() Service Portal 管理者ユーザとしてログインします。(Service Portal を新規にインストールした場合、管理者ユーザのデフォルト ユーザ名は「admin」、デフォルト パスワードは「admin」です)。My Services ホーム ページが表示されます。
Service Portal 管理者ユーザとしてログインします。(Service Portal を新規にインストールした場合、管理者ユーザのデフォルト ユーザ名は「admin」、デフォルト パスワードは「admin」です)。My Services ホーム ページが表示されます。
ステップ 3![]() 画面右上隅の [Logout] ボタンの横にある [Module] ドロップダウン リストから [Service Link] を選択します。[Service Link] ホームページが表示されます。
画面右上隅の [Logout] ボタンの横にある [Module] ドロップダウン リストから [Service Link] を選択します。[Service Link] ホームページが表示されます。
ステップ 4![]() ページ左側の [Service Link Status] で接続のステータスが緑色であることを確認します。
ページ左側の [Service Link Status] で接続のステータスが緑色であることを確認します。
これで、WebSphere への Cisco Service Portal のインストールが完了しました。
Web サーバの設定
次に、WebSphere サーバ(または WebSphere クラスタ)を指し示すように Web サーバのプラグインを設定します。WebSphere アプリケーション サーバでサポートされている Web サーバを以下に示します。
このマニュアルでは、Web サーバ プラグインの設定方法については説明しません。Service Portal インストーラ プログラムでは、Web サーバと WebSphere の間のプラグインの設定は行われません。Web サーバのインストール時にインストールまたは設定する必要がある Cisco ライブラリまたはバイナリはありません。IBM から提供される手順(WebSphere プラグインの場合)または Web サーバのベンダーから提供される手順に従って、プラグインを設定してください。
この項では、Web サーバ設定ファイルに追加できる設定の例のみを記載しています。IBM HTTP Server v7.0 の設定例を以下に示します(示されているディレクトリ名は例である点に注意してください)。
以下のエントリをファイル httpd.conf の終わりに追加します。
/opt/IBM/HTTPServer/Plugins/bin/32bits/mod_was_ap22_http.so
プラグイン設定ファイルの再生成
RequestCenter.ear と ISEE.war を導入したら、Service Portal に対して設定した新しいアプリケーション名、ポート番号、および仮想ホスト名を反映するため、WebSphere プラグイン設定ファイルを再生成する必要があります。
ステップ 1![]() WebSphere Deployment Manager サーバが稼動しているマシンでディレクトリ「<WAS_INSTALL_ROOT>/profiles/Dmgr01/bin」に移動します。
WebSphere Deployment Manager サーバが稼動しているマシンでディレクトリ「<WAS_INSTALL_ROOT>/profiles/Dmgr01/bin」に移動します。
•![]() (UNIX または Linux) ./GenPluginCfg.sh
(UNIX または Linux) ./GenPluginCfg.sh
これにより plugin-cfg.xml ファイルが変更されます。このファイルは通常「<WAS_INSTALL_ROOT>/profiles/Dmgr01/config/cells」ディレクトリに保管されています。前述の IBM HTTP Server v7.0 の例では、httpd.conf ファイルの終わりに追加したパラメータ WebSpherePluginConfig がこの plugin-cfg.xml ファイルを参照します。IBM HTTP Server が WebSphere Deployment Manager とは異なるマシンで稼動している場合は、この plugin-cfg.xml ファイルを IBM HTTP Server マシンにコピーし、IBM HTTP Server マシンの plugin-cfg.xml ファイルを指し示すように WebSpherePluginConfig パラメータを設定してください。
また、変更を反映するため IBM HTTP Server を再起動する必要もあります。
「インストールの確認」で説明する手順を繰り返し、Web サーバ プラグインが WebSphere アプリケーション サーバを指し示すように正しく設定されていることを確認します。ただし、この場合は URL = http://<WebServer_Host>:<Webserver_Port>/RequestCenter に接続します。この <WebServer_Host> は Web サーバ マシンのホスト名、<WebServer_Port> は Web サーバが使用するポートの番号です。
 フィードバック