- Preface
- Chapter 1 - Overview
- Chapter 2 - Preparing for Installation
- Chapter 3 - Installing and Configuring the Client Adapter
- Chapter 4 - Enabling Security Features
- Chapter 5 - Advanced Configuration
- Chapter 6 - Performing Diagnostics
- Chapter 7 - Routine Procedures
- Chapter 8 - Troubleshooting
- Appendix A - Technical Specifications
- Appendix B - Channels
- Appendix C - Translated Safety Warnings
- Appendix D - Declarations of Conformity and Regulatory Information
- Glossary
Cisco Aironet Wireless LAN Adapters Installation and Configuration Guide for Linux
Bias-Free Language
The documentation set for this product strives to use bias-free language. For the purposes of this documentation set, bias-free is defined as language that does not imply discrimination based on age, disability, gender, racial identity, ethnic identity, sexual orientation, socioeconomic status, and intersectionality. Exceptions may be present in the documentation due to language that is hardcoded in the user interfaces of the product software, language used based on RFP documentation, or language that is used by a referenced third-party product. Learn more about how Cisco is using Inclusive Language.
- Updated:
- May 4, 2007
Chapter: Chapter 7 - Routine Procedures
Routine Procedures
This chapter identifies and describes routine operations and provides procedures for performing them.
The following topics are covered in this chapter:
•![]() Turning Your Client Adapter's Radio On or Off
Turning Your Client Adapter's Radio On or Off
•![]() Updating the Driver and Client Utilities
Updating the Driver and Client Utilities
•![]() Uninstalling the Driver and Client Utilities
Uninstalling the Driver and Client Utilities
Ascertaining the ACU Version
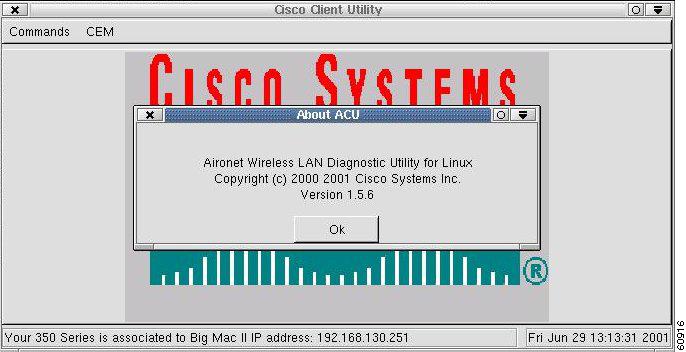
To determine which version of the ACU you are running, select About from the Commands drop-down menu. The About ACU screen appears (Figure 7-1).
Figure 7-1 About ACU Screen
Turning Your Client Adapter's Radio On or Off
Your client adapter's radio can be turned on or off. Turning the radio off prevents the adapter from transmitting RF energy. You might want to turn off the client adapter's radio when you are not transmitting data and want to conserve battery power or when you are using a laptop on an airplane and want to prevent the adapter's transmissions from potentially interfering with the operation of certain devices.
If the radio is not turned off, it periodically sends out an inquiry even if it is not associated to an access point, as required by the IEEE 802.11 specification. Therefore, it is important to turn it off around devices that are susceptible to RF interference.

Note ![]() Your client adapter is not associated while the radio is off.
Your client adapter is not associated while the radio is off.
Follow these steps to turn the client adapter's radio on or off.
Step 1 ![]() From the Commands drop-down menu, click Toggle Radio on/off.
From the Commands drop-down menu, click Toggle Radio on/off.
Step 2 ![]() Verify that the radio is on or off by checking the status message in the left corner of the ACU screen.
Verify that the radio is on or off by checking the status message in the left corner of the ACU screen.
Note ![]() If the radio is off, the following message appears:
If the radio is off, the following message appears:
Your (radio type) is disabled
Selecting a Help Browser
To view the ACU's online help files, you must select an html browser to open when you click a Help button in a screen that has online help. Follow these steps to select a help browser.
Step 1 ![]() From the Commands drop-down menu click Select help browser. An ACU window appears.
From the Commands drop-down menu click Select help browser. An ACU window appears.
Step 2 ![]() Enter the path to your browser and click OK.
Enter the path to your browser and click OK.
When you click on a screen's help button, the browser you specified opens the help page for that screen.
Loading New Firmware
Your client adapter's firmware is in the adapter's Flash memory, which allows it to be easily updated. Your adapter's firmware version is shown on the Status screen. See the "Viewing the Current Status of Your Client Adapter" section for instructions on accessing this screen.
You can find the latest firmware version at http://www.cisco.com/public/sw-center/sw-wireless.shtml.
Note ![]() Firmware files are prepared in self-extracting executable files that Linux cannot automatically extract. You need a Linux file extractor application such as unzip in order to extract the firmware image file.
Firmware files are prepared in self-extracting executable files that Linux cannot automatically extract. You need a Linux file extractor application such as unzip in order to extract the firmware image file.
Follow the instructions in this section to load the new firmware into your client adapter.
Matching the Protocol Drafts for EAP Authentication
If you use Network-EAP authentication on your wireless network, your client devices and infrastructure devices (access points and bridges) must use the same IEEE 802.1x protocol draft. Client firmware release 4.25.23 supports draft 10 of the IEEE 802.1x protocol standard. Therefore, if your wireless network's client devices use this firmware standard, the access points to which they will associate must be configured to also use Draft 10. Table 7-1 lists firmware versions for Cisco Aironet products and the drafts to which they comply.
If your clients and infrastructure devices do not have matching IEEE 802.1x drafts, upgrade the firmware in these devices to the same draft number. However, if your access points or bridges are using firmware version 11.06 or later, you can use their Authenticator Configuration page to select the draft of the IEEE 802.1x protocol that they should use. To set the draft for your access points or bridges, follow the instructions in the Release Notes for Cisco Aironet Access Points for firmware version 11.06.
You can access these Release Notes at this URL:
http://www.cisco.com/univercd/cc/td/doc/product/wireless/airo_350/350cards/linux/index.htm
Follow these steps to load new firmware.

Step 1 ![]() Make sure the client adapter is installed in your computer and is operational.
Make sure the client adapter is installed in your computer and is operational.
Step 2 ![]() Use your web browser to access the following URL:
Use your web browser to access the following URL:
http://www.cisco.com/public/sw-center/sw-wireless.shtml
The wireless software page appears.
Step 3 ![]() In the Cisco Aironet Access Point, Wireless Bridge, Base Station, Workgroup Bridge and Wireless LAN Client Adapter Firmware section, click the link for your client adapter.
In the Cisco Aironet Access Point, Wireless Bridge, Base Station, Workgroup Bridge and Wireless LAN Client Adapter Firmware section, click the link for your client adapter.
Step 4 ![]() Identify the firmware you want to download.
Identify the firmware you want to download.
Step 5 ![]() Download the firmware file to a directory on your computer's hard drive.
Download the firmware file to a directory on your computer's hard drive.
Step 6 ![]() Use a Linux file extractor to extract the firmware files.
Use a Linux file extractor to extract the firmware files.
Step 7 ![]() Open ACU.
Open ACU.
Step 8 ![]() From the Commands drop-down menu, select Load New Firmware. The File Selection window appears (Figure 7-2).
From the Commands drop-down menu, select Load New Firmware. The File Selection window appears (Figure 7-2).
Figure 7-2 File Selection Window
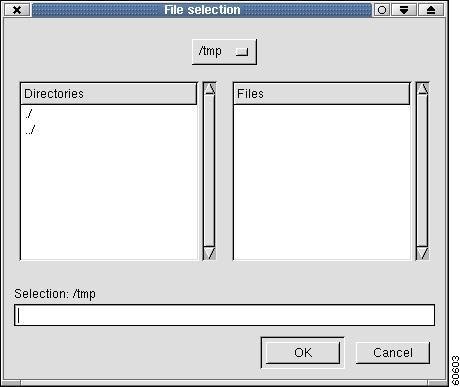
Step 9 ![]() Find the location of the new firmware in the Files box. Double-clicking the directory button at the top of the screen takes you to the directory indicated, and clicking the directory name moves you to that directory.
Find the location of the new firmware in the Files box. Double-clicking the directory button at the top of the screen takes you to the directory indicated, and clicking the directory name moves you to that directory.
Step 10 ![]() Under Files, click the new firmware image file (*.img) so that it appears in the Selection box at the bottom of the File Selection window.
Under Files, click the new firmware image file (*.img) so that it appears in the Selection box at the bottom of the File Selection window.
Step 11 ![]() Click OK. The selected image is loaded into the client adapter's Flash memory.
Click OK. The selected image is loaded into the client adapter's Flash memory.
Updating the Driver and Client Utilities
Instructions for updating the driver and client utilities are the same as for initially installing them. Refer to the "Installing the Driver and Client Utilities" section.
Uninstalling the Driver and Client Utilities
If you experience difficulty while installing the driver, you might want to stop the installation procedure and start over. However, before you attempt to install the driver again, you must first remove any part of the driver that you might have already installed. You can remove the driver and client utilities manually, or by running an uninstall script.
Uninstalling Manually
To uninstall the driver and client utilities manually, enter the following at the command line (excluding the comment (#) lines).
#remove the utilities:
rm /opt/cisco/bin/acu
rm /opt/cisco/bin/bcard
rm /opt/cisco/bin/leapset
rm /opt/cisco/bin/leapscript
rm /opt/cisco/bin/leaplogin
rm /opt/cisco/ACU.PRFS
# remove the utility subdirectory:
rmdir /opt/cisco/bin
# remove the help files:
rm /opt/cisco/helpml.tar.gz
rm /opt/cisco/helpml/*
# remove the help files subdirectory:
rmdir /opt/cisco/helpml
# remove the main cisco directory:
rmdir /opt/cisco
# remmove the drivers (note: the card should not be in the system
# when removing the drivers, otherwise the files might be in use)
The location of the drivers can vary depending on the major kernel version in use (2.2 or 2.4) and whether or not the pcmicia-cs package was used. If your distribution supports the locate command (most do), the driver's locations can be determined by the output from locate airo and locate airo_cs.o. Use the rm command to remove the drivers.
For example, if locate airo.o returns:
# /ib/modules/2.2.16-25.uid32/pcmcia/airo.o
you would use:
rm /lib/modules/2.2.16-25.uid32/pcmcia/airo.o
to remove the driver file. Use the same procedure to remove airo_cs.o.
If your system does not support the locate command, then you can use the find command as follows:
# find/-name airo.o and find/-name airo_cs.o
Use the output from these commands as you would the output from the locate command discussed above. The driver and utilities are now removed from your system.
Running an Uninstall Script
You can uninstall the driver and client utilities using one of the following uninstall scripts:
•![]() Use the cwremove script to uninstall a PCMCIA system.
Use the cwremove script to uninstall a PCMCIA system.
•![]() Use kpciinstall with the -R option to uninstall a PCI system.
Use kpciinstall with the -R option to uninstall a PCI system.
Removing the Client Adapter
Follow the instructions in this section whenever you need to remove the client adapter from your computer.
Removing a PC Card
To remove a PC card after it is successfully installed and configured (such as when your laptop is to be transported), pull the card directly out of the PC card slot. The client adapter is "hot swappable" and can be inserted and ejected at any time after you have installed the driver.
Removing a PCI Client Adapter
Because PCI client adapters are installed inside desktop computers, which are not designed for portable use, you should have little reason to remove the adapter. Follow these steps in case you ever need to remove your PCI client adapter.
Step 1 ![]() Completely shut down your computer.
Completely shut down your computer.
Note ![]() When the computer is turned off using the power switch, there still might be power supplied to the motherboard. To ensure that your computer is completely shut down, unplug the computer's power cord from its power source.
When the computer is turned off using the power switch, there still might be power supplied to the motherboard. To ensure that your computer is completely shut down, unplug the computer's power cord from its power source.
Step 2 ![]() Disconnect the client adapter's antenna.
Disconnect the client adapter's antenna.
Step 3 ![]() Remove the computer cover.
Remove the computer cover.
Step 4 ![]() Remove the screw from the top of the CPU back panel above the PCI expansion slot that holds your client adapter.
Remove the screw from the top of the CPU back panel above the PCI expansion slot that holds your client adapter.
Step 5 ![]() Pull up firmly on the client adapter to release it from the slot, and carefully tilt the adapter to allow it to clear the opening in the CPU back panel.
Pull up firmly on the client adapter to release it from the slot, and carefully tilt the adapter to allow it to clear the opening in the CPU back panel.
Step 6 ![]() Reinstall the screw on the CPU back panel, and replace the computer cover.
Reinstall the screw on the CPU back panel, and replace the computer cover.
 Feedback