SPR Support in PCF

SPR Support in PCF

Feature Summary and Revision History

Summary Data

Table 1. Summary Data

Applicable Products or Functional Area

PCF

Applicable Platform(s)

SMI

Feature Default Setting

Enabled - Always-on

Related Documentation

Not Applicable

Revision History

Table 2. Revision History
Revision Details Release

First introduced.

2023.03.0

Feature Description

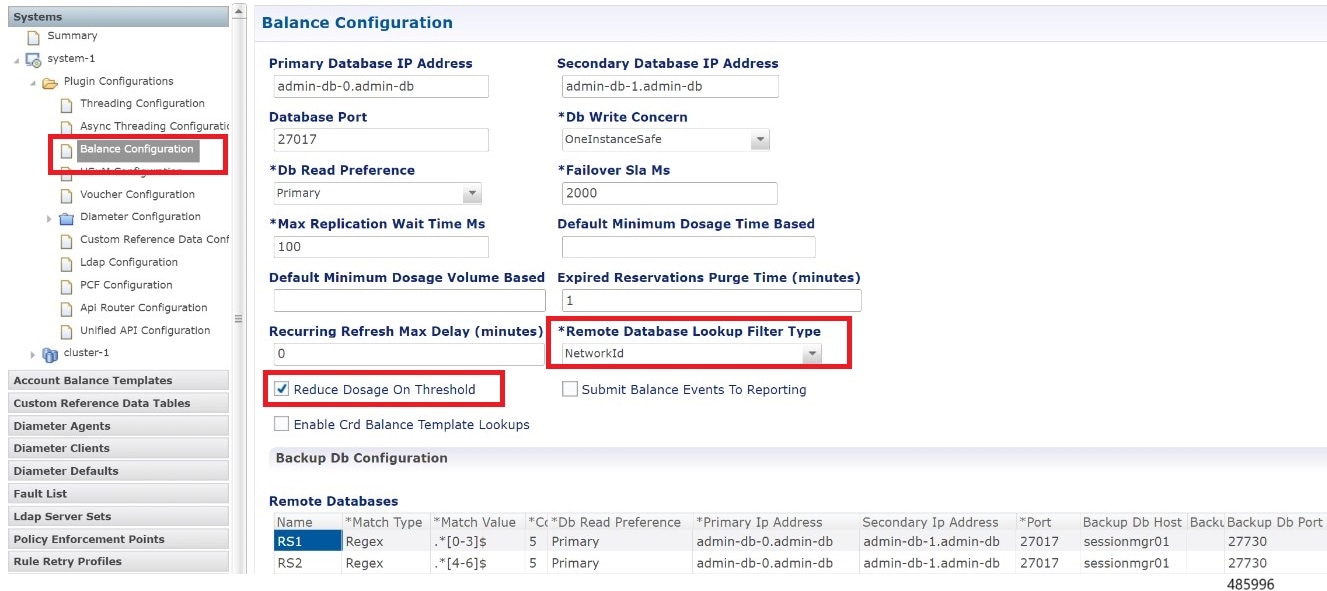
In the case of Embedded Subscriber Profile Repository (SPR), PCF supports subscriber authorization for Gx and N7. The PCF provides internal access to both SPR and the Unified API Endpoint. The SPR databases get configured in an existing administration database replica set or used as a separate MongoDB replica set.

PCF must review the subscriber session policies if any subscriber profile changes get notified in the SPR DB. If there is any post profile update in the subscriber policy, the PCF sends a Gx-RAR or N7 Notify message. When the PCF receives the notification, it locates the subscriber profile from the SPR DB, reviews the policy, and initiates an N7 Notify message to SMF if there is any policy change.

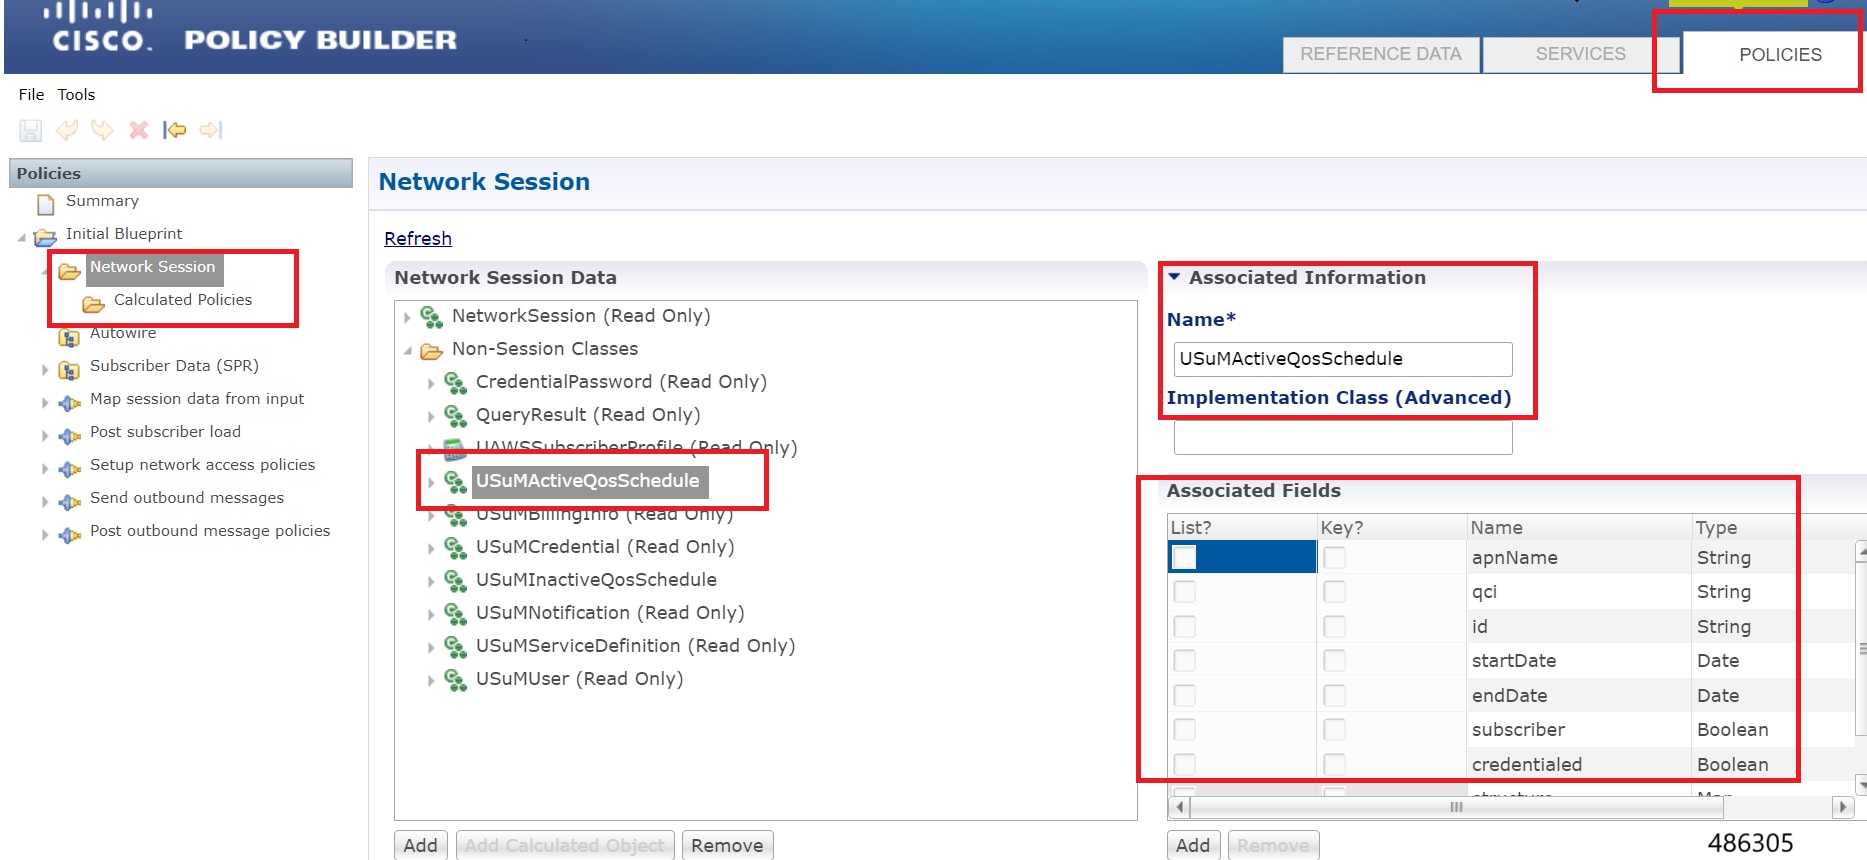
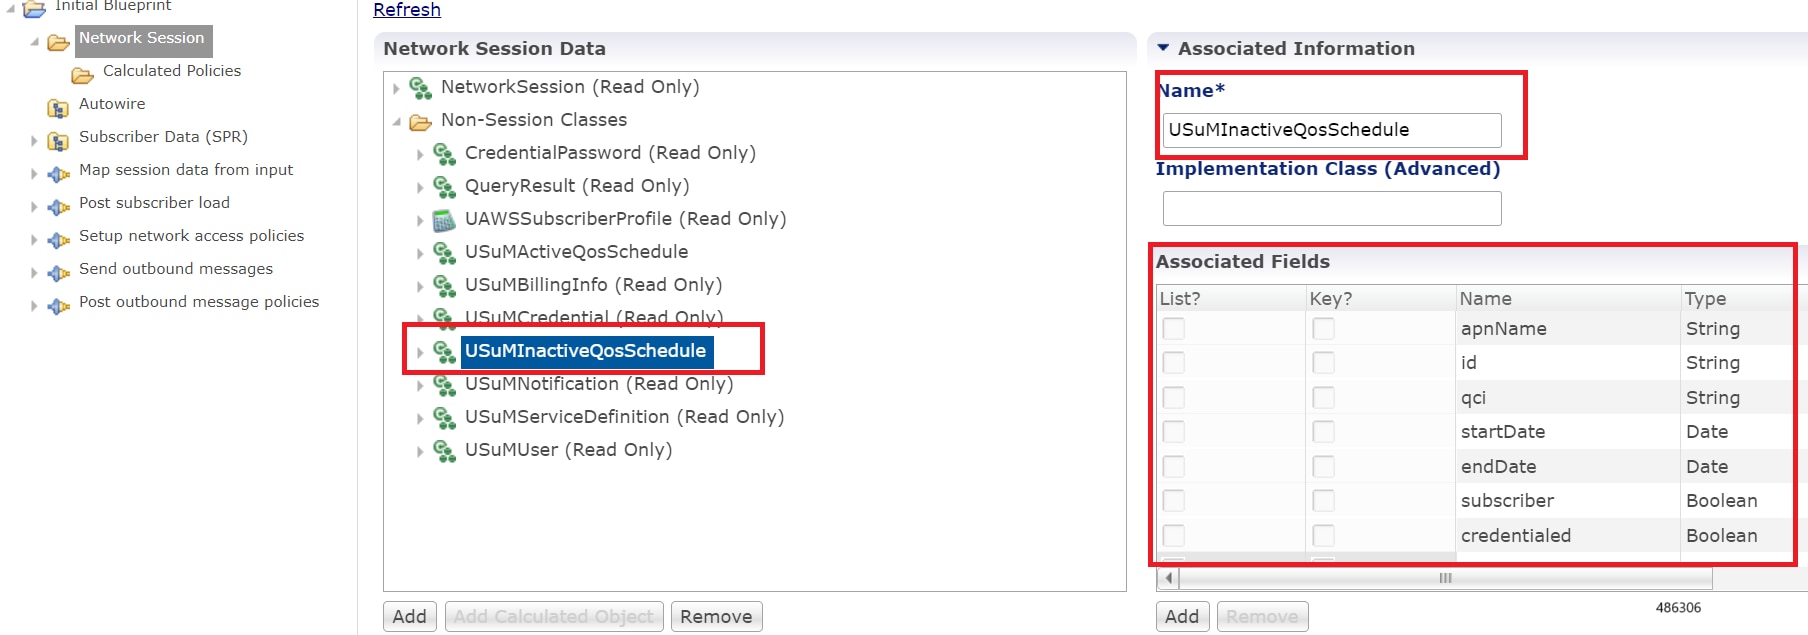
Feature Configuration

This section describes how to configure the SPR PB.

SPR PB configuration:

In the Policy Builder > Plugin Configuration > Click USuM Configuration.

Figure 1. USuM Configuration
Figure 2. SPR N7 Configuration

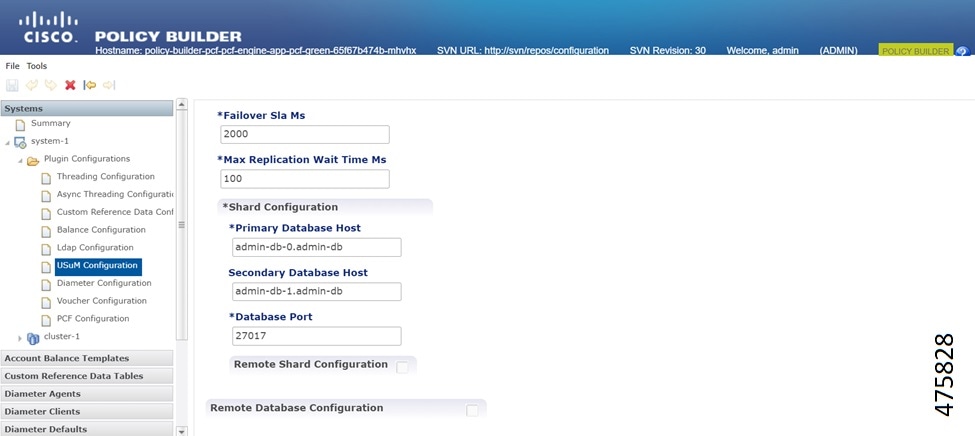
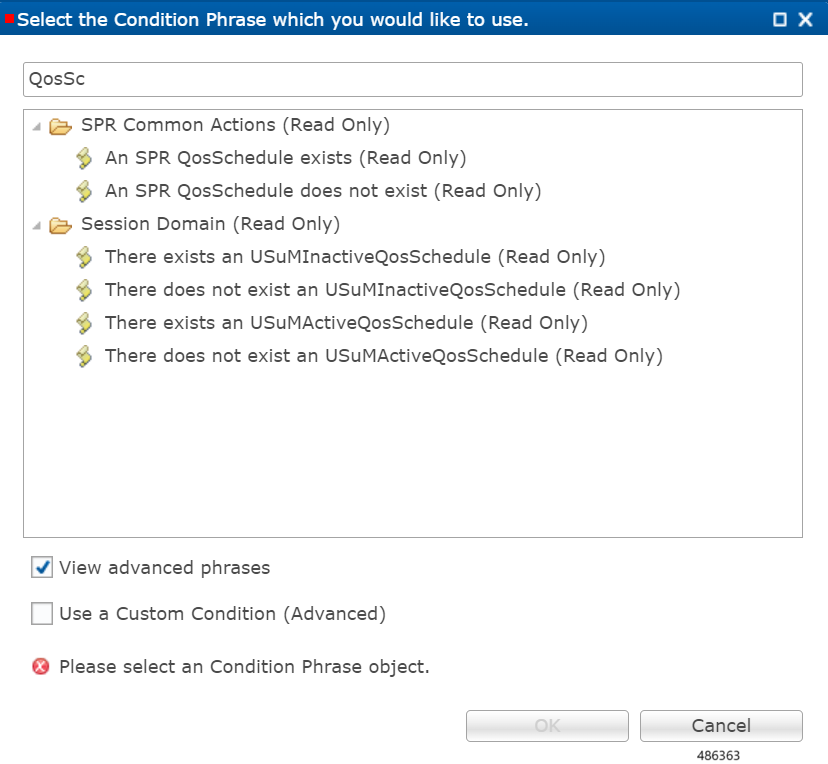
You can use N7 GPSI or SUPI as a lookup key for N7.

Figure 3. SPR Gx Configuration

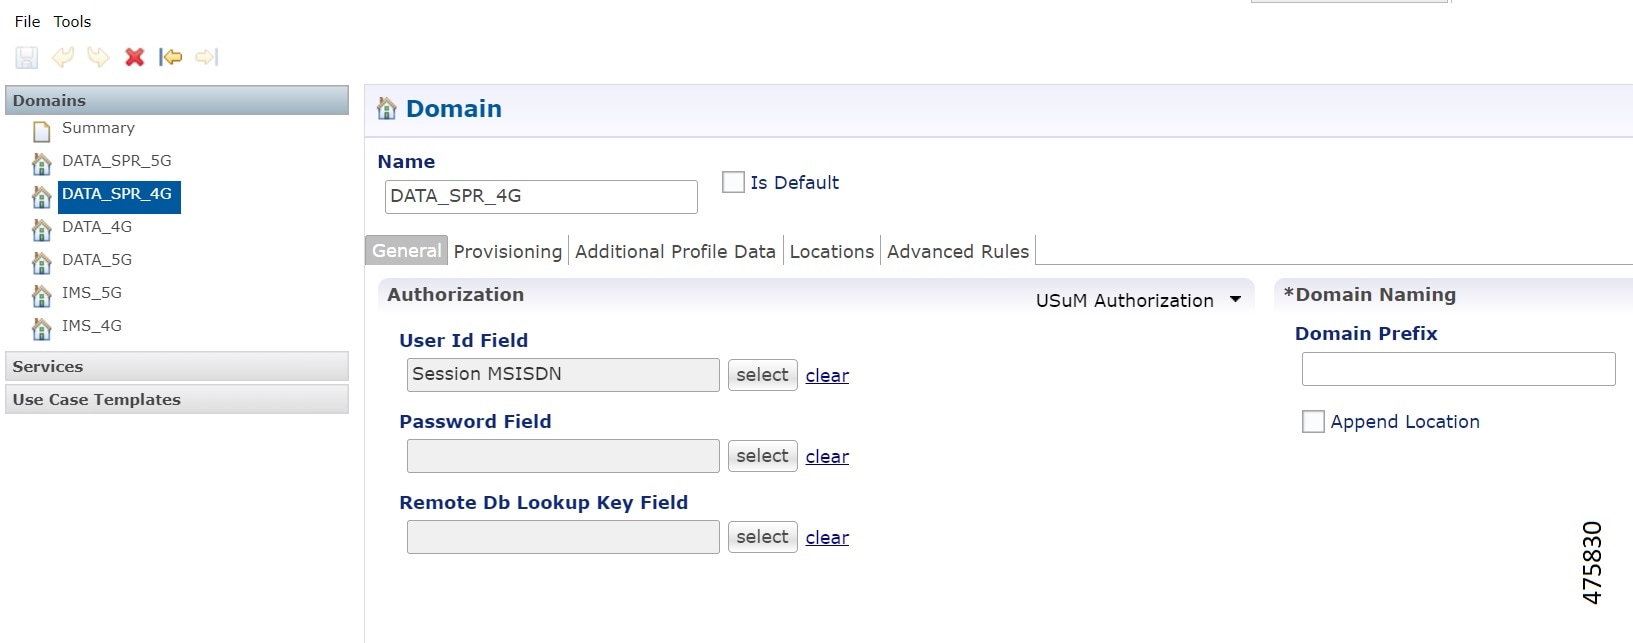
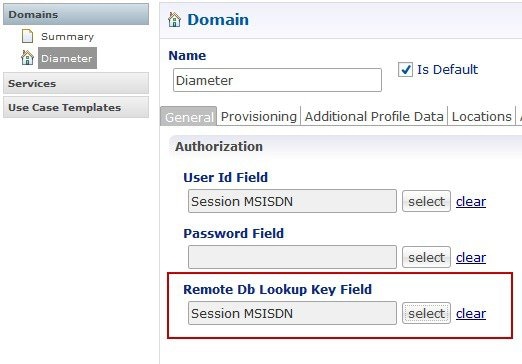
In the Domain tab, select the USuM Authorization from the drop down. You can use the Gx IMSI or MSISDN as a lookup key for Gx.

Ops Center Configuration

Following is the configuration for SPR call model to notify the anonymous subscribers:

Login to the CLI and execute the following:

config // Enter config mode

Set the following CLI configuration for CDL:

cdl datastore session
find-by-nuk-prefixes USuMMissingCredKey
exit
cdl datastore session
find-by-nuk-prefixes USuMSubscriberIdKey
exit

Set the following CLI configuration for engine:

engine <ENGINE_NAME>
properties usum.missingcredential.keyname value USuMMissingCredKey
exit

Note


Add these configurations with all the pods in the shutdown state.


API Router Functionality for Subscriber Data Storage

Table 3. Feature History

Feature

Release

Description

API Router Functionality with Multiple SPR Replica Set in PCF

2024.04.0

The API Router feature supports the routing of subscriber data to multiple Subscriber Profile Repository (SPR) replica sets. This feature also includes multi-credential management, allowing the system to handle subscribers with multiple credentials such as IMSI and MSISDN.

Default Setting: Disabled – Configuration Required to Enable

The API Router functionality allows the PCF to store and manage subscriber data across multiple SPR replica sets. This is particularly useful for managing large volumes of subscriber data and ensuring high availability and redundancy. The feature also supports multi-credential management, enabling the system to handle subscribers with multiple identifiers.

Multi-Credential Management

The IMSI or MSISDN number of a subscriber is the primary networkId of a subscriber. PCF supports creation or modification action for subscribers using the IMSI and MSISDN numbers. The MSISDN and IMSI numbers can have the same or different ending starting from 0 through 4 or from 5 through 9.

Use these API queries to create or edit subscriber data:

  • CreateSubscriberRequest: Create a subscriber with both IMSI and MSISDN credentials

  • GetSubscriberRequest: Query a subscriber by either IMSI or MSISDN.

  • DeleteSubscriberRequest: Delete a subscriber by either IMSI or MSISDN.

  • ChangeCredentialUsernameRequest: Change the credential for a subscriber by either IMSI or MSISDN.

Here is an example for subscriber creation:

<CreateSubscriberRequest>
            <subscriber>
                    <credential>
                            <networkId>5678</networkId>
                            <type>IMSI</type>
                    </credential>
                    <credential>
                            <networkId>1234</networkId>
                            <type>primary</type>
                    </credential>
                    <credential>
                            <networkId>bob</networkId>
                    </credential>
                     ...
            </subscriber>
        </CreateSubscriberRequest>

Set Network ID in Domain Configuration

Use the MSISDN or IMSI number as a network ID of a subscriber to support multiple SPR.

Procedure


Step 1

Click the Services option on right side of Policy Builder page.

Step 2

In the Domain tab on right pane, select the Remote Db Lookup Key Field as Session MSISDN or Session IMSI option.


Configure API Router to Route Subcriber Data

Configure the API router to route the subscriber data based on the last digit of the networkId. Here, the SPR1 stores the subscriber information for networkId that ends with 0 through 4 and SPR2 stores the subscriber information for networkId that ends with 5 through 9.

Before you begin

To install the API router feature, configure the installation feature parameters in Ops Center. Login to the configuration mode and set the CLI configuration for engine:

engine <ENGINE_NAME> install-features policy-builder com.broadhop.client.feature.apirouter
engine <ENGINE_NAME> install-features policy-server com.broadhop.apirouter.service.feature 

Procedure


Step 1

In the left pane of Policy Builder page, click Plugin Configurations option.

Step 2

Click the API Router Configuration tab.

Step 3

Select the Enable Multi-Credential Management check box.

Step 4

Select the Enable Backup Cache Lookup For Primary Key check box.

Step 5

Set the Filter Type as NetworkId to configure mutiple SPR. The Router Criteria displays remote SPR database values from USuM Configuration and Remote Balance Database from Balance Configuration .


Configure Remote Database with Balance Configuration

You can configure the remote balance database in Policy Builder page using Balance configuration tab.

Procedure


Step 1

In the left pane of Policy Builder page, click Plugin Configurations option.

Step 2

Select Balance Configuration tab.

Step 3

Enter the mandatory values.

Step 4

By default, the Remote Database Lookup Filter Type is set as Networkid and the Reduce Dosage on Threshold check box is selected.


Configure Remote Database with USuM Configuration

You can configure the remote SPR database in Policy Builder page using UsuM configuration tab.

Procedure


Step 1

In the left pane of Policy Builder page, click Plugin Configurations option.

Step 2

Select USuM Configuration tab.

Step 3

Enter the mandatory Database values.


Dynamic QoS Uplift based on Subscriber QoS Schedule

Table 4. Feature History

Feature

Release

Description

QCI Value Management for Subscriber Session

2024.04.0

This feature allows to dynamically uplift the Quality of Service (QoS) Class Identifier (QCI) value for a subscriber based on the provisioned Access Point Name (APN) and a specified time window. The feature is managed through the SPR database. This helps to optimize the network performance, and enhance the user experience through efficient QoS management.

Default Setting: Disabled – Configuration Required to Enable

The Dynamic QoS Uplift feature enables the adjustment of the QCI value for a subscriber session dynamically, based on predefined schedules. This manages the network resources and ensures optimal performance during peak times or for specific applications.

QoS Schedule Management for a Subscriber

Provision QoS Schedule

Use these API queries to create or edit subscriber data and provision the QoS schedule for a subscriber:

  • CreateSubscriberRequest

  • UpdateSubscriberRequest

Here is an example to provision the QoS schedule:


<qosSchedule>
        <id>5</id>
        <qci>5</qci>
        <apn>APN_A</apn>
        <startDate> 2024-08-27T11:50:00.000Z</startDate>
        <endDate> 2024-08-27T11:50:59.000Z</endDate>        
    <qosSchedule>

Note


  • The schedule includes the qosSchedule ID, QCI value, APN, start date, and end date.

  • There is no tag to support all APNs. To enable for ALL APN , do not send <apn> tag in the QoS schedule request.

  • In the start date and end date, the application supports hours and minutes fields without seconds. So, update the values as 00 seconds for start date and 59 seconds for end date fields.


PCF sends a Re-Auth Request (RAR) to the Packet Gateway (PGW) to adjust the QCI value at the start and end times specified in the schedule. Multiple QoS schedules can be defined for different APNs for a single subscriber.

View QoS Schedule Information

Use the GetSubscriberRequest API to view the QoS Schedule information after provisioning the QoS schedule.

Delete Expired QoS Schedules

Send UpdateSubscriberRequest with empty values in the qosSchedule to delete all expired schedules.

Multiple Session Handling

PCF matches the sessions with the provisioned APN and send RARs to adjust the QCI value at the configured start and end times.

Configure Dynamic QoS Uplift based on Subscriber QoS Schedule

Configure the active and inactive QoS schedule in Policy Builder page to store the values in the policy engine.

Before you begin

  • Ensure that there is no time overlap in qosSchedule or the same APN for a given subscriber.

  • Enter the -DenableSubscriberQosSchedule=true in Ops Center to enable the feature in PCF engine.

    engine pcf-green
    properties enableSubscriberQosSchedule
      value true
     exit
  • In Policy Builder page, click Tools in the left top corner. Select Preferences >Show Policies and enable Policies option to view the POLICIES tab for QoS schedule configuration.

Procedure


Step 1

Click POLICIES in the right corner of the Policy Builder page.

Step 2

In the left pane of Policy Builder page, select Network Session option.

Step 3

In the right pane, add entries for USuMActiveQosSchedule and USuMInactiveQosSchedule below Non-Session Classes option.

Step 4

The Associated Fields section has the field names and field type listed.

Step 5

Save the configuration.

Step 6

Click SERVICES in the right corner of the Policy Builder page.

Step 7

Select QosSchedule from the left pane and select condition phrases. Turn on the View advanced phrases check box and save the configuration.