Connectors in Active-Active

Connector Active-Active

You can pair two Cisco Spaces: Connectors in an active-active mode to enable the uninterrupted flow of data to Cisco Spaces.

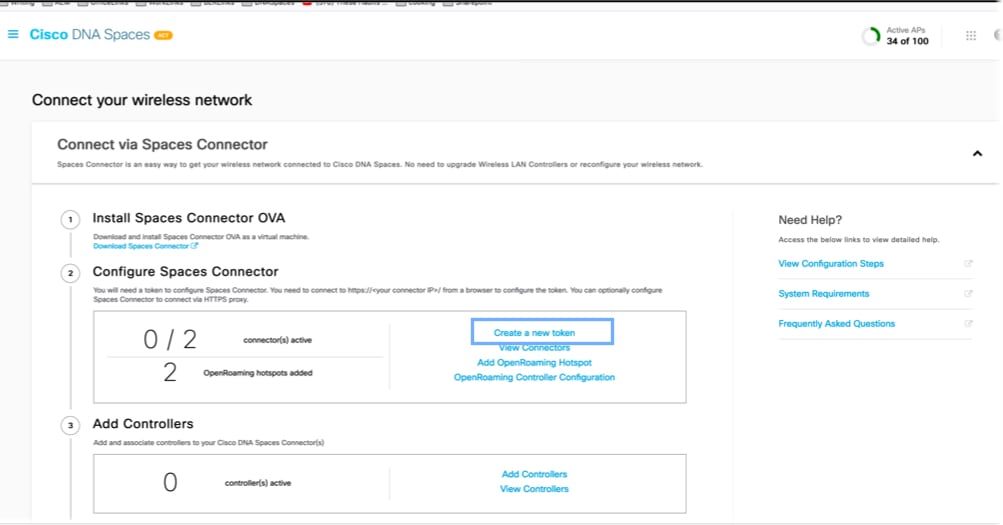
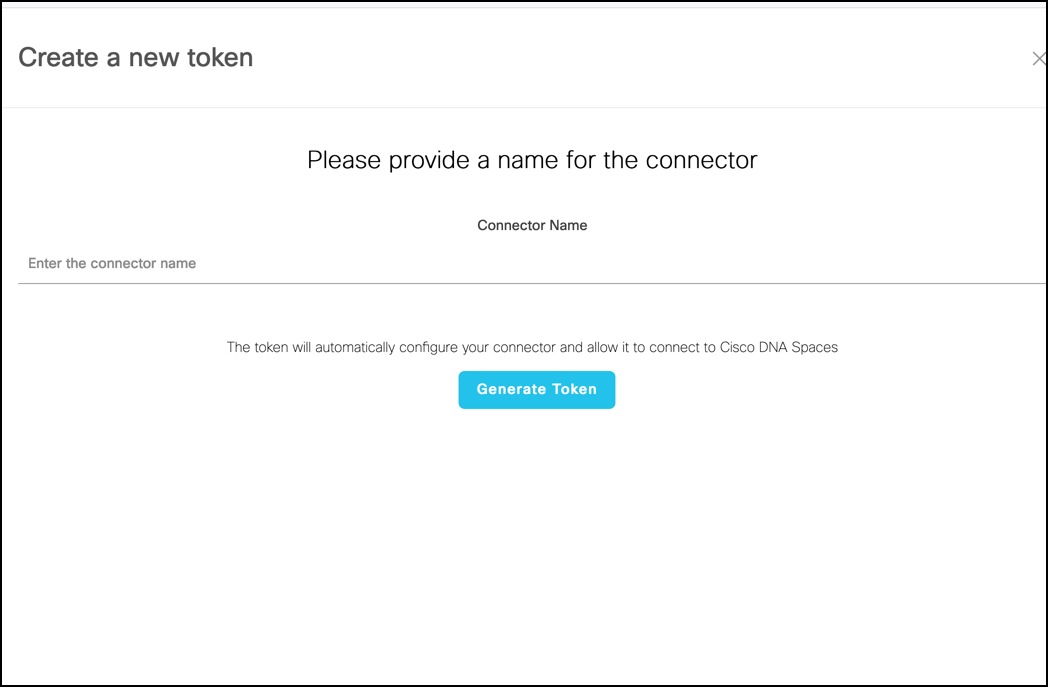
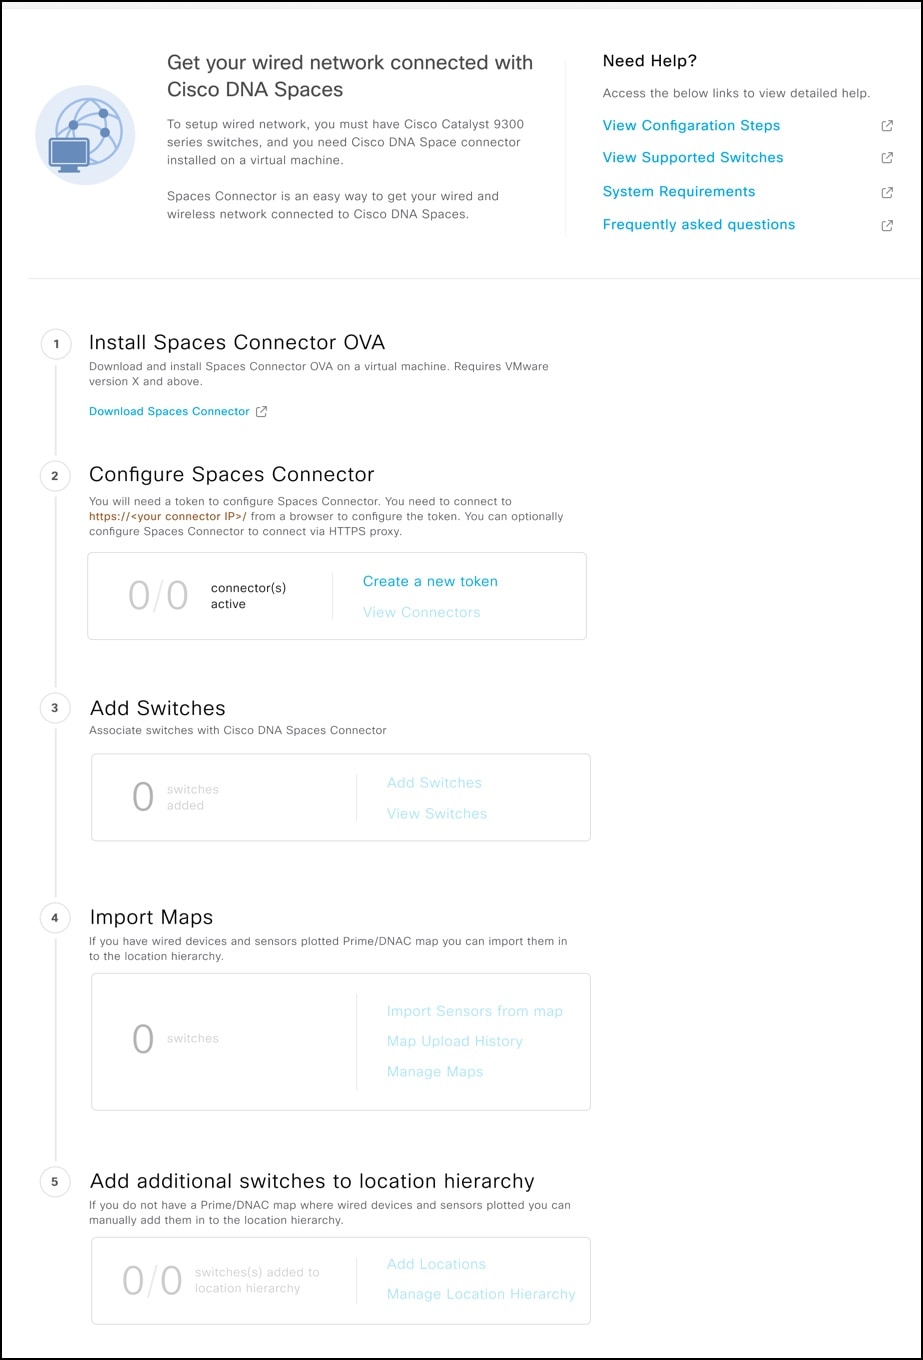
  1. You retrieve a token from Cisco Spaces and configure the token on two different connectors. Each connector must have a unique IP address.

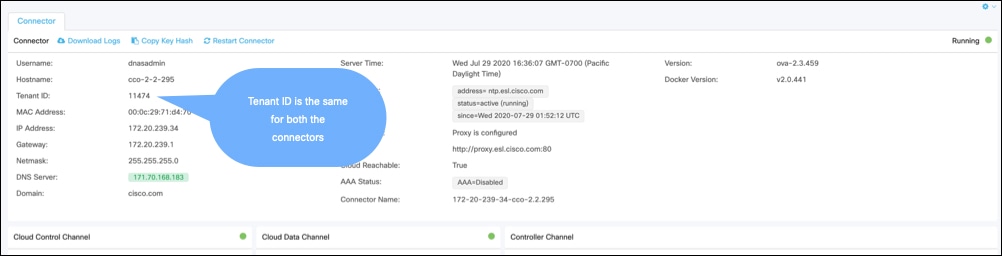
  2. Both connectors receive configurations from Cisco Spaces.

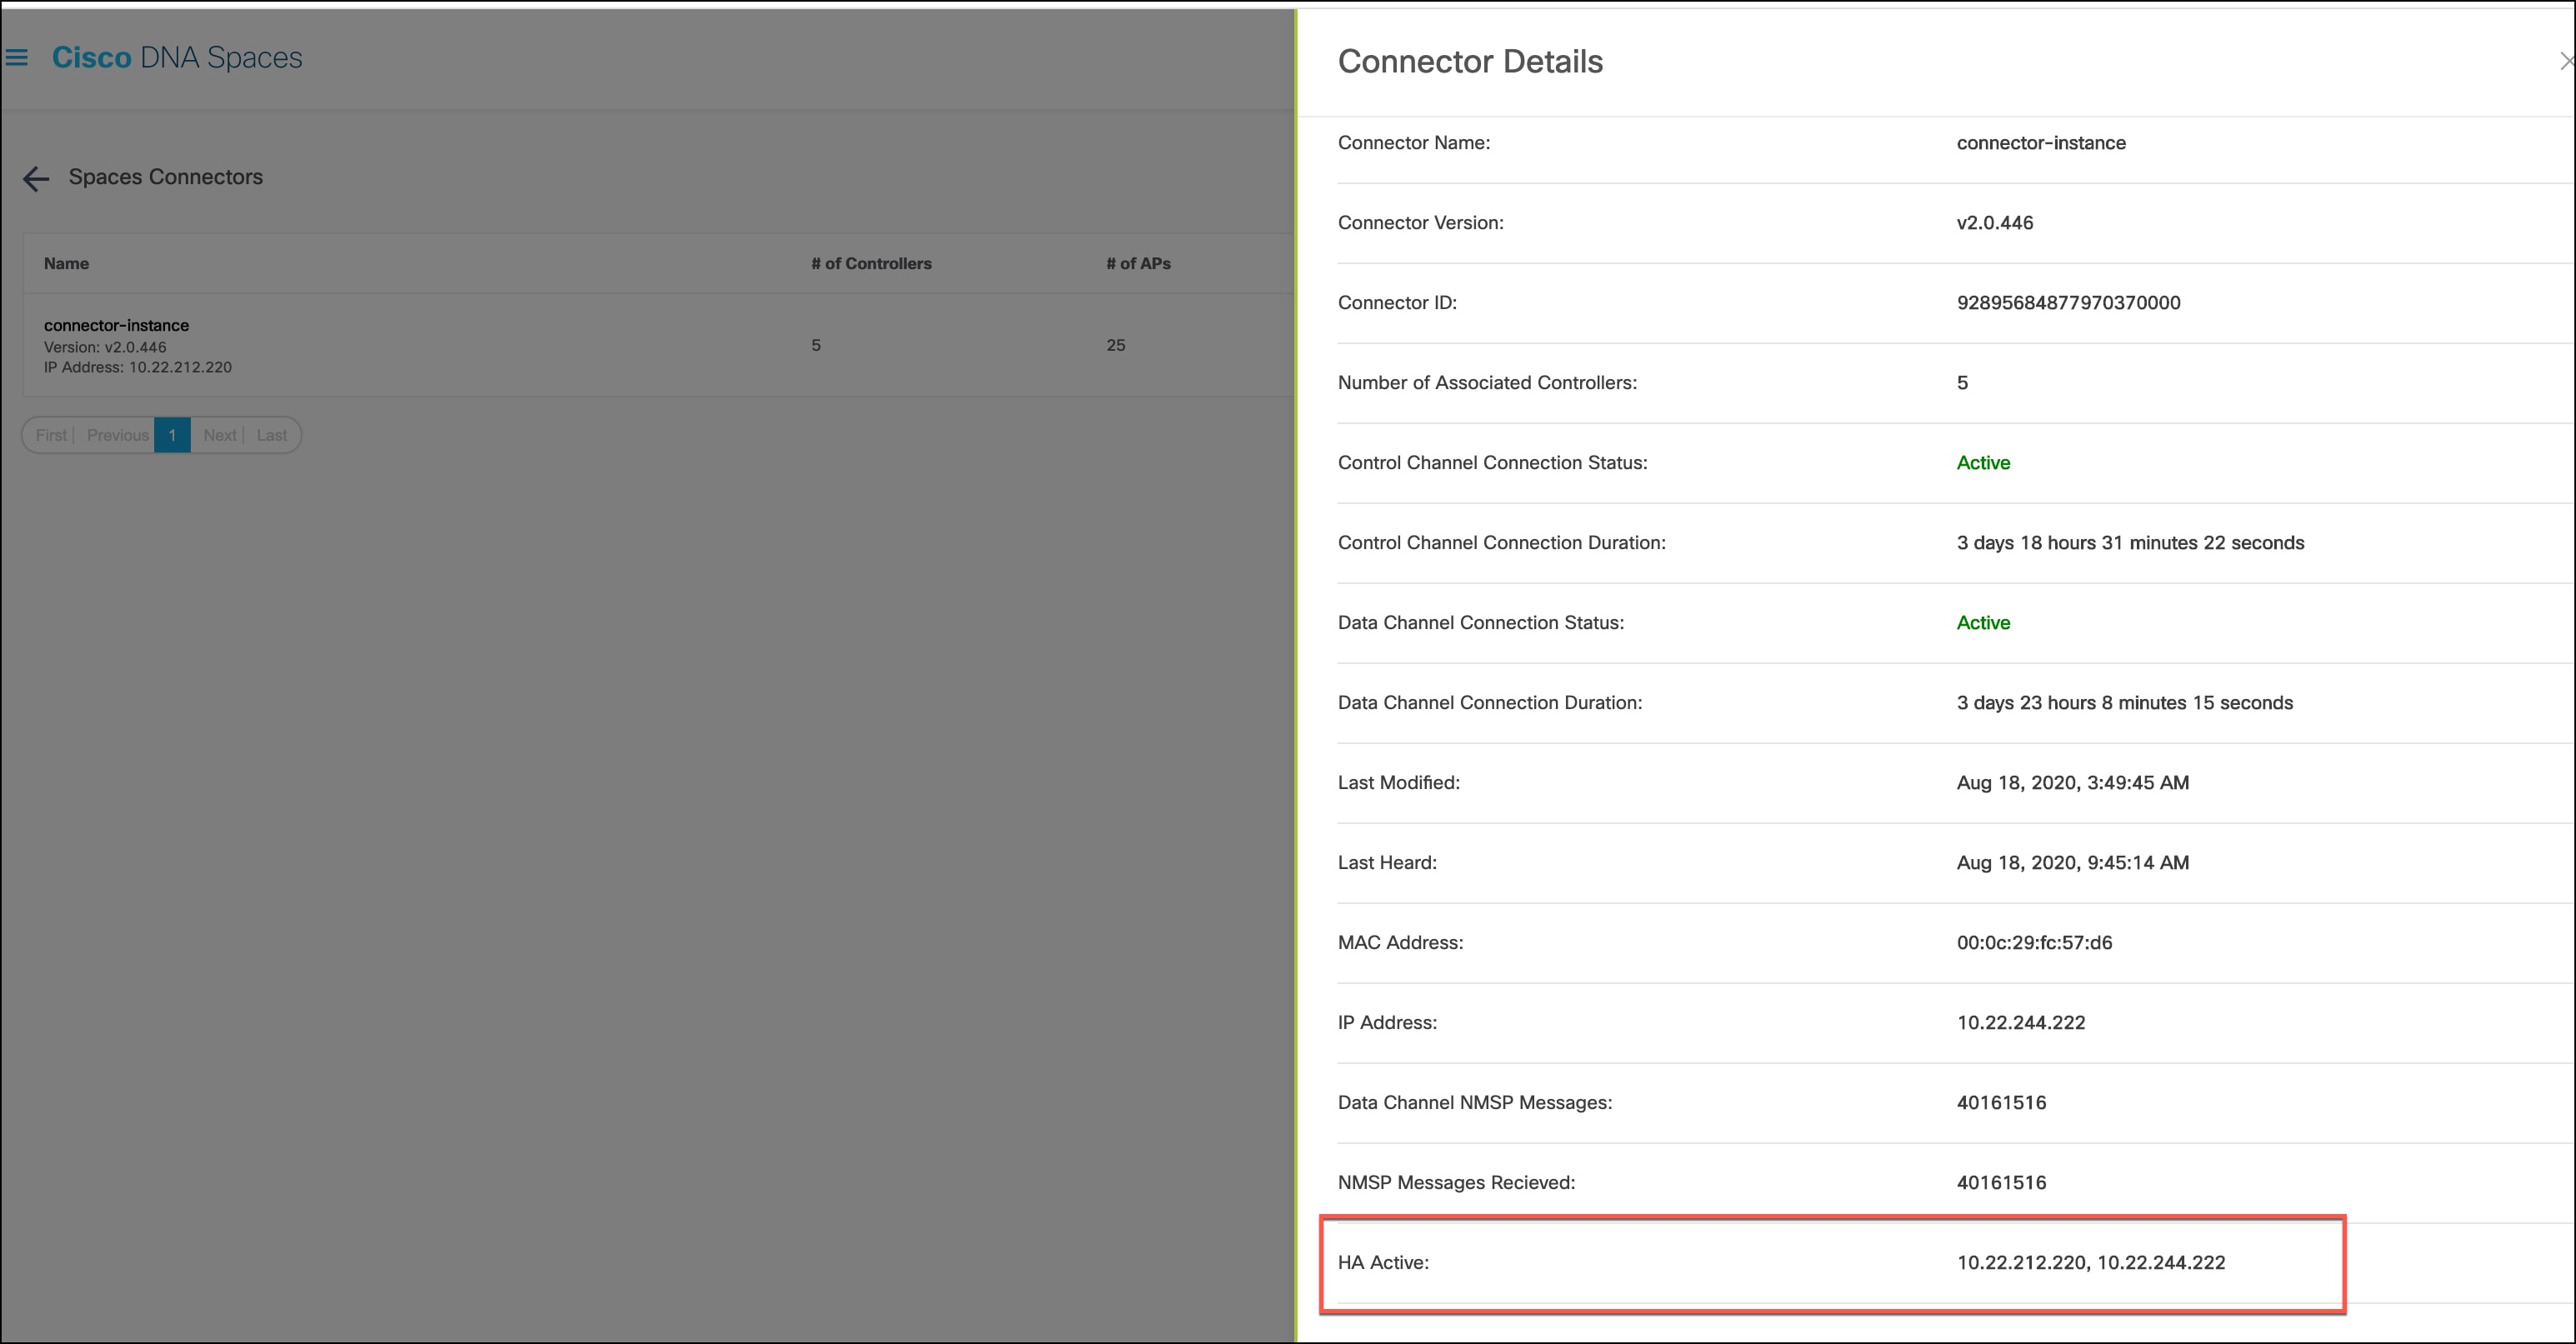
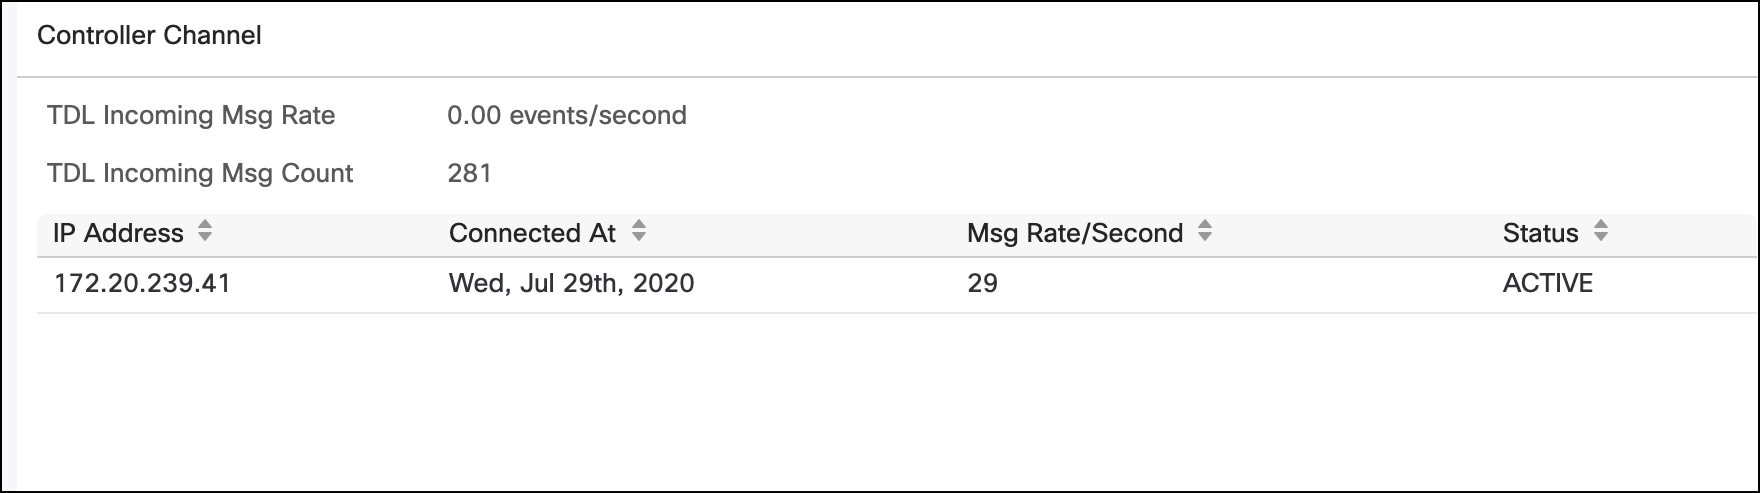
  3. The connectors can then connect to devices and send data back to Cisco Spaces.

  4. Cisco Spaces then manages the redundant data.

  5. If one connector is down, the other connector continues to send data.

Restrictions

  • On the Cisco Spaces dashboard, there is no configuration required for two connectors to be an active-active pair.

  • Both connectors connect to all Wireless Controllers and send traffic to Cisco Spaces. The traffic from Wireless Controllers to Cisco Spaces hence increases.

  • To be an active-active connector pair, two connectors must run OVA version 2.3 or higher.

  • There is no failover support for Hyperlocation, and IoT Service. Reprovision these services after a failover.


    Note


    FastLocate is re-established after failover with a delay of three to four minutes.


  • With CSCvv38762, there is no failover support for IoT Service. Reprovision these services after a failover.

  • There is no support for monitoring the connector active-active feature.

  • With CSCvv34216, a connector active-active pair has only one connector managing the Controller Channel and the other connector managing the AP Channel.

Connector Active-Active vs Cisco CMX High Availability

The Connector active-active feature is similar to traditional high availability. But, high availability concepts such as virtual IP address, primary, and secondary are not implemented in this feature. The following is a comparison of the Connector active-active feature with the high availability feature of Cisco CMX.

Table 1. Connector Active-Active (High Availability) model
Connector Active-Active

IoT Services App, Detect and Locate App

Cisco CMX Layer 2 VIP High Availability
IP addressing Both Connectors are configured with a unique IP address.

Two Cisco CMX devices are configured with a single IP address.

Operational state Both Connectors are configured in the active state.

One Cisco CMX is the hot primary while the other is in cold standby.

Data before failover

Both Connectors have the same data set and it is the responsibility of Cisco Spaces to manage the data redundancy.

Both the hot primary and the cold standby have the same data set.
Failover support In the event of a failure, FastLocate, Hyperlocation, and IoT Services need to be reprovisioned. If the hot primary fails, the cold standby takes over seamlessly.
Version restriction The same OVA version of 2.3 or higher is mandatory for a Connector active-active pair. Same version of Cisco CMX is recommended for high availability.

Configuring Connectors as Active-Active

This task shows you how to configures two connectors as active-active.

Before you begin

Install two different Cisco Spaces: Connectors of OVA version 2.3 or higher. Configure each connector with a unique IP address.

SUMMARY STEPS

  1. Login to Cisco Spaces > Setup > Wireless Networks and in the Configure Spaces Connector area, click Create Connector.
  2. Enter a name for the connector and click Generate Token. Copy the token displayed and save it for future reference.
  3. Log in to the first connector and configure the saved token there.
  4. Log in to the second connector and configure the saved token there.
  5. On each connector, observe that the value of the tenant ID is the same.
  6. On the Cisco Spaces dashboard, observe both the connector IP addresses.
  7. On each connector, observe that all wireless controllers added are present.
  8. On the Wireless Controller CLI, observe that all connectors are in the NMSP state.

DETAILED STEPS


Step 1

Login to Cisco Spaces > Setup > Wireless Networks and in the Configure Spaces Connector area, click Create Connector.

Step 2

Enter a name for the connector and click Generate Token. Copy the token displayed and save it for future reference.

Step 3

Log in to the first connector and configure the saved token there.

Step 4

Log in to the second connector and configure the saved token there.

Step 5

On each connector, observe that the value of the tenant ID is the same.

Step 6

On the Cisco Spaces dashboard, observe both the connector IP addresses.

Step 7

On each connector, observe that all wireless controllers added are present.

Step 8

On the Wireless Controller CLI, observe that all connectors are in the NMSP state.

show nmsp status

NMSP Status
-----------
 
DNA Spaces/CMX IP Address                          Active    Tx Echo Resp  Rx Echo Req   Tx Data     Rx Data     Transport
-------------------------------------------------------------------------------------------------------------------------
10.x.212.xxx                           Inactive  13            13            161         6           TLS       
10.x.212.xxx                           Inactive  0             0             17          6           TLS       
10.x.212.xxx                           Active    45070         45070         1378446     574         TLS       
10.x.244.xx                            Inactive  7             7             79          6           TLS       
10.x.244.xx                            Active    56111         56111         1714241     286         TLS       
10.x.244.xx                            Inactive  7             7             104         6           TLS       
10.x.244.xxx                           Active    23056         23056         683908      298         TLS   

Configuring Connectors in Active-Active (Wired)

This task shows you how to configures two connectors as active-active.

Before you begin

Install two different Cisco Spaces: Connectors of OVA version 2.3 or higher. Configure each connector with a unique IP address.

SUMMARY STEPS

  1. Login to Cisco Spaces>Setup>Wired Networks and in the Configure Spaces Connector area, click Create a new token.
  2. Enter a name for the connector and click Generate Token. Copy the token displayed and save it for future reference.
  3. Log in to the first connector and configure the saved token there.
  4. Log in to the second connector and configure the saved token there.
  5. On each connector, observe that the value of the tenant ID is the same.
  6. On the Cisco Spaces dashboard, observe both the connector IP addresses.
  7. On each connector, observe that all connectors added are present.

DETAILED STEPS


Step 1

Login to Cisco Spaces>Setup>Wired Networks and in the Configure Spaces Connector area, click Create a new token.

Step 2

Enter a name for the connector and click Generate Token. Copy the token displayed and save it for future reference.

Step 3

Log in to the first connector and configure the saved token there.

Step 4

Log in to the second connector and configure the saved token there.

Step 5

On each connector, observe that the value of the tenant ID is the same.

Step 6

On the Cisco Spaces dashboard, observe both the connector IP addresses.

Step 7

On each connector, observe that all connectors added are present.