Managing CPS vDRA Cluster

Accessing CPS vDRA Management CLI

There are two options for accessing the CPS vDRA Management CLI.

Access Via Web Browser

Perform the following steps to access the CPS vDRA Management CLI:

Procedure


Step 1

Enter the following URL in Firefox or Chrome:

https://<masterip>/

Step 2

Login to the application using your user ID and password.

Step 3

Follow the Installation Management hyperlink in the following screen:
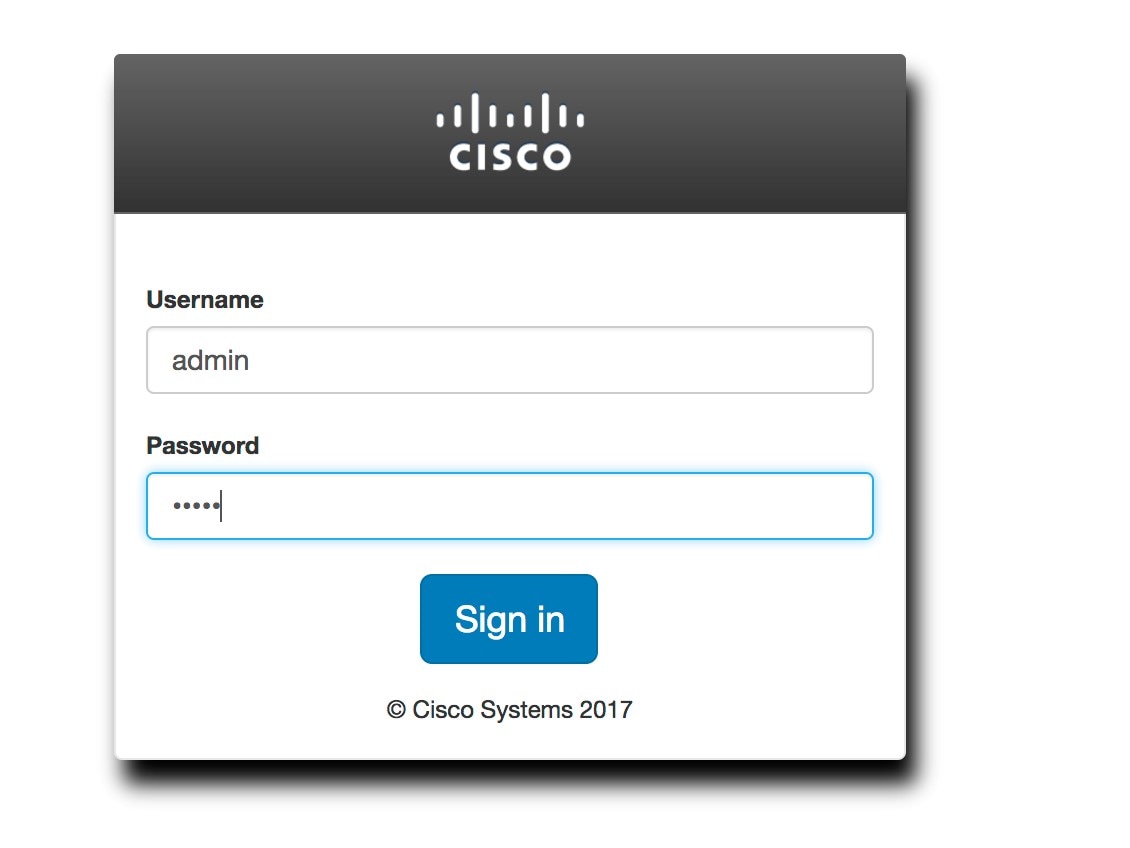
Figure 1. CPS DRA Login

Step 4

In the Management screen, click the Login link to display the in-browser terminal window.
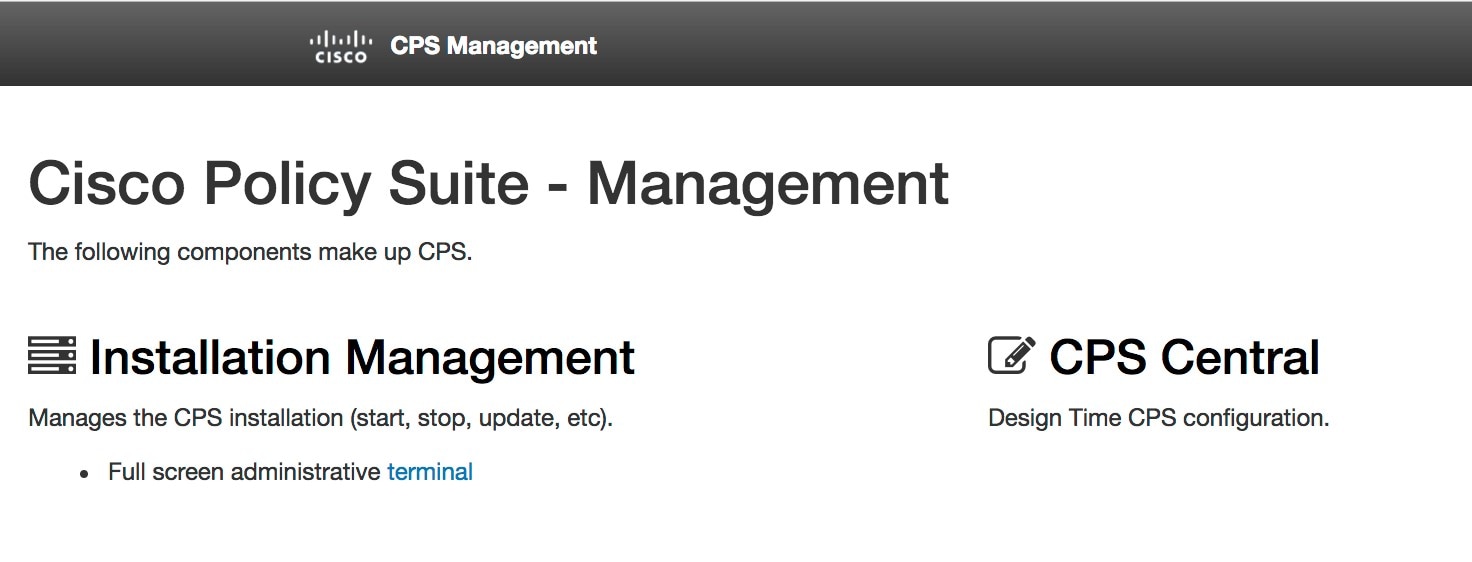
Figure 2. Installation Management

Step 5

Login with a valid user name and password.
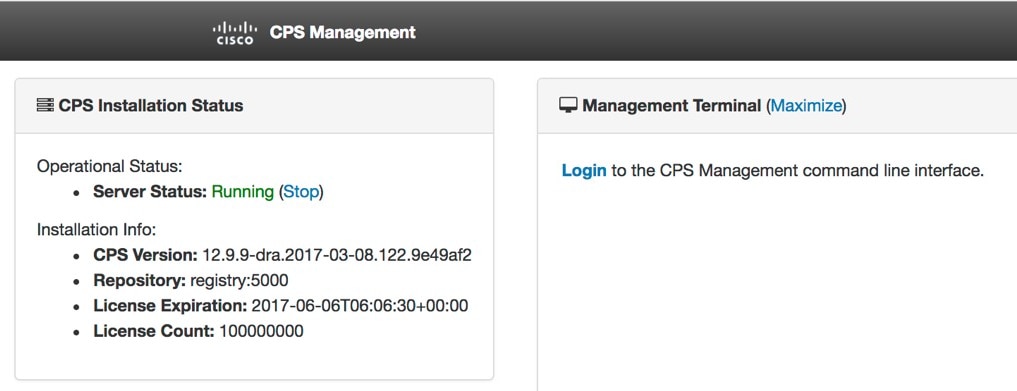
Figure 3. Management Terminal Link

Access Via SSH

Access is available to the CPS vDRA via SSH listening on port 2024 of the master virtual machine. This port must be open in the OpenStack security rules in order to access the Management CLI via SSH.

Starting CPS vDRA Cluster

A CPS vDRA cluster is a self-organizing cluster that does not require operator actions to configure the system when you follow the instructions found in the installation guide. The system self-organizes by following the algorithm:
  1. The cluster master node is started and bootstraps the Docker engine, an embedded Docker registry, the Weave overlay network, and the CPS vDRA scheduling application.

  2. The worker nodes are started either after the master node is started or in parallel. The bootstrapping of the Docker engine and Weave overlay network point back to the master node.

  3. The scheduling function on the master node begins an auto discovery function on engine startup of the Docker engines that have joined the Weave overlay network.

  4. For each engine discovered, the system queries the Docker engine configuration to discover the node identifier and the role within the cluster that the engine will perform. The roles are used by the scheduling function to map application services to the appropriate virtual machines.
    1. The CPS vDRA application (for both Policy DRA and IMS DRA solutions) supports the following roles:
      1. master – This is always the master scheduling node.

      2. control-a[b] – This is a control node that works in concert with the other control node and the master node to provide OAM support for the application.

      3. diameter-endpoint – This is the node where all diameter traffic terminals.

      4. binding-worker – This is the node where binding/slf queries are executed.

    2. The vDRA Binding and SLF application supports the following roles:

      1. master – This is always the master scheduling node.

      2. control-a[b] – control node that works in concert with the other control nodes and the master node to provide OAM support for the application.

      3. persistence-router – node where binding/slf queries are routed.

      4. persistence-db – nodes where the binding database replica sets are located.

  5. As the Docker engines are registered, the scheduling application begins executing a controlled startup by starting modules as the underlying engines become available.
    1. A module is a set of interrelated services that are started, stopped and scaled as a set of related processes. These processes are either collocated on the same virtual machine or across multiple virtual machines. There are three type of modules that exist:
      1. infrastructure – These are core modules that are not shutdown when the application shuts down.

      2. application – These are modules that are removed when the application is shutdown.

      3. External – These are external services that are installed on the system and whose images are built and loaded outside of the system. See the scheduling external-service command for more information on configuring external services.

Stopping Application Services In CPS vDRA Cluster

The modules of type “application” can be shut down in a controlled manner by running the system stop command. This command will unload all modules in reverse run-level order and stop the associated running Docker services.

Starting Services In CPS vDRA Cluster

The modules of type “application” can be started in a controlled manner by running the system start command. This command will start all modules in run-level order and schedule the underlying Docker services on the registered Docker engines.

Stopping External Services In CPS vDRA Cluster

The modules of type “external” can be shut down in a controlled manner by running the system disable-external-services command. This command will unload all modules in reverse run-level order and stop the associated running Docker services.

Starting External Services In CPS vDRA Cluster

The modules of type “external” can be shut down in a controlled manner by running the system enable-external-services command. This command will unload all modules in reverse run-level order and stop the associated running Docker services.

Restarting An Individual Docker Service

Perform the following steps to restart an individual docker service:

Procedure


Step 1

Run the show docker service command to locate the container ID of the service to restart.

scheduler# show docker service 
                                                                                                   PENALTY           
MODULE           INSTANCE  NAME               VERSION          ENGINE  CONTAINER ID       STATE    BOX      MESSAGE  
---------------------------------------------------------------------------------------------------------------------
admin-db         1         mongo-admin-a      3.6.9.0          aio     mongo-admin-a      HEALTHY  false    -        
admin-db         1         mongo-admin-arb    3.6.9.0          aio     mongo-admin-arb    HEALTHY  false    -        
admin-db         1         mongo-admin-b      3.6.9.0          aio     mongo-admin-b      HEALTHY  false    -        
admin-db         1         mongo-admin-setup  12.9.9-SNAPSHOT  aio     mongo-admin-setup  HEALTHY  false    -        
consul           1         consul-1           12.9.9-SNAPSHOT  aio     consul-1           HEALTHY  false    -        
consul           1         consul-2           12.9.9-SNAPSHOT  aio     consul-2           HEALTHY  false    -        
consul           1         consul-3           12.9.9-SNAPSHOT  aio     consul-3           HEALTHY  false    -        
foobar           1         foobar             3.2.6.0          aio     foobar             HEALTHY  false    -        
grafana          1         grafana            12.9.9-SNAPSHOT  aio     grafana            HEALTHY  false    -        
haproxy-common   1         haproxy-common     12.9.9-SNAPSHOT  aio     haproxy-common-s1  HEALTHY  false    -        
orchestrator-ui  1         orchestrator-ui    12.9.9-SNAPSHOT  aio     orchestrator-ui    HEALTHY  false    -        
subversion       1         svn                12.9.9-SNAPSHOT  aio     svn                HEALTHY  false    -        

Step 2

Using the provided container-id, run the docker restart container-id container-id command. This will issue a non-graceful stop on the Docker container and move the state of the container to ABORTED. The container will stay in this state for 10 seconds before restarting.

Step 3

Verify the health of the restarted docker service by running the show docker service command again and waiting for the service to progress into the HEALTHY state. Optionally the log of the individual container can be followed by running the monitor log container container-id using the same container ID from Step 2.


Installing New Software Images

When a new ISO is provided with software, you need to perform the following steps to upgrade the current system software:

Procedure


Step 1

Download the ISO image from CCO site.

Step 2

Copy the ISO to DRA VNF /data/iso/staged-isos.

Step 3

Run the following commands:

system software iso load category product file <ISO file name>
 activate true
show system software available-versions

Step 4

Repeat the steps for the DRA database ISO.


Upgrading to New Software Version

Perform the following steps to upgrade to a new software version:

Before you begin

Take a snapshot of the consul state to be used in case a rollback is required.

  1. Login to CLI mode.

    docker connect consul-1
  2. Take the backup and exit the CLI mode.

    Example:

    consul snapshot save <SITE-2-19.4-DBVNF-consul-backup.snap>
  3. Copy the consul snapshot from orchestrator container to master VM.

    Example:

    docker cp consul-1:/ SITE-2-19.4-DBVNF-consul-backup.snap
  4. Copy the backup to installer VM.

    Example:

    scp -i cps.pem <backupdirectorypath>/SITE-2-19.4-DBVNF-consul-backup.snap cps@<installerip>:/home/cps

Procedure


Step 1

Run the following command:

system software iso load category product file cisco-policy-dra.iso activate true

Step 2

In the Management CLI, run show system software available-versions to determine if the correct version of has been uploaded:

scheduler# show system software available-versions 
VERSION                            
-----------------------------------
12.9.9-dra.2017-03-08.122.9e49af2 

Step 3

In the Management CLI, run the system upgrade version command to upgrade to the version found in Step 2:

scheduler# system upgrade version 12.9.9-dra.2017-03-08.122.9e49af2 

At this point the application will begin downloading the new scheduling and application images from the on-board Docker Registry. The download will take several seconds and the scheduler application will disconnect and restart. You must re-login after the disconnect occurs.

Step 4

In the Management CLI, run the show scheduling status command to validate the progress of the upgrade.


Aborting an Upgrade

If an in-progress upgrade needs to be aborted, run the system abort-upgrade command. This will immediately stop all scheduling activities. Reverting to the previous versions is triggered by the downgrade to a previous software version procedure.

Downgrading to Previous Software Version

Perform the following steps to downgrade to a previous software version:

Before you begin

Make sure older version consul snapshot is listed by executing consul list-snapshots command.

If the snapshot is not available, copy the older version consul snapshot taken Upgrading to New Software Version to the directory /data/orchestrator/config/snapshot-consul in master VM.

Trigger the DRA App VNF downgrade to older version (for example, 19.4.0 release) with consul downgrade (entire ISO downgrade) using system downgrade version <version-qualifier> consul-downgrade true snapshot-name <snapshot-name> command.

Example: system downgrade version 19.4.0-20200625_121852.7720 consul-downgrade true snapshot-name SITE-2-19.4-DRAVNF-consul-backup.snap

Procedure


Step 1

Select the qualifier for the version you want to downgrade and then activate the ISOs for downgrading as shown in the following example:

system abort-upgrade
show system software iso details 
| tab
CATEGORY NAME           VERSION QUALIFIER                    CREATED                     ACTIVE SIZE MB
-------------------------------------------------------------------------------------------------------
product cisco-policy-dra 13.1.1 dra.2017-12-06.1366.b800a6d 2018-03-02T23:37:21.848+00:00 false 1339.99
product cisco-policy-dra 13.1.1 dra.2018-02-28.1793.f618c58 2018-03-12T22:42:19.225+00:00 false 1341.93
product cisco-policy-dra 13.1.1 dra.2018-03-28.1938.f618c58 2018-04-13T21:10:34.872+00:00 true  1342.13
admin@orchestrator[mpsl14fdrm01v]# system software iso activate category product 
name cisco-policy-dra version 13.1.1 qualifier dra.2018-02-28.1793.f618c58

Step 2

In the Management CLI, run the show system software available-versions to determine if the correct version has been uploaded:

scheduler# show system software available-versions 
VERSION                            
-----------------------------------
12.9.9-dra.2017-03-08.122.9e49af2 

Step 3

In the Management CLI, run the system downgrade version command to upgrade to the version found in Step 2:

scheduler# system downgrade version 12.9.9-dra.2017-03-08.122.9e49af2 

At this point the application begins downloading the new scheduling and application images from the on-board Docker Registry. The download takes several seconds and the scheduler application disconnects and restarts. You must re-login after the disconnect occurs.

Note


During downgrade, make sure consul is using the proper snapshot file after downgrade. If a consul snapshot was taken before the upgrade to the running version, find the list of available consul snapshots using the following command:

scheduler# consul list-snapshots

Select the correct consul snapshot for the version to be downgraded and downgrade DRA and consul using the following command:

scheduler# system downgrade version 12.9.9-dra.2017-03-08.122.9e49af2 consul-downgrade true snapshot-name 12.9.9-dra.snap

Step 4

In the Management CLI, run the show scheduling status command to validate the progress of the upgrade.


Aborting a Downgrade

If an in-progress downgrade needs to be aborted, run the system abort-downgrade command. This will immediately stop all scheduling activities. Reverting to the previous versions is triggered by the upgrading to a new software version procedure.