Chat and Email Control Gadget
-
Chat and Email state: The Chat and Email state is different from the Voice state that is displayed below the agent name. The following are the states: -
Not Ready:
-
You are set to this state by default when you sign in to the Cisco Finesse desktop.
-
If you refresh the browser, all the active chat sessions are cleared, email sessions are requeued, and you are moved to this state.
-
You can move to this state when you are not ready to handle chat and email.
-
-
Ready: You can move to this state when you are ready to handle chat and email.
-
The agent must be in Not Ready state to Logout from Finesse.
-
When an agent accepts the chat, the state of the agent changes to Reserved.
-
-
Time-to-accept counter: When you receive an incoming chat, the time counter is displayed in the pop-over notification and you must accept the chat within the specified time. If you do not accept the chat within the specified time, your state changes to Not Ready.
-
Customer details: When an incoming chat arrives on your desktop, the customer details are displayed.
The buttons in the control area:
-
When an incoming chat request arrives, the Accept button, time-to-accept counter, and customer details appear for you to accept the chat.
Accept a Chat
-
Sends incoming chat to an available agent.
-
Plays an audio alert (For a, new chat request and new message on an inactive chat).

Note
With multiple chat session tabs, the selected chat session tab is considered as active. All other chat session tabs are considered as inactive.
-
Displays contact details of the customer.
When a customer initiates a chat from Facebook Messenger, Unified CCX Web Chat:
-
Prompts agent to accept chat before the time counter expires.
-
Sends incoming chat from Facebook Messenger to an available agent with a distinct icon that differentiates Facebook Messenger chat from a regular chat.
-
Only agents can end Facebook Messenger chats. Customers can't end chat.
-
Agents cannot see typing indicator from Facebook users. However, Facebook users can see typing indicator from agents.
-
Facebook users see the business entity name in the chat. Agent name is not displayed to Facebook users.
-
Group chat is supported in Facebook Messenger chat, however Facebook users continue to see the business entity name.
-
You are presented with incoming chats until you reach the maximum active chat sessions that are set by administrator.
Note |
The maximum length of a chat message from the agent is 1500 unicode characters. |
Procedure
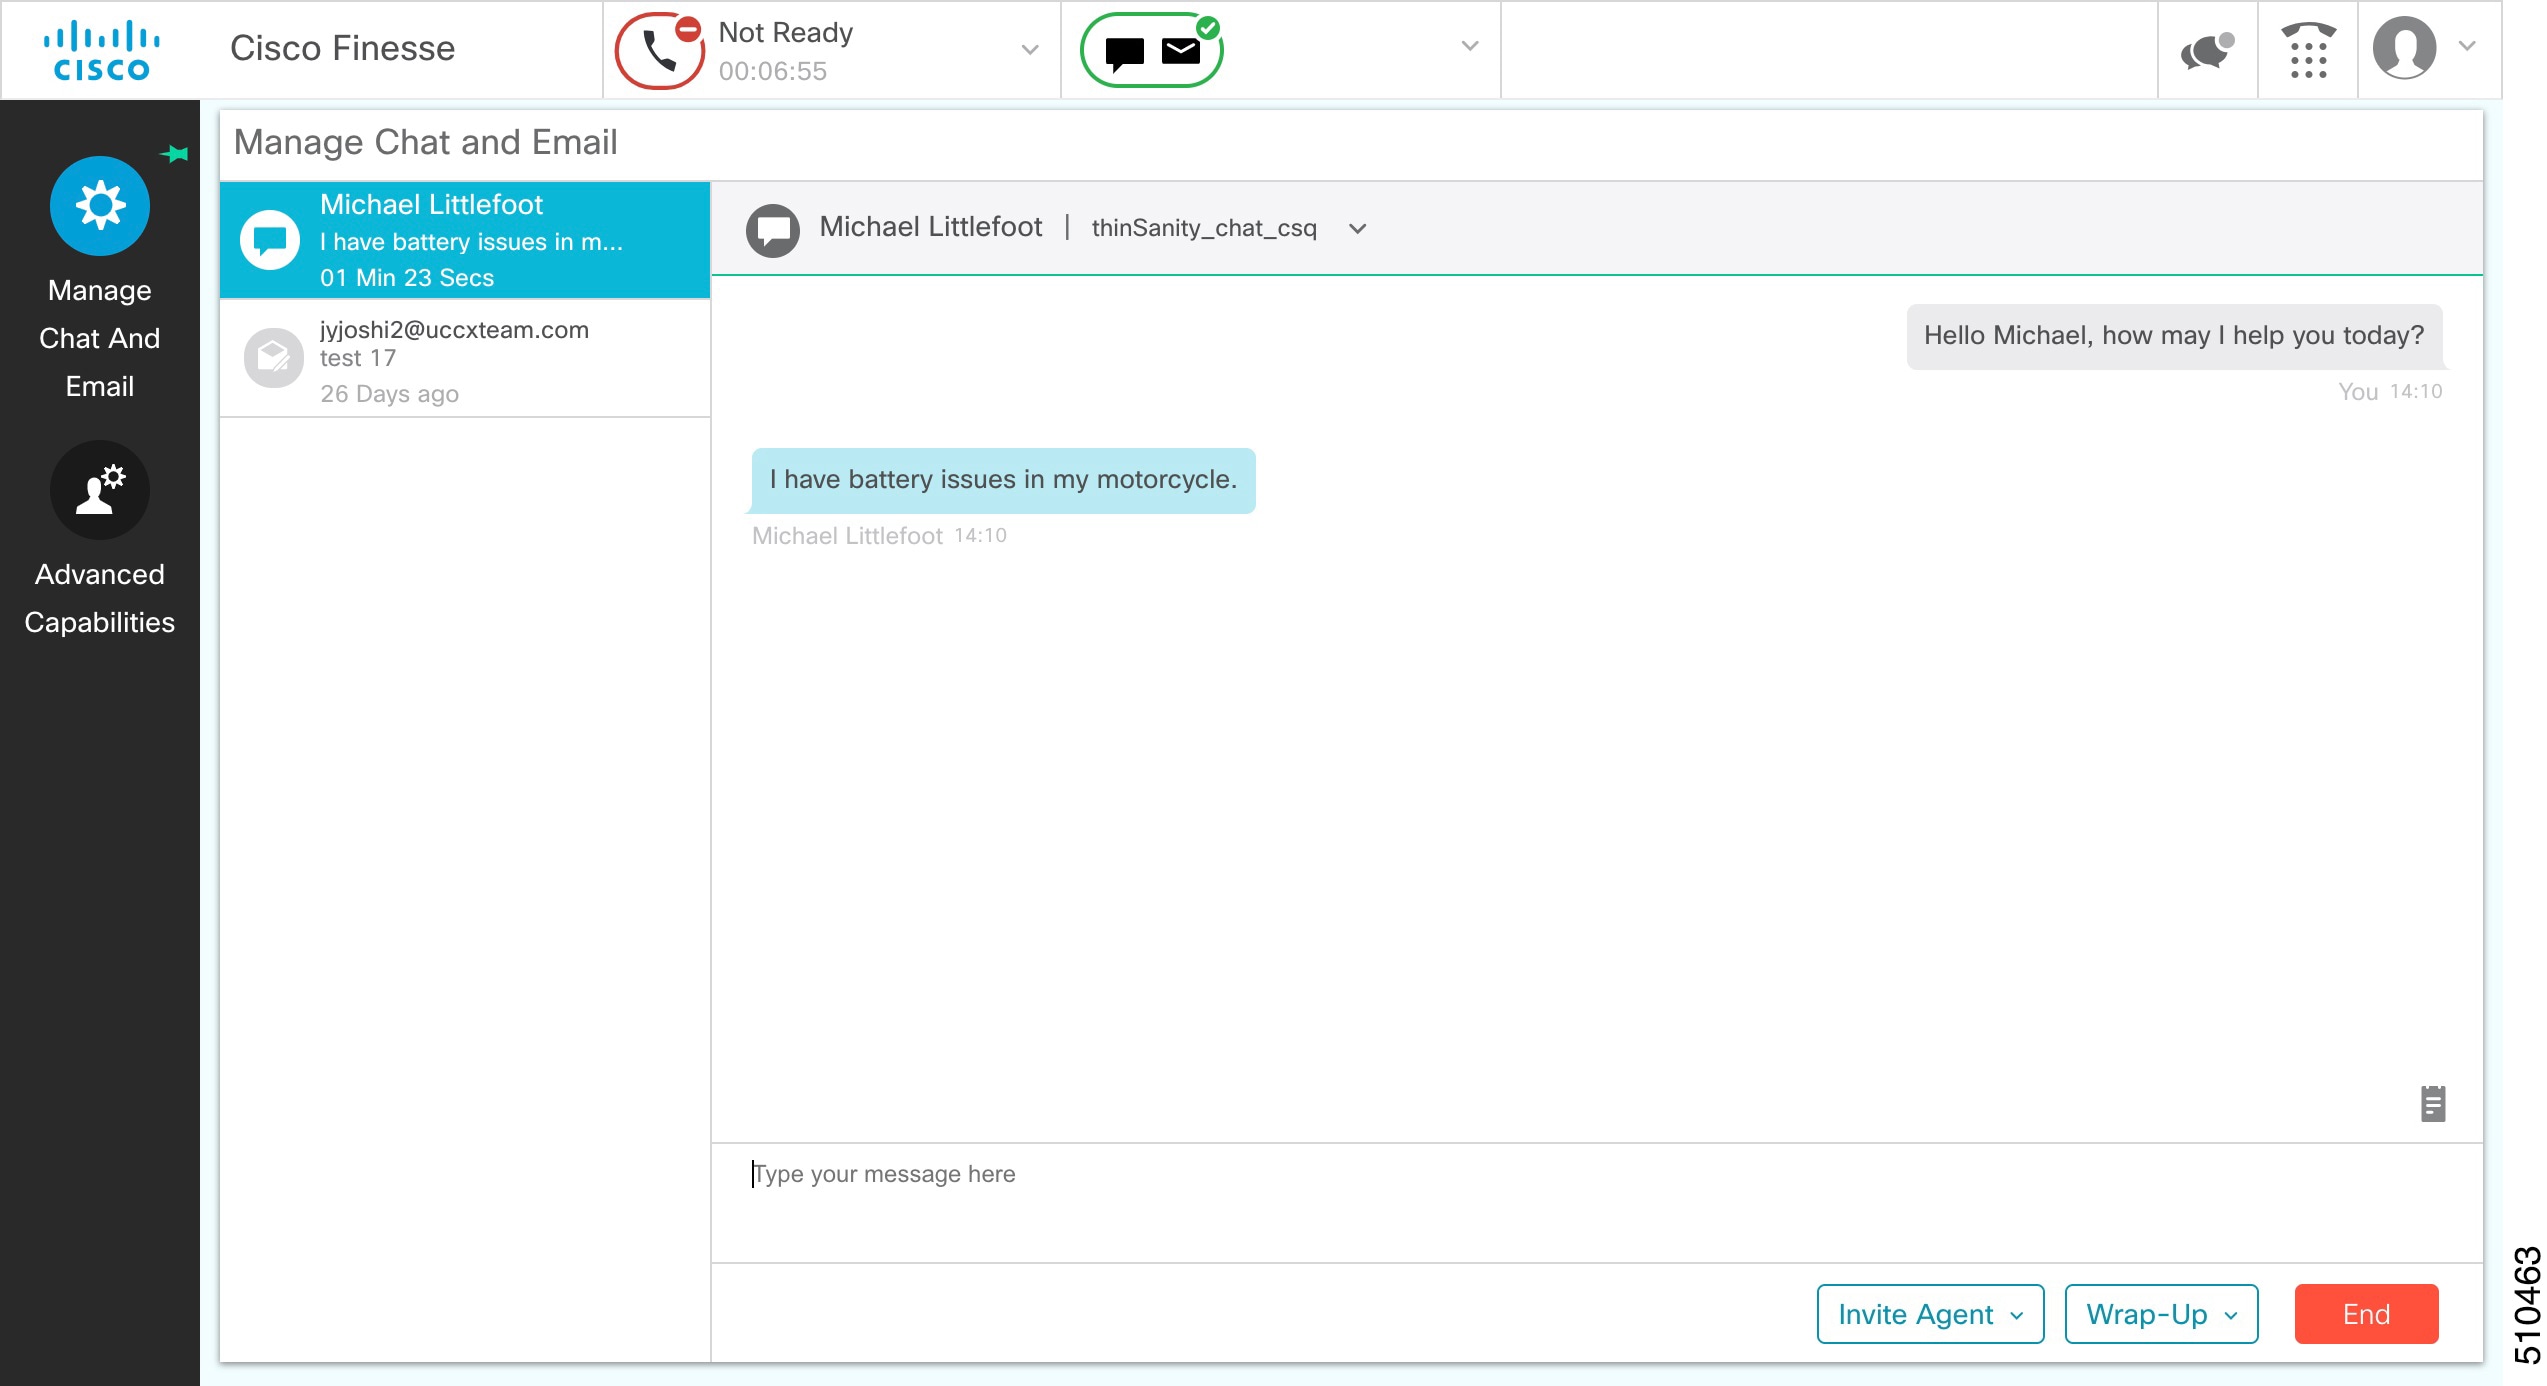
| Step 1 |
Click Accept in the incoming chat pop-over notification box within the specified time to accept the chat. The Manage Chat and Email gadget opens, chat session starts, and you are connected to the customer.
|
||
| Step 2 |
To end the chat session, click End. |
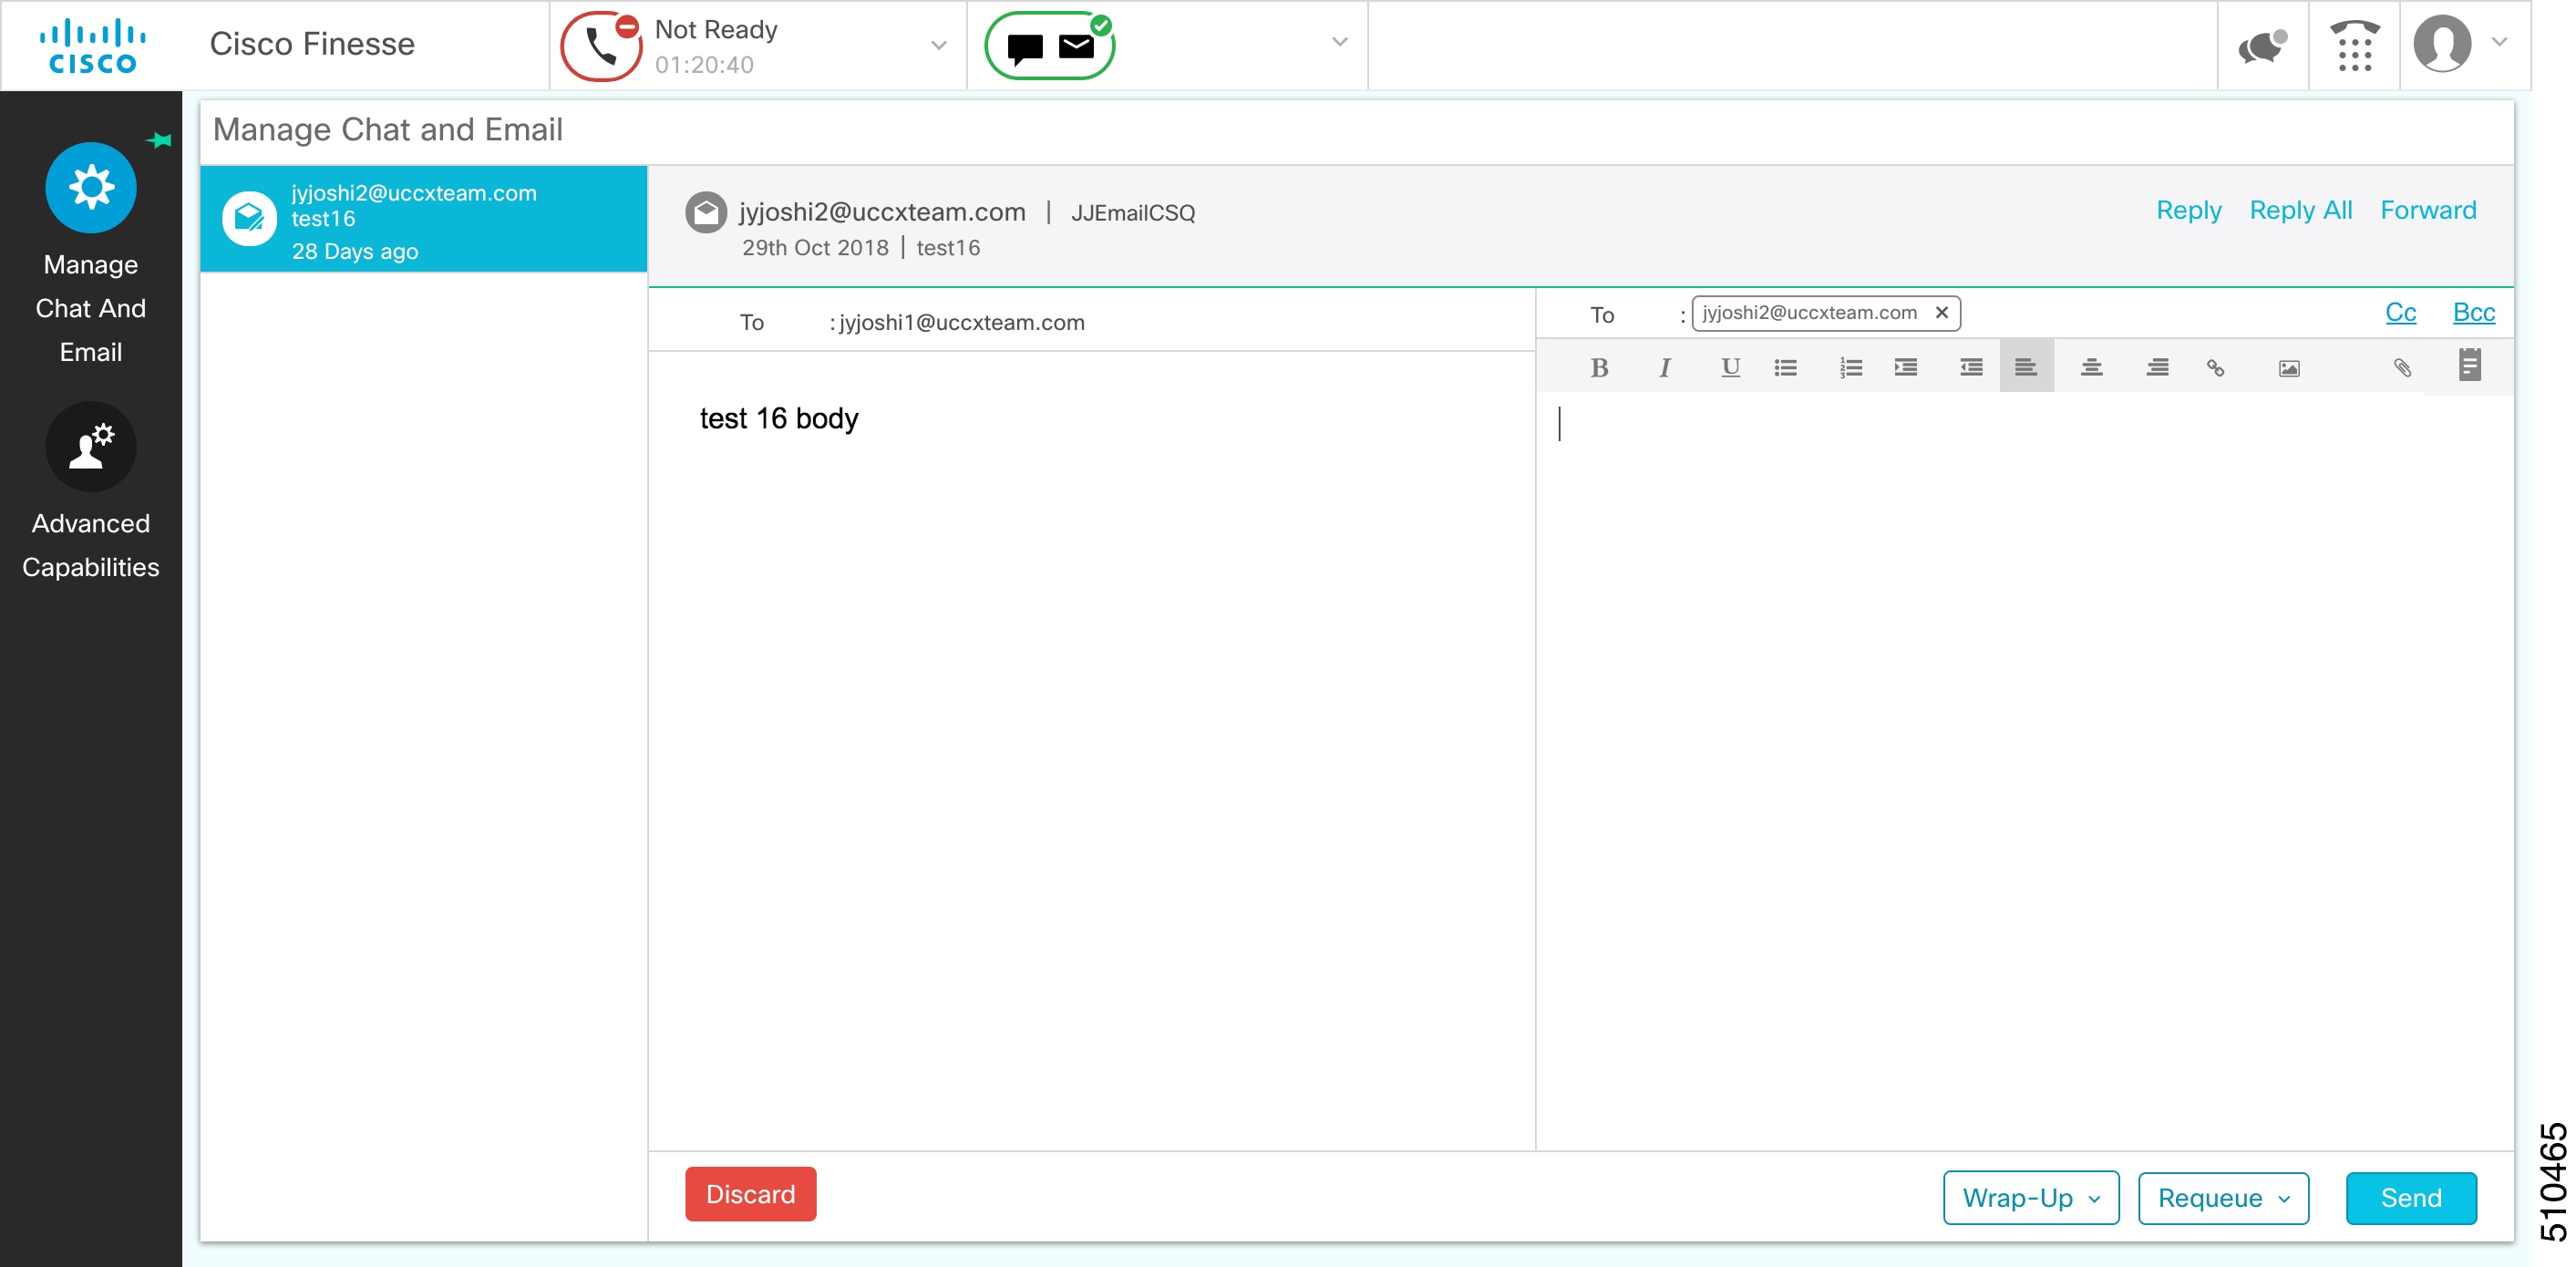
Accept an Email
You must be in Ready state to receive an email contact. When an email contact arrives on your desktop, it is automatically accepted and you would be notified by a pop-over notifictaion.
To view the contact, you must click the Manage Chat and Email tab to go to the Manage Chat and Email gadget. If you have more than one contact assigned to you, in the left panel, click the tab for the email contact that you want to view.
 to select a predefined response from the list. When you insert a predefined response, it is placed at the position of your
cursor.
to select a predefined response from the list. When you insert a predefined response, it is placed at the position of your
cursor.
 Feedback