Mitigate Threats Using MITRE Framework in Snort 3 Intrusion Policies

About MITRE Framework

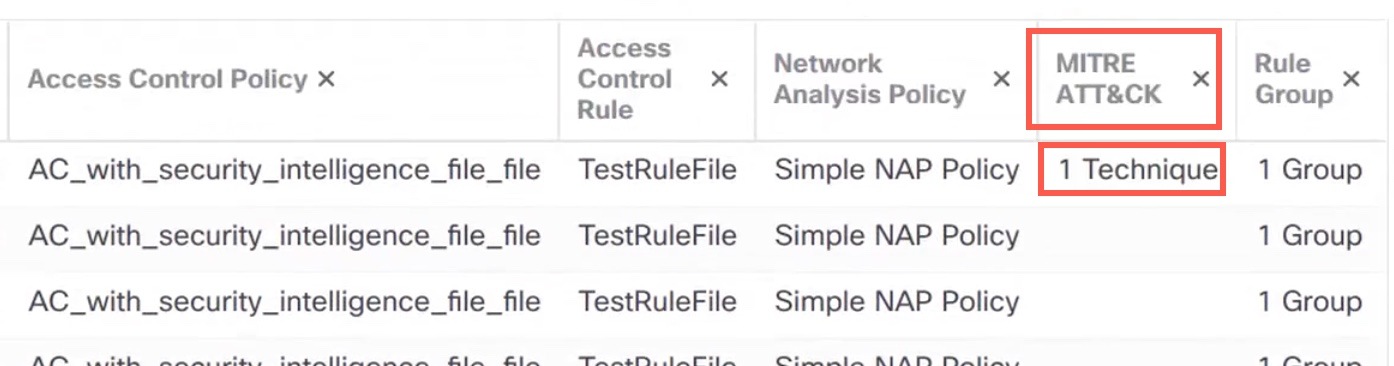
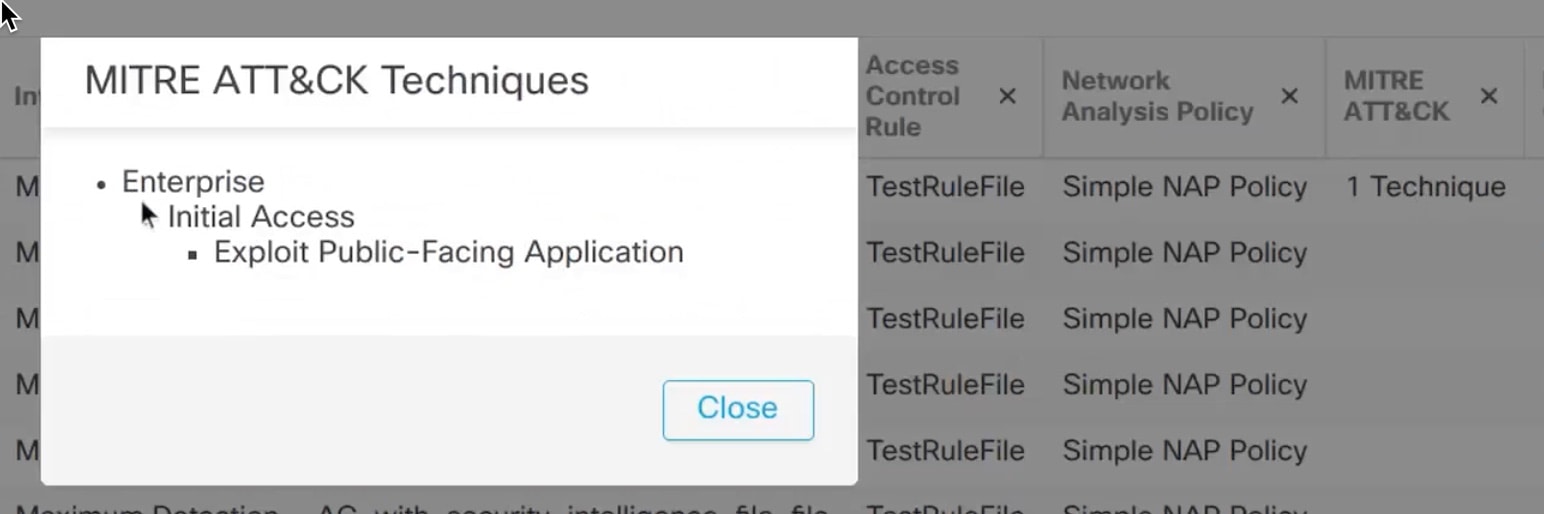
The MITRE ATT&CK (Adversarial Tactics, Techniques, and Common Knowledge) Framework is an extensive knowledge base and methodology that provides insights into the tactics, techniques, and procedures (TTPs) distributed by threat actors aiming to harm systems. ATT&CK is compiled into matrices that each represent operating systems or a particular platform. Each stage of an attack, which is known as "tactics", is mapped to the specific methods used to achieve those stages, which are known as "techniques."


Note


See https://attack.mitre.org for information about MITRE.


Each technique in the ATT&CK framework is accompanied with information about the technique, associated procedures, probable defenses and detections, and real-world examples. The MITRE ATT&CK framework also incorporates groups to refer to threat groups, activity groups, or threat actors based on the set of tactics and techniques they employ. Usage of groups in the framework helps categorize and document behaviors.

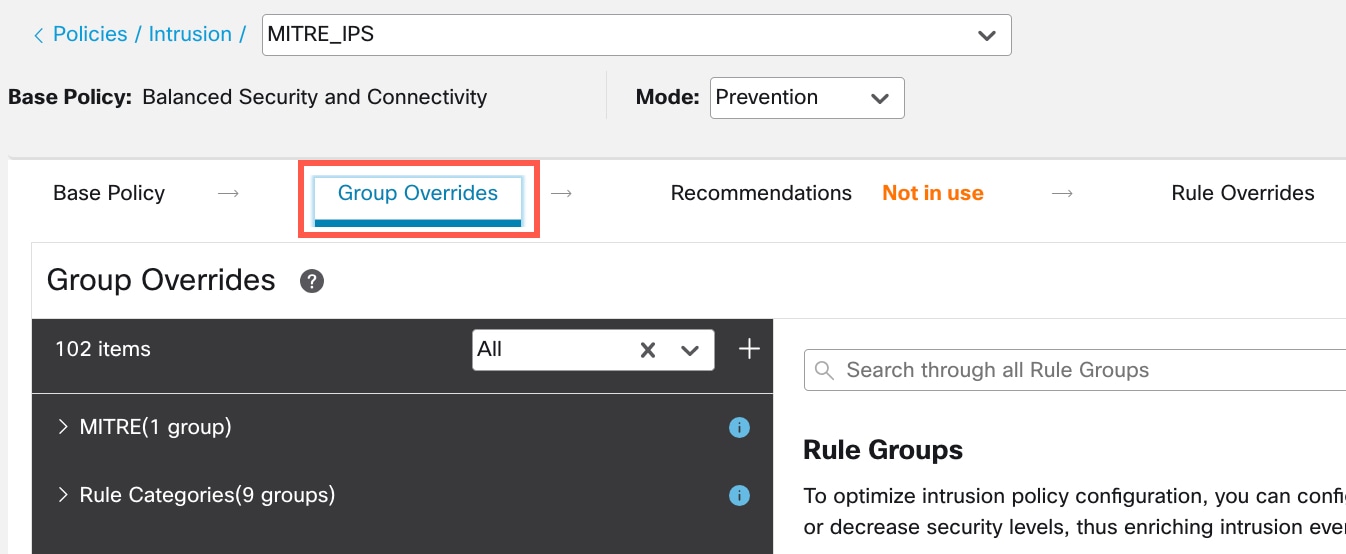
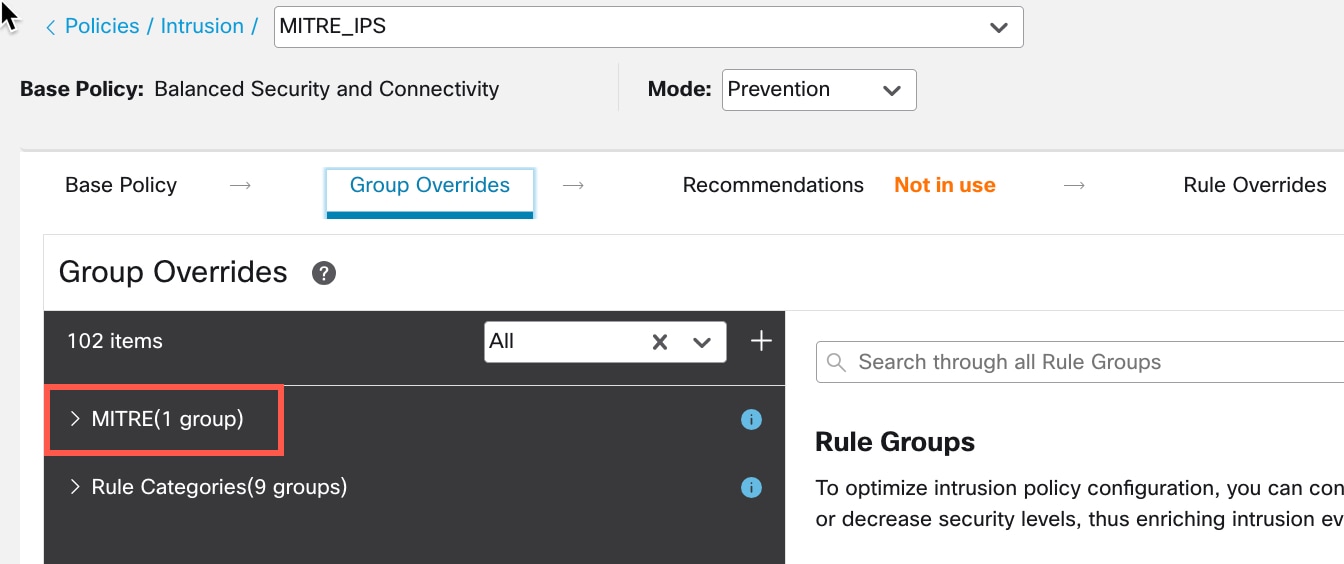
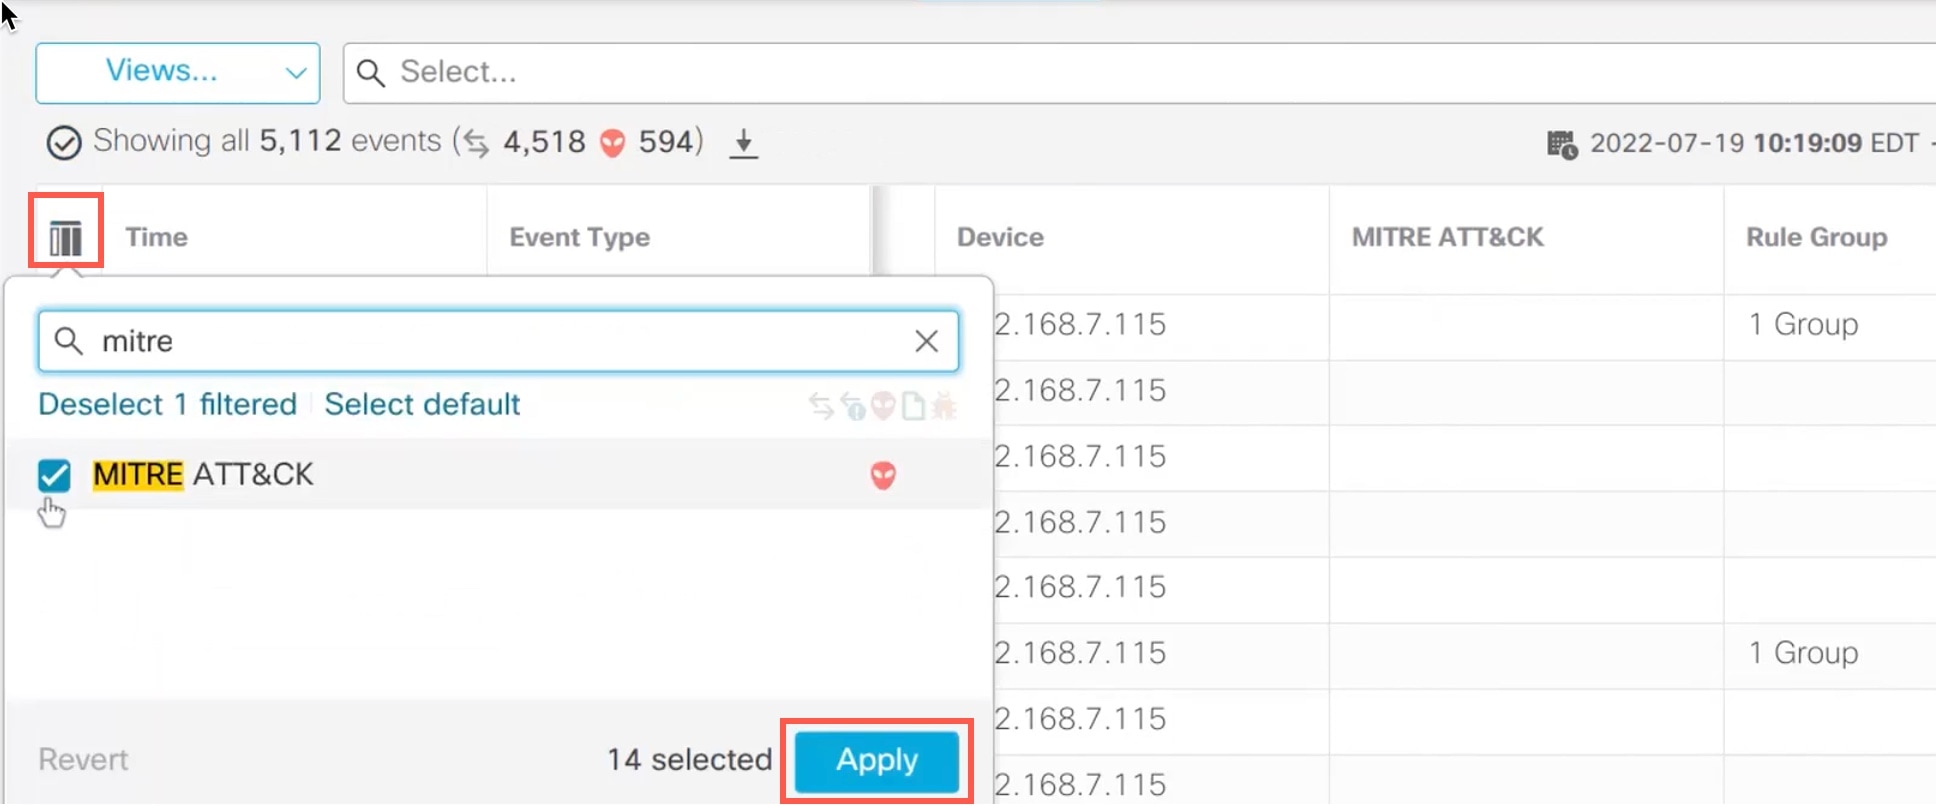
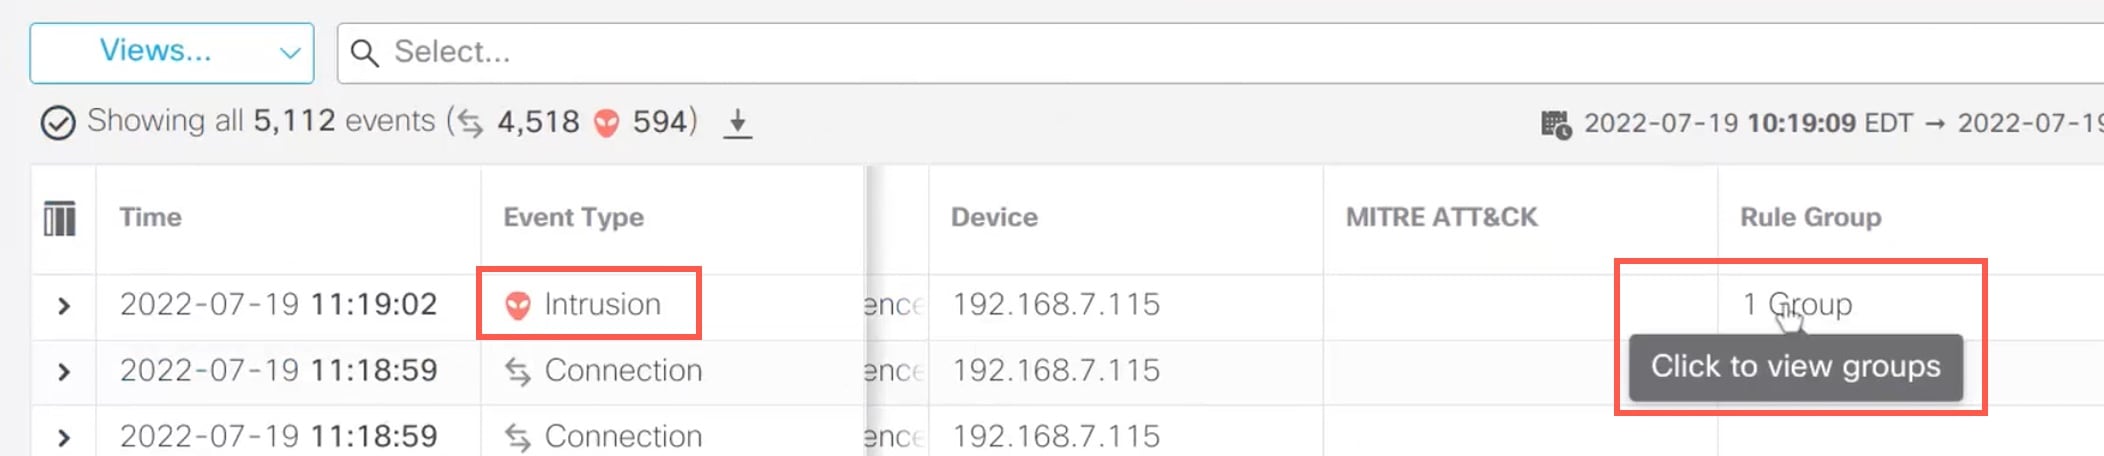
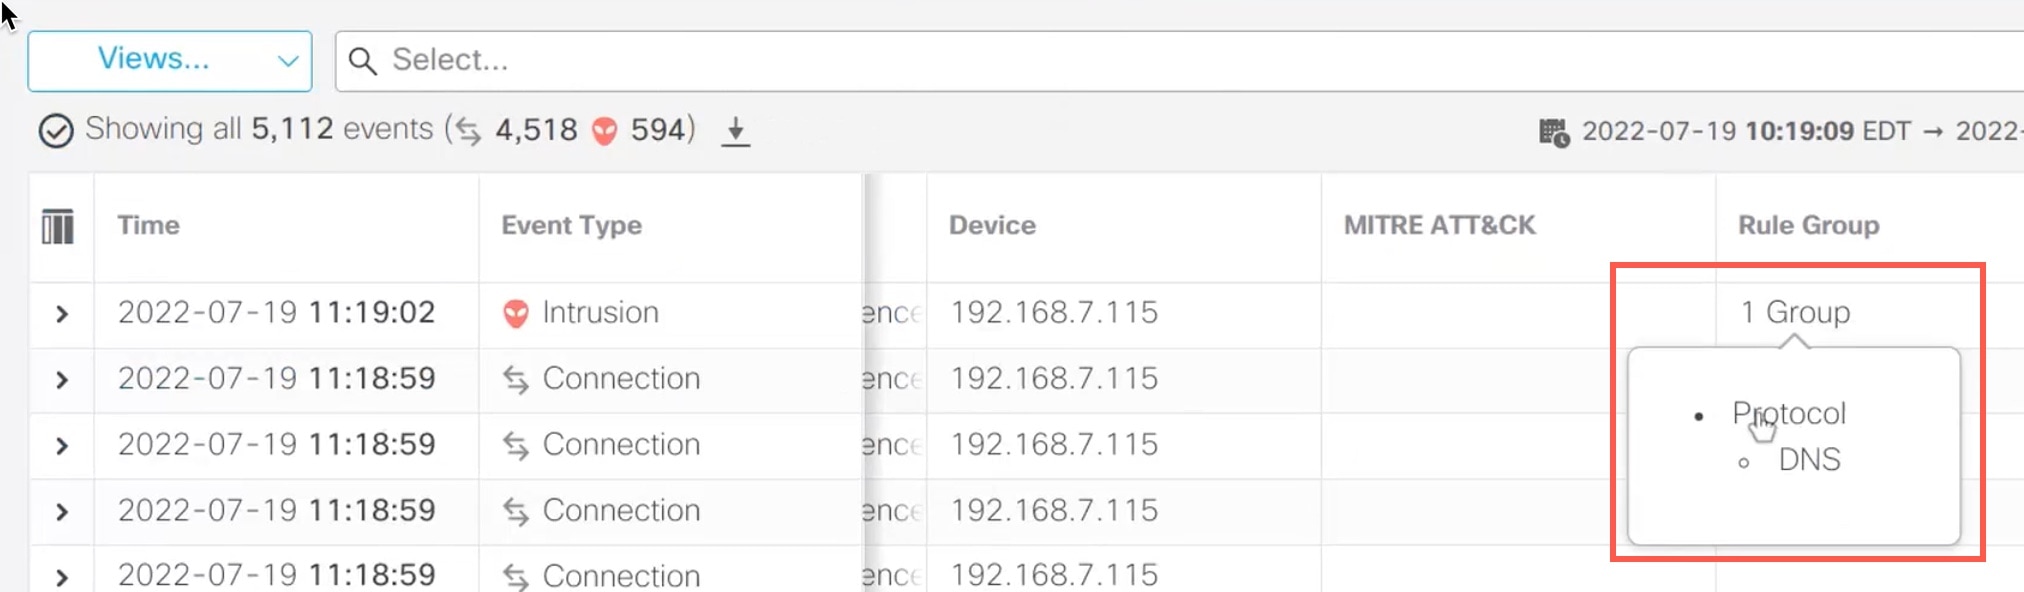
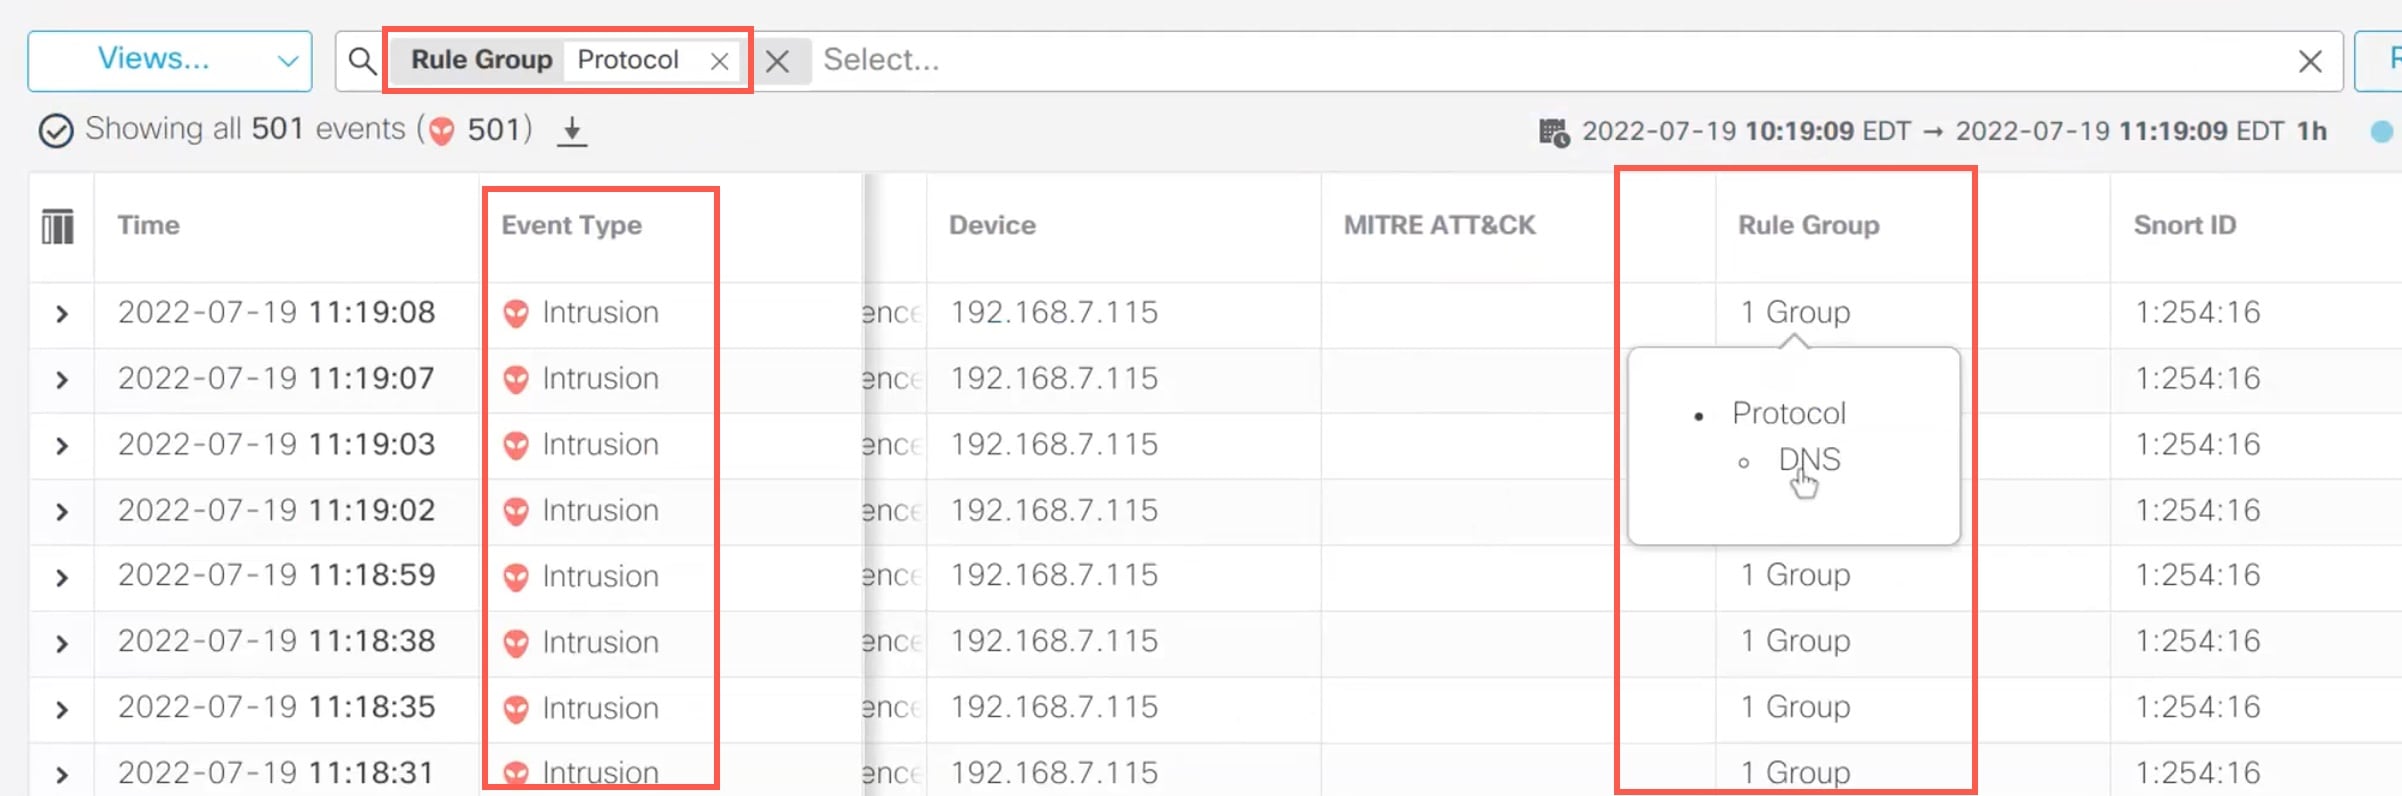
The MITRE framework enables you to navigate through your intrusion rules. MITRE is just another category of rule groups and is part of the Talos rule groups. In your Snort 3 intrusion policy, you can navigate through several levels of rule groups that provide more flexibility and logical grouping of rules.

Benefits of MITRE Framework

  • MITRE Tactics, Techniques, and Procedures (TTPs) are added to intrusion events that enables administrators to act on traffic based on the MITRE ATT&CK (Adversary Tactics Techniques and Common Knowledge) framework. This enables administrators to view and handle traffic with more granularity, and they can group rules by vulnerability type, target system, or threat category.

  • You can organize intrusion rules according to the MITRE ATT&CK framework. This allows you to customize policies according to specific attacker tactics and techniques.

Prerequisites

Sample Business Scenario

A large corporate network uses Snort 3 as its primary intrusion detection and prevention system. In a rapidly evolving threat landscape, adoption of robust network security measures is necessary and important. Network administrators need to know if the configured policies are finding traffic of interest and if they are observing a known attack group.

As an example, you may want to know if adversaries are attempting to take advantage of a weakness in your systems or applications to cause unintended or unanticipated behavior. The weakness in the system can be a bug, a glitch, or a design vulnerability. The applications may be websites, databases, standard services, such as SMB or SSH, network device administration and management protocols, or applications, such as web servers and related services.

The insights provided by the MITRE framework enables the administrators a more precise opportunity to specify protection for specific assets and protect themselves from specific threat groups.

View and Edit Your Snort 3 Intrusion Policy

Procedure


Step 1

Choose Policies > Intrusion.

Step 2

Ensure that the Intrusion Policies tab is chosen.

Step 3

Click Snort 3 Version next to the intrusion policy that you want to view or edit.

Step 4

Close the Snort helper guide that pops up.

Step 5

Click the Group Overrides layer.

The Group Overrides layer lists all the categories of rule groups in a hierarchical structure. You can traverse to the last leaf rule group in each rule group.

Step 6

Under Group Overrides, ensure that All is chosen in the drop-down list, so that all the rule groups for the intrusion policy are visible in the left pane.

Step 7

Click MITRE in the left pane.

Note


For this example, we have chosen MITRE, but depending on your specific requirements, you can choose the Rule Categories rule group or any other rule group and subsequent rule groups under it. All the rule groups use the MITRE framework.

Step 8

Under MITRE, click ATT&CK Framework to expand it.

Step 9

Under ATT&CK Framework, click Enterprise to expand it.

Step 10

Click Edit (edit icon
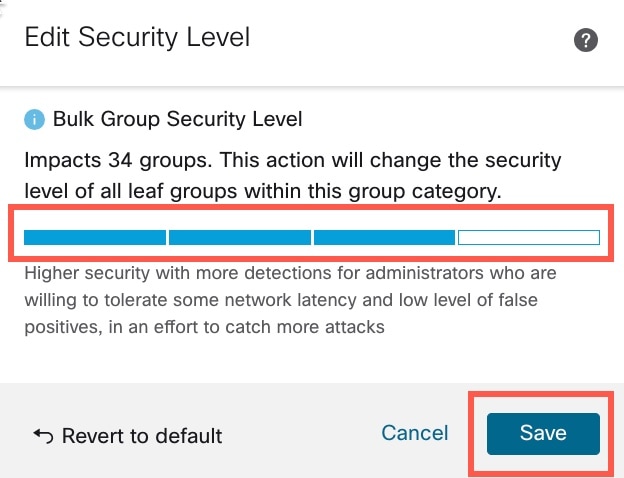
) next to the Security Level of the rule group to make bulk changes to the security level for all the associated rule groups under the Enterprise rule group category.

Step 11

As an example, choose security level 3 in the Edit Security Level window and click Save.

Step 12

Under Enterprise, click Initial Access to expand it.

Step 13

Under Initial Access, click Exploit Public-Facing Application, which is the last leaf group.

Figure 1. MITRE Tactics and Techniques

Step 14

Click the View Rules in Rule Overrides button to view the different rules, rule details, rule actions, and so on, for the different rules. You can change the rule actions for one or multiple rules in the Rule Overrides layer.

Step 15

Click the Recommendations layer and then click Start to start using Cisco recommended rules. You can use the intrusion rule recommendations to target vulnerabilities that are associated with host assets detected in the network. For more information, see Generate New Secure Firewall Recommendations in Snort 3.

Step 16

Click the Summary layer for a holistic view of the current changes to the policy. Based on the rule overrides, security level changes, and generation of Cisco recommended rules, you can view the rule distribution of the policy, group overrides, rule overrides, rule recommendations, and so on, to verify your changes.


What to do next

Deploy your intrusion policy to detect and log events that are triggered by the Snort rules. See Deploy Configuration Changes.

View Intrusion Events

You can view the MITRE ATT&CK techniques and rule groups in the intrusion events in the Classic Event Viewer and Unified Event Viewer. Talos provides mappings from Snort rules (GID:SID) to MITRE ATT&CK techniques and rule groups. These mappings are installed as part of the Lightweight Security Package (LSP).

Procedure


Step 1

Click Analysis > Intrusions > Events.

Step 2

Click the Table View of Events tab.

Step 3

In the MITRE ATT&CK column header, you can see the techniques for an intrusion event.

Step 4

Click 1 Technique to view the MITRE ATT&CK Techniques, as shown in the following figure. In this example, Exploit Public-Facing Application is the technique.

Step 5

Click Close.

Step 6

Click Analysis > Unified Events.

Step 7

If not already enabled, click the column selector icon to enable the MITRE ATT&CK and Rule Group columns.

Step 8

As shown in the example here, the intrusion event was triggered by an event that is mapped to one rule group. Click 1 Group under the Rule Group column.

Step 9

As an example, you can view Protocol, which is the parent rule group, and DNS rule group under it.

Step 10

You can click Protocol to search for all the intrusion events that have at least one rule group, that is Protocol > DNS. The search results are displayed, as shown in the example below.