Managing the Camera
This chapter provides information and instructions for managing the Cisco Video Surveillance PTZ IP camera, and includes the following topics:
• Understanding the PTZ IP Camera User Interface
•Powering the PTZ IP Camera On or Off
•Resetting the PTZ IP Camera
•Viewing Live Video
Understanding the PTZ IP Camera User Interface
After you log in to the PTZ IP camera, you can access the windows and perform a variety of administrative and user procedures.
The links and activities that you can see and access in the PTZ IP camera windows depend on your camera privilege level.
•Administrator—Can access all PTZ IP camera windows, features, and functions.
•Viewer—Can access the Camera Video & Control window with limited controls, and can access the Refresh, Logout, About, and Help links from that window.
PTZ IP Camera Window Links
The PTZ IP camera user interface includes links that you use to access various windows and perform other activities. Table 4-1 describes each link and lists the PTZ IP camera privilege level that you must have to access the link.
Table 4-1 Links in the PTZ IP Camera Windows
|
|
|
|
Refresh |
Updates the information in the window that is currently displayed. |
Administrator User |
Home |
Displays the Home window. |
Administrator |
View Video |
Displays the Camera Video & Control window. You may be prompted to install ActiveX controls when trying to access this window for the first time. ActiveX controls are required to view video from the IP camera. Follow the on-screen prompts to install ActiveX controls. |
Administrator User |
Setup |
Provides access to the configuration menus for the PTZ IP camera. |
Administrator |
Logout |
Logs you out from the PTZ IP camera. |
Administrator User |
About |
Displays a pop-up window with model, version, and copyright information for the PTZ IP camera. |
Administrator User |
Help |
Provides reference information for the window that is currently displayed. |
Administrator User |
PTZ IP Camera Windows
The PTZ IP camera user interface includes these main windows:
•Home window—Displays the system information that is described in Table 4-2.
•Setup window—Provides access to the PTZ IP camera configuration windows. For more information, refer to the Cisco Video Surveillance PTZ IP Camera Configuration Guide.
•Camera Video & Control window—Displays live video from the camera and lets you control a variety of camera and display functions.
Table 4-2 Home Window Information
|
|
|
General Information |
ID |
Identifier of the PTZ IP camera. |
Name |
Name of the PTZ IP camera. |
Current Time |
Current date and time of the PTZ IP camera. |
S/N |
Serial number of the PTZ IP camera. |
Firmware |
Version of the firmware that is installed on the PTZ IP camera. |
Part Number |
Cisco manufacturing part number of the PTZ IP camera. |
Top Assembly Revision |
Cisco assembly revision number. |
Network Status |
MAC Address |
MAC address of the PTZ IP camera. |
Configuration Type |
Method by which the PTZ IP camera obtains its IP address. |
LAN IP |
IP address of the LAN to which the PTZ IP camera is connected. |
Subnet Mask |
Subnet mask of the LAN to which the PTZ IP camera is connected. |
Gateway Address |
IP address of the gateway through which the PTZ IP camera is connected. |
Primary DNS |
IP address of the primary DNS server, if configured for the PTZ IP camera. |
Secondary DNS |
IP address of the secondary DNS server, if configured for the PTZ IP camera. |
IO Port Status |
Input Port |
Current state of the input port(s) on the PTZ IP camera. |
Output Port |
Current state of the output port(s) on the PTZ IP camera. |
Stream 1 and Stream 2 |
User |
PTZ IP camera user name of each user who is accessing the primary video stream (Stream 1) or the secondary video stream (Stream 2) through a client PC or a third-party device. By default, users appear in order of start time. To display users in ascending order of any information in any corresponding column, click the column heading. Click a column heading again to reverse the display order. |
IP Address |
IP address of the client device. |
Start Time |
Time and date that the client accessed the video stream for this session. |
Elapsed Time |
Length of time that the client has been accessing the video stream. |
Codec |
Video codec being used for the stream. |
Powering the PTZ IP Camera On or Off
The PTZ IP camera does not include an on/off switch. You power it on or off by connecting it to or disconnecting it from a power source. When you power off the PTZ IP camera, configuration settings are retained.
To power on the PTZ IP camera, take either of these actions:
•Use an STP (shielded twisted pair) Category 5 or higher network cable to connect the PTZ IP camera to a network switch that provides 802.3af compliant PoE.
•Use an optional AC 24V power adapter to connect the PTZ IP camera to a wall outlet.
To power off the PTZ IP camera, take either of these actions:
•If the PTZ IP camera is receiving PoE, disconnect the network cable.
•If the PTZ IP camera is receiving power through the power adapter, unplug the adapter from the wall or disconnect it from the camera.
Resetting the PTZ IP Camera
You reset the PTZ IP camera by pressing the Reset button on the PTZ IP Camera (see Figure 1-1). There are various reset types, as described in Table 4-3.
You also can also perform these reset operations from the Maintenance Settings window as described in the Cisco Video Surveillance PTZ IP Camera Configuration Guide.
Table 4-3 Resetting the PTZ IP Camera
|
|
|
|
Reboot |
Press and immediately release the Reset button. |
This action is equivalent to powering the PTZ IP camera down and then powering it up. Settings that are configured for the PTZ IP camera are retained. |
Factory reset |
Press and hold the button for at least 15 seconds. |
Sets all PTZ IP camera options to their default values. After you perform this procedure, follow the steps in the "Performing the Initial Setup of the IP Camera" section. |
Viewing Live Video
After you install and set up the Cisco Video Surveillance PTZ IP camera, you can connect to the PTZ IP camera through Internet Explorer and access the Camera Video & Control window to view live video.
The Camera Video & Control window also provides for controlling the video display, configuring preset positions, and controlling certain PTZ IP camera functions. Available controls depend on the privilege level of the user.
To view live video, log in to the PTZ IP camera, then click View Video in the PTZ IP camera Main window menu bar. The Camera Video & Control window appears. This window displays live video from the camera and lets you control a variety of camera and display functions.
The controls that you see in the Camera Video & Control window depend on your PTZ IP camera privilege level and the configurations settings for the PTZ IP camera. Users with the Administrator privilege can access all controls. Users with the Viewer privilege do not have access to the following controls:
•Video image controls
•Motion detection controls
Table 4-4 describes the controls in the main Camera Video & Control window.
Table 4-4 Camera Video & Control Window Controls
|
|
|
|
|
Video Codec drop-down list 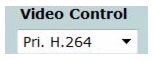 |
Choose the codec for video transmission (H.264 or MJPEG). You can choose H.264 only if the primary video stream (channel 1) is enabled. You can choose MJPEG only if the secondary video stream (channel 2) is enabled. For information about enabling and disabling video streams, see the "Streaming Window" section on page 4-1. |
Video Resolution drop-down list  |
Choose the resolution for video transmission. The resolutions in this drop-down list depend on the video standard that you selected. The default value for H.264 is 1920 x 1080. The default value for MJPEG is 704 x 480. You cannot configure a secondary stream if you configure this resolution for 1920 x 1080. Note You can also change the resolution for video transmission by changing the value in the Video Resolution Type field, as described in the "Streaming Window" section on page 4-1. |
|
|
Hotspot zoom button  |
Click this latch button to enable the digital zoom feature, which provides five-step digital zooming in for the normal (not full screen) video display. Click this button again to disable the digital zoom feature. To perform a digital zoom, engage the Hotspot zoom button and click the video display. The first five clicks zoom the display. The sixth click returns to unzoomed display. |
Hotspot pan+tilt button  |
This button is disabled. |
Save snapshot button  |
Captures and saves a the current video image as a .gif file or a .jpg file in the location of your choice and with the file name of your choice. When you click this button, the Snapshot window appears. Click Save and follow the on-screen prompts to save the image with the name and in the location that you want. |
Flip button  |
Rotates the video image by 180 degrees. |
Mirror button  |
Reverses the video image. |
Restore button  |
Displays the default video image, which is not rotated and not reversed. |
Full Screen button  |
Displays the video image in full screen mode. To return to normal display mode, click the full screen image. |
|
|
|
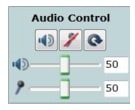
Displays the controls for audio when you enable audio. Controls are greyed out when audio is disabled. To enable audio: •Click on the Setup link and select Streaming. •From the Audio section of the Streaming page, check the Enable Audio box. •Click Save. Use these controls to enable or disable the speaker and microphone. Use the sliders to adjust the volume. |
The following settings are accessible from the main Camera Video & Control window:
•Camera Settings
•Motion Detection Settings
•Pan/Tilt/Zoom Settings
•Privacy Zone
Camera Settings
The controls in Table 4-5 appear when you click the Up Arrow next to Camera Settings under the video image.
Table 4-5 Camera Settings
|
|
|
|
|
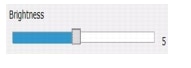
Brightness slider
|
To control the brightness of the video image, drag the slider. Values are 1 through 10. A higher value increases the brightness and a lower value decreases the brightness. For example, if the PTZ IP camera is facing a bright light and the video appears too dark, you can increase the brightness. The default value is 5. |
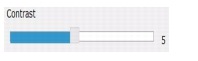
Contrast slider
|
To control contrast of the video image, drag the slider. Values are 1 through 10. A higher value increases the contrast and a lower value decreases the contrast. The default value is 5. |
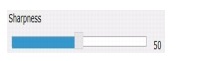
Sharpness slider
|
To control the sharpness of the video from the PTZ IP camera, drag the slider. Values are 1 through 100. A higher value increases the sharpness and a lower value decreases the sharpness. The default value is 50. |
Restore button |
Resets white balance, brightness, contrast, sharpness, saturation, and hue to their default values. |
White Balance Mode |
Options are •Auto (default)—White balance is automatically set by the camera and is suitable for most conditions. •Indoor—This white balance mode is specifically for indoors. You can capture images with natural white balance. •Outdoor—This white balance mode is specifically for outdoors. You can capture images with natural white balance in the morning and evening. •One Push WB—This option is a fixed white balance mode. You can automatically readjust as required, assuming that a white object, in suitable lighting conditions and occupying more than half of the image area, is seen by the camera. •Manual—With this option you can set the white balance by setting red gain (RGain) and blue gain (BGain) manually. •Sodium Lamp—This option is a fixed white balance mode specifically for sodium vapor lamps. •ATW—The camera automatically adjusts the white balance in response to varying light conditions. |
|
Note Click on the Exposure Control heading to access the controls. |
|
|
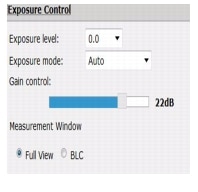
Exposure level |
Choose this option if you want to increase or decrease the exposure level. For example, if you want to add light to properly expose the image, set the value to +2. If you want to underexpose the scene, set value to -2. Range is -2.0 through +2.0. Default is 0. |
Exposure mode |
Options are •Auto (default)—Automatically sets the Exposure time. You can manually set the Gain control. •Shutter Priority—Allows you to manually set the Exposure time and Gain control. Choose longer exposures to create an impression of motion. Choose shorter exposures to ensure that the motion is effectively frozen in the resulting image. •Iris Priority—Allows you to manually set the Gain control and Iris adjustment to control the distance between the nearest and farthest objects in a scene that appear acceptably sharp in an image. •Manual—Allows you to manually set the Exposure time, Gain control, and Iris adjustment. Selecting this option sets the Switch Mode to Day on the Camera page. |
Gain control slider |
Set the gain control. Range is 6dB through 28dB. Default is 22dB. Note Changing gain control affects the Day to Night Threshold on the Camera page. |
Measurement Window |
Options are •Full View—Exposure is calculated based on full view. •Back light compensation (BLC)—This option adds a weighted region in the middle of the image view to give necessary exposure compensation. The option is only available when the Exposure mode is set to Auto. |
|
Note Click on the Advanced Settings title to access the control. |
Enable WDR |
For extremely light and dark areas, enable the wide dynamic range (WDR) feature to ensure you can clearly view the objects in the scene. Options are •Off (default) •Auto •Manual |
Motion Detection Settings
The controls in Table 4-6 appear when you click the Up Arrow in the Motion Detection area under the video image. These controls are available only when viewing the primary (H.264) stream.
Note When you use PTZ on the camera, motion detection is disabled for 20 seconds.
Table 4-6 Motion Detection Settings
|
|
|
Enable Motion Detection check box |
Enables the motion detection feature and displays a grid over the video image. When motion detection is enabled, the PTZ IP camera monitors activity in regions of the video that you specify. If activity at a defined level occurs in any of these areas, the PTZ IP camera generates an alert and takes the actions that are configured as described in the "Event Notification Window" section on page 4-9. After motion detection has been enabled, you create specific regions that the PTZ IP camera monitors for activity. To create a motion detection region, right-click on the video image, choose Draw Region, and then click and drag across the motion detection grid to draw a green square or rectangle comprised of one or more grid squares. Up to eight of the following regions can be drawn: •Motion inclusion regions—Designate areas to examine for motion. You can draw up to four motion inclusion regions. •Motion Exclusion Regions—Designate areas to ignore for motion. You can draw up to four motion exclusion regions. For each region listed under the Region Properties area, you can configure the following properties: •IsActive—Specifies whether the region is active (enabled) or not active (disabled). Chose true to enable a region; choose False to disable a region. •Location—Specifies the grid coordinate (X, Y) for the upper left corner of the region. •Name—You can enter a name of up to 12 characters for a region. •Region Type—Specifies whether the region is an inclusion or an exclusion region. Choose Inclusion to have the region examine for motion; choose Exclusion to have the region ignore motion. •Sensitivity—Designates the relative amount of activity that the PTZ IP camera must detect in the area before it generates an alert. A lower value means that more, or faster, activity is required to trigger an alert. A higher value means that less, or slower, activity is required. The default value is 80. •Threshold—Designates the percentage of pixels that the PTZ IP camera must identify as changed in the area before it generates an alert. The camera detects pixel changes at the defined sensitivity level. The default threshold value is 10. To reset the sensitivity and threshold to their default values of 80 and 10 respectively, right-click on the region, and choose Restore Values. To remove a region, right-click it, and choose Delete Region. |
Pan/Tilt/Zoom Settings
The controls in Table 4-7 appear when you click the Up Arrow in the Pan/Tilt/Zoom area at the bottom of the video image.
Table 4-7 Pan/Tilt/Zoom Settings
|
|
|
|
|
|
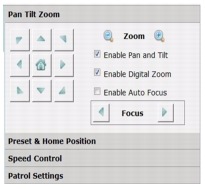
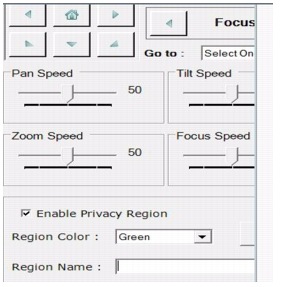
Check the Enable Pan and Tilt box to enable the pan and tilt controls on the left. Use the arrow buttons to manually position the camera to the desired area. Use the home button to return the camera to the original position. |
Zoom |
To control the field of view zoom factor, left click on the minus magnifier to zoom out (wide). Left click on the plus magnifier to zoom in (telephoto). Depress the left mouse button to continuously zoom in or out. |
Enable Digital Zoom |
Check this box to enable digital zoom. |
Enable Auto Focus |
Check this box to automatically focus the PTZ IP camera for the selected zoom. |
Focus |
To manually control the field of view focus, use the left arrow to focus on near objects. Use the right arrow to focus on far objects. Note To use the Focus controls, ensure that the Enable Auto Focus option is not checked. |
|
Note Click on the title to access these controls. |
|
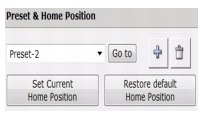
You can configure a maximum of eight preset positions. To add a preset position •Click on the plus button. •Enter a unique name for this preset position. The name can contain from 1 to 64 characters, which can be letters, numbers, and special characters, but no spaces. Special characters are: ! % ( ) , - = @ _ ~ •Click the Save button. If you already configured the maximum amount of preset positions, an error message displays. To delete a preset position, use the trash button. Note You cannot delete a preset position that is part of a patrol list. Go to Patrol Settings to remove a preset position from the patrol list. To set one of the preset positions as the home position, click the Set Current Home Position button. To restore the default home position, click the Restore default Home Position button. |
|
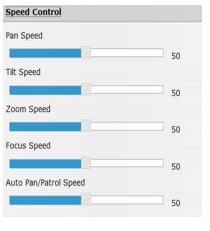
|
|
Pan Speed—Use the slider to set the rate at which the camera pans to the desired location. Values are 1 through 100. Default is 50. Tilt Speed—Use the slider to set the rate at which the camera tilts. Values are 1 through 100. Default is 50. Zoom Speed—Use the slider to set the rate at which the camera zooms. Values are 1 through 100. Default is 50. Focus Speed—Use the slider to set the rate at which the camera focuses on a desired location. Values are 1 through 100. Default is 50. Auto Pan/Patrol Speed—Use the slider to set the rate at which the camera automatically pans and patrols based on the patrol list. Values are 1 through 100. Default is 50. |
|
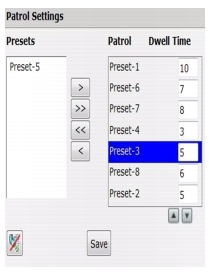
|
|
Use this screen to manage the patrol areas and times for each preset position. After adding the preset positions, select the preset position in the Presets list. Use the right arrow button to add one preset (>) to the patrol list. To add all of the preset positions, use the Shift key to highlight all of the positions. Click the double right arrow button (>>). These presets are now added to the Patrol list. Set the time that the Preset position patrols the area before moving to the next position by adding the time in the Dwell Time box next to each preset. Dwell Time is the time (in seconds) that the camera spends in a specific preset area. To set the priority of each preset, highlight the preset. Use the up and down arrows under the Patrol and Dwell Time window to set the priority of each preset. Click the Save button to save the patrol settings. An informational message appears indicating that the patrol settings are successfully stored on the camera. Use the Auto Patrol button to start patrolling the first preset area in the patrol list followed by the second, and so forth. Click the button to stop patrolling. |
Privacy Zone
The controls in Table 4-8 appear when you click the Up Arrow in the Privacy Zone area at the bottom of the video image.
Table 4-8 Privacy Zone Controls
|
|
|
|
Use the Privacy Zone section to mask particular regions that should not be visible in video streaming. Privacy Zone is drawn on the center of the image. In the Privacy Zone section, use the pan, tilt, zoom, and focus controls to place targeted object or view inside the green box in center. The green box can be resized to increase height and width. Once the target object is inside the green box, enter the name in the Region Name edit box and click the Add button to draw the mask on video. To change mask color, click the Region Color drop down box and select mask color. Click the Save button to apply new mask color to video. To remove a privacy region, select desired region from the Privacy Mask drop down list. The camera automatically goes to the position of the selected mask. Click the Delete button to delete the mask. The message, "Privacy Zone setting successfully stored on the camera" is displayed when region is deleted. To focus on a particular Privacy Zone, select the region name from Privacy Mask drop down list. The camera automatically pans and tilts to the masked region. |


 Feedback