Configuring Voice Ports

Voice Ports

This chapter explains how to configure voice ports using the commands specific for Cisco VG450 Analog Voice Gateways and associated service modules.

This chapter contains the following topics:

Prerequisite

Before you configure voice ports on Cisco VG450 you must establish a working IP network.

Configuring the Voice Port

This section discuss the changes and modifications on the following commands:

For configuration examples, see Cisco VG450 Configuration Examples.

loop-length

The loop-length CLI is created to configure the analog FXS voice port. It has the following format:

voice-port x/y/z

[no] loop-length [long | short]

The loop-length CLI has the following characteristics:

  • For Cisco VG450 platform, the default is short loop-length. This command is not applicable to analog FXS on motherboard slot.

  • This command is applicable to all 48 FXS voice ports on SM-D-48FXS-E and the first 4 (0-3) FXS voice ports on SM-D-72FX like Cisco VG450 platform.

  • The default FXS is short loop-length and long loop-length FXS needs to be configured and can be applied on motherboard NIM slots.

  • The first sixteen voice ports 0/0/0-15 can be configured as long loop (OPX-lite).

  • FXS voice ports on VIC 1 (0/1/0 - 0/1/23) will not support long loop. By default, they are short-loop FXS.

  • Shutdown and no shutdown are required on the voice port after loop-length is configured for it to take effect.

  • Because up to 2 ren is supported on long-loop (OPX-lite) FXS, when loop-length long is configured on the FXS voice port, if its existing ren configuration is greater than 2, it will be changed automatically to 2, a message “The existing ren configuration is changed to 2" is displayed on the console.

  • When loop-length short is configured on the FXS voice port, if the voice port has ring dc-offset configured, the ring dc-offset configuration will be removed. A message “The existing ring dc-offset configuration is removed” is displayed on the console.

ren

The existing ren CLI under FXS voice port will accept value 1-2 for FXS voice port with loop-length long configured. For short loop-length analog FXS voice port, ren CLI will accept value 1-5.

ren dc-offset

The existing ring dc-offset CLI is configurable on the long loop-length FXS voice port.

cm-current-enhance

The existing cm-current-enhance CLI is configurable on the long loop-length FXS voice port.

vmwi

The existing vmwi [fsk | dc-voltage] is configurable on all on-board FXS voice ports.
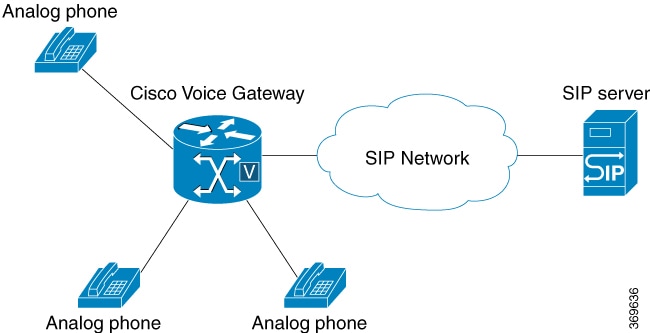
Cisco IOS Bulk Configuration

An optional bulk-configuration mechanism for voice-port and voice dial peer is available to save on time.

group

The group option is added to dial-peer CLI for dial peer bulk configuration. It has the following formats:

dial-peer group <tag> pots

dial-peer group <tag> pots all stcapp

The second command from the above list will create dial peers on all analog voice ports as stcapp ports by expanding it to the following three commands:

dial-peer group <tag> pots
service stcapp
port all

The group command is specific for stcapp-controlled analog ports. Therefore, only a subset of dial peer commands are supported, which are as follows:

  1. port

  2. description

  3. service

  4. shutdown

  5. preference

The port subcommand specifies what ports to configure for a specific group command. It has the following formats:

port <voice port#> [ans | called | dest] <E164 address> [desc <description>]
port <voice port#> [desc <description>]
port <voice port#>
port <start voice port#>-<end port#> [ans | called | dest] <E164 address> <interval>
[desc <description>]
port <start voice port#>-<end port#> [ans | called | dest] <E164 address> [desc
<description>]
port <start voice port#>-<end port#> [desc <description>]
port <start voice port#>-<end port#>
port all [ans | called | dest] <E164 address> <interval> [desc <description>]
port all [ans | called | dest] <E164 address> [desc <description>]
port all [desc <description>]
port all
  • The voice port# is composed of slot#/subunit#/port# or slot#/port#.

  • The ans is the abbreviation for answer-address, which has the same meaning as the subcommand under dial-peer voice <tag> pots.

  • The called is the abbreviation for incoming called-number, which has the same meaning as the subcommand under dial-peer voice <tag> pots.

  • The dest is the abbreviation for description, which has the same meaning as the subcommand under dial-peer voice <tag> pots.

  • The <interval> denotes the interval value of the E164 number for each adjacent port. The default is zero and the allowable value is from 1 to 100, inclusively.

  • Multiple port commands are allowed and can be removed one by one with exact port specification or all at once using no port all.

  • No overlay port commands are allowed. As a result, no other port commands are allowed if port all is configured.

Configuring FXS Ports for Supplementary Services

To handle supplementary services for Foreign Exchange Station (FXS) ports, the event handler handles the hookflash or onhook events. Additionally the event handler also sends events events to call control and triggers the supplementary service on SIP SPI. However, currently, FXS ports do not register to Cisco Unified Communications Manager (CUCM) as SIP endpoints. To ensure the FXS port are registered as a SIP endpoint:

  • Each configured FXS ports need to register to CUCM. CUCM creates the database for proper call routing based on the registered endpoint.

  • SIP stack adds or modifies SIP headers content to a proper interface with CUCM and enables new features such as directed call retrieval, call pick-up, and so on.

Figure 1. Supplementary Services for FXS ports

The FXS Ports for Supplementary Services feature is supported on Cisco VG450 Voice Gateway and Cisco 4461 ISR. The FXS ports for Supplementary Services supports CUCM verion 12.5.1 SU1 or later.

Call Transfer

The call transfer status includes the following concepts:

  • Hookflash—A hookflash is a brief interruption in the loop as the system places the active call on hold.

  • On hook—This option completes the call transfer.

The following table describes the call transfer action.

Table 1. Supported Call Transfer Action

State

Action

Result

Response on FXS line

Active call

Controller hookflash

Held call

Second dial tone

Held call and outgoing dialed, alerting, and active call

Controller on hook

Held call and active call transferred

Transfer

Three-Way Conference

A three-way conference call allows three people to participate in a single phone session. The following table describes the three-way conference action.

Table 2. Supported Three-Way Conference Action

State

Action

Result

Active Call

First party hookflash

Held call

First party held and second party active

Active call hookflash

First and second calls are bridged

Three-way conference

Controller on hook

Both call legs torn down

Three-way conference

First called party on hook

Call between controller and first called party terminated. Call between controller and second called party remains active.

Three-way conference

Second called party on hook

Call between controller and second called party terminated, call between controller and first called party remains

Three-way conference

Controller hookflash

Call between controller and second called party terminated, call between controller and first called party remains

Configuring the Device Control Session Application for SIP

SUMMARY STEPS

  1. enable
  2. configure terminal
  3. application global service default dsapp
  4. param dial-peer number
  5. param callWaiting string
  6. param callConference string
  7. param callTransfer string

DETAILED STEPS

  Command or Action Purpose

Step 1

enable

Example:


Router> enable

Enables privileged EXEC mode.

  • Enter your password if prompted.

Step 2

configure terminal

Example:


Router# configure terminal

Enters global configuration mode.

Step 3

application global service default dsapp

Example:

router(config)#application
router(config-app)#global
router(app-global)#service default dsapp	

(Optional) Enables the new hookflash functionality globally. Device Control Session Application (DSAPP) drives these hookflash features and it must be configured for new bookflash functionality for an application framework module in IOS. DSAPP can be configured globally or on a dial-peer basis.

Note


This is a global configuration command. After you configure this command, all the calls are impacted. Even a FXO call will be controlled by DSAPP application which can lead to a failure. If the gateway is controlled by a DSAPP application, it is not recommended to make DSAPP as the default call controler.

Step 4

param dial-peer number

Example:

router(config)#application
router(config-app)#service dsapp
router(app-global)#param dial-peer 100

If multiple dial-peer matches are made for the destination-pattern, dial-peer 100 command is used.

Note

 
When you configure DSAPP on a dial-peer basis, specify a VOIP dial-peer for any outbound call. If all outbound calls that use the hookflash functionality are on the same server, it is recommended to use the param dial-peer command.

When multiple matches are possible on hookflash, enable peer parameters callXXXX TRUE for DSAPP to interpret hookflash to SIP supplementary service messages.

Step 5

param callWaiting string

Example:

router(config)#application
router(config-app)#service dsapp
router(app-global)#param dial-peer 100
router(app-global)#param callWaiting TRUE

Enables call waiting feature.

Step 6

param callConference string

Example:

router(config)#application
router(config-app)#service dsapp
router(app-global)#param dial-peer 100
router(app-global)#param callWaiting TRUE
router(app-global)#param callConference TRUE

Enables call conference feature.

Step 7

param callTransfer string

Example:

router(config)#application
router(config-app)#service dsapp
router(app-global)#param dial-peer 100
router(app-global)#param callWaiting TRUE
router(app-global)#param callConference TRUE
router(app-global)#param callTransfer TRUE

Enables call transfer feature.

Configuring the Outbound Voip Dial-peer

Outbound dial-peer is configured like regular voip dial-peer for SIP. In addition to the parameters required, the following configurations are required:

  • service dsapp—specifyies that the dial-peer is controlled by DSAPP application.

  • session transport tcp—specifyies only TCP signaling is supported.

  • voice-class sip extension gw-ana— this parameter is used to interop with CUCM

  • voice-class sip bind control source-interface GigabitEthernetx/y/z—indicates this interface’s mac address as the base mac.

  • dual tone multifrequency (DTMF)—Specify how a Session Initiation Protocol (SIP) gateway relays dual tone multifrequency (DTMF) tones between telephony interfaces and an IP network. It supports SIP-Notify, SIP-KPML and RTP-NTE. It can be configured with any of these options.

dial-peer voice 714281111 voip
 service dsapp
 destination-pattern .+
 session protocol sipv2
 session target ipv4:172.16.0.
 incoming called-number 7141116...
 voice-class sip bind control source-interface GigabitEthernet0/0/0
 codec g711ulaw

Note- G711 is the only codec supported for conference calls. It is recommended to add this command.
Example for dtmf relay
dtmf-relay method1 [...[method6]]

dtmf-relay sip-nofity
dtmf-relay  sip-kpml
dtmf-relay rtp-nte

Configuring Pots Dial-peer

You can configure the pots dial-peer like a regular pots dial-peer for FXS. In addition to the parameters required, you have to configure the following command under pots dial-peer to interpret HF correctly and interop with CUCM:

  • service dsapp—specifyies this dial-peer to be controlled by DSAPP application.

  • voice-class sip extension gw-ana– this parameter is used to interop with CUCM.

dial-peer voice 19993000 pots                                                                                                 
 service dsapp                                                                                                                
 destination-pattern 2124506300                                                                                               
 voice-class sip extension gw-ana                                                                                             
 port 3/0/0                                                                                                                   

Configuring Voice-card and SIP

When you configure the voice-card, all the traffic should go through the CUCM and the hairpin calls are not supported. You have to configure no local-bypass command for the voice-card that have FXS SIP endpoints.

For FXS SIP endpoints to register, configure the registrar IP address under the sip-ua mode and use the TCP as the transport type. UDP protocal is not supported.

!                                                                                                                             
voice-card 3/0                                                                                                                
 no local-bypass                                                                                                              
 no watchdog                                                                                                                  
!
!                                                                                                                             
sip-ua                                                                                                                        
 registrar ipv4:172.16.0.0 expires 3600 tcp                                                                                
 protocol mode dual-stack                                                                                                     
!

Enabling Device Control Session Application Line features

To register to CUCM as a SIP endpoint, and to distinguish line feature from trunk, you should configure the dsapp line command.

SUMMARY STEPS

  1. enable
  2. configure terminal
  3. dsapp line

DETAILED STEPS

  Command or Action Purpose

Step 1

enable

Example:


Router> enable

Enables privileged EXEC mode.

  • Enter your password if prompted.

Step 2

configure terminal

Example:


Router# configure terminal

Enters global configuration mode.

Step 3

dsapp line

Example:

router(config)#
router(config)#dsapp line
router(config)#	

Specifies the format of each call feature.

Note


If you do not configure the dsapp line command, the gateway will act like a SIP trunk and the analog phones may not register as SIP endpoints. Also, you cannot configure the FAC. Ensure to configure the dsapp line command to enable the FXS for SIP supplementary services.

Configuring Feature Access Code

The dsapp line feature access-code command invokes the feature to translate the Feature Access Code (FAC) to the format that the CUCM understands. If you do not configure this command, the whole FAC digits are sent to the CUCM and may not invoke features. You can also change the default FAC in the sub-mode.

Analog phones do not have soft keys. The required supplementary service features are invoked through FAC. By default, prefix of the FAC is ‘**’ and it can also be changed using the CLI command.

router(config)#dsapp line feature access-code
router(config-dsappline-fac)#prefix *#
router(config-dsappline-fac)#cancel-call-waiting **4
router(config-dsappline-fac)#exit
router# show dsapp line feature codes
  dsapp line feature access-code
    prefix *#
    call forward all *#1
    call forward cancel *#2
    pickup local *#5
    pickup group *#7
    pickup direct *#6
    cancel-call-waiting **4
    last-redial *#3

If the dsapp line feature access-code is not configured, the voice gateway does not translate the FAC to the format that the CUCM understands. The whole FAC digits is sent to the CUCM.

After the FAC is disabled and re-enabled, all the FAC and prefix are rolled back to the default values.

router(config)#no dsapp line feature access-code                                                                                            
  Feature access-code disabled                                                                                                                 
router(config)#do show dsapp line feature codes                                                                                             

  dsappline feature access-code disabled

router(config)#dsapp line feature access-code
router(config-dsappline-fac)#do show dsapp line feature codes

  dsapp line feature access-code
    prefix **                   
    call forward all **1        
    call forward cancel **2
    pickup local **5
    pickup group **7
    pickup direct **6
    cancel-call-waiting **9
    last-redial **3

router(config-dsappline-fac)#do show run | b dsapp line                                                                                     
dsapp line                                                                                                                                     
!                                                                                                                                              
dsapp line feature access-code                                                                                                                 
! 

Autoconfiguration

To enable the autoconfiguration, use the ccm-manager sipana auto-config local command. To get the XML configuration file, use the ccm-manager config server command to download the configuration file from the CUCM TFTP server.

! 
ccm-manager sipana auto-config local GigabitEthernetx/y/z
!
ccm-manager config server x.x.x.x   

Note


For DSAPP autoconfiguration, add only the dial-peer. After the auto-config is enabled, only the dial-peers are added for each endpoint configured on CUCM.


Verifying the Device Control Session Application Configuration

Use the following commands to verify the the DSAPP configuration:

  • show dsapp line device summary

  • show dsapp line feature codes

  • show ccm-manager config-download

The show dsapp line device summary command shows whether the FXS ports are successfully registered to the CUCM as SIP endpoints.

router#show dsapp line device summary
Total Devices:           3
Port       Device          Registration  Dev     Directory   Last Number
Identifier Name            State         Type    Number      Dialed
---------- --------------- ------------- ------- ----------- -----------
3/0/0      ANDD309DD761600 REGISTERED    ALG     2124506300  Not Avail
3/0/1      ANDD309DD761601 REGISTERED    ALG     2124506301  Not Avail
3/0/2      ANDD309DD761602 UNREGISTERED  ALG     2124506302  Not Avail
router#	

The show dsapp line feature codes command shows whether FAC is enabled and feature codes

router#show dsapp line feature codes

  dsapp line feature access-code
    prefix **
    call forward all **1
    call forward cancel **2
    pickup local **5
    pickup group **7
    pickup direct **6
    cancel-call-waiting **9
    last-redial **3

router#

The show ccm-manager config-download command provides download status and history of the auto-configuration.

Art_Utah_73#show ccm-manager config-download 
 
SIP Line Side Analog auto-configuration status
===============================================================
Registered with Call Manager: Yes
Local interface: GigabitEthernet0/0/0 (2c5a.0fc8.8b70)
Current version-id: 1541004382-f60b9ac2-ce5b-439e-92e5-02b62e26d15c
Current config applied at: 16:47:40 UTC Oct 31 2018
Gateway downloads succeeded: 2
Gateway download attempts: 2
Last gateway download attempt:  16:47:40 UTC Oct 31 2018
Last successful gateway download: 16:47:40 UTC Oct 31 2018
Current TFTP server: 172.19.156.84
Gateway resets: 1
Managed endpoints: 3
Endpoint downloads succeeded: 6
Endpoint download attempts: 6
Last endpoint download attempt:  16:47:40 UTC Oct 31 2018
Last successful endpoint download: 16:47:40 UTC Oct 31 2018
Endpoint resets: 0
Endpoint restarts: 0
 
Configuration Error History:

Autoconfiguration for SCCP

To enable autoconfigruationo on CUCM controlled SCCP endpoints (STCAPP endpoints), you have to configure both CUCM and voice gateway . STCAPP gateway supports configuration downloaded from CUCM. In this scenario, you have to first configure the CUCM and then push the configurations to voice gateway so that the voice gateway can generate the associated configurations.

There are two ways to reset/reconfigure:

  • Voice gateway can initiate the process and download the configuration XML file to voice gateway.

    Or
  • CUCM can trigger the download by sending RESET message to gateway.

    • Voice gateway starts dowloading the configurations XML file.

    • In the later sections, this is refered as CUCM push configuration to voice gateway.

Prerequisites

For autoconfiguration, voice gateway requires the following basic configuration:

  • Download the autoconfiguration file from CUCM and set the configuration server to CUCM.
    ccm-manager config server x.x.x.x - This is the CUCM IP address.
  • To download the XML file, must use the ccm-manager sccp local FastEthernet0/0 interface.

  • SCCP msut specify the ethernet interface sccp local FastEthernet0/0

Domain Name Server (DNS) requires the following basic configuration:

  • DNS IP address must be present.
    ip name-server x.x.x.x - This is the DNS server IP address.
  • If the network does not have a DNS, then configure CUCM IP address.
    ccm x.x.x.x identifier <ccm_id> version 7.0
    sccp ccm group <group_id>
    associate ccm <ccm_id> priority <priority>”
    sccp To enable the auto-config
    “ccm-manager sccp
  • To enable STCAPP, configure the stcapp ccm group.
    Stcapp ccm-group <group_id>
  • Enable the STCAPP.
    Stcapp

STCApp Autoconfiguration

To enable autoconfiguration:

Before you begin

Procedure


Step 1

When you execute the ccm-manager sccp command for the first time, the autoconfiguration initiates a configuration file download request to the configuration server.

Step 2

After the configuration file is downloaded, the XML file will be parsed to determine the following CUCM details: CUCM name, Ports configured in CUCM, and each port’s network locale (translated into voice-port as cptone)

Step 3

Once the CUCM name is identified, autoconfiguration will use the DNS to resolve the IP of the serger. In case, if the DNS is not available, the CUCM IP address must be manually configured.

Step 4

When CUCM adds a port in the configuration, you can go to the device (gateway) and click ApplyConfig which will push the configuration XML file to gateway.

  1. After the configuration XML file is pusbed to the gateway, the gateway will apply the newly added port to its running configuration.

Step 5

For the modified ports, CUCM will send a reset request to restart the port.

Step 6

For the deleted ports, CUCM will push the new XML file to voice gateway.

  1. Voice gateway will parse it and remove the dial-peers of the deleted ports.

Note


When you click ApplyConfig, there will be a service interruption for a short period of time.


Configuring STCAPP Autoconfiguration

To enable auto-configuration:

Before you begin

Ensure that the prerequisities are confurated. For more information on the prerequisities, see the STCApp Autoconfiguration section.

Procedure


Step 1

After the configuration file is downloaded, voice gateway parses it. The voice gateway creates the corresponding CLIs/dial-peer running configurations.

  1. The voice port cptone is updated according to the network locale.

Step 2

The voice gateway starts the SCCP and STCAPP. This ensures that the voice gateway is up and running.

Step 3

Users can save this running configuration.

Step 4

For voice port configuration, the initial timeout and the inter-digit timeout is set to 60 seconds. This value is set by the voice gateway and it is not downloaded from CUCM.

Step 5

After the voice gateway is up and running, CUCM modifies the following:

  1. If a port or multiple ports are added on the CUCM, then the CUCM accesses the gateway level, and clicks ApplyConfig. This trigers the CUCM to push the XML file to voice gateway. The voice gateway parses it and adds the newly created ports on CUCM (including the dial-peer CLIs) .

  2. If a port is modified on the CUCM, the voice gateway will receive a message StationReset to RESET that port. User needs to go to the gateway level and click ApplyConfig to push the configuration to voice gateway. The voice gateway will update the cptone according to CUCM’s network locale configuration

  3. If a port or multiple ports are deleted on the CUCM and if a user clicks ApplyConfig at the gateway level, a XML file will be pushed to voice gateway.

Step 6

To remove a port at both CUCM and voice gateway follow these steps:

  1. Go to the gateway, and see if all the ports are configured.

  2. Go to the port that needs to be deleted.

  3. At the port level, click Delete and confirm to delete the port.

  4. Go back to gateway level and click Save.

  5. At the gateway level, click ApplyConfig.

  6. After the ports are removed, an XML file is pushed to voice gateway.

  7. The voice gateway will first delete all the dial-peers that are configured.

  8. The voice gateway will readd them all back according to the new XML file.


STCApp Autoconfiguration Examples

This section provides the sample configuration for the STCApp autoconfiguration.

Example: Prerequisities Configuration

This example shows the prerequisities configuration which is required if there is no DNS in the network.

ccm-manager config server 1.5.29.100
ccm-manager sccp local FastEthernet0/0
ccm-manager sccp
!
!
sccp local FastEthernet0/0
sccp ccm 1.5.29.100 identifier 10 version 7.0

sccp ccm group 1
 associate ccm 10 priority 1

Example: STCAPP Auto-config

This example shows the console messages of the STCAPP autoconfiguration.

Art_224_30(config)#ccm-manager sccp
Art_224_30(config)#
Loading SKIGW0C86385E3D.cnf.xml from 1.5.29.100 (via FastEthernet0/0): !
[OK - 6559 bytes]

Translating "CUCM-10-5"

sccp ccm CUCM-10-5 identifier 1 version 4.1
          ^
% Invalid input detected at '^' marker.

Selected CCM identifier is not configured in global SCCP configuration mode;
Please configure it in global SCCP config mode and then retry.
SCCP operational state bring up is successful.
Loading AN0C86385E3D400.cnf.xml from 1.5.29.100 (via FastEthernet0/0): !
[OK - 5414 bytes]

Loading AN0C86385E3D401.cnf.xml from 1.5.29.100 (via FastEthernet0/0): !
[OK - 5414 bytes]

Loading AN0C86385E3D402.cnf.xml from 1.5.29.100 (via FastEthernet0/0): !
[OK - 5414 bytes]

*Mar  1 00:01:57.291: %SYS-5-CONFIG_I: Configured from console by console
……
*Mar  1 00:01:57.723: %SYS-5-CONFIG_I: Configured from console by console

Example: Adding Dial Peers

This example shows the added dial peers.

sccp local FastEthernet0/0
sccp ccm 1.5.29.100 identifier 10 version 7.0 
sccp
!
sccp ccm group 1
 associate ccm 10 priority 1
!
dial-peer cor custom
!
!
dial-peer voice 999200 pots
 service stcapp
 port 2/0
!
dial-peer voice 999201 pots
 service stcapp
 port 2/1
!         
dial-peer voice 999202 pots
 service stcapp
 port 2/2

Exmaple: Adding a Port

This example show the added port. When a port is added on CUCM, the CUCM clicks ApplyConfig at the gateway level. The new port dial-peer is added.
Loading SKIGW0C86385E3D.cnf.xml from 1.5.29.100 (via FastEthernet0/0): !
[OK - 6559 bytes]

stcapp shutdown initiated... waiting for calls to clear.
stcapp shutdown complete.
Loading AN0C86385E3D400.cnf.xml from 1.5.29.100 (via FastEthernet0/0): !
[OK - 5414 bytes]

Loading AN0C86385E3D401.cnf.xml from 1.5.29.100 (via FastEthernet0/0): !
[OK - 5414 bytes]

Loading AN0C86385E3D402.cnf.xml from 1.5.29.100 (via FastEthernet0/0): !
[OK - 5414 bytes]

*Mar  1 00:20:40.999: %SYS-5-CONFIG_I: Configured from console by console
……
*Mar  1 00:20:41.427: %SYS-5-CONFIG_I: Configured from console by console

Running Config:

dial-peer voice 999200 pots
 service stcapp

Example: Modifying a Port

This example show the modified port. When a port’s setting is modified, user need to go to gateway level and click ApplyConfig. The voice will parse the configuration and run the cptone configuration on the voice-port.
Loading SKIGW0C86385E3D.cnf.xml from 1.5.29.100 (via FastEthernet0/0): !
[OK - 6532 bytes]

stcapp shutdown initiated... waiting for calls to clear.
stcapp shutdown complete.
Loading AN0C86385E3D400.cnf.xml from 1.5.29.100 (via FastEthernet0/0): !
[OK - 5387 bytes]

Loading AN0C86385E3D401.cnf.xml from 1.5.29.100 (via FastEthernet0/0): !
[OK - 5414 bytes]

Loading AN0C86385E3D402.cnf.xml from 1.5.29.100 (via FastEthernet0/0): !
[OK - 5414 bytes]

*Mar  1 01:24:08.207: %SYS-5-CONFIG_I: Configured from console by console
……
*Mar  1 01:24:08.627: %SYS-5-CONFIG_I: Configured from console by console
Art_224_30#

Running config:

voice-port 2/0
……
 cptone JP
 timeouts initial 60
 timeouts interdigit 60
 timeouts ringing infinity
 caller-id enable

Eample: Deleting a Port

This example show the deleted port. When a port is deleted on CUCM, and CUCM clicks ApplyConfig”at the gateway level. The dial-peer associated with that port on the gateway will be removed.

Before port deletion on CUCM:

dial-peer voice 999200 pots
 service stcapp
 port 2/0
!
dial-peer voice 999201 pots
 service stcapp
 port 2/1
!         
dial-peer voice 999202 pots
 service stcapp
 port 2/2


After port 2/0 deleted on CUCM:

!
dial-peer voice 999201 pots
 service stcapp
 port 2/1
!         
dial-peer voice 999202 pots
 service stcapp
 port 2/2