Bring-up Cisco NCS 1004

After installing the hardware, boot the Cisco NCS 1004 system. You can connect to the XR console port and power on the system. NCS 1004 completes the boot process using the pre-installed operating system (OS) image. If no image is available, NCS 1004 can be booted using the iPXE boot, an external bootable USB drive, or Golden ISO.

After booting, create the root username and password, and then use it to log on to the XR console. From the XR console, access the System Admin console to configure system administration settings.

Boot Sequence

The boot sequence in NCS 1004 that you need to follow is:

  1. Boot using SSD (hard disk)

  2. Boot using USB drive

  3. Boot using iPXE

  4. Boot using ZTP

  5. Boot using Golden ISO

If there is no bootable image in all the above boot options, reboot the system.

Boot NCS 1004

Use the console port to connect to NCS 1004. By default, the console port connects to the XR mode. If required, subsequent connections can be established through the management port, after it is configured.

Procedure


Step 1

Connect a terminal to the console port of the RP.

Step 2

Start the terminal emulation program on your workstation.

The console settings are 115200 bps, 8 data bits, 2 stop bits and no parity.

Step 3

Power on NCS 1004.

To turn on the power shelves, press the power switch up. As NCS 1004 boots up, the boot process details are displayed at the console of the terminal emulation program.

Step 4

Press Enter.

The boot process is complete when the system prompts you to enter the root-system username. If the prompt does not appear, wait for a while to give NCS 1004 more time to complete the initial boot procedure; then press Enter.

Important 

If the boot process fails, it may be because the pre-installed image on the NCS 1004 is corrupt. In this case, the NCS 1004 can be booted using an external bootable USB drive.


Boot NCS 1004 Using USB Drive

The bootable USB drive is used to re-image the NCS 1004 for the purpose of system upgrade or to boot the NCS 1004 in case of boot failure. A bootable USB drive is created by copying a compressed boot file into a USB drive. The USB drive becomes bootable after the contents of the compressed file are extracted.

This task can be completed using the Windows, Linux, or MAC operating systems available on your local machine. The exact operation to be performed for each generic step outlined here depends on the operating system in use.

Before you begin

  • You need a USB drive with a storage capacity of at least 4 GB.

  • NCS 1004 software image can be downloaded from Software Download page on cisco.com.

  • Copy the compressed boot file from the software download page at cisco.com to your local machine. The file name for the compressed boot file is in the format ncs1004-usb-boot-<release_number>.zip. For example, ncs1004-usb-boot-7.0.1.zip.

Procedure


Step 1

Connect the USB drive to your local machine and format it with the FAT32 file system.

Step 2

Copy the compressed boot file to the USB drive.

Step 3

Verify that the copy operation is successful. To verify, compare the file size at source and destination. Also, verify the MD5 checksum value.

Step 4

Extract the content of the compressed boot file by unzipping it in the USB drive. This makes the USB drive a bootable drive.

Note 
The content of the zipped file ("EFI" and "boot" directories) must be extracted directly in the root folder of the USB drive. If the unzipping application places the extracted files in a new folder, move the "EFI" and "boot" directories to the root folder of the USB drive.
Step 5

Insert the USB drive in one of the USB ports of NCS 1004.

Step 6

Reboot NCS 1004 using power cycle or console.

Step 7

Press Esc to enter BIOS.

Step 8

Select the Save & Exit tab of BIOS.

BIOS
Step 9

Choose IOS -XR Install.

The system detects USB and boots the image from USB.


Admin Console:
GNU GRUB version 2.00
Press F2 to goto grub Menu..
Booting from USB..
Loading Kernel..

Validating End Entity Certificate...

Validating SubCA Certificate...

Validating Root Certificate...
Loading initrd..

Validating End Entity Certificate...

Validating SubCA Certificate...

Validating Root Certificate...
CiscoSec: Image signature verification completed.
XR Console:
CiscoSec: Image signature verified.
[    9.957281] i8042: No controller found
Starting udev
udevd[972]: failed to execute '/etc/udev/scripts/network.sh' '/etc/udev/scripts/network.sh': No such file or directory
Populating dev cache
Running postinst /etc/rpm-postinsts/100-dnsmasq...
update-rc.d: /etc/init.d/run-postinsts exists during rc.d purge (continuing)
 Removing any system startup links for run-postinsts ...
  /etc/rcS.d/S99run-postinsts
Configuring network interfaces... done.
Step 10

Remove the USB drive. The NCS 1004 reboots automatically.


Setting maximal mount count to -1
Setting interval between checks to 0 seconds
Fri Dec 11 20:35:56 UTC 2015: Install EFI on /dev/mb_disk4
Fri Dec 11 20:35:57 UTC 2015: Install finished on mb_disk
Rebooting system after installation ...
[  116.973666] reboot: Restarting system
Version 2.17.1245. Copyright (C) 2015 American Megatrends, Inc.                 
BIOS Date: 11/29/2015 12:02:45 Ver: 0ACBZ1110                                   
Press <DEL> or <ESC> to enter setup.                                            
CiscoSec: Image signature verified.


GNU GRUB version 2.00
Press F2 to goto grub Menu..
Booting from Disk..
Loading Kernel..

Validating End Entity Certificate...

Validating SubCA Certificate...

Validating Root Certificate...
Loading initrd..

Validating End Entity Certificate...

Validating SubCA Certificate...

Validating Root Certificate...
CiscoSec: Image signature verification completed.
Initrd, addr=0xff69a000, size=0x955cb0
[    1.745686] i8042: No controller found

Boot Using iPXE

iPXE is a pre-boot execution environment that is included in the network card of the management interfaces and works at the system firmware (UEFI) level of the chassis. iPXE is used to re-image the system, and boot the chassis in case of boot failure or in the absence of a valid bootable partition. iPXE downloads the ISO image, proceeds with the installation of the image, and finally bootstraps inside the new installation.

iPXE acts as a boot loader and provides the flexibility to choose the image that the system will boot based on the Platform Identifier (PID), the Serial Number, or the management mac-address. iPXE must be defined in the DHCP server configuration file.

Setup DHCP Server

A DHCP server must be configured for IPv4, IPv6, or both communication protocols.


Note

For DHCPv6, a routing advertisement (RA) message must be sent to all nodes in the network that indicates which method is to be used to obtain the IPv6 address. Configure Router-advertise-daemon (radvd, install using yum install radvd) to allow the client to send the DHCP request. For example:
interface eth3
{
        AdvSendAdvert on;
        MinRtrAdvInterval 60;
        MaxRtrAdvInterval 180;
        AdvManagedFlag on;
        AdvOtherConfigFlag on;
        prefix 2001:1851:c622:1::/64
        {
                AdvOnLink on;
                AdvAutonomous on;
                AdvRouterAddr off;
        };
};

To setup a DHCP server:

  1. Create the dhcpd.conf file (for IPv4, IPv6 or both communication protocols), dhcpv6.conf file (for IPv6) or both in the /etc/ directory. This configuration file stores the network information such as the path to the script, location of the ISO install file, location of the provisioning configuration file, serial number, MAC address of the chassis.

  2. Test the server once the DHCP server is running:

    For example, for ipv4:
    1. Use MAC address of the chassis:
      host ncs1004 
      {
      hardware ethernet ab:cd:ef:01:23:45;
      fixed-address <ip address>;
      filename "http://<httpserver-address>/<path-to-image>/ncs1004-mini-x.iso";
      }
      Ensure that the above configuration is successful.
    2. Use serial number of the chassis:
      host demo {
      option dhcp-client-identifier "<chassis-serial-number>";
        filename "http://<IP-address>/<hardware-platform>-mini-x.iso";
        fixed-address <IP-address>;
      }

      The serial number of the chassis is derived from the BIOS and is used as an identifier.

      Example
      
      host 10.89.205.202 {
             hardware ethernet 40:55:39:56:0c:e8;
                if exists user-class and option user-class = "iPXE" {
                filename "http://10.89.205.127/box1/ncs1004-mini-x-7.0.1.iso";
             } else {
                 filename "http://10.89.205.127/box1/StartupConfig.cfg";
             }
             fixed-address 10.89.205.202;
          }
      

Boot Using iPXE

Before you use the iPXE boot, ensure that:

  • DHCP server is set and is running.

  • You have logged in to the System Admin console using the admin command.

Run the following command to invoke the iPXE boot process to reimage the chassis:
hw-module location all bootmedia network reload
Example:
sysadmin-vm:0_RP0# hw-module location all bootmedia network reload
Tue Feb 12 15:29:57.376 UTC
Reload hardware module ? [no,yes]
The following example shows the output of the command:
 
iPXE 1.0.0+ (3e573) -- Open Source Network Boot Firmware -- http://ipxe.org
Features: DNS HTTP TFTP VLAN EFI ISO9660 NBI Menu
Trying net0...
net0: c4:72:95:a6:14:e1 using dh8900cc on PCI01:00.1 (open)
[Link:up, TX:0 TXE:0 RX:0 RXE:0]
Configuring (net0 c4:72:95:a6:14:e1).................. Ok << Talking to DHCP/PXE server to obtain network information
net0: 10.37.1.101/255.255.0.0 gw 10.37.1.0
net0: fe80::c672:95ff:fea6:14e1/64
net0: 2001:1800:5000:1:c672:95ff:fea6:14e1/64 gw fe80::20c:29ff:fefb:b9fe
net1: fe80::c672:95ff:fea6:14e3/64 (inaccessible)
Next server: 10.37.1.235
Filename: http://10.37.1.235/ncs1004/ncs1004-mini-x.iso
http://10.37.1.235/ ... 58% << Downloading file as indicated by DHCP/PXE server to boot install image

Boot Using ZTP

Zero Touch Provisioning (ZTP) is used to deploy minimal configurations on several chassis. ZTP is used to boot, set up, and configure the system. Configurations such as configuring the management ethernet interface, installing SMUs, applications, and optional packages can be automated using ZTP. ZTP does not execute if a user name is already configured in the system.

ZTP auto provisioning involves:
  • Configuration: Downloads and executes the configuration files. The first line of the file must contain !! IOS XR for ZTP to process the file as a configuration.

  • Script: Downloads and executes the script files. These script files include a programmatic approach to complete a task. For example, scripts created using IOS XR commands to perform patch upgrades. The first line of the file must contain #! /bin/bash or #! /bin/sh for ZTP to process the file as a script.

The user can either use the ZTP bash script or the ZTP configuration file.


host ncs1004 {
  #hardware ethernet 00:a0:c9:00:00:00; 
  option dhcp-client-identifier "<chassis-serial-number>";
     filename "http://<IP-address>/<folder>/ncs1004-ztp.script";
     #filename "http://<IP-address>/<folder>/ncs1004-ztp.cfg";
  }

The following is the sample content of the ZTP bash script.


#! /bin/bash
#
# NCS1004 Demo Sample
# ZTP installation of config and day-0 SMU's
#
source ztp_helper

wget http://downloads.sourceforge.net/project/yourcode/application.tgz
#install the downloaded application.tgz

#Run XR CLI’s from the script
`xrcmd “show version”`

The following is the sample content of the ZTP configuration file. The user can automate all the configurations.


!! IOS XR Configuration version = 7.0.1
!
telnet vrf default ipv4 server max-servers 20
!
vty-pool default 0 20 line-template default
!
interface MgmtEth0/RP0/CPU0/0
 ipv4 address dhcp
 no shutdown
!
router static
 address-family ipv4 unicast
  0.0.0.0/0 10.77.132.1
!
end

Boot NCS 1004 Using Golden ISO

Golden ISO is a feature provided to the user to build customized ISO using mini ISO, required SMUs, and IOS XR configuration.

Before the introduction of Golden ISO feature, the user must perform the following three steps, to install a new image.

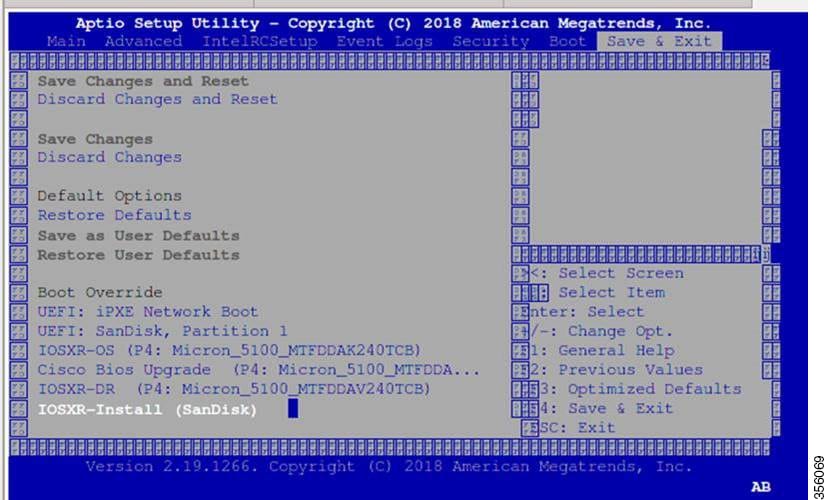
  1. Boot the system with mini ISO. This can be done using iPXE or USB boot.

  2. Install, add, and activate all the relevant SMUs and optional packages on to NCS 1004. NCS 1004 reloads on reload of any SMUs.

  3. Apply IOS XR configuration.

Benefits of Golden ISO

  • Saves installation effort and time.

  • System is available in a single command and boot.

Golden ISO is built using ‘gisobuild.py’script available at /pkg/bin/gisobuild.py location.

Build Golden ISO

The following command is used to build Golden ISO.

gisobuild.py -i./ncs1004-mini-x.iso -r ./rpm-directory -c ./xr-config -1 label

rpm-directory - Directory where SMUs (xr, calvados and host) are copied.

xr-config - IOS XR configuration to be applied to the system after booting.

label - Label of Golden ISO.


Note

The user must copy /pkg/bin/gisobuild.py from NCS 1004 to the linux environment and use the following command to build the Golden ISO image.


python gisobuild.py -i ./ncs1004-mini-x-7.0.1.04I.iso -r. -c startup_new.cfg -l v2
System requirements check [PASS]
Golden ISO build process starting...

Platform: ncs1004 Version: 7.0.1.04I

XR-Config file (/bh/bosshogg_images/r701/701_04I_DT_IMAGE/giso/startup_new.cfg) will be encapsulated in Golden ISO.

Scanning repository [/bh/bosshogg_images/r701/701_04I_DT_IMAGE/giso]...

Building RPM Database...
Total 1 RPM(s) present in the repository path provided in CLI

Following XR x86_64 rpm(s) will be used for building Golden ISO:

(+) ncs1004-k9sec-2.1.0.0-r70104I.x86_64.rpm

...RPM compatibility check [PASS]

Building Golden ISO...
Summary .....

XR rpms:
ncs1004-k9sec-2.1.0.0-r70104I.x86_64.rpm

XR Config file:
router.cfg

...Golden ISO creation SUCCESS.

Golden ISO Image Location: /bh/bosshogg_images/r701/701_04I_DT_IMAGE/giso/ncs1004-goldenk9-x-7.0.1.04I-v2.iso

Detail logs: /bh/bosshogg_images/r701/701_04I_DT_IMAGE/giso/Giso_build.log-2019-03-20:15:47:19.516203

Golden ISO file is created in the following format:

platform-name-golden-x.iso-version.label (does not contain security(*k9sec*.rpm) rpm)

Example: ncs1004-golden-x-7.0.1.014I-V1.iso

platform-name-goldenk9-x.iso-version.label (contains security(*k9sec*.rpm) rpm)

Example: ncs1004-goldenk9-x-7.0.1.014I-V1.iso

Verify Boot Operation

Procedure


show version

Example:

RP/0/RP0/CPU0:ios# show version
Wed Aug 28 11:13:19.718 IST       
Cisco IOS XR Software, Version 7.1.1
Copyright (c) 2013-2020 by Cisco Systems, Inc.
 
Build Information:
Built By     : nkhai
 Built On     : Tue Jan  7 16:02:50 PST 2020
 Build Host   : iox-lnx-072
 Workspace    : /auto/iox-lnx-072-san1/prod/7.1.1/ncs1004/ws
 Version      : 7.1.1
 Location     : /opt/cisco/calvados/packages/
 Label        : 7.1.1
System uptime is 11 hours, 42 minutes

Compare the displayed version with the boot image version. The versions need to be the same.


Bring-up Line Card

Procedure


Step 1

Insert the line card on the slot.

Step 2

Wait until the LED on the line card turns Green.

Step 3

Upgrade the FPDs of the line card depending on the output of show hw-module location 0/line-card-slot fpd command.


Disaster Recovery

When CPU or NCS 1004 chassis must be replaced, the Disaster Recovery feature allows the user to restore the node configuration with minimum downtime. The feature works without console access. Before replacing CPU, use the graceful-recovery backup initiate command to back up the XR configuration. The node will also back up the running XR configuration after 20 mins. After reboot, the node backs up the XR configuration immediately.

CPU Replacement

The following points must be considered for CPU replacement.

  • The node runs in headless mode.

  • The user can insert the CPU with SSD and the node starts to boot the OS from CPU SSD.

  • The version of the images in CPU or chassis SSD are compared.

  • If the version is different, configuration is taken from chassis SSD as the chassis golden image has priority.

  • If the version is same, the node boots up. This version comparison happens upon each reboot including power cycle.

  • The configuration is always taken from the chassis. If the chassis SSD is not functional, the node boots with only the CPU.

Chassis Replacement

The following points must be considered for chassis replacement.

  • Chassis replacement involves minimum downtime.

  • When the chassis is obtained, the user can connect the CPU and boot. After receiving the empty chassis through RMA, the user can insert the CPU and same configuration is restored.

  • CPU swap from other units is also supported; however, the chassis image and configuration will be replaced in the CPU.

Access the System Admin Console

All the system administration and hardware management setups are performed from the System Admin console.

Procedure


Step 1

Login to the XR console as the root user.

Step 2

Type Ctrl + O to access the console logs.

Example:

RP/0/RP0/CPU0:ios# Ctrl + O

RP/0/RP0/CPU0:ios#
Disconnecting from 'default-sdr--1' console. Continue(Y/N)?


Y
Connecting to 'sysadmin' console

System Admin Username: root
Password:
root connected from 127.0.0.1 using console on sysadmin-vm:0_RP0
sysadmin-vm:0_RP0#
After you enter the System Admin console, the prompt changes to:
sysadmin-vm:0_RP0#

Configure Management Interface

To use the management interface for system management and remote communication, you must configure an IP address and subnet mask for the management ethernet interface. To communicate with devices on other networks (such as remote management stations or TFTP servers), you need to configure a default (static) route for NCS 1004.

Before you begin

  • Consult your network administrator or system planner to procure IP addresses and a subnet mask for the management port.

  • Ensure that the management port is connected to the management network.

Procedure


Step 1

configure

Example:

RP/0/RP0/CPU0:ios# configure
Enters XR configuration mode.
Step 2

interface mgmtEth rack/slot/instance/port

Example:

RP/0/RP0/CPU0:ios(config)# interface mgmtEth 0/RP0/CPU0/0

Enters interface configuration mode for the management interface.

Step 3

ipv4 address ipv4-address subnet-mask

Example:

RP/0/RP0/CPU0:ios(config-if)# ipv4 address 10.1.1.1 255.0.0.0

Assigns an IP address and a subnet mask to the interface.

Step 4

no shutdown

Example:

RP/0/RP0/CPU0:ios(config-if)# no shutdown

Places the interface in an "up" state.

Step 5

exit

Example:

RP/0/RP0/CPU0:ios(config-if)# exit

Exits the management interface configuration mode.

Step 6

router static address-family ipv4 unicast 0.0.0.0/0default-gateway

Example:

RP/0/RP0/CPU0:ios(config)# router static address-family ipv4 unicast 0.0.0.0/0 12.25.0.1

Specifies the IP address of the default gateway to configure a static route. This must be used for communication with devices on other networks.

Step 7

Use the commit or end command.

commit-Saves the configuration changes and remains within the configuration session.

end-Prompts user to take one of these actions:

  • Yes-Saves configuration changes and exits the configuration session.

  • No-Exits the configuration session without committing the configuration changes.

  • Cancel-Remains in the configuration session without committing the configuration changes.


What to do next

Configure Telnet and Configure SSH.

Configure Telnet

This procedure allows you to establish a telnet session to the management interface port using its IP address.

Procedure


Step 1

configure

Example:

RP/0/RP0/CPU0:ios# configure

Enters the configuration mode.

Step 2

telnet {ipv4 | ipv6} server max-servers limit

Example:

RP/0/RP0/CPU0:ios(config)# telnet ipv4 server max-servers 10

Specifies the number of allowable Telnet servers (up to 100). By default, no Telnet servers are allowed. You must configure this command to enable the use of Telnet servers.

Step 3

Use the commit or end command.

commit-Saves the configuration changes and remains within the configuration session.

end-Prompts user to take one of these actions:

  • Yes-Saves configuration changes and exits the configuration session.

  • No-Exits the configuration session without committing the configuration changes.

  • Cancel-Remains in the configuration session without committing the configuration changes.


What to do next

Configure SSH

Configure SSH

This procedure allows you to establish a SSH connection to the management interface port using its IP address.

Before you begin

  • Install the ncs1004-k9sec package on NCS 1004. For details about package installation, see Install Packages.

  • Generate the crypto key for SSH using the crypto key generate dsa command.

Procedure


Step 1

configure

Example:

RP/0/RP0/CPU0:ios# configure

Enters the configuration mode.

Step 2

ssh server v2

Example:

RP/0/RP0/CPU0:ios(config)# ssh server v2

Enables the SSH server to accept only SSHv2 client connections.

Step 3

Use the commit or end command.

commit-Saves the configuration changes and remains within the configuration session.

end-Prompts the user to take one of these actions:

  • Yes-Saves configuration changes and exits the configuration session.

  • No-Exits the configuration session without committing the configuration changes.

  • Cancel-Remains in the configuration session without committing the configuration changes.

Step 4

show ssh session details

Example:

RP/0/RP0/CPU0:ios# show ssh session details

Displays a detailed report of the SSHv2 connections to and from NCS 1004.


Tue Feb 12 16:03:51.455 UTC
SSH version : Cisco-2.0

id      key-exchange           pubkey               incipher    outcipher   inmac         outmac
----------------------------------------------------------------------------------------------------
Incoming Sessions
1       ecdh-sha2-nistp256     ecdsa-sha2-nistp256  aes128-ctr  aes128-ctr  hmac-sha2-256 hmac-sha2-256

Outgoing sessions

What to do next

Perform Clock Synchronization with NTP Server

Perform Clock Synchronization with NTP Server

There are independent system clocks for the XR and the System Admin. To ensure that these clocks do not deviate from true time, they need to be synchronized with the clock of a NTP server. In this task, you will configure an NTP server for the XR. After the XR clock is synchronized, the System Admin clock automatically synchronizes with the XR clock.

Before you begin

Configure and connect to the management port.

Procedure


Step 1

configure

Example:

RP/0/RP0/CPU0:ios# configure
Enters XR Configuration mode.
Step 2

ntp server server_address

Example:

RP/0/RP0/CPU0:ios# ntp server 64.90.182.55

The XR clock is configured to be synchronized with the specified sever.