![]()
Editing an SD-WAN Control Plane
To edit a control plane:
Procedure
| Step 1 |
Log in to the Cisco MSX Portal. |
||
| Step 2 |
From the left pane, click Tenant Workspace > Services. |
||
| Step 3 |
In the SD-WAN service panel, click on the ellipsis (...) and click Edit Control Plane. |
||
| Step 4 |
Edit the control plane information that you had provided earlier for the selected site. You can edit the details of the SD-WAN Control Plane, such as URL, organization name, username, and password of the control plane.
|
Editing a Provisioned Device
Use the procedure below to modify the device details after the device is provisioned and has established a connection with the Cisco MSX control plane.
To edit a provisioned device in Cisco SD-WAN:
Procedure
| Step 1 |
Log in to the Cisco MSX portal using your credentials. |
| Step 2 |
From the left hand pane, click Tenant Workspace > Devices. |
| Step 3 |
Select a device and click Device Details. In the Device Template section, click Edit Details to update the configuration details. Click Save. Alternatively, you can also reimport the site template CSV or JSON file with the updated values. For more information on how to import the site template file, see Importing Multiple Site Data from Cisco SD-WAN into MSX. |
| Step 4 |
After you update the device, the Provision Device button is enabled. Click Provision Device to provision the device. The provisioning process on the Control Plane takes approximately 5 to 10 minutes. During this time, Cisco MSX displays various validation messages to validate if the device template variables match with the information on the Control Plane. Depending on the device synchronization status and the validity of template variables passed by the user, device status changes to 'Provisioned' to 'Provisioned Failed'. For more details on these statuses and the next steps, see Monitoring Cisco SD-WAN Device Status. |
Upgrading Control and Data Plane
You can upgrade the software image running on both Control and Data Plane. The upgrade process comprises of uploading the new software image, upgrading the device software, and activating the software image.
 Note |
It is recommended that all devices run the same software version. If this is not possible, you must ensure that the SD-WAN Control Plane server (vManage) software version is higher version than that of vSmart, vBond controller and vEdges. |
Uploading Software Images
Before you can upgrade any device to a new software version, you need to either upload the software image to the SD-WAN Control Plane (vManage) server or point to a remote server on which the software image is available.
To upload the software image:
Procedure
| Step 1 |
Log in to the SD-WAN Control Plane (vManage). For more information, see Logging in to the Cisco SD-WAN Control Plane. |
| Step 2 |
In the Control Plane, select the Maintenance > Software Upgrade.The Maintenance | Software Upgrade screen appears. |
| Step 3 |
Click the Device List button that is located on the right side of the title bar and select Repository. The Software Repository screen appears. |
| Step 4 |
Click Add New Software. |
| Step 5 |
Select the location from which to download the software images. |
| Step 6 |
If you select vManage, the Upload Software to vManage dialog box appears.
|
| Step 7 |
If you select Remote Server, the Location of Software on Remote Server dialog box opens.
|
Upgrading vEdge Devices
To upgrade the software image on a device:
Procedure
| Step 1 |
Log on to vManage. |
| Step 2 |
In vManage, select the Maintenance > Software Upgrade.The Maintenance | Software Upgrade screen appears. |
| Step 3 |
In the title bar, click the vEdge tab. |
| Step 4 |
Verify that the device that needs to be upgraded is reachable. |
| Step 5 |
Select one or more devices on which to upgrade the software image. |
| Step 6 |
Click the Upgrade button. The Software Upgrade dialog box opens. |
| Step 7 |
Select the software version to install on the device. If the software is located on a Remote Server, select the VPN in which the software image is located. |
| Step 8 |
To automatically activate the new software version and reboot the device, select the Activate and Reboot check box. |
| Step 9 |
Click Upgrade. A progress bar indicates the status of the software upgrade. If the control connection to the SD-WAN Control Plane does not come up within the configured time limit, SD-WAN Control Plane automatically reverts the device to the previously running software image. |
Activating New Software Image on vEdge Devices
If you did not select the Activate and boot check box when upgrading the software image, the device continues to use the existing configuration.
To activate new software image on vEdge devices:
Procedure
| Step 1 |
Log on to vManage. |
| Step 2 |
In vManage, select the Maintenance > Software Upgrade.The Maintenance | Software Upgrade screen appears. |
| Step 3 |
In the title bar, click the WAN Edge tab. |
| Step 4 |
Select one or more devices on which to activate the new software image. |
| Step 5 |
Click the Activate button. The Activate Software dialog box opens. |
| Step 6 |
Select the software version to activate on the device. |
| Step 7 |
Click the Activate button. The SD-WAN Control Plane reboots the device and activates the new software image. If the control connection to the SD-WAN Control Plane does not come up within the configured time limit, SD-WAN Control Plane automatically reverts the device to the previously running software image. |
Deleting a Device
The procedure for deleting vEdge Cloud and vEdge SP Cloud is the same. However, deleting a vEdge cloud device is a slower process than deleting a vEdge SP Cloud device, and takes around 5-10 minutes.
Deleting a vEdge cloud device is a three-step process:
-
First, the vEdge device is decommissioned—the configuration on the device is removed, certificates are cleared, and the chassis ID is made available again in SD-WAN Control Plane. At this point, the reachability status will be in Red and overall site status will be Gray.
-
Second, the delete process then undeploy the vEdge device from the ENCS device.
-
Final step is the SD-WAN database clean-up after which device can no longer be viewed on the map.
Note |
Only users with the permission ‘SD-WAN Data Plane’ can delete sites. For more information, see Managing Roles in Cisco MSX. |
Deleting a vEdge SP Cloud is a faster process as this process instantly clears up the SD-WAN database.
This section covers procedure on deleting a customer site on vEdge Cloud and vEdge SP Cloud. For more information on the site status, see Monitoring SD-WAN Service Status.
Deleting a Device
To delete a customer device:
Procedure
| Step 1 |
Log in to the Cisco MSX Portal. |
| Step 2 |
In the main menu, click Dashboard. |
| Step 3 |
Select the tenant from the drop-down. |
| Step 4 |
Click SD-WAN. The SD-WAN Service Offer screen appears. |
| Step 5 |
Click SD-WAN. |
| Step 6 |
Select the SD-WAN service. The SD-WAN screen appears. |
| Step 7 |
In the Map View, click the device that you want to delete. The Device Summary screen appears. 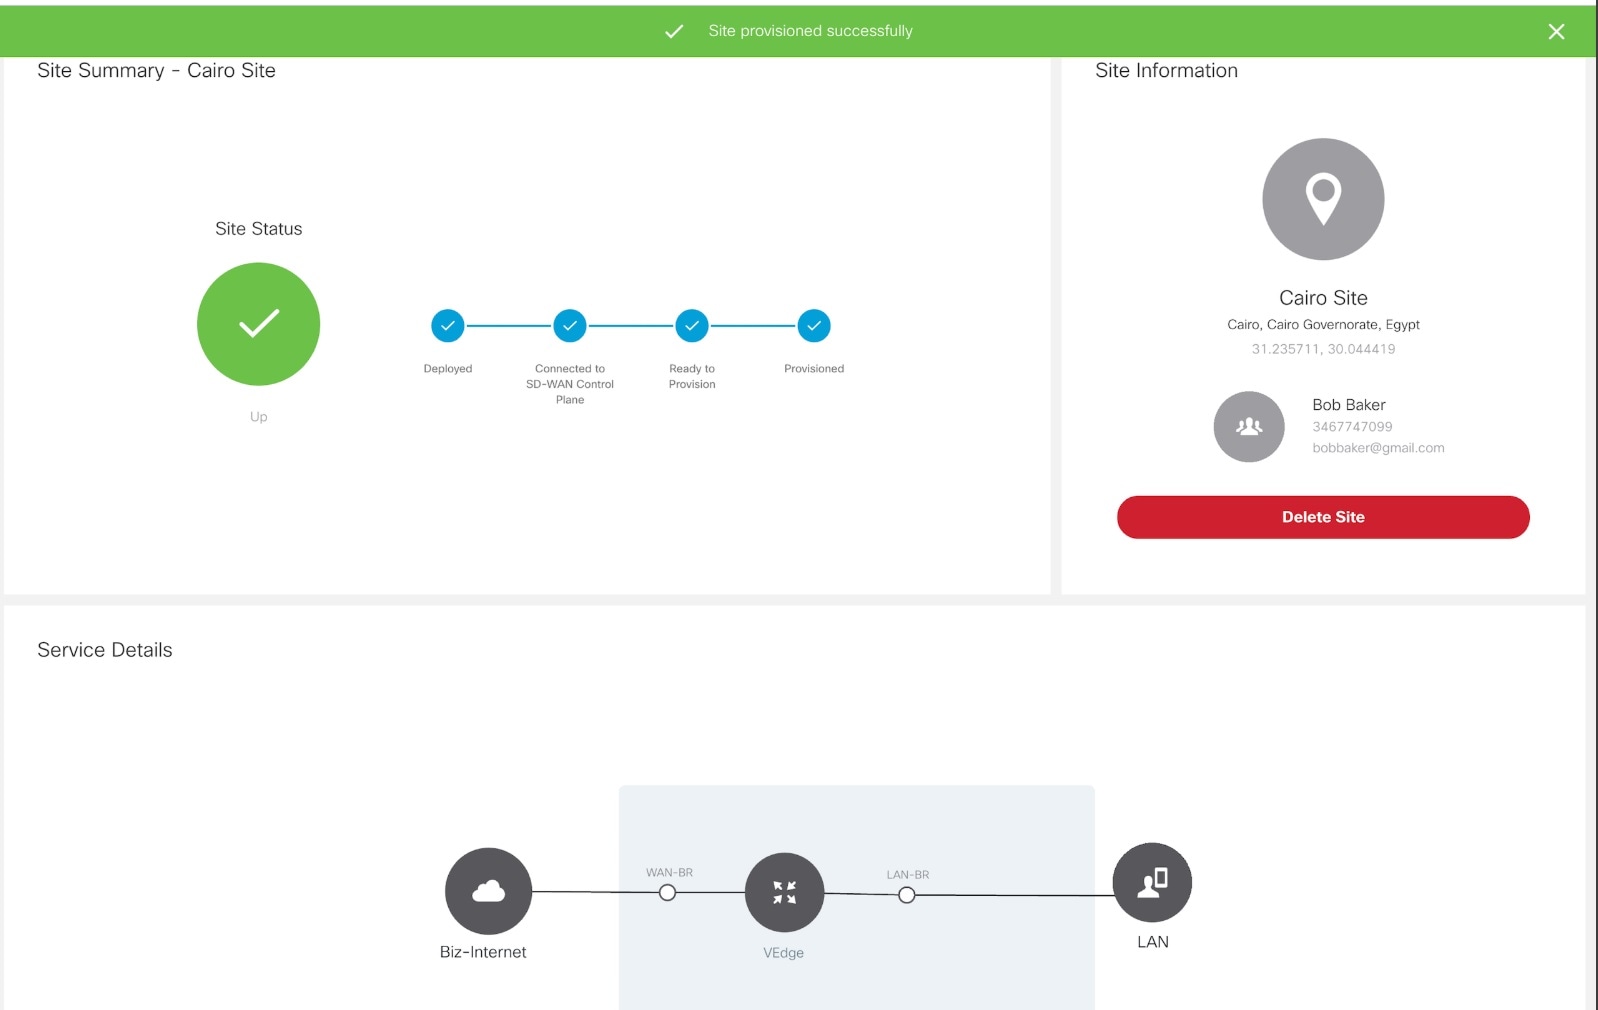
|
| Step 8 |
Click Delete Device. This permanently deletes all information about the site and the device from Cisco MSX. If the delete operation fails, the device status is displayed in the Device Summary as Deleting Failed. In this case, you need to click Force Delete Device. Click Force Delete Device in the confirmation window. This deletes all the information about the device from Cisco MSX. 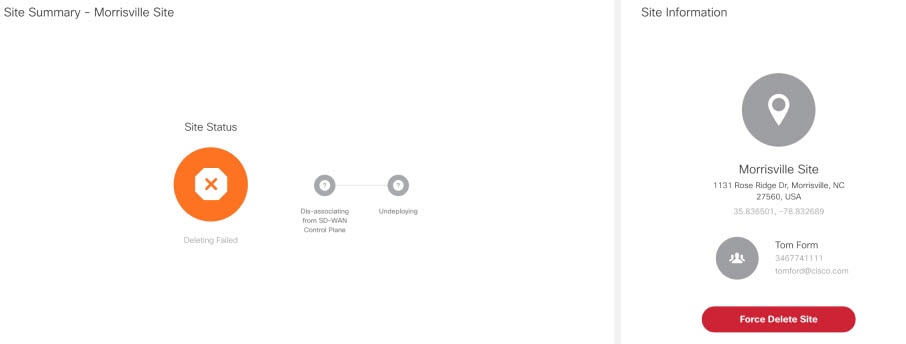
|
Detaching an SD-WAN Control Plane
After you detach a control plane, management of any ENCS devices used to deploy vEdge Cloud devices will no longer be available using the Cisco MSX SDWAN service. If you reattach the control plane, you can manage the vEdge Cloud devices.
Before you Begin
Only users with the permission ‘SD-WAN Control Plane’ can detach a Control Plane.
Procedure
| Step 1 |
Log in to the Cisco MSX portal. |
| Step 2 |
From the left pane, click Tenant Workspace > Services. |
| Step 3 |
In the SD-WAN service panel, click on the ellipsis (...) and click Detach Control Plane. The control plane detachment process may take a few minutes as Cisco MSX clears up a few things in the background, such as templates assigned to tenants in the background. Cisco MSX does not unsubscribe the SD-WAN service when you detach the control plane. To unsubscribe from the SD-WAN service for a specific tenant, click on the ellipsis (...) and click Unsubscribe. For more information, see Unsubscribing the SD-WAN Service. |
Unsubscribing the SD-WAN Service
Use this procedure to unsubscribe from the SD-WAN service for a specific tenant.
Procedure
| Step 1 |
Log in to the Cisco MSX Portal. |
| Step 2 |
From the left hand pane, click Tenant Workspace > Services. |
| Step 3 |
In the SD-WAN service panel, click on the ellipsis (...) and click Unsubscribe. The Unsubscribe from SD-WAN Service window is displayed. |
| Step 4 |
Click Unsubscribe. The Unsubscribe Initiated notification is displayed. |
| Step 5 |
Click Close. The unsubscription process first deletes the control plane if created or detaches if attached, and then unsubscribes from the SD-WAN service. The estimated time for the unsubscribtion process depends on the number of devices in the system. You can monitor the unsubscription status on the SD-WAN service panel or in the event logs in Cisco MSX. |
![]()
 Feedback