Deployment Workflow for Meraki SD-WAN
Cisco MSX allows seamless integration with Meraki's SD-WAN service providing capability to create SD-WAN networks and managing the devices in them.
The Meraki cloud solution is a centralized management service that allows users to manage all of their Meraki network devices with a single simple and secure platform. Meraki networks are used to contain devices and their configurations and map to sites on Cisco MSX.
To deploy a SD-WAN service for Meraki:
| Task | See |
|---|---|
|
1. Attach control plane for Meraki SD-WAN. |
|
|
2. Create sites. |
|
|
3. Perform post deployment activities on Meraki SD-WAN |
Setting Up SD-WAN Control and Management Plane for Meraki
To create the Meraki SD-WAN control plane service:
Before you begin
Configure Meraki-specific initial settings in MSX. For more information, see Setting Up Meraki SD-WAN-Specific Configurations in MSX.
Procedure
| Step 1 |
Log in to the Cisco MSX portal. |
| Step 2 |
From the left pane, click Tenant Workspace > Services. |
| Step 3 |
In the SD-WAN service panel, click on the ellipsis (...) and click Meraki SD-WAN Home. |
| Step 4 |
Click Add Control Plane to launch the wizard. |
| Step 5 |
Select Attach to use an existing control plane. Click Continue. |
| Step 6 |
In the Select Control Plane Type section, select Meraki SD-WAN to attach a Meraki SD-WAN control plane. The selected controller will appear in blue. |
| Step 7 |
Click Continue. |
| Step 8 |
Enter the API Access Key. |
| Step 9 |
Enter the Organization ID. The organization ID helps to uniquely identify tenant's Meraki SD-WAN control plane. This ID appears in the field if you have already configured Meraki in Tenant Workspace > Settings. We recommend that you configure this ID in the Meraki Organizations Settings. |
| Step 10 |
Click Submit. The Meraki SD-WAN Control plane is attached. 
|
Adding a New Device for Meraki
Before You Begin
Set up the Meraki control plane for the tenant and ensure that the status is active. For more information, see Setting Up Meraki SD-WAN-Specific Configurations in MSX.
To create a new device:
Procedure
| Step 1 |
Log in to the Cisco MSX portal. |
||
| Step 2 |
From the left pane, click Tenant Workspace > Services. |
||
| Step 3 |
In the SD-WAN service panel, click on the ellipsis (...) and click Meraki SD-WAN Home. The SD-WAN home page appears and displays the Device Summary window for the selected tenant. |
||
| Step 4 |
Click Add Device button to add a new Meraki device.
|
||
| Step 5 |
Select Control Plane Type. Select Meraki as the control plane type and click Continue. If the tenant has only Meraki control plane deployed, only the Meraki controller type is enabled. If the tenant has both Cisco SD-WAN and Meraki control planes, you can choose to add site on either Meraki or Cisco SD-WAN control planes. For more information, see Deploying a Site or Device for Cisco SD-WAN. |
||
| Step 6 |
Enter the device information such as Location, Latitude, Longitude, and Support details, and click Continue. |
||
| Step 7 |
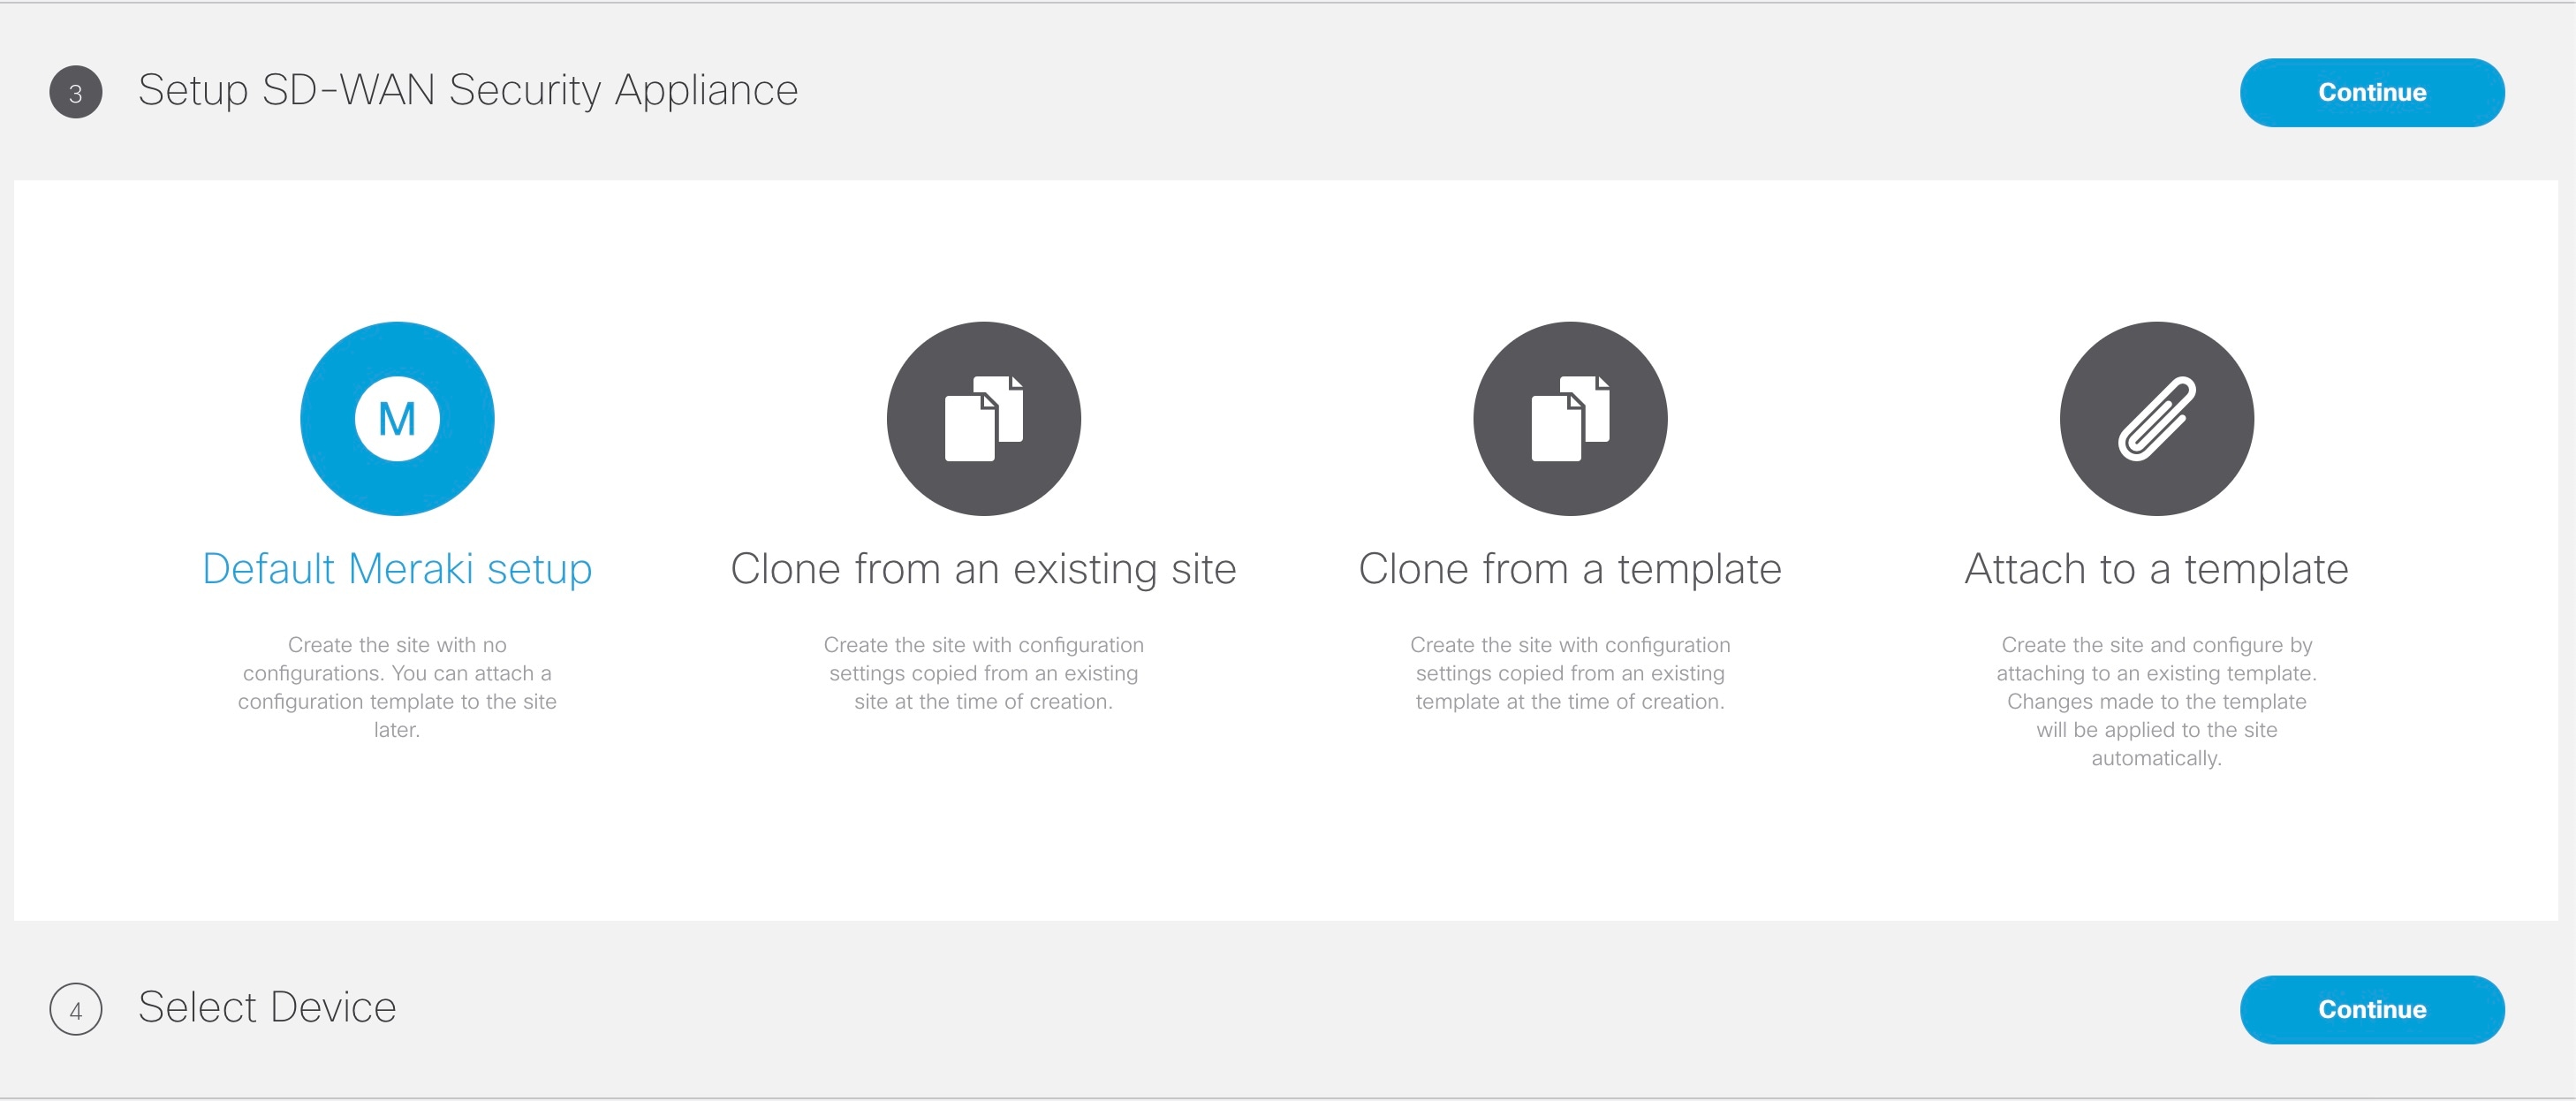
Select a Device Type. Choose from one of the following device types you want to set up on your Meraki site:
|
||
| Step 8 |
Set up Meraki device. Choose from one of the following options:
|
||
| Step 9 |
Select a device to add. From the Select a Device to Add drop-down list, choose the device to be added from the device inventory. The options shown in this drop-down depends on the device or the network type you chose in Step 7. After creating a device, from the Device Summary page, you can use the option 'Add Additional Devices' to add more devices. |
||
| Step 10 |
Click Submit. The device summary page appears. |

 Feedback