Initial setup
Under this chapter, you will find a set of instructions to guide you through the first steps in the CWM application. This initial setup allows you to prepare your workplace and start executing workflows.
Use these guidelines to accomplish the following:
Procedure
|
Step 1 |
Install adapters and create workers: First, you would need to add and install adapters that allow workflows to interact with external systems. In this guide, it's assumed that you will use the default adapters shipped with CWM, or that you have custom adapter(s) developed and ready to use. For execution of your adapter activities and code, you need workers. You can create a worker directly during adapter installation. |
|
Step 2 |
...configure secrets and resources: Adapters mostly communicate with external entities via APIs, and they need to have connection data, like port or host, and authentication data, like username with password. This information is kept in secrets and resources. The structure and schema for each resource and secret type are defined in the adapter files. As an operator, you can add secrets and resources to the CWM. Once created, they can be reused by different workflow definitions and passed on when needed. |
|
Step 3 |
...and finally, add your workflow definition:Workflow definitions, in CWM shortly referred to as workflows, are a piece of code intended to automate operations, written in JSON or YAML and follow the Serverless Workflow Specification. Before workflows can be executed, they need to be added to the CWM application. When you complete this setup you are ready to run your first job. |
Install adapter
This section explains how to upload an adapter file in the CWM and then install (deploy) it.
Procedure
|
Step 1 |
In CWM, go to the Admin -> Adapters tab. |
||
|
Step 2 |
Click the Add Adapter button. 
|
||
|
Step 3 |
In the Install a new adapter modal, click on the file uploader to select an installable adapter file from your local machine and click Upload. You can find adapter files in the CWM software package. 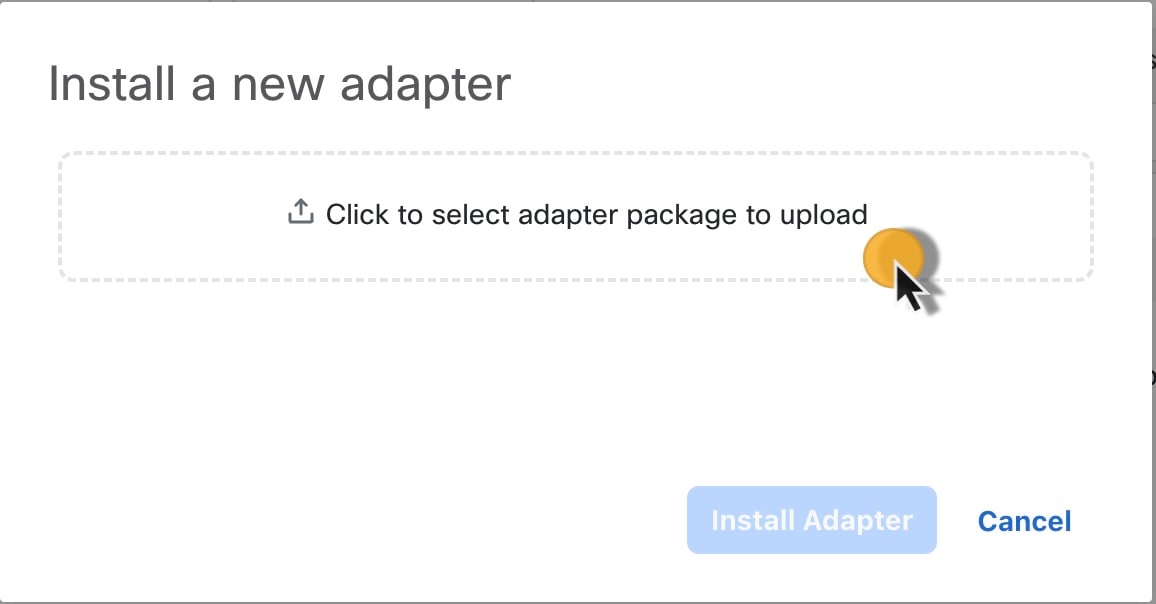
|
||
|
Step 4 |
After the adapter file is uploaded to the CWM database, optionally tick Automatically create worker for this adapter checkbox if you want to create one, then click Install Adapter to finish the installation process. 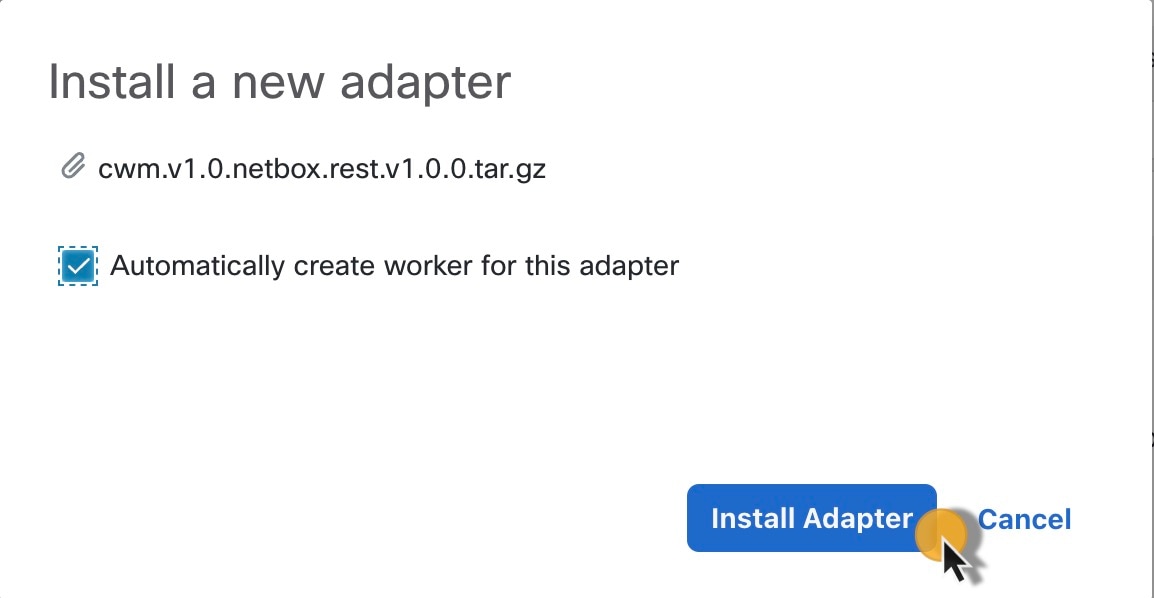
|
||
|
Step 5 |
If your adapter was installed, you should see the successful message on the modal "Your_adapter's_name has been fully installed!". Click Done. 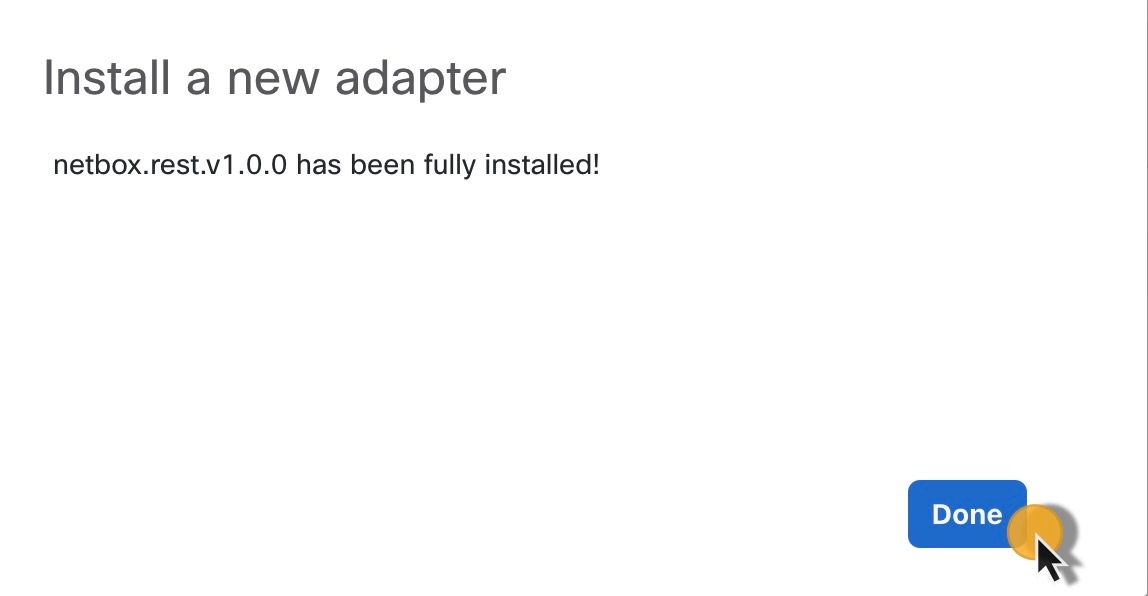

|
Set adapter as default for associated activities
You can set which adapter should be the default one for associated activities. To do so, follow the steps below.
Procedure
|
Step 1 |
In CWM, go to the Admin -> Adapters tab. |
||
|
Step 2 |
In the adapters list, click the name of the chosen adapter to open the adapter's details view. |
||
|
Step 3 |
Tick the checkbox Use as default version for associated activities. 
|
||
|
Step 4 |
Click Save Changes.
|
Delete adapter
 Note |
Adapters already used by running workflow(s) with the status In use cannot be deleted. |
Procedure
|
Step 1 |
In CWM, go to the Admin -> Adapters tab. |
|
Step 2 |
Find the adapter you want to remove from the adapters list and click the Delete button in the same row under the Actions column. |
|
Step 3 |
In the Delete Adapter modal, confirm by clicking the Delete Adapter button. 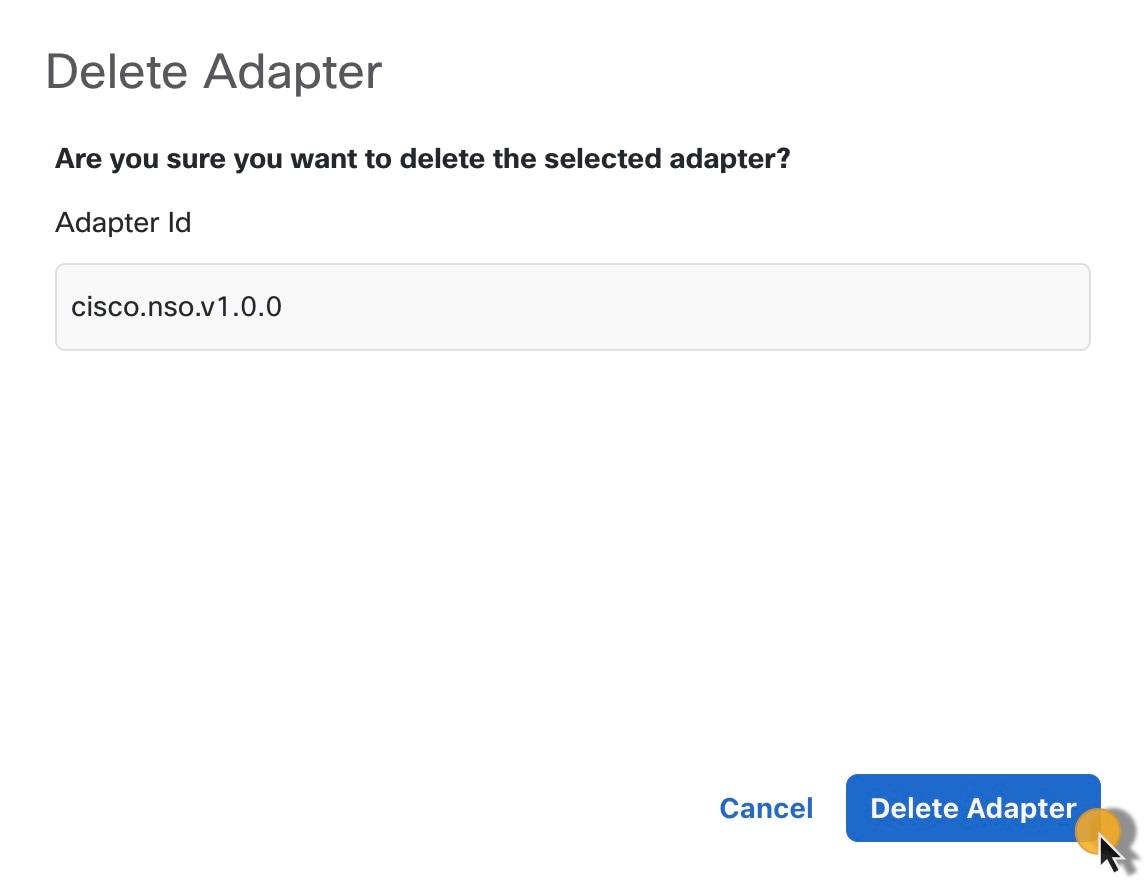
In case the delete option is disabled, you need first to terminate the running workflow(s) using this adapter and remove associated workers. |
Add worker
This section explains how to create a worker in CWM.
Prerequisites: You should have added and deployed adapter(s).
Procedure
|
Step 1 |
In CWM, click the Admin tile from the navigation menu on the left. In the Workers view, click Add Worker. |
|
Step 2 |
In the Create new worker modal, provide the required input:
|
|
Step 3 |
Click Create worker. |

Create secrets and resources
This section explains how to add secrets and resources to CWM.
Prerequisites: Uploaded adapter(s) with workers.
Note |
It's recommended to add secrets to CWM before creating resources, as resources utilize secrets. |
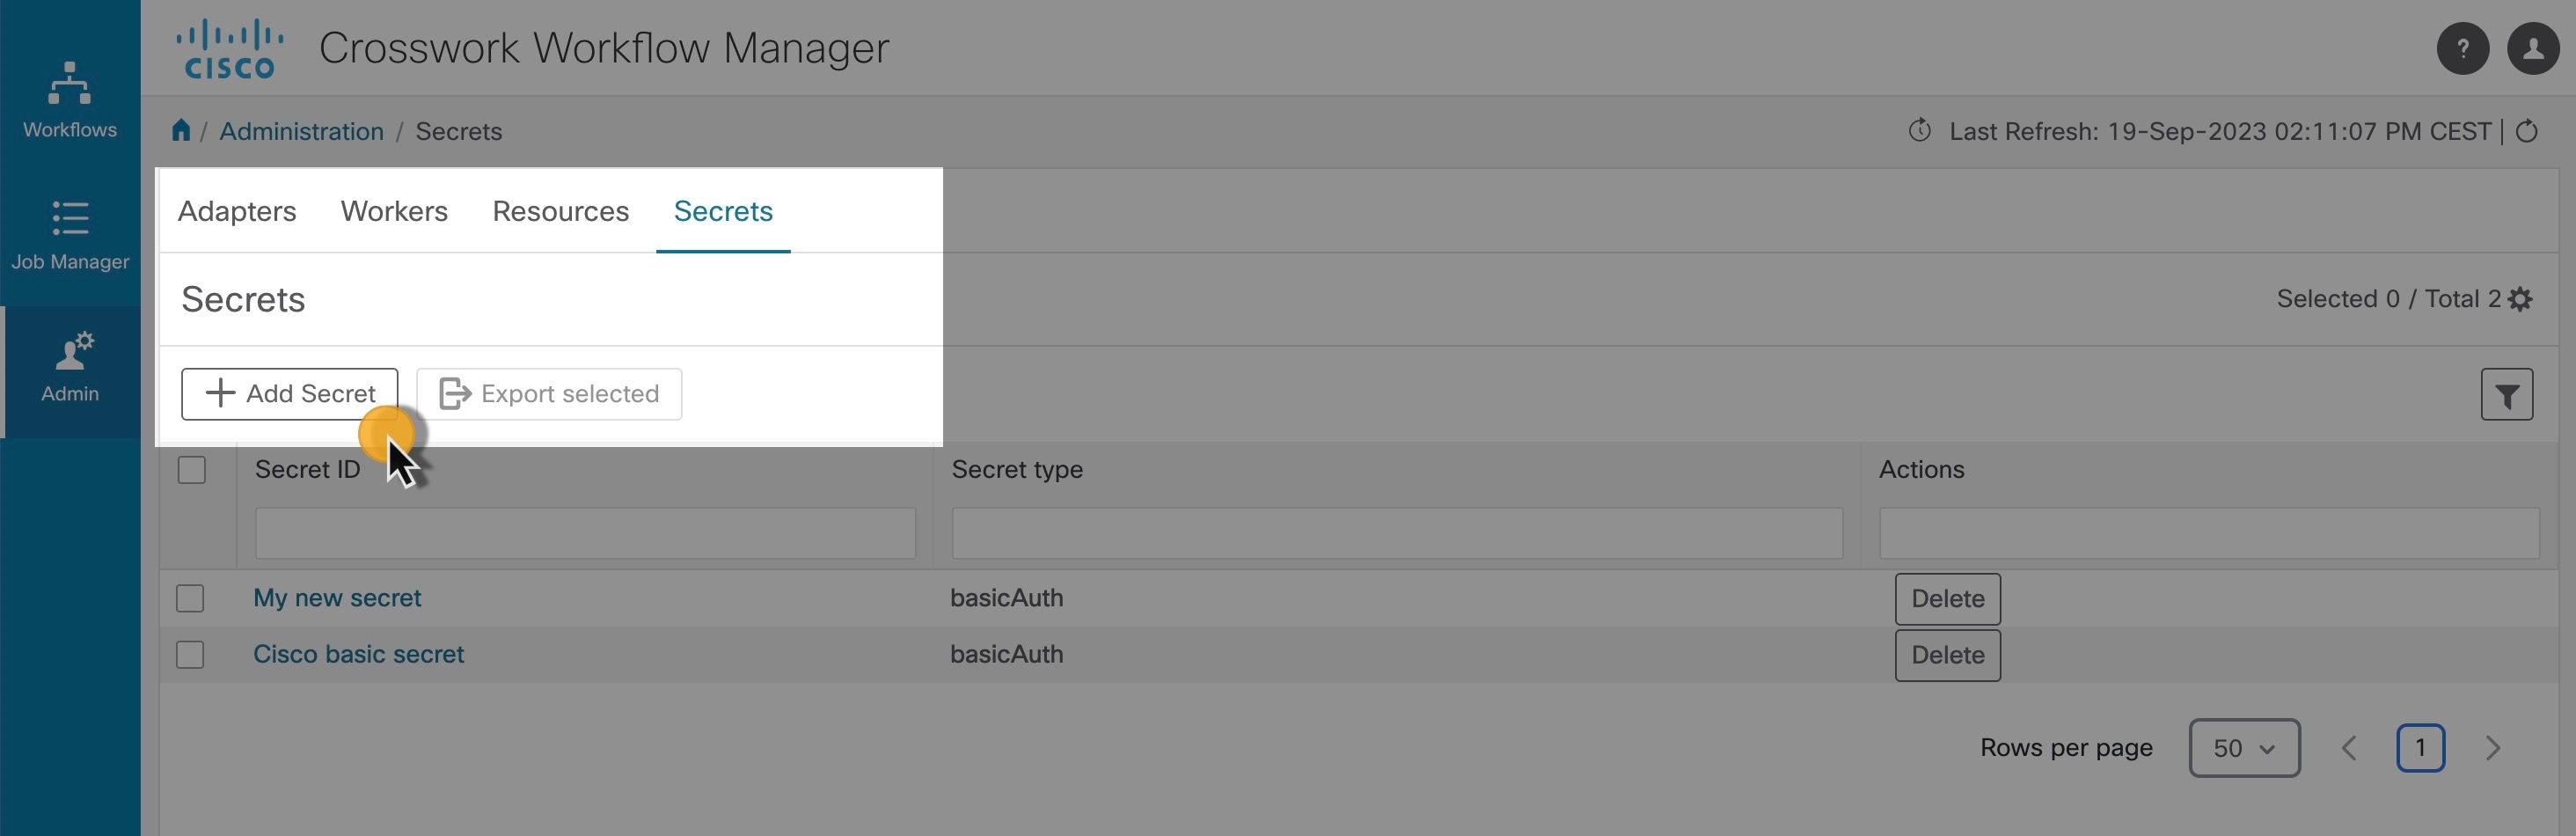
Add secret
Procedure
|
Step 1 |
In CWM, go to the Admin -> Secrets tab. In the Secrets view, click Add Secret. |
||
|
Step 2 |
In the opened New secret view, provide the required input:
|
||
|
Step 3 |
After selecting the secret type, a set of additional fields is displayed under the Secret type details section. Fill in the fields (for example, username and password) with values. These fields can vary among the secret types
and are specified in the adapter files.
|
||
|
Step 4 |
Click the Create Secret button. Once you've added a secret and its details, create a resource in CWM and associate it with the secret. |


Add resource
Prerequisites: You should have added secret(s).
Procedure
|
Step 1 |
In CWM, go to the Admin -> Resources tab. In the Resources view, click Add Resource. |
||
|
Step 2 |
In the opened New resource view, provide the required input:
|
||
|
Step 3 |
After selecting the resource type, a set of additional fields is displayed under the Connection section. Fill in the fields (for example, host or port) with configuration details. These fields can vary among the resource types and are specified in the adapter files. |
||
|
Step 4 |
Select a Secret ID from the drop-down menu to associate a previously created secret with this resource.
|
||
|
Step 5 |
Click the Create resource button. |


 Once created, your resource is displayed on the list in the main Resources view.
Add workflow
This section explains how to add a workflow definition to CWM.
Procedure
|
Step 1 |
In CWM, go to the Workflows -> All Workflows tab. |
|
Step 2 |
Click the Create new workflow button. 
|
|
Step 3 |
In the Create new workflow modal, provide the required input:
|
|
Step 4 |
Click Create Workflow. The steps above create a workflow entry in CWM with dummy code that needs further editing. In the next section, you can check how to insert your workflow definition and replace the pre-defined code. 
|
Workflow editing
Procedure
|
Step 1 |
To edit an existing workflow, from the All Workflows tab, click on the chosen workflow definition name to open the Detail tab. You can add there a description, edit a version or workflow definition name, or assign tags to the workflow definition.

|
||||
|
Step 2 |
Go to the Code tab to edit a workflow definition. By default, after creating a new workflow in CWM, the Code tab contains a dummy piece of code that you need to replace with the actual developed workflow definition in JSON or YAML, based on Serverless Workflow Specification. |
||||
|
Step 3 |
After inserting the desired changes, there are several actions you can take by using the buttons on the right:

|
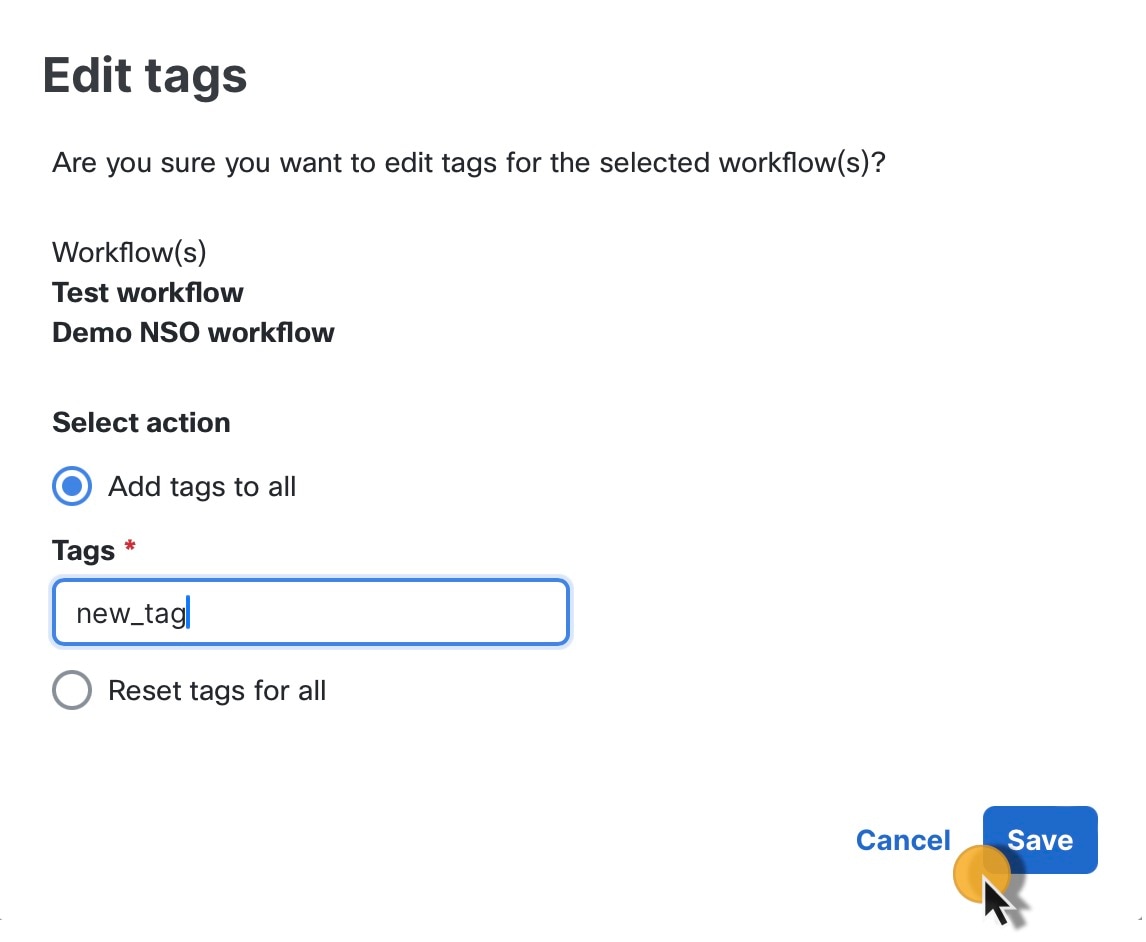
Bulk tags editing
You can edit tags for many workflow definitions at once. You can add a tag(s) to all selected workflows or remove all tags by resetting them.
Procedure
|
Step 1 |
In CWM, go to the Workflows -> All Workflows tab. |
|
Step 2 |
Select chosen workflows by ticking the checkbox on the right side of the All Workflows table, then click on the Edit tags button. 
|
|
Step 3 |
In the Edit tags modal, under the Select action section, click on the chosen radio button depending on whether you plan to add tag(s) or reset them:
|
|
Step 4 |
Click Save. |
|
Step 5 |
The result will be visible under the Workflow tags column. 
|
 Feedback