- Preface
-
- Introducing the Cisco SNS 3415 and Cisco SNS 3495 Hardware Appliances
- Preparing to Install the Cisco SNS 3415 and Cisco SNS 3495 Hardware Appliances
- Installing the Cisco SNS 3415 and Cisco SNS 3495 Hardware Appliances
- Installing and Configuring Cisco Secure Access Control System with Cisco SNS 3415 and Cisco SNS 3495 Appliances
-
- Introducing the Cisco SNS 3515 and Cisco SNS 3595 Hardware Appliances
- Preparing to Install the Cisco SNS 3515 and Cisco SNS 3595 Hardware Appliances
- Installing the Cisco SNS 3515 and Cisco SNS 3595 Hardware Appliances
- Installing and Configuring Cisco Secure Access Control System with Cisco SNS 3515 and Cisco SNS 3595 Appliances
Installation and Upgrade Guide for Cisco Secure Access Control System 5.8.1
Bias-Free Language
The documentation set for this product strives to use bias-free language. For the purposes of this documentation set, bias-free is defined as language that does not imply discrimination based on age, disability, gender, racial identity, ethnic identity, sexual orientation, socioeconomic status, and intersectionality. Exceptions may be present in the documentation due to language that is hardcoded in the user interfaces of the product software, language used based on RFP documentation, or language that is used by a referenced third-party product. Learn more about how Cisco is using Inclusive Language.
- Updated:
- March 22, 2016
Chapter: Installing and Configuring Cisco Secure Access Control System with Cisco SNS 3415 and Cisco SNS 3495 Appliances
Installing and Configuring the Secure Access Control System with the Cisco SNS-3415 and Cisco SNS-3495
This chapter describes how to install and initially configure the Cisco SNS-3415 or Cisco SNS-3495 and the ACS 5.8.1 server.
■![]() Installing ACS on the Cisco SNS-3415 or 3495 Appliance
Installing ACS on the Cisco SNS-3415 or 3495 Appliance
■![]() Downloading the Cisco Secure ACS 5.8.1 ISO Image
Downloading the Cisco Secure ACS 5.8.1 ISO Image
■![]() Resetting the Administrator Password
Resetting the Administrator Password
■![]() Reimaging the Cisco SNS-3415/3495 Appliance
Reimaging the Cisco SNS-3415/3495 Appliance
Installing ACS on the Cisco SNS-3415 or 3495 Appliance
The Cisco SNS-3415 or Cisco SNS-3495 appliance is preinstalled with the ACS 5.8.1 software. This section gives you an overview of the installation process and the tasks that you must perform before installing ACS.
Before you begin installing ACS 5.8.1, you must:
1.![]() Open the box and check the contents. See Unpacking and Inspecting the Server
Open the box and check the contents. See Unpacking and Inspecting the Server
2.![]() Read Introducing the Cisco SNS-3415 and Cisco SNS-3495 Hardware Appliances.
Read Introducing the Cisco SNS-3415 and Cisco SNS-3495 Hardware Appliances.
3.![]() Read the general precautions and safety warnings in Preparing to Install the Cisco SNS 3415 and Cisco SNS 3495 Hardware Appliances
Read the general precautions and safety warnings in Preparing to Install the Cisco SNS 3415 and Cisco SNS 3495 Hardware Appliances
4.![]() Install the appliance in the rack. See Preparing for Server Installation
Install the appliance in the rack. See Preparing for Server Installation
5.![]() Connect the Cisco SNS-3415 or Cisco SNS-3495 to the network and appliance console. See Connecting Cables
Connect the Cisco SNS-3415 or Cisco SNS-3495 to the network and appliance console. See Connecting Cables
6.![]() Power up the Cisco SNS-3415 or Cisco SNS-3495 appliance. See Connecting and Powering On the Cisco SNS-3415/3495 Appliance
Power up the Cisco SNS-3415 or Cisco SNS-3495 appliance. See Connecting and Powering On the Cisco SNS-3415/3495 Appliance
7.![]() Power up the Cisco SNS-3415 or Cisco SNS-3495 appliance to the network and appliance console. See Connecting Cables
Power up the Cisco SNS-3415 or Cisco SNS-3495 appliance to the network and appliance console. See Connecting Cables
8.![]() Run the setup command at the CLI prompt to configure the initial settings for the ACS server. See Running the Setup Program. The setup can be done by using the appliance console or CIMC.
Run the setup command at the CLI prompt to configure the initial settings for the ACS server. See Running the Setup Program. The setup can be done by using the appliance console or CIMC.
You can use the Cisco UCS Server Configuration Utility, Release 3.0 User Guide to configure the
Cisco SNS-3415 or Cisco SNS-3495 appliance. You can also see the Cisco UCS C-Series Rack Server guides for more information on Cisco SNS-3415 or Cisco SNS-3495 appliance.
Downloading the Cisco Secure ACS 5.8.1 ISO Image
You can download the Cisco Secure ACS 5.8.1 ISO image from Cisco.com
1.![]() Go to http://www.cisco.com/go/acs. You must already have a valid Cisco.com login credentials to access this link.
Go to http://www.cisco.com/go/acs. You must already have a valid Cisco.com login credentials to access this link.
The Cisco Secure ACS Release 5.8.1 software image appears on the Cisco.com page. You can test all the Cisco ACS services once your installation and initial configuration are complete.
Note: You can download the ACS 5.x software images from Cisco.com only when you have a valid Software Application Support (SAS) contract for a previous version of ACS 5.x software. If you do not have a valid SAS contract for a previous version, you must contact your Sales Engineer (SE), Accounts Manager (AM), or Cisco partners to publish the software image on Cisco.com to the specific customers account.
Installing the ACS Server
After you download the Cisco Secure ACS 5.8.1 ISO image, you can use any of the following options to install and set up the Cisco Secure ACS 5.8.1 software on your appliance:
■![]() Configure the Cisco Integrated Management Interface (CIMC) and use it to install Cisco Secure ACS 5.8.1 remotely via the network. See Configuring CIMC, Installing ACS 5.8.1 on the Cisco SNS-3415/3495 Appliance Remotely Using CIMC and Running the Setup Program.
Configure the Cisco Integrated Management Interface (CIMC) and use it to install Cisco Secure ACS 5.8.1 remotely via the network. See Configuring CIMC, Installing ACS 5.8.1 on the Cisco SNS-3415/3495 Appliance Remotely Using CIMC and Running the Setup Program.
■![]() Create a bootable USB Drive and use it to install Cisco Secure ACS 5.8.1. See Creating a Bootable USB Drive, Installing ACS 5.8.1 on the Cisco SNS-3415/3495 Appliance Using the USB Drive, and Running the Setup Program.
Create a bootable USB Drive and use it to install Cisco Secure ACS 5.8.1. See Creating a Bootable USB Drive, Installing ACS 5.8.1 on the Cisco SNS-3415/3495 Appliance Using the USB Drive, and Running the Setup Program.
Installing ACS 5.8.1 on the Cisco SNS-3415/3495 Appliance Remotely Using CIMC
After you have configured the CIMC for your appliance, you can use it to manage your Cisco SNS-3415 or Cisco SNS-3495 appliance. You can perform all operations including BIOS configuration on your Cisco SNS-3415 or Cisco SNS-3495 appliance through the CIMC.
1.![]() Connect to the CIMC for server management. Connect Ethernet cables from your LAN to the server, using the ports that you selected in NIC Mode setting. The Active-active and Active-passive NIC redundancy settings require you to connect to two ports.
Connect to the CIMC for server management. Connect Ethernet cables from your LAN to the server, using the ports that you selected in NIC Mode setting. The Active-active and Active-passive NIC redundancy settings require you to connect to two ports.
2.![]() Use a browser and the IP address of the CIMC to log in to the CIMC Setup Utility. The IP address is based upon your CIMC config settings that you made (either a static address or the address assigned by your DHCP server).
Use a browser and the IP address of the CIMC to log in to the CIMC Setup Utility. The IP address is based upon your CIMC config settings that you made (either a static address or the address assigned by your DHCP server).
Note: The default user name for the server is admin. The default password is password.
3.![]() Use your CIMC credentials to log in.
Use your CIMC credentials to log in.
6.![]() Select Activate Virtual Devices from the list.
Select Activate Virtual Devices from the list.
You can view the check mark near to Activate Virtual Devices option.
7.![]() Click Virtual Media again, and select MAP CD/DVD option.
Click Virtual Media again, and select MAP CD/DVD option.
8.![]() Click Browse and locate the ACS 5.8.1 ISO image.
Click Browse and locate the ACS 5.8.1 ISO image.
10.![]() Choose Macros > Static Macros > Ctrl-Alt-Del to boot the Cisco SNS-3415 or Cisco SNS-3495 appliance using the ISO image.
Choose Macros > Static Macros > Ctrl-Alt-Del to boot the Cisco SNS-3415 or Cisco SNS-3495 appliance using the ISO image.
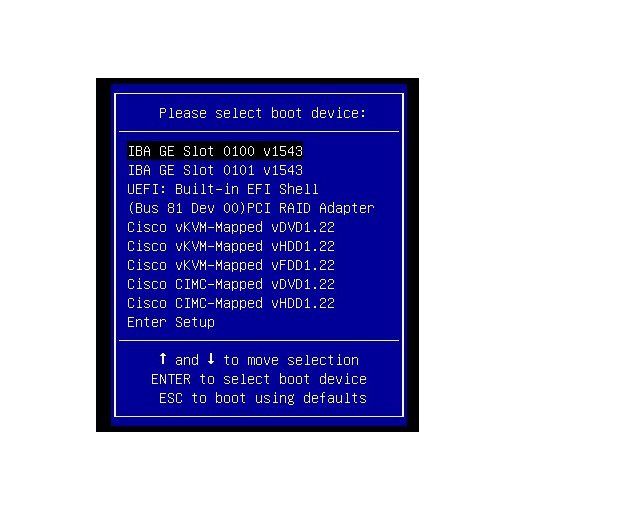
11.![]() Enter F6 to bring up the boot menu. A screen similar to the following one appears.
Enter F6 to bring up the boot menu. A screen similar to the following one appears.
12.![]() Select the Cisco vKVM-Mapped vDVD that you mapped and press Enter. The following message is displayed.
Select the Cisco vKVM-Mapped vDVD that you mapped and press Enter. The following message is displayed.
13.![]() At the boot prompt, enter 1 and press Enter.
At the boot prompt, enter 1 and press Enter.
14.![]() After you enter the network configuration parameters in the Setup mode, the appliance automatically reboots, and returns to the shell prompt mode.
After you enter the network configuration parameters in the Setup mode, the appliance automatically reboots, and returns to the shell prompt mode.
15.![]() Exit from the shell prompt mode. The appliance comes up.
Exit from the shell prompt mode. The appliance comes up.
16.![]() Continue with Verifying the Installation Process.
Continue with Verifying the Installation Process.
Installing ACS 5.8.1 on the Cisco SNS-3415/3495 Appliance Using the USB Drive
To install ACS 5.8.1 on the Cisco SNS-3415 or Cisco SNS-3495 appliance using the USB drive, complete the following steps:
You need to create a bootable USB drive. See Creating a Bootable USB Drive.
1.![]() Power on the Cisco SNS-3415 or Cisco SNS-3495 appliance.
Power on the Cisco SNS-3415 or Cisco SNS-3495 appliance.
2.![]() Plug in your bootable USB drive that has the Cisco Secure ACS ISO image into the USB port.
Plug in your bootable USB drive that has the Cisco Secure ACS ISO image into the USB port.
3.![]() Restart ACS and go to the BIOS mode.
Restart ACS and go to the BIOS mode.
4.![]() In the BIOS mode, choose boot from USB.
In the BIOS mode, choose boot from USB.
5.![]() Exit from the BIOS mode and click Save.
Exit from the BIOS mode and click Save.
6.![]() Again, restart ACS and boot from USB.
Again, restart ACS and boot from USB.
7.![]() Now, continue reimaging the Cisco SNS-3415 or Cisco SNS-3495 using the USB drive.
Now, continue reimaging the Cisco SNS-3415 or Cisco SNS-3495 using the USB drive.
The following message is displayed.
8.![]() At the boot prompt, enter 1 and press Enter.
At the boot prompt, enter 1 and press Enter.
9.![]() After you enter the network configuration parameters in Setup mode, the appliance automatically reboots and returns to the shell prompt mode.
After you enter the network configuration parameters in Setup mode, the appliance automatically reboots and returns to the shell prompt mode.
10.![]() Exit from the shell prompt mode. The appliance comes up.
Exit from the shell prompt mode. The appliance comes up.
11.![]() Continue with Verifying the Installation Process.
Continue with Verifying the Installation Process.
Creating a Bootable USB Drive
You can download the ACS 5.8.1 USB Installation tool for SNS-3415, and SNS-3495 (ACS_58_USB_Installation_tool.zip) zip from the Cisco Secure ACS 5.8.1 Download Software section on Cisco.com. This zip file contains the bootable scripts which needs to be extracted to create a bootable USB to install Cisco Secure Access Control System 5.8.1.
■![]() You should have the ACS_581_USB_Installation_tool.zip file.
You should have the ACS_581_USB_Installation_tool.zip file.
–![]() Linux machine with RHEL-5 or RHEL-6, CentOS 5. x or CentOS 6. x. If you are going to use your PC or MAC, ensure that you have installed a Linux VM on it.
Linux machine with RHEL-5 or RHEL-6, CentOS 5. x or CentOS 6. x. If you are going to use your PC or MAC, ensure that you have installed a Linux VM on it.
■![]() You should have access permissions to the drives in the local Linux machine.
You should have access permissions to the drives in the local Linux machine.
1.![]() Plug in your USB drive into the USB port.
Plug in your USB drive into the USB port.
2.![]() Copy the iso-to-usb.sh script and the Cisco Secure ACS 5.8.1 ISO image to a directory on your linux machine.
Copy the iso-to-usb.sh script and the Cisco Secure ACS 5.8.1 ISO image to a directory on your linux machine.
3.![]() Enter the following command:
Enter the following command:
iso-to-usb.sh source_iso usb_device
For example, # ./iso-to-usb.sh ACS_v5.8.1.0.32.iso/dev/sdc where iso-to-usb.sh is the name of the script, ACS_v5.8.1.0.32.iso is the name of the ISO image, and /dev/sdc is your USB device.
The following success message is displayed.
Note: After you execute the command iso-to-usb.sh, your USB drive will be partitioned in a format where non-Linux operating systems will not recognize all of the spaces available in it. To repartition your USB drive for general purpose use with Windows or MAC operating system, you need to run the command repurpose-usb.sh utility in this directory. This utility will repartition and reformat your USB key for general use.
Running the Setup Program
This section describes the setup process to install the ACS server.
The setup program launches an interactive command-line interface (CLI) that prompts you for the required parameters.
An administrator can use the console or a dumb terminal to configure the initial network settings and provide the initial administrator credentials for the ACS 5.8.1 server using the setup program. The setup process is a one-time configuration task.
2.![]() At the login prompt, enter setup and press Enter.
At the login prompt, enter setup and press Enter.
The console displays a set of parameters. You must enter the parameters as described in Table 1.
Note: You can interrupt the setup process at any time by typing Ctrl-C![]() before the last setup value is entered.
before the last setup value is entered.
The console requests for the parameters as shown below:
After the ACS server is installed, the system reboots automatically.
Now, you can log into ACS using the CLI username and password that was configured during the setup process.
Note: You can use this username and password to log in to ACS only via the CLI.
Note: The initial setup of the ACS 5.8.1 server should be configured with an IPv4 IP address. You can configure the IPv6 IP address for your server only after the initial setup is completed.
Note: ACS 5.8.1 supports IPv4 and IPv6 dual stack networking and does not support pure IPv6 network.
Verifying the Installation Process
To verify that you have correctly completed the installation process:
1.![]() When the system reboots, at the login prompt enter the username you configured during setup, and press Enter.
When the system reboots, at the login prompt enter the username you configured during setup, and press Enter.
2.![]() At password prompt, enter the password you configured during setup, and press Enter.
At password prompt, enter the password you configured during setup, and press Enter.
3.![]() Verify that the application has been installed properly by entering the show application command, and press Enter.
Verify that the application has been installed properly by entering the show application command, and press Enter.
4.![]() At the system prompt, check the release and ACS version that are installed, by entering the show application version acs command and pressing Enter.
At the system prompt, check the release and ACS version that are installed, by entering the show application version acs command and pressing Enter.
Note: The Version and Internal Build ID may change for different versions of this release.
5.![]() Check the status of ACS processes, at the system prompt by entering show application status acs, and press Enter.
Check the status of ACS processes, at the system prompt by entering show application status acs, and press Enter.
Note: To get the latest ACS patches and to keep your ACS up-to-date, visit http://software.cisco.com/download/navigator.html?i=rt
Resetting the Administrator Password
If you are not able to log in to the system due to the loss of the administrator password, you can use the ACS 5.8.1 recovery DVD to reset the administrator password.
Note: You can also use the bootable USB drive and CIMC to reset the administrator password.
To reset the administrator password:
2.![]() Insert the ACS 5.8.1 recovery DVD.
Insert the ACS 5.8.1 recovery DVD.
To reset the administrator password, at the system prompt, enter 3 if you are using a keyboard and video monitor, or enter 4 if you are using a serial console port.
The console displays a set of parameters.
3.![]() Enter the parameters as described in Table 2.
Enter the parameters as described in Table 2.
|
|
|
|---|---|
Enter the number of the administrator whose password you want to reset. |
|
Reimaging the Cisco SNS-3415/3495 Appliance
You can either use CIMC or the bootable USB drive to reimage the Cisco SNS-3415 or Cisco SNS-3495 appliance with ACS 5.8.1.
To reimage the Cisco SNS-3415 or Cisco SNS-3495 appliance:
■![]() Reimage using CIMC. See Installing ACS 5.8.1 on the Cisco SNS-3415/3495 Appliance Remotely Using CIMC
Reimage using CIMC. See Installing ACS 5.8.1 on the Cisco SNS-3415/3495 Appliance Remotely Using CIMC
■![]() Reimage using bootable USB drive. See Installing ACS 5.8.1 on the Cisco SNS-3415/3495 Appliance Using the USB Drive
Reimage using bootable USB drive. See Installing ACS 5.8.1 on the Cisco SNS-3415/3495 Appliance Using the USB Drive
Regulatory Compliance
For regulatory compliance and safety information, see Regulatory Compliance and Safety Information for Cisco Secure Access Control System.
 Feedback