Post Installation Tasks Summary
After successful cluster configuration, perform the following additional post installation tasks to ensure that the cluster is ready to serve VMs.
|
Task |
Reference |
|---|---|
|
Create the First Datastore |
|
|
Assign a static IP address for Live Migration and VM Network |
Configuring a Static IP Address for Live Migration and VM Network |
|
(Optional) Constrained Delegation |
|
|
Configure Local Default Paths |
|
|
Configure File Share Witness |
|
|
Checking the Windows Version on the Hyper-V Host |
|
| Validate Failover Cluster Manager | |
|
Testing Upstream Failover |
|
|
Deploying VMs on a Hyper-V cluster |
|
|
Configuring HyperFlex Share to SCVMM |
|
|
Re-enabling Windows Defender |
|
|
VM Migration between standalone Hyper-V and HX Hyper-V hosts. |
Create the First Datastore
Before you begin using the cluster, you must create a datastore. The datastore can be created in HX Connect UI.
Procedure
|
Step 1 |
Launch HX Connect UI from a browser of your choice from https://Cluster_IP/ or https://FQDN.  |
||||||||||
|
Step 2 |
Log in with the following credentials:
|
||||||||||
|
Step 3 |
In the Navigation pane, select Datastores. 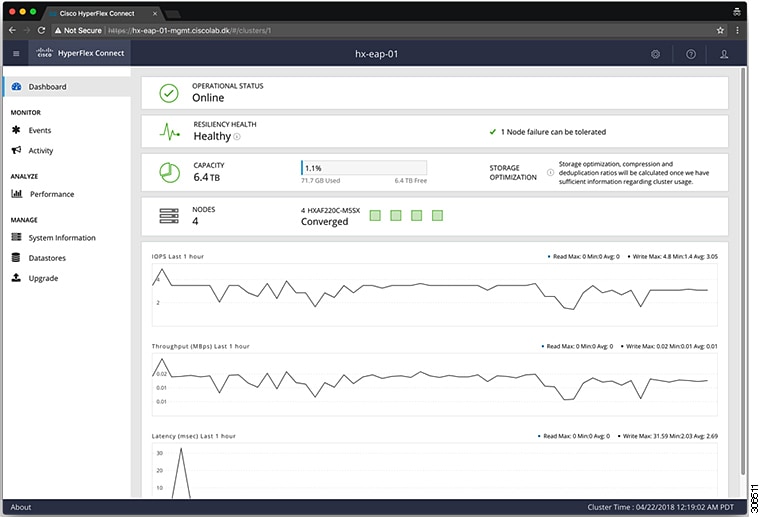 |
||||||||||
|
Step 4 |
In the Work pane, click Create Datastore. |
||||||||||
|
Step 5 |
In the Create Datastore dialog box, complete the following fields:
|
Configuring a Static IP Address for Live Migration and VM Network
|
# |
Command |
Purpose |
|---|---|---|
|
1 |
|
Assigns a static IP address to the Live Migration network. |
|
2 |
|
Assigns a static IP address to the VM network. |
(Optional) Post Installation Constrained Delegation
 Attention |
This step must be performed only if Constrained Delegation was not configured during initial installation. It is recommended that you perform this procedure using the HX Installer and not as part of post-installation. |
Constrained Delegation gives granular control over impersonation. When the remote management requests are made to the Hyper-V hosts, it needs to make those requests to the storage on behalf of the caller. This is allowed if that host is trusted for delegation for the CIFS service principal of HX Storage.
Constrained Delegation requires that the option for the security setting User Account Control: Behavior of the elevation prompt for Administrators in Admin Approval Mode is set to Elevate without Prompting. This will prevent the global AD policy from overriding policy on HX OU.
Perform the following procedure on each Hyper-V host in the HX Cluster to configure using Windows Active Directory Users and Computers.
Procedure
|
Step 1 |
Click Start, click Administrative Tools, and then click Active Directory Users and Computers. |
|
Step 2 |
Expand domain, and then expand the Computers folder. |
|
Step 3 |
In the right pane, right-click on the computer name (for example, HX-Properties), and then click Properties. |
|
Step 4 |
Click on the Delegation tab. |
|
Step 5 |
Select Trust this computer for delegation to specified services only. |
|
Step 6 |
Ensure that Use any authentication protocol is selected. |
|
Step 7 |
Click Add. In the Add Services dialog box, click Users or Computers, and then browse or type the name of the Service Type (such as CIFS). Click OK. The following illustration can be used as an example. 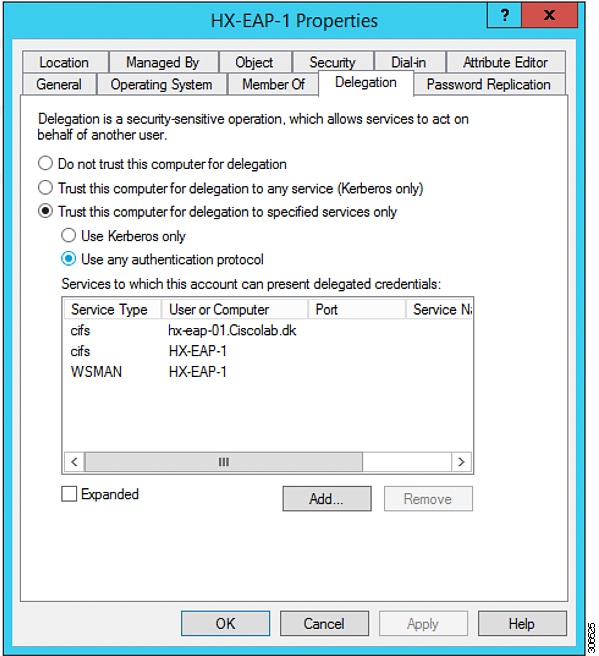 |
|
Step 8 |
Repeat these steps for all nodes. |
Configure Local Default Paths
Configure the default local path for the VMs to ensure that they will be on the HX cluster datastore.
Run the following commands in PowerShell:
$Creds = Get-Credential -Message "User Credentials" -UserName <<current logon username>>
$hosts = ("hostname1","hostname2","hostname3","hostname4")
Invoke-Command -ComputerName $hosts -Credential $Creds -ScriptBlock {Set-VMHost -VirtualHardDiskPath
"\\HX-EAP-01.ciscolab.dk\DS1_8K" -VirtualMachinePath "\\HX-EAP-01.ciscolab.dk\DS1_8K"}
Note |
The username should either be a Domain admin account or the HX service account. The local Administrator on the Hyper-V host will not work. |
Note |
Remember to change the variables to suit your environment. |
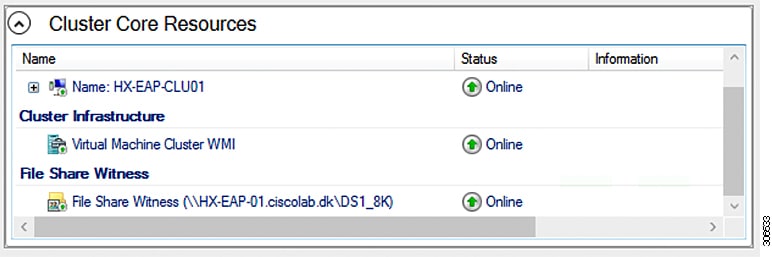
Configuring a File Share Witness
As a Microsoft best practice, ensure that you configure a Quorum witness datastore. Use the following procedure to configure a File Share Witness using Failover Cluster Manager (FCM). A File Share Witness ensures high availability of the failover cluster when nodes on the network fail. Specifically, a File Share Witness is needed to maintain a failover cluster quorum, which is designed to prevent split-brain scenarios that may happen when a partition in the network and subsets of nodes cannot communicate with each other. For more information, see "Understanding cluster and pool quorum".
Note |
In an HX cluster, the storage is designed to be highly available and no host should lose access to the storage. In the event that one host does stop writing to the datastore, Microsoft's storage resiliency behavior kicks in. The host repeatedly retries to establish a connection with the storage for 30 mins by default. During this time, the user VMs may be paused. If it cannot connect after 30 mins, the VM moves to a 'stopped' state. |
The following procedure describes how to configure a File Share Witness for Microsoft Windows 2016. If you are deploying Microsoft Windows 2019, do not use HyperFlex Share or any other file share as a witness. Microsoft has identified a defect in Windows 2019, which will be resolved in a subsequent patch release. Until such time, you must configure the Microsoft Windows 2019 Failover cluster without any witness.
Note |
|
Before you begin
Microsoft released a security patch on November 12, 2019 that applies to Windows 2019. If you are running Windows 2019, upgrade your Hyper-V hosts with the patch at the path level, before using the following procedure to configure a file share witness. For more information, see the Microsoft article "November 12, 2019—KB4523205 (OS Build 17763.864)".
Procedure
|
Step 1 |
Launch FCM. |
|
Step 2 |
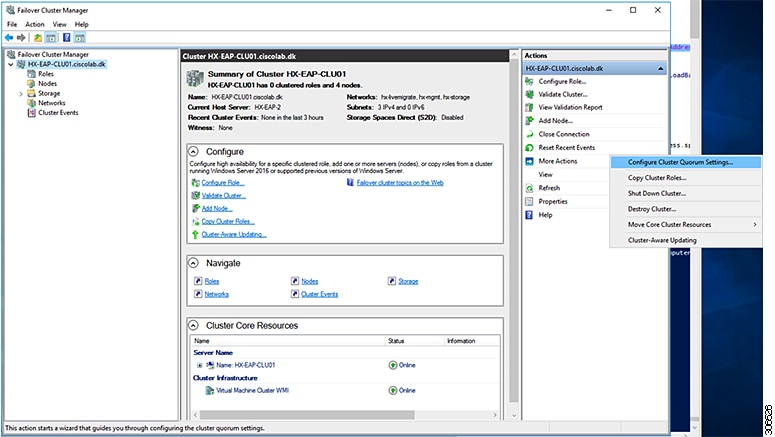
In the navigation pane, select your cluster. Then, in the Actions pane, select .
|
|
Step 3 |
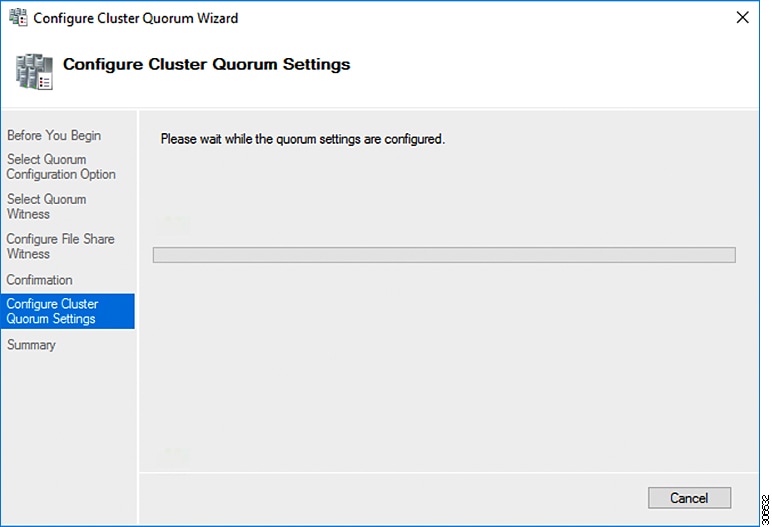
The Configure Cluster Quorum wizard is launched. Click Next. 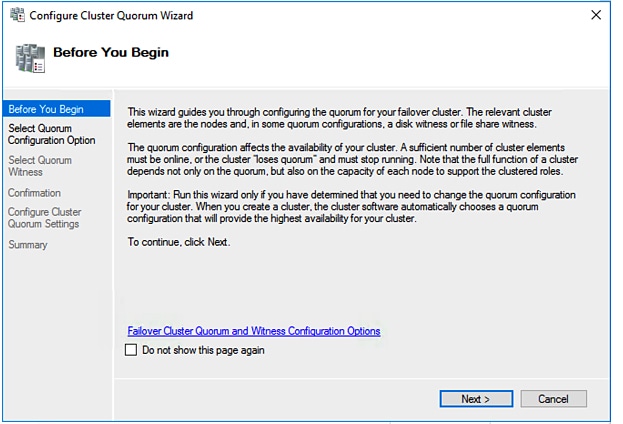 |
|
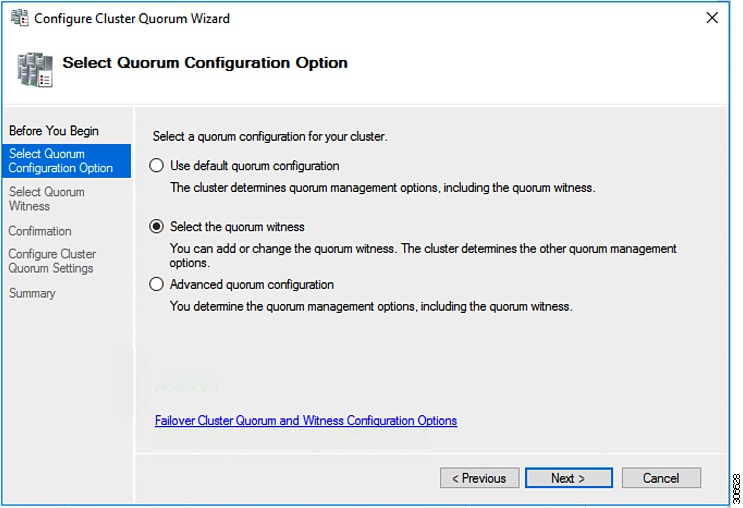
Step 4 |
In the Select Quorum Configuration Option screen, choose Select the quorum witness. Click Next.
|
|
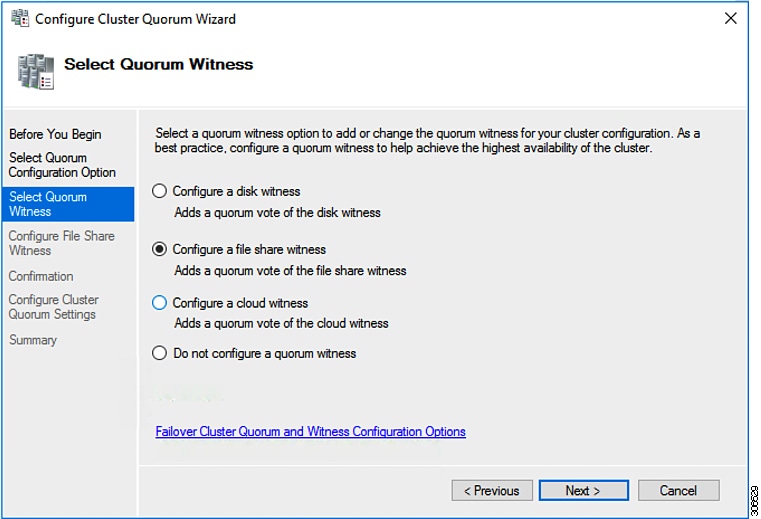
Step 5 |
In the Select Quorum Witness screen, choose Configure a file share witness. Click Next.
|
|
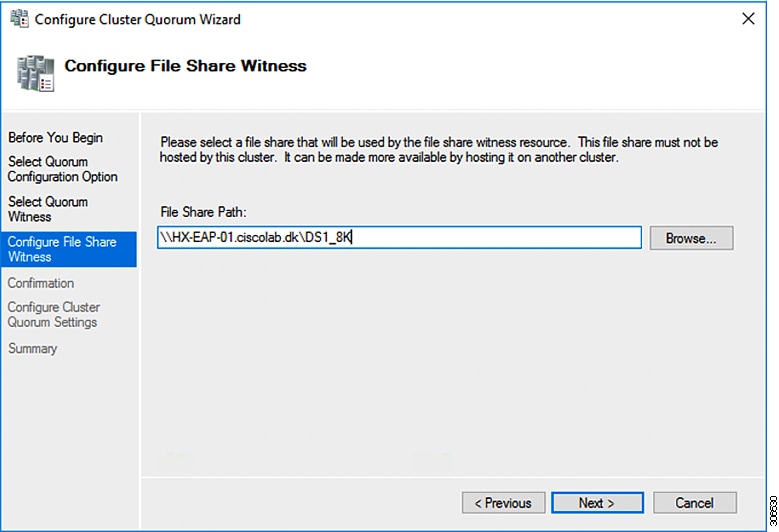
Step 6 |
In the Configure File Share Witness screen, specify the path to the File Share. Click Next.
|
|
Step 7 |
In the Confirmation screen, click Next.
|
|
Step 8 |
In the Summary screen, click Finish to close the wizard. |
|
Step 9 |
Alternatively, you can configure a file share witness using Windows PowerShell.
|
Checking the Windows Version on the Hyper-V Host
Follow the steps below to check the version of Windows installed.
Procedure
|
Step 1 |
Log into the Hyper-V server as an administrator or HX Service Administrator account. |
|
Step 2 |
In Powershell, run the following command: C:\Users\adminhyperflex> Get-ItemProperty 'HKLM:\SOFTWARE\Microsoft\Windows NT\CurrentVersion' |
|
Step 3 |
Verify the installed Windows version in the result of the command output. Following is a sample output if you have installed Windows Server 2016. Following is a sample output if you have installed Windows Server 2019. |
|
Step 4 |
In addition, verify the following:
|
Validate Failover Cluster Manager
Procedure
|
Step 1 |
Open the Failover Cluster Manager and click Validate Cluster and then click Next. 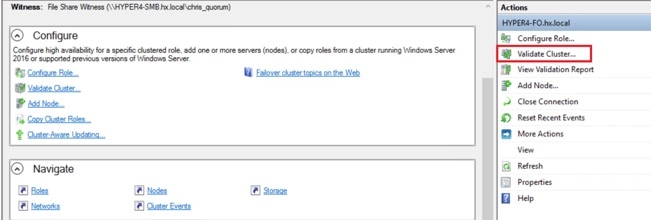 |
|
Step 2 |
Select Run all tests (recommended) and then click Next.  After clicking Next, the validation procedure starts running. |
|
Step 3 |
Verify that there are no validation failures. If there are any validation failures, click View Report and address any results that show Failed. 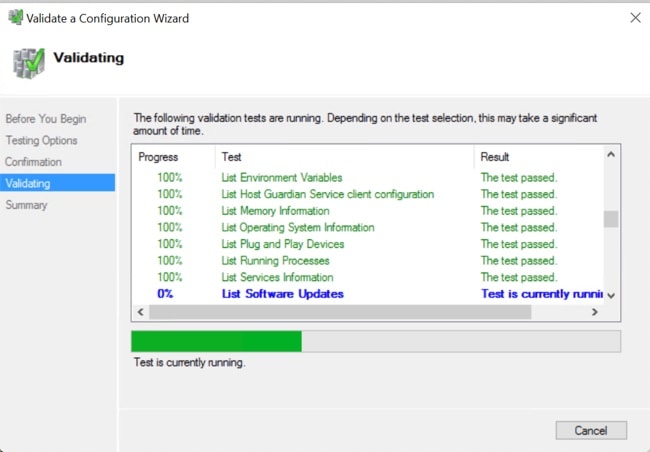 |
Deploying VMs on a Hyper-V cluster
Deploying VMs on a Hyper-V cluster is a multi-step process as described below:
-
Install Remote Server Administration Tools (RSAT) on the management station/host—You must install administrator tools such as Hyper-V Manager and Failover Cluster Manager as features Server Manager. For more information see, Install RSAT tools on the Management Station or Host.
-
Manage VMs—Connecting to all the Hyper-V nodes in the HX cluster and creating new VMs can be accomplished using either Hyper-V Manager or Failover Cluster Manager. For more information see, Creating VMs using Hyper-V Manager.
Install RSAT tools on the Management Station or Host
To install RSAT, complete the following steps:
Before you begin
RSAT tool installation requires the following:
-
A server from which you can install, manage, monitor the VMs on the Hyper-V HX cluster.
-
Administrator tools such as Hyper-V Manager, FCM, PowerShell, SCVMM.
Procedure
|
Step 1 |
In Server Manager, click Manage and then select Add Roles and Features. The Add Roles and Features wizard appears. 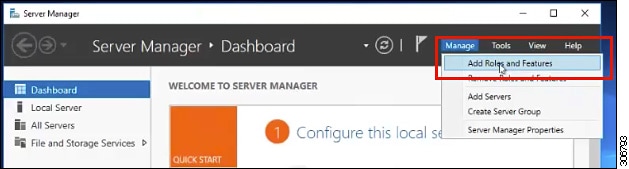 |
|
Step 2 |
In the Before you begin page, click Next.  |
|
Step 3 |
In the Select installation type page, select Role-based or feature-based installation. Click Next. |
|
Step 4 |
In the Server Selection page, select your server from the list. This server belongs to the same domain as the HX cluster. Click Next. 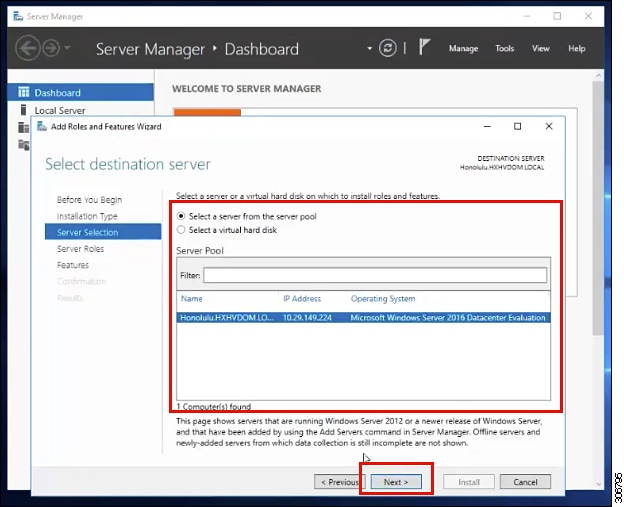 |
|
Step 5 |
In the Select Roles page, click Next. |
|
Step 6 |
In the Features page, select , and . Click Next. 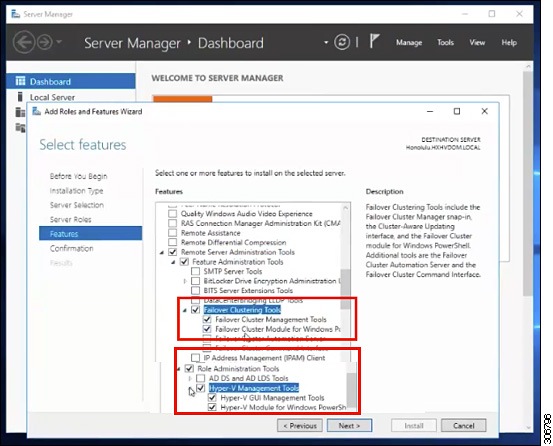 |
|
Step 7 |
In the Confirmation page, click Install. Leave the Restart the destination server if required checkbox unchecked. |
|
Step 8 |
The Installation Progress page displays installation progress. When installation completes, click Close to exit the wizard. 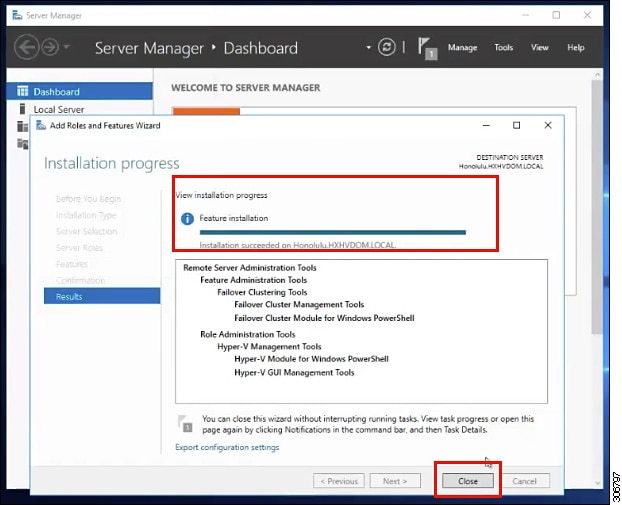 |
Managing VMs using Hyper-V Manager
Connecting to Hyper-V Nodes
Complete the following steps to connect to all the Hyper-V nodes in the Hyper-V HX Cluster.
Procedure
|
Step 1 |
Open the Server Manager dashboard and click Tools. Then, click Hyper-V Manager. The Hyper-V Manager console appears. |
||
|
Step 2 |
In the left pane, select Hyper-V Manager and click Connect to Server.... |
||
|
Step 3 |
In the Select Computer dialog box, select Another computer and type in the name of the Hyper-V node (for example, HXHV1) that belongs to the Hyper-V cluster. Click OK. |
||
|
Step 4 |
Repeat all of the above steps for each node in the Hyper-V HX cluster.
|
Creating VMs using Hyper-V Manager
Complete the following steps to create VMs using Hyper-V Manager.
Procedure
|
Step 1 |
Open Hyper-V Manager. |
|
Step 2 |
Select the Hyper-V server, and right click and select . The Hyper-V Manager New Virtual Machine wizard displays. |
|
Step 3 |
In the Before you Begin page, click Next. |
|
Step 4 |
In the Specify Name and Location page, enter a name for the virtual machine configuration file. The location for the virtual machine click Next. |
|
Step 5 |
In the Specify Generation page, choose either Generation 1 or Generation 2. |
|
Step 6 |
In the Assign Memory page, set the start memory value 2048 MB. Click Next. |
|
Step 7 |
In the Configure Networking page, select a network connection for the virtual machine to use from a list of existing virtual switches. |
|
Step 8 |
In the Connect Virtual Hard Disk page, select Create a Virtual Hard Disk page, and enter the name, location and size for the virtual hard disk. Click Next. |
|
Step 9 |
In the Installation Options, you can leave the default option Install an operating system later selected. Click Next. |
|
Step 10 |
In the Summary page, verify that the list of options displayed are correct. Click Finish. |
|
Step 11 |
In Hyper-V Manager, right-click the virtual machine and click Connect. |
|
Step 12 |
In the Virtual Machine Connection window, select . |
Managing VMs using Failover Cluster Manager
Creating VMs using Failover Cluster Manager
Complete the following steps to connect to the Windows Failover cluster (installed along with the Hyper-V HX cluster) and create new VMs using Failover Cluster Manager.
Procedure
|
Step 1 |
In the Failover Cluster Manager console, under the Actions pane, click Connect to Server... |
||
|
Step 2 |
In the Select Cluster dialog box, click Browse to navigate to the Hyper-V HX cluster. Click OK. |
||
|
Step 3 |
In the left pane, click . |
||
|
Step 4 |
In the New Virtual Machine dialog box, search and select the Hyper-V node where you wish to create new VMs. Click OK. The New Virtual Machine wizard appears. |
||
|
Step 5 |
In the Before You Begin page, click Next. |
||
|
Step 6 |
In the Specify Name and Location page, choose a name for the VM, and specify the location or drive where the VM will be stored. Click Next. |
||
|
Step 7 |
In the Specify Generation page, select the generation of virtual machine you want to use (Generation 1 or Generation 2) and click Next. |
||
|
Step 8 |
In the Assign Memory page, enter the amount of memory that you want for the VM. Click Next. |
||
|
Step 9 |
In the Connect Virtual Hard Disk page, enter the name, location and hard drive size. Click Next. |
||
|
Step 10 |
In the Installation Options page, select the install location for the OS. Click Next. |
||
|
Step 11 |
In the Summary page, review the options selected and click Finish. |
||
|
Step 12 |
Right-click on the newly created VM, and click Connect.... In the Virtual Machine Connection window, click Start.
|
What to do next
To enable redirection of datastore access requests from outside the HX cluster boundary through the management path, add the following entry to the hosts file on the (remote) machine running Hyper-V manager, Failover Cluster Manager, or SCVMM Console. For example, edit C:\Windows\System32\drivers\etc\hosts and add:
cluster_mgmt_ip \\smb_namespace_name\datastore_name
10.10.10.100 \\hxcluster.company.com\ds1
Opening Data Path Access to the SCVMM Host
Before you begin
FixScvmmAccess.py script must be invoked with python3.
Note |
|
Procedure
| Command or Action | Purpose | |
|---|---|---|
|
Step 1 |
Launch a secure shell login session to the cluster management IP address. |
|
|
Step 2 |
Determine the ensemble members in the cluster by reviewing the following information: |
|
|
Step 3 |
From the current SSH login session, launch an SSH session to any of the IP addresses displayed for the crmZKEnsemble parameter. |
|
|
Step 4 |
Run the following script without any additional parameters: |
python /opt/springpath/storfs-hyperv/FixScvmmAccess.py The script prompts you to enter the SCVMM IP address. |
|
Step 5 |
Add the SCVMM IP address and exit the SSH session. |
Configuring HyperFlex Share to SCVMM
Before you begin
Edit the /etc/hosts file on the host running the VMM admin console to resolve the smb access point to the cluster management IP address of HyperFlex cluster. This IP address is typically used to launch Cisco HX Connect.
The complete path is : C:\Windows\System32\drivers\etc
Open the "hosts" file in the above directory in Notepad or any other text editor and add the following entry in the bottom :

<CMIP>  <smb_share_namespace>

CMIP will be the Cluster Management IP which is usually used to open HX connect UI.

For example,
10.10.10.1    hxhvsmb.example.com
Note |
For SCVMM Run As account, it is recommended to use hxadmin (or any other Domain Admin account which has FULL permissions) for the corresponding HyperFlex Organization Unit (OU) in the Active Directory (AD). |
Procedure
|
Step 1 |
Add the cluster to System Center - Virtual Machine Manager (VMM). |
|
Step 2 |
In the VMM console, go to . |
|
Step 3 |
Right-click on the cluster and select Properties. 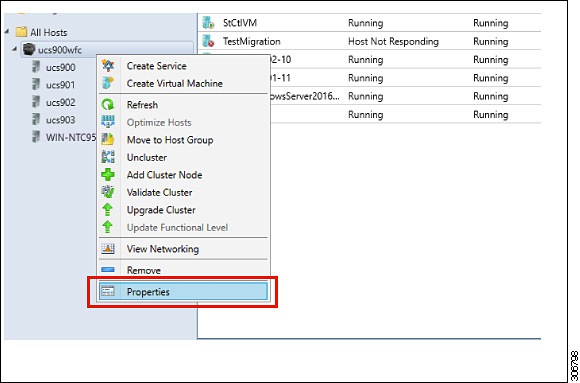 |
|
Step 4 |
In the Properties window, right-click . 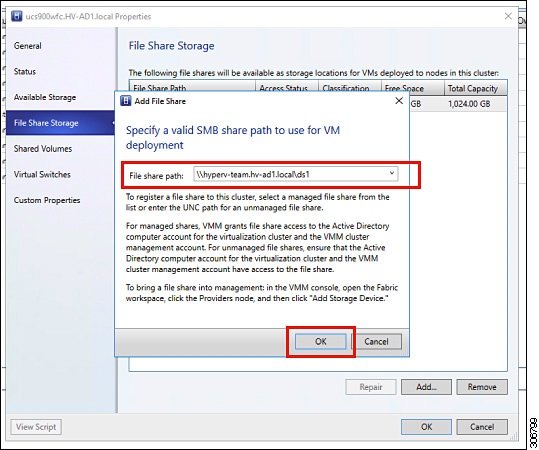 |
|
Step 5 |
When mapping completes, the share is added as shown in the screenshot below. 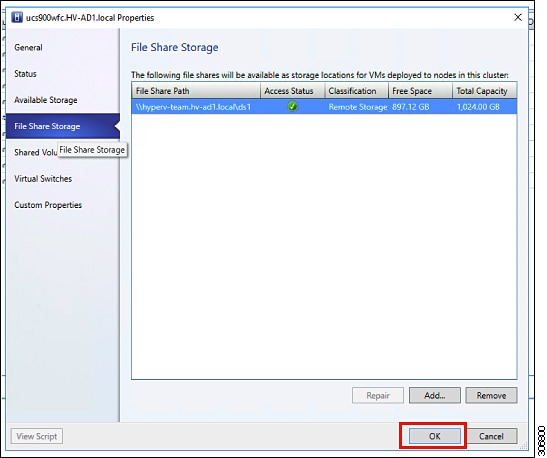 |
|
Step 6 |
Click OK and exit VMM. The HyperFlex Share is now mapped and VMs can be created on this share using SCVMM. |
Re-enabling Windows Defender
Install Defender from PowerShell
Install-WindowsFeature -Name Windows-Defender
(Optional) Install Defender GUI from PowerShell
Install-WindowsFeature -Name Windows-Defender-GUI
VM Migration between Hosts
Before you begin
Follow the steps below to perform VM migration between a standalone host and an HX Hyper-V host. Prior to performing this procedure, make sure that your environment meets the following prerequisites:
-
The source and destination computers either belong to the same Active Directory domain or belong to domains that trust each other.
-
In Failover Cluster Manager, configure Live Migration settings on both the source and destination Hyper-V hosts.
Procedure
|
Step 1 |
Open Hyper-V Manager. |
|
Step 2 |
In the navigation pane, select, HXHVINFRA2. |
|
Step 3 |
In the Action pane, click . |
|
Step 4 |
In the Live Migrations pane, check Enable incoming and outgoing live migrations. |
|
Step 5 |
Under Incoming live migrations, select Use the IP addresses for live migration. Click Add, and then click OK. This opens the Move Wizard. |
|
Step 6 |
Use the wizard pages to choose the type of move, destination server, and options. |
|
Step 7 |
On the Summary page, review your choices and then click Finish. |
Testing Upstream Failover for Storage Data Network
Configure upstream (top-of-rack (ToR)) so storage data network jumbo frames communicate between FI-A and FI-B.
Note |
In some cases 1500 based frames are used because you are not able to configure ToR for jumbo frames as the cluster was previously configured to use 1500 sized frames. The ping test enables you to test basic 1500 frame connectivity across the ToR. |
Procedure
|
Step 1 |
Log into a single Hyper-V Host as HX Service account. |
|
Step 2 |
Open . |
|
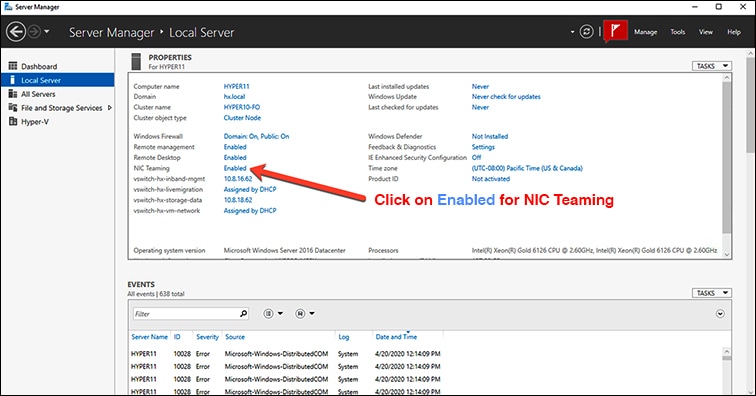
Step 3 |
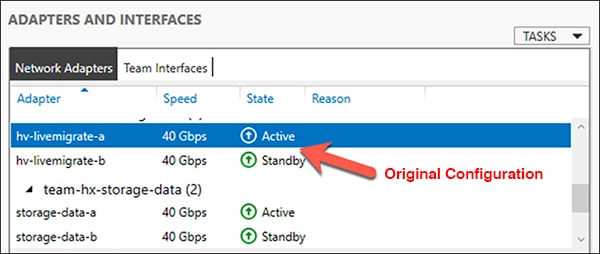
Click on Enabled for NIC Teaming.
|
|
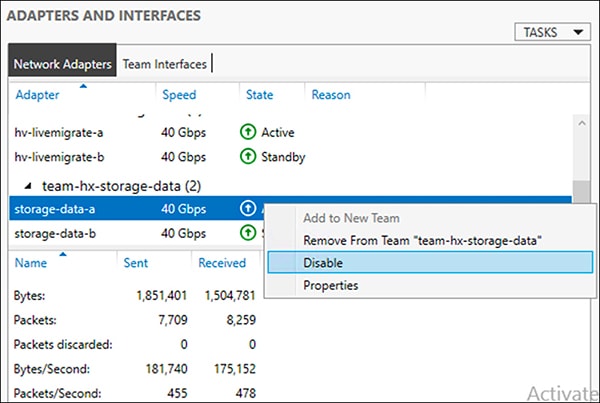
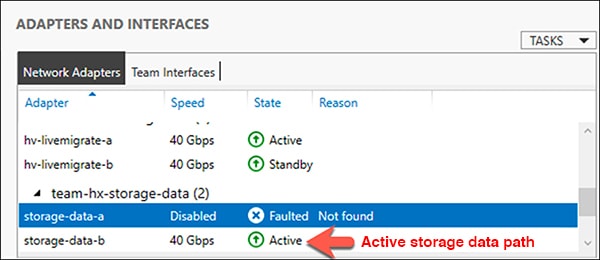
Step 4 |
Right mouse click on storage-data-a and select Disable.
This forces the storage-data-b interface on FI-B to become the active path for data.
|
|
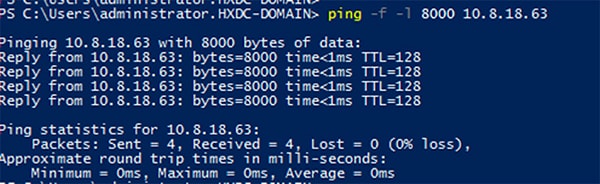
Step 5 |
Test jumbo pings from local powershell window to remote host storage data ip addresses. For example:
|
|
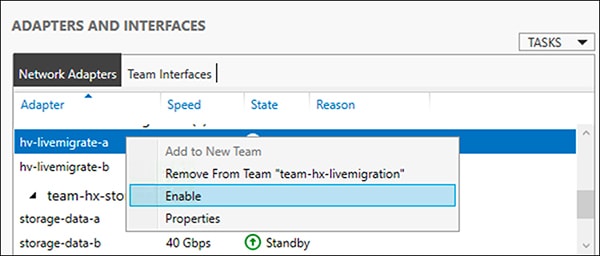
Step 6 |
Reset the storage-data-a team interface to Active by right mouse-clicking and selecting Enable.
|
 Feedback