Managing iSCSI


Note


The iSCSI features are supported in Cisco HyperFlex Release 4.5(x) and later.


HyperFlex iSCSI Target Service Overview and Supported Use Cases

The HyperFlex iSCSI Target Service is introduced in HyperFlex 4.5(1a). Supported use cases for the the HX iSCSI Target Service are as follows:

  • Support failover clustering, such as Microsoft Failover Clusters, for applications that require highly available shared storage, including Microsoft SQL Server and Hyper-V.

  • Present block storage to applications running inside or outside the HyperFlex cluster, such as Oracle Database or Oracle RAC deployments on external compute hosts

  • Support Microsoft Exchange deployment over iSCSI

  • Provision persistent volumes for Kubernetes through the HyperFlex Container Storage Interface for Kubernetes

  • Support for HX iSCSI support to Edge and DC-No-FI was introduced in Cisco HX Release 5.0(2a).

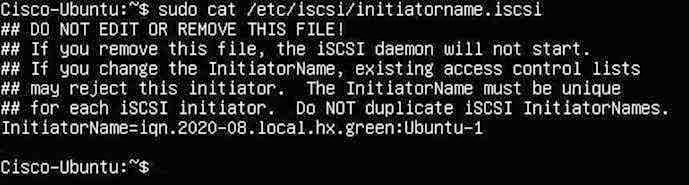
Initiators are currently supported on Windows Server 2016, Windows Server 2019, Ubuntu 18.04 and 20.04, Oracle Linux 8.2, Oracle Linux 7, Red Hat Enterprise Linux 8.2, Red Hat Enterprise Linux 7.


Note


The HyperFlex iSCSI Target Service is not supported on Stretched and Hyper-V clusters.


HyperFlex iSCSI Best Practices

When enabling iSCSI in HyperFlex, it is a best practice to also enable Boost Mode. Boost Mode allows the Cisco HyperFlex Cluster to deliver higher IOPs by increasing the storage controller VM CPU resources by 4 vCPU, and mitigate the performance impact of iSCSI. For more information about enabling or configuring Boost Mode, see Boost Mode.

iSCSI Configuration Overview

The process to configure the iSCSI Target Service is as follows:

iSCSI Scale and Support

The following describes iSCSI support recommendations. The noted values are based on what Cisco has tested, and what provides optimal performance. Using these as your "Maximum supported" guideline is strongly encouraged.

Table 1. iSCSI Scale and Support Recommendations

Scale Item

HXDP Support

iSCSI LUNs per HyperFlex cluster

32,640

iSCSI Initiator Groups per HyperFlex cluster

128

iSCSI targets per HyperFlex cluster

128

iSCSI LUNs per target

255

Maximum iSCSI LUN size

64 TB

Maximum number of iSCSI sessions per controller VM

64

iSCSI IO initiator queue depth per iSCSI session

256

iSCSI IO target side queue depth per controller

2,048

iSCSI Network Page

Displays configuration information for your iSCSI network.

iSCSI Network Data

If you have already configured your iSCSI network, basic network information is displayed.

Table 2. iSCSI Network Data

UI Element

Description

ISCSI Configuration

Status of iSCSI network configuration. If configured, status is indicated as "Network Configured".

LUNs

Number of LUNs created.

Capacity Used

Capacity used (in GB).

Cluster Capacity Utilization

Percentage of cluster capacity used by LUNs, Other and Free.

Targets

List and configuration information for iSCSI Targets.

Initiator Groups

List and configuration information for iSCSI Initiator Groups.

Creating an iSCSI Network


Caution


An ip address range is required for the new VLAN configuration. This range should not already exist in the cluster. Not adhering to this requirement can result in a cluster outage.


To create your iSCSI Network:
  1. Enter the information required for the iSCSI Network: iSCSI Network, Subnet, Gateway, IP Range, iSCSI Storage IP, Set non-default MTU, and VLAN Configuration. Click Next when done.

  2. Click Configure; or click Cancel to cancel your changes.

  3. Click Confirm to confirm that you want to create your iSCSI Network; or click Cancel to cancel your changes.


    Note


    After you confirm creation of your iSCSI network, you cannot change some iSCSI network parameters without TAC assistance.


    Note


    If you configured the hx-storage-data network with 1500 MTU (no Jumbo frames), but you want to utilize Jumbo frames (as recommended for the iSCSI network), you will need to manually edit the hx-storage-data network vswitch on all ESXi hosts in the HyperFlex cluster to 9000 MTU.


iSCSI Network Configuration Data

The following information is required to create your iSCSI Network.

Table 3. iSCSI Network Configuration Data

UI Element

Description

iSCSI Network

Configuration information for the iSCSI Network is displayed.

Subnet

Enter a valid Subnet

Gateway

Enter a valid Gateway

IP Range

Enter a valid IP Range (this range should not include the iSCSI Storage IP)

iSCSI Storage IP

Enter a valid IP Address for iSCSI Storage (this IP address should not be an address used in the IP Range field)

Set non default MTU

Checkbox to enable setting MTU (Message Transport Unit) manually. The MTU defines the maximum size of a network frame that you can send in a single data transmission across the network. The default MTU size is 9000.

To disable Jumbo Frames, click the Set non default MTU checkbox, and then use the pull-down to change the value to 1500.

Note


If any of the initiators are crossing a router, the router will need to allow Jumbo Frames.

VLAN Configuration

Click in the checkbox to Create a new VLAN(Recommended) or Select an existing VLAN.

To Create a new VLAN, you need to specify the following: VLAN ID, VLAN Name, UCS Manager host IP or FQDN, Username (Username for authentication with UCS), Password (Password for authentication with UCS).

To Select an existing VLAN, you need to specify the VLAN ID.

Note


To configure the VLAN manually in UCS-M, use the create VLANs menu option. In the Create VLANs window, leave the checkboxes as is. In the vNIC templates for HX, attach the VLAN to "vNIC Template storage-data-a" and "vNIC Template storage-data-b". This configuration is non-disruptive.

Editing an iSCSI Network

To edit your iSCSI network configuration:

  1. Go to the Actions menu, and select Edit Network. The Edit Network for <cluster_name> window appears.

  2. Add an IP Range for the iSCSI Network.

  3. Click Save Changes; or click Cancel to cancel your changes.

Deleting an iSCSI Network

You may delete and reconfigure an iSCSI network configuration while preserving the iSCSI LUNs, initiator groups and targets on the cluster.

To delete an iSCSI network configuration:

  1. Go to the Actions menu, and select Delete Network. The Delete Network Configuration window appears prompting "Are you sure you want to delete Network Configuration?".

  2. Click Confirm; or click Cancel to cancel your changes.


Note


The option to delete an iSCSI network and retain objects you have configured is also available using the "hxcli iscsi network delete" command or API. For more information, see the CLI Reference Guide.


iSCSI Initiator Group

Displays configuration information for iSCSI Initiator Groups.

iSCSI Initiator Group Data

The following information is required to create an iSCSI Initiator Group.

Table 4. iSCSI Initiator Group Data

UI Element

Description

Name

Name for the Initiator Group.

Initiator IQN

iSCSI Qualified Name (IQN) for your Initiator.

The IQN format takes the form iqn.yyyy-mm.naming-authority:unique name.

Creating an iSCSI Initiator Group

To create an iSCSI Initiator Group:

Before you begin

Before creating an iSCSI Initiator Group, you should have already created an iSCSI Network using HX Connect.

Procedure


Step 1

Go to the Initiator Groups tab, and click on Create.

The Create Initiator Group window appears.

Step 2

Enter a name for your Initiator Group in the Name field.

Step 3

Enter the Initiator IQN in the field provided. If you do not know the Initiator IQN, you can fetch it from the server:

  1. For Windows, log into the Windows machine. Go to Server Manager and click on iSCSI Initiator. Go to the Configuration tab. The Initiator IQN is identified in the Initiator Name field.

  2. For Linux, enter the command: "sudo cat /etc/iscsi/initiatorname.iscsi". The Initiator IQN is identified in the Initiator Name field.

    The initiator name is in the file and can be changed with the appropriate rights.

Step 4

Click Add Initiator.

Note

 
To allow access to initiators outside of the iSCSI VLAN subnet, use the hxcli iscsi allowlist command. For example:

hxcli iscsi allowlist add --ips 192.168.101.3

For more information, see the CLI Guide for your release.

Step 5

Repeat the above steps to add multiple IQNs to participate in the same Initiator Group.

Step 6

Click Create Initiator Group.


The Initiator Group appears in the Initiator Groups tab.

Editing an iSCSI Initiator Group

To edit an iSCSI Initiator Group:

Procedure


Step 1

Click on the Edit (pencil) icon next to the Create button.

The Edit Initiator Group window appears.

Step 2

Edit data for the iSCSI Initiator Group.

Step 3

Click Save Changes; or click Cancel to cancel your changes.


Deleting an iSCSI Initiator Group

To delete an iSCSI Initiator Group:


Note


You cannot delete an iSCSI Initiator Group when linked with a Target.

Procedure


Step 1

Click on the Delete (X) icon next to the Create Initiator Group button. The Delete Initiator Group window appears.

Step 2

Click Delete; or Cancel to cancel your changes.


Linking iSCSI Initiator Group with Targets

To link an iSCSI Initiator Group:

Before you begin

Verify you have created an Initiator Group and iSCSI Targets.

Procedure


Step 1

Go to the Targets tab, and select the name of the Target you want to link an Initiator Group.

Step 2

From the Linked Initiator Groups tab, click in the checkbox to Link.

The Link Initiator Groups window appears.

Step 3

Select the Initiator Group(s) to link to the Target.

Step 4

Click Link Initiator Groups.


What to do next

After you have linked Initiator Groups with Targets;

Unlinking an iSCSI Initiator Group

To unlink an iSCSI Initiator Group:

Procedure


Step 1

Go to the Targets tab, and select the name of the Target you want to unlink an Initiator Group.

Step 2

From the Link Initiator Groups tab, click in the checkbox to select the Initiator Group(s) to unlink to the Target.

Step 3

Click on the Unlink Initiator Group button.

Step 4

Click Unlink Initiator Group(s) to proceed or Cancel.


iSCSI Target Page

Displays configuration information for Targets.

Target Data

The following information is required to create a Target.

Table 5. Target Creation Data

UI Element

Description

Name

Name for the target.

Enable CHAP authentication

Click to enable CHAP authentication.

Note

 
HXDP supports one-way CHAP authentication.

Username

Username for CHAP authentication

Secret

Secret for CHAP authentication

After a Target is created, the following information appears.

Table 6. Target Information Data

UI Element

Description

IQN

Target iSCSI Qualified Name for your Initiator.

Active Initiators Count

Total number of active Initiators.

Total LUN Capacity

Total storage capacity of LUN used and available (in Tb and in Gb).

CHAP authentication

Indicates whether you have Enabled CHAP authentication.

LUNs

Tab allowing you to create, edit, clone, delete and view LUNs for the Target.

Linked Initiator Groups

Tab allowing you to create and view LUNs for the Target.

Creating an iSCSI Target

To create an iSCSI target:

Before you begin

Before creating an iSCSI Target, you should have already created an iSCSI Network using HX Connect. It is also recommended that you create Initiator Groups.

Procedure


Step 1

Go to the Targets tab, and click on Create.

The Create Target window appears.

Step 2

Enter a name for the target in the Target name field.

Step 3

(Optional) If you want to enable CHAP authentication, click in the Enable CHAP authentication checkbox. Fields for Username and Secret appear. Enter the Username and Secret.

Note


For Windows, the Secret must be 12-16 characters.

Note


CHAP based authentication is not supported during iSCSI Discovery phase.

HXDP supports one-way CHAP authentication.

Note


When using CHAP and booting from SAN (iSCSI LUN), you must set the CHAP user/password at the top initiator area in UCS (for example, in UCS manager, navigate to Boot Policy > Set iSCSI Boot Parameters > Authentication Profile).

Step 4

Click Create Target.


The Target appears in the Targets tab.

What to do next

After you have created an iSCSI Target:

Editing an iSCSI Target

To edit an iSCSI Target:

Procedure


Step 1

Click on the Edit (pencil) icon next to the Create button.

The Edit Target window appears.

Step 2

Edit data for the Target.

Step 3

Click Save Changes; or click Cancel to cancel your changes.


Deleting an iSCSI Target

To delete a Target:

Procedure


Step 1

Click on the Delete (X) icon next to the Create Target button.

The Delete Target window appears.

Step 2

Click Delete Target; or click Cancel to cancel your changes.

Note

 
You cannot delete a Target if there is an Initiator Group linked to the target.

Note

 
You cannot delete a Target if LUNs are created for it. If you still want to delete the Target, you must first delete all LUNs created for it.

Linking iSCSI Targets

To link an iSCSI Target:

Before you begin

Before linking an iSCSI Target, you need to create and configure Initiator Groups. If you have not yet created an Initiator Group, you will need to do so before linking to an iSCSI Target. For more information, see Creating an iSCSI Initiator Group.

Procedure


Step 1

Go to the Initiator Groups tab, and select the name of the Initiator Group you want to link to a Target.

Step 2

From the Linked Targets tab, click on the Link button.

The Link Target window appears.

Step 3

Select the Target(s) to link to the Initiator Group(s).

Step 4

Click Link Target.


The linked targets you selected appear in the Linked Targets tab.

What to do next

After you have linked iSCSI Targets.

Unlinking an iSCSI Target

To unlink an iSCSI Target:

Procedure


Step 1

Go to the Initiator Groups tab, and select the name of the Initiator Group you want to unlink targets.

Step 2

From the Linked Targets tab, click in the checkbox to select the Target(s) that you want to unlink.

Step 3

Click on the Unlink Target button.

Step 4

Click Unlink; or click Cancel to cancel your changes.


iSCSI LUN Page

Displays configuration information for iSCSI LUN.

iSCSI LUN Data

The following information is required to create a LUN.

Table 7. iSCSI LUN Data

UI Element

Description

Name

Name of the LUN.

Size

Total capacity size of the LUN (in GB).

Note


The maximum LUN size is 64TB.

After a LUN is created, the following information appears.

Table 8. LUN Information Data

UI Element

Description

Name

Name of the LUN.

LUN ID

Unique ID for the LUN.

Serial No.

Serial Number of the LUN.

Size

Total capacity size of the LUN (in GB).

Used

Total capacity of the LUN used (in GB).

Available

Total capacity of the LUN available (in GB).

Creating an iSCSI LUN

To create an iSCSI LUN:

Procedure


Step 1

Go to the Targets tab, and select the name of the Target you want to create a LUN.

Step 2

Click in the Create LUN checkbox.

The Create LUN window appears.

Step 3

Enter a name for the LUN in the LUN field.

Step 4

Enter the size and unit of the LUN in the Size field.

Note


The maximum LUN size is 64 TB.

Step 5

Click Create LUN.


The LUN appears in the LUNs tab for the Target.


Note


There is a limit on the number of LUNs that you can expose per target. On Linux systems, the limit is 255 LUNs per target. On Windows systems, the limit is 254 LUNs per target.

Note


You can create volumes that are protected by CHAP. The limit that you can create with one storage class for each target is 255 volumes (Persistent Volume Claims).

What to do next

After you have created an ISCSI LUN, you can Configure an iSCSI Initiator

.

Editing an iSCSI LUN

To edit an iSCSI LUN:

Procedure


Step 1

Go to the Targets tab, and select the name of the Target you want to edit LUNs.

Step 2

From the LUNs tab, click in the checkbox to select the LUN you want to edit.

Step 3

Click on the Edit icon next to the Create LUN button. The Edit LUN window appears.

Step 4

Edit data for the LUN.

Note


The maximum LUN size is 64 TB.

Step 5

Click Edit LUN; or click Cancel to cancel your changes.


Deleting an iSCSI LUN

To delete an iSCSI LUN:

Procedure


Step 1

Go to the Targets tab, and select the name of the Target you want to delete LUNs.

Step 2

From the LUNs tab, click in the checkbox to select the LUN you want to delete.

Step 3

Click on the Delete (X) icon next to the Clone LUN button. The Delete LUN window appears.

Step 4

Click Delete; or click Cancel to cancel your changes.


Configuring an iSCSI Initiator (Windows)

This procedure describes how to configure a Windows machine as an iSCSI Initiator. This must be done to initialize, online and create a volume on the iSCSI LUN prior to cloning the LUN.


Note


HXDP supports one-way CHAP authentication. Two-way CHAP authentication is not supported.


Procedure


Step 1

Log into the Windows machine that you want to configure as an iSCSI Initiator.

Step 2

Go to Server Manager, and click on iSCSI Initiator. Click Yes to continue.

Step 3

Enter the Target’s Hostname or IP address in the Target tab, and then click on Quick Connect.

Discovered Targets appear as "HX Cluster IP(CIP)" and display the Target IQN and status of the Targets.

Step 4

Click Done.

Step 5

Select the target, and then click Connect on the Target tab.

Step 6

Click Advanced.

Step 7

Click to "Enable CHAP log on", and then specify the username and password for HyperFlex. Click OK.

If there are no issues with the configuration, the status is updated to indicate "Connected".

Step 8

Verify that the iSCSI LUN(s) is attached in the Disk Management tool.


You can now initialize, online and create a volume on the iSCSI LUN(s).

Configuring an iSCSI Initiator (Linux)

This procedure describes how to configure an iSCSI Initiator on Linux. This must be done to initialize, online and create a volume on the iSCSI LUN prior to cloning the LUN.

Procedure


Step 1

Verify that the iscsiadm command is present.

Step 2

Run the following command: sudo apt-get install open-iscsi.

Step 3

Discovery the target. You can do so by running the following command: sudo iscsiadm -m discovery -t sendtargets -p <HX iSCSI CIP>.

Step 4

Log into the target. You can do so by running the following command: sudo iscsiadm -m discovery -t sendtargets -p <HX iSCSI CIP> -l.

Note


With lsblk –scsi, you can verify which device is the target. You can now partition it with gdisk and format the HX iSCSI drive.


Cloning an iSCSI LUN

If you require the LUN to be application consistent, you can clone the LUN. Cloning LUNs is supported on Windows and Linux hosts. However, the application consistent LUN clones are only supported on Windows via VSS.

To clone an iSCSI LUN on a Windows machine, you must first install HX Windows Agent. For more information, see Installing HX Windows Agent for iSCSI Clone LUN.

To clone an iSCSI LUN:

Before you begin

Install the HX Windows Agent on each initiator. For more information on installing the HX Windows Agent, see Installing HX Windows Agent for iSCSI Clone LUN.

Procedure


Step 1

Go to the Targets tab, and select the name of the Target you want to clone LUNs.

Step 2

From the LUNs tab, click in the checkbox(es) to select the LUN(s) you want to clone.

Step 3

Click on the Clone LUN icon next to the Edit LUN button. The Clone LUNs window appears.

Step 4

Click in the Application Consistent checkbox to enable. Specify the administrator account (local or AD) username and password for the Windows machine to verify and authenticate the VSS user.

Note

 
If you do not enable the Application Consistent checkbox, the iSCSI Clone LUN(s) will be Crash Consistent.

Step 5

Enter a name for the new destination target in the New destination target name field.

Step 6

If you want to enable CHAP authentication, select the check box to Enable CHAP Authentication. For each source LUN(s), enter the destination LUN(s) name in the Destination LUN Name field.

Note


CHAP based authentication is not supported during iSCSI Discovery phase.

Step 7

Click Clone; or click Cancel to cancel your changes.

Note

 
The HX Windows Agent will not identify LUN(s) which are involved for other applications for example, SQL Server, Exchange. You must select the required LUN(s) for cloning.

What to do next

To access cloned LUN(s), link the destination Target with an Initiator Group, and then discover the LUN(s) by refreshing the iSCSI target from the Initiator window. Use the HxWindowsAgentUtils.exe to change the disk/volume properties for the destination LUN(s).

Limitations for the HX Windows Agent

The following limitations apply for the HX Windows Agent:

  • iSCSI LUN(s) should be added using an in-guest Initiator in Windows virtual machines deployed on the vCenter Server\ESXi Host.

  • Shared Disk on the Windows machine not managed by Microsoft Failover Cluster is not supported for iSCSI Clone LUN operations.

  • From HX Connect, you can clone the iSCSI LUN on a new destination target only.

  • For application consistent iSCSI Clone LUN, make sure to select all the LUNs which are used by the application (for example, SQL Server, Oracle, etc.)

  • Clone of Cluster Shared Volume(CSV) and clustered disk/standalone disk combination is not supported. SCV LUN(s) only or combination of standalone/clustered disk is supported for the clone operation.

  • The HyperFlex VSS Hardware Provider service can only be invoked by the HyperFlex Windows Agent. If third-party backup vendor tries to clone the HX LUN, “Microsoft Software Shadow Copy” Provider will be invoked.

  • Upgrade and patching of the HX Windows Agent is supported.

  • Upgrade of HyperFlex will not upgrade the HX Windows Agent. You must manually upgrade the HX Windows Agent.

  • If you restart or power off the HyperFlex cluster node, the iSCSI Clone LUN operation fails.

Prerequisites for the HX Windows Agent

To run the HX Windows Agent, you must meet the following prerequisites:

  • Windows 2016 or later with basic configuration of the host machine.

  • Ports 10152 and 9347 must be open on the Windows Server

  • Ports 10151 and 9347 must be open on the HX Controller VMs

  • Ensure that the “HyperFlex Windows Agent” and “HyperFlex VSS Hardware Provider” services are installed on the Windows machine.

  • Ensure that the “HyperFlex Windows Agent” is in running state.

  • Ensure that both the services - “HyperFlex Windows Agent” and “HyperFlex VSS Hardware Provider” are installed on all Windows machines that are exposed as an ISCSI Initiator.

  • Provide Administrator or AD credentials while triggering the Application Consistent ISCSI Clone LUN workflow.

  • Ensure that the source LUN you are going to clone is discovered and the volume with volume label is created on the Windows machine.

Installing HX Windows Agent for iSCSI Clone LUN

This procedure describes how to install the HX Windows Agent for iSCSI Clone LUN.

Before you begin

Ensure that you are running Microsoft Windows Server 2016 or later with basic configuration on the VM\Bare Metal. The Installer adds rules to allow inbound communication over 10152 port. If you are using any third-party firewall or antivirus software however, you will need to ensure that port 10152 is open.

Procedure


Step 1

Log into the Windows machine using Administrator or AD credentials.

Step 2

Run the Windows HX Agent install executable by double-clicking on the file: HxWindowsAgentIscsiClone-v4.5.1a-39020.exe.

Note


Agent logs and files extracted from HxWindowsAgentIscsiClone-v4.5.1a-39020.exe appear with build number 4.5.1a.38547 in properties of the file. This is a version display issue with no impact on functionality and can be disregarded.

Step 3

Click Next.

Step 4

Click to select “I accept the terms in license agreement” and click Next.

Step 5

Confirm <Program File>\Cisco\HxWindowsAgent as the location of the installation directory, then click Next.

Step 6

Click Install.

Step 7

Click Finish.


This installs the HyperFlex Windows Agent and HyperFlex VSS Hardware Provider services. Other installatoin notes are as follows:
  • You can view the HyperFlex Windows Agent and HyperFlex VSS Hardware Provider services in Windows services. The HyperFlex Windows Agent should be in running state and the HyperFlex VSS Hardware Provider is in stopped state. The HyperFlex VSS Hardware Provider service is started when you request to clone or backup a LUN.

  • You can view MSI installation and other install details in %appdata%\HxWinAgentMsiInstall.log.

  • In the installation directory, you may notice some dependent dll’s. Do not delete or update these dependencies. If deleted, you will need to use the repair option in the installer to restore.

  • View service logs in C:\HxWindowsAgent\Logs\ HxAgentService_<DateTime>.log. The Windows Registry is in location : HKEY_LOCAL_MACHINE\SOFTWARE\HyperFlex. This entry will have the location of Service logs.

  • To verify the Agent version: Go to the Installation directory, right-click on HxWinAgentService.exe and select Properties. Go to the Details tab and verify the Product Version.

  • You can view installation and operation events on the service in the Event viewer with Source as “HxVssHardwareProvider” and “HxWindowsAgent”. Inbound rules are set with the name “Hx Windows Agent” on port 10152 and enabled for all IP Addresses in Windows firewall .

Installing HX Windows Agent (with Pre-Installed Dependencies) for iSCSI Clone LUN

This procedure describes how to install the HX Windows Agent to enable iSCSI Clone LUN for HyperFlex, if there are dependencies - for example, if Microsoft .NET framework 4.5 (version : 4.5.50709 or above),Microsoft Visual C++ 2017 Redistributable (x64) (version: 14.10.25017 or above) , Microsoft Visual C++ 2017 Redistributable (x86) (version: 14.10.25017 or above) programs are already installed on the Windows machine.

Procedure


Step 1

Log into the Windows machine using Administrator or AD credentials.

Step 2

Double-click on the file: HxWindowsAgentIscsiClone-v4.5.1a-39020.msi

Note


You cannot use HxWindowsAgentIscsiClone-v4.5.1a-39020.msi to uninstall the agent.

Note


Agent logs and files extracted from HxWindowsAgentIscsiClone-v4.5.1a-39020.exe appear with build number 4.5.1a.38547 in properties of the file. This is a version display issue with no impact on functionality and can be disregarded.

Step 3

Click Next.

Step 4

Click to select “I accept the terms in license agreement” and then click Next.

Step 5

Select the Installation directory. The default location is <Program File>\Cisco\HxWindowsAgent.

Step 6

Click Install.

Step 7

Click Finish.


Uninstalling HX Windows Agent for iSCSI Clone LUN

This procedure describes how to uninstall the HX Windows Agent for iSCSI Clone LUN.

Procedure


Step 1

Log into the Windows machine using Administrator or AD credentials.

Step 2

Double click on the file: HxWindowsAgentIscsiClone-v4.5.1a-39020.exe.

Note


Agent logs and files extracted from HxWindowsAgentIscsiClone-v4.5.1a-39020.exe appear with build number 4.5.1a.39020 in properties of the file. This is a version display issue with no impact on functionality and can be disregarded.

Step 3

Click Next.

Step 4

Select Remove and Click Next.

Step 5

Click Remove.

Step 6

Click Finish.


  • When done, the uninstaller removes “HyperFlex Windows Agent” and “HyperFlex VSS Hardware Provider” services.

  • The uninstaller deletes inbound rules with the name “Hx Windows Agent” having port 10152 from Windows Firewall.

  • The uninstaller does not remove Microsoft .NET framework 4.5 (version : 4.5.50709 or later), Microsoft Visual C++ 2017 Redistributable (x64) (version: 14.10.25017 or later), Microsoft Visual C++ 2017 Redistributable (x86) (version: 14.10.25017 or later) programs.

  • The uninstaller does not delete files and folders from the location: C:\HxWindowsAgent\Logs\ HxAgentService_<DateTime>.log and Installation directory\HxCAInstallLogMsi.txt”.

  • HKEY_LOCAL_MACHINE\SOFTWARE\HyperFlex registry entry is retained.

iSCSI HX Windows Agent Logs

The following logs are available for the HX Windows Agent.

Table 9. HX Windows Agent Logs

Log File

Description

hxCloneSvcMgr.log

Located in: /var/log/springpath

hxApplicationConsistentSvcMgr.log

Located in: /var/log/springpath

HxAgentService_<DateTime>.log

Located in: %SystemDrive%\HxWindowsAgent\Logs.

This file contains Windows Agent logs specific to the VSS requestor.

HxVSSProvider_<DateTime>.log

Located in: %SystemDrive%\HxWindowsAgent\Logs.

This file contains Windows Agent logs specific to the VSS hardware provider.

HxWinAgentMsiInstall.log

Located in: %appdata%.

This file contains Windows Agent Installation logs.

Transferring HX Windows Agent Logs

To transfer helpful support information including the HXWindows Agent logs from a Windows machine to the Controller VM, run the following command from the Controller VM machine:

bash-4.2# hxWindowsAgentLogging


Note


This command accepts input parameters including the Windows IP, username and password required to pull the logs.


The logs are transferred to the following location on the Controller VM machine: :/var/log/springpath/<WindowsIP> in a file called "HXLogs.zip". The HXLogs.zip file includes the following information: HX Windows Agent logs, Disk Details from the HxDiskInfo.log, and system information from HxSystem.log.

Editing the Location of Service Logs

This procedure describes how to change the location of service logs.

Procedure


Step 1

Log into the Windows machine using Administrator or AD credentials.

Step 2

Open the Registry Editor.

Step 3

Open HKEY_LOCAL_MACHINE\SOFTWARE\HyperFlex.

Step 4

Right-click on the Data field of TargetDirectory and select Modify.

Step 5

Edit the value for the location of the log file.

Step 6

Restart the Hx Windows Agent service from Windows services.


Accessing Cloned LUN(s) on Destination Target

Follow the below procedure to discover the Destination LUN(s) on the Destination Target using the iSCSI Initiator window. You can also use the HxWindowsAgentUtils.exe located in the HX Windows Agent install directory.

Procedure


Step 1

Go to diskmgmt.msc and right-click on the required Disk <Disk ID> as "Online".

Step 2

Open a command prompt as "Administrator". Run diskpart.exe.

Step 3

Run the command: List Disk.

Step 4

Run the command: Select Disk <Disk ID> (Select the corresponding disk accordingly).

Step 5

Run the command: Detail Disk.

Step 6

If the disk attribute "Read-only" is "Yes", set as "No": "attributes disk clear readonly"

Step 7

Select Volume <Volume ID> (select volume shown as part of detail disk)

Step 8

Run the following commands:

  • attributes volume clear READONLY

  • attributes volume clear SHADOWCOPY

  • attributes volume clear NODEFAULTDRIVELETTER

  • attributes volume clear HIDDEN


You should now have a disk with volume accessible and the volume label with read/write permissions.