Set Up Stealthwatch Security Analytics

Install Stealthwatch Security Analytics

Procedure


Step 1

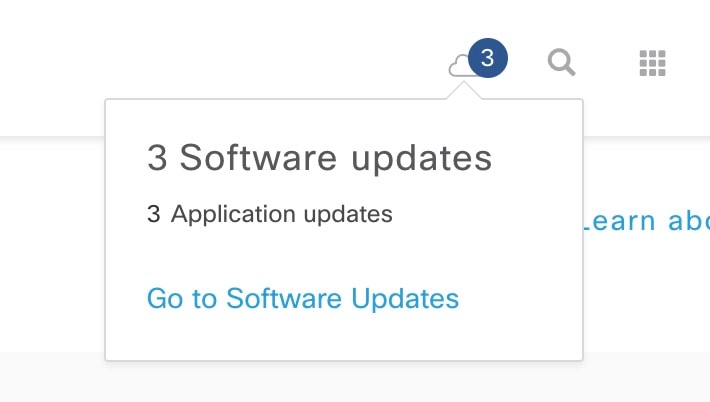
On the Cisco DNA Center home page, click the Software Updates icon.

Step 2

Click Go to Software Updates.

Step 3

Ensure that the Updates is selected in the tab on the left.

Step 4

Under Automation, click Install next to Stealthwatch Security Analytics.

After the installation is complete, the Stealthwatch Security Analytics service shows up under the Installed Apps tab.


Register Stealthwatch

Procedure


Step 1

From the Cisco DNA Center home page, click the gear icon () and select System Settings.

Step 2

Click Settings from the bar at the top.

Step 3

From the left navigation pane, select Stealthwatch.

Step 4

In the IP Address field, enter the IP address of your Stealthwatch Management Console.

If the IP address to which you are attempting to connect does not have a certificate signed by an official Certificate Authority, an alert appears.

Note 

By default, Stealthwatch Management Console ships with a self-signed certificate, which is not trusted.

If the alert appears because your Stealthwatch Management Console certificate is not trusted, then complete the following steps:

  1. Click the red alert icon.

  2. Select the check box to allow Cisco DNA Center to access the specified IP address and add the untrusted certificate to the Cisco DNA Center trust pool.

  3. Review the certificate details.

  4. Click Allow.

    The red alert icon changes to a green check mark.

Step 5

Enter the Username and Password for the Stealthwatch User that you would like to use.

The following are the minimum privileges required for the Stealthwatch user account:

  • Data Role: Read only

  • Function roles: Configuration Manager and Network Engineer

Step 6

Click Apply.

After Stealthwatch has successfully been registered, the status will display as Active | Registered and Running, just above the IP Address field.


Stealthwatch Security Analytics Readiness Checks

The Stealthwatch Security Analytics service conducts an automatic readiness check of the devices in your sites and fabrics to ensure they meet the criteria for deployment.

The following checks are conducted:

  • Required Software: The software running on your devices must meet the minimum requirements.

  • Required Device Role: The device role must support the deployment of the service. If you're using ASR and ISR series routers, then ensure that their Device Role is set to Border Router. If you're using 9300 and 9400 series switches, then ensure that their Device Role is set to Access.

  • Required Hardware: The device hardware must support the deployment of the service.

  • Required Licenses: The active license on the devices in your site must meet the minimum requirements.

  • No Conflicts with other Services: There should be no compatibility issues with other services.

The total number of devices that meet all of these criteria are considered to be Ready.


Note

See Stealthwatch Security Analytics Supported Devices for hardware, software, and license requirements.


Enable Stealthwatch Security Analytics

Procedure


Step 1

From the Cisco DNA Center home, navigate to the Provision page.

Step 2

Select the Services tab.

Step 3

Click Stealthwatch Security Analytics.

Step 4

In the left pane, select All Sites or All Fabrics, depending on whether you want to enable Stealthwatch Security Analytics for a site or fabric. By default, All Sites is selected.

Step 5

In the left pane, drill down to the site or fabric for which you want to enable Stealthwatch Security Analytics. Alternatively, you can search for the site or fabric using the search bar.

Step 6

Select the site or fabric for which you want to enable Stealthwatch Security Analytics by clicking the site card. If you choose, you can navigate the site and fabric heirarchy down to a specific floor.

The site card displays the number of devices that are enabled, ready, and not ready.

Note 

At least one device must be ready for you to enable Stealthwatch Security Analytics.

Step 7

Review the readiness check and click Get Started.

Step 8

From the drop-down list, select the IP address of the Stealthwatch Flow Collector that you wish to use for this site or fabric.

If you do not see the desired Stealthwatch Flow Collector in the drop-down list, it probably has not been defined in the Stealthwatch Management Console. For more information, see the Stealthwatch Management Console VE and Flow Collector VE Installation and Configuration Guide.

Step 9

Click Next.

Step 10

Ensure that the Ready tab is selected in the device table.

Step 11

Review the list of devices that will be enabled.

Step 12

Select the corresponding radio button to deploy the application immediately (Now), or at a later time (Later).

Note 

For deployments scheduled for a later time, you can edit the scheduled time from the Notifications list in the upper-right corner of the screen, by clicking Edit.

A series of readiness checks will be run close to the time of the deployment, including a readiness check on the CPU of the device at that time. Any readiness checks that fail will be listed in the task manager.

Step 13

Click Enable.

Step 14

You can view the status of your deployment from the Scheduled Tasks tab under the Notifications list ().

After your task is complete, the status of the deployment changes from In Progress to Success. To ensure that you're viewing the updated status click the Refresh button in the upper-right corner of the Notifications list.


View Not Ready Devices

Devices that have failed one or more of the software, compatibility, and license checks are considered to be not ready for the enablement of Stealthwatch Security Analytics. To view the list of devices that are Not Ready, complete the following steps:

Procedure


Step 1

From the Cisco DNA Center home, navigate to the Provision page.

Step 2

Select the Services tab.

Step 3

Click Stealthwatch Security Analytics.

Step 4

In the left pane, drill down to the site or fabric for which you want to view the devices that are not ready for Stealthwatch Security Analytics enablement. Alternatively, you can search for the site or fabric using the search bar.

Step 5

Select the site or fabric for which you want to view the not ready devices, by clicking the appropriate site card.

Step 6

At the device table, click Not Ready.

The list of devices that are not ready for Stealthwatch Security Analytics enablement are displayed, along with the status of each check for each of the devices.

Step 7

Hover your cursor over the red icon to view more information about failed checks.