Configure Change of Authorization in Catalyst 1300 Using Web User Interface
Available Languages
Objective
The objective of this article is to show you how to configure change of authorization (CoA) in Catalyst 1300 switches using the web user interface (UI).
Applicable Devices and Software Version
- Catalyst 1300 switches | 4.1.6.53
Introduction
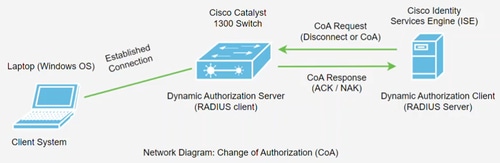
Change of Authorization (CoA) is an extension to the RADIUS protocol, that allows you to change the properties of an authentication, authorization, and accounting (AAA) or dot1x user session after it has been authenticated. When a policy for a user or group in AAA changes, administrators can transmit RADIUS CoA packets from the AAA server, such as a Cisco Identity Services Engine (ISE), to reinitialize authentication and apply the new policy.
The Cisco Identity Services Engine (or ISE) is a fully featured Network Based Access Control and Policy Enforcement Engine. It provides security analysis and enforcement, RADIUS and TACACS services, policy distribution, and more. Cisco ISE is currently the only supported CoA Dynamic Authorization Client for Catalyst 1300 switches. Refer to the ISE Admin guide for more information.
This feature requires communication between the Dynamic Authorization Client (RADIUS Server) and the Dynamic Authorization Server (Catalyst switch). As seen in network diagram below, the Dynamic Authorization Server sends a disconnect or CoA message to the Dynamic Authorization Server and the switch provides a response.
The CoA support has been added to the Catalyst 1300 switches in firmware version 4.1.3.36. This includes support for disconnecting users and changing authorizations applicable to a user session. The device supports the following CoA actions:
- Disconnect Session
- Disable host port CoA command
- Bounce host port CoA command
- Reauthenticate host CoA command
To configure CoA using command line interface (CLI), refer to Configuration of Change of Authorization in Catalyst 1300 Switch using CLI.
Table of Contents
Configuring Catalyst 1300 RADIUS Client on ISE
In this example, Cisco ISE server version 3.2 is used. For an overview of ISE, check out the Cisco Identity Services Engine product page.
CoA is supported on ISE version 2.7 and later.
After deploying Cisco ISE server, log in to access the web UI.
Step 1
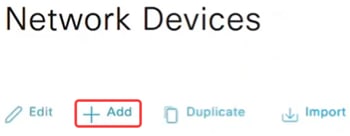
To add network devices, navigate to the Administration > Network Resources menu.

Step 2
Click on the + Add button.
Step 3
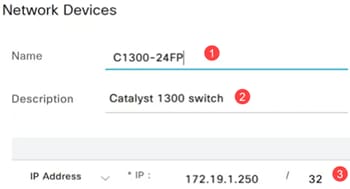
Enter the Name, Description, and IP address of the Catalyst switch.
Step 4
From the Device Profile drop-down menu, select Cisco.

Step 5
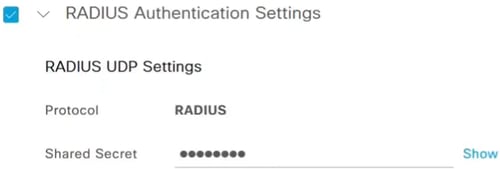
Configure the RADIUS Authentication Settings by entering the Shared Secret.
Step 6
Enter the CoA Port number. The default port is 1700.

Step 7
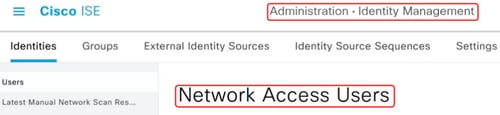
Next, navigate to Administration > Identity Management and select Network Access Users.
Step 8
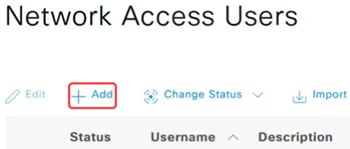
To define the username and password, click on the +Add symbol.
Step 9
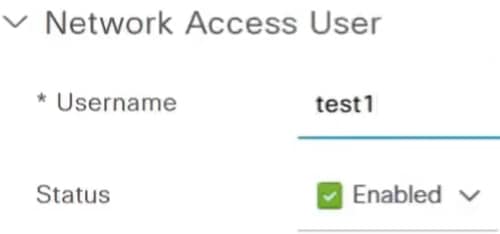
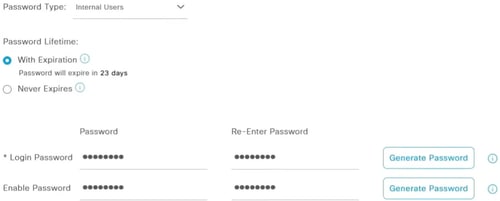
Enter the username, password and click Save at the bottom of the page.
Configurations in Catalyst 1300 Switch
Step 1
Login to your Catalyst 1300 switch and select Advanced mode. In this example, C1300-24FP-4X is used.
The CoA support has been added to the Catalyst 1300 switches in firmware version 4.1.3.36.
Step 2
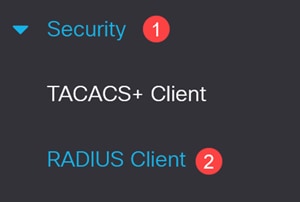
Navigate to the Security > RADIUS Client in the navigation pane.
Step 3
Set RADIUS Accounting to Port Based Access Control.

Step 4
To add the ISE server, scroll down to the RADIUS Table and click on the plus icon.
Step 5
Configure the RADIUS server settings.
- Select Server Definition. In this example, By IP address is selected. Enter the IP address in the Server IP Address/Name field.
- Set a RADIUS Priority.
- Authentication and Accounting Ports are set to the default.
- Usage Type is 802.1x.
Click Apply.


Step 6
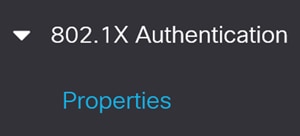
To configure 802.1x authentication, navigate to Security > 802.1X Authentication > Properties menu.
Step 7
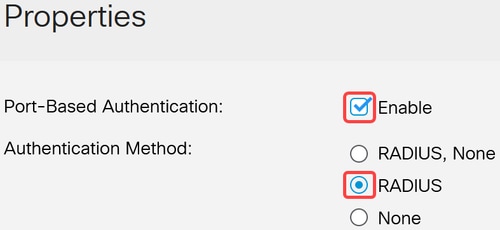
Ensure that Port-Based Authentication is enabled, and Authentication Method is set to RADIUS.
Step 8
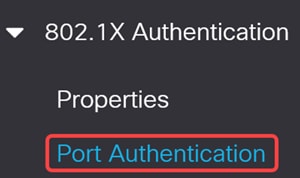
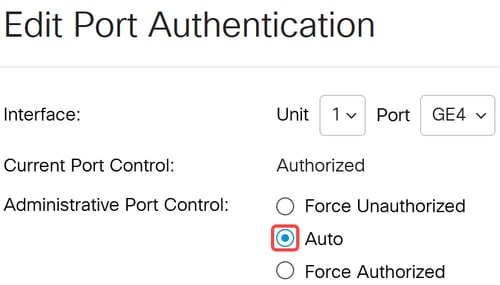
Navigate to Port Authentication menu, select the desired port, and click edit.
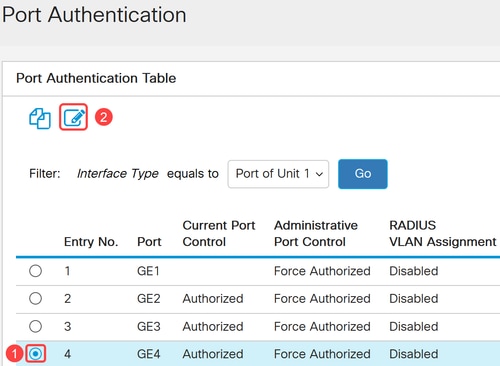
Step 9
For Administrative Port Control, select Auto option that will switch the port between authorized and unauthorized state based on the RADIUS response.
Step 10
Enable 802.1x Based Authentication and click Apply.

Step 11
You will need the MAC address for the device on the port. The CoA operation on ISE will be applied to that MAC address. In this example, it is port 9. To get it, navigate to MAC Address Tables > Dynamic Addresses.
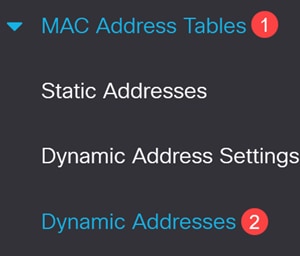
Step 12
Scroll down to the port and note the MAC address.
Step 13
Navigate to Security > Dynamic Authorization Server.
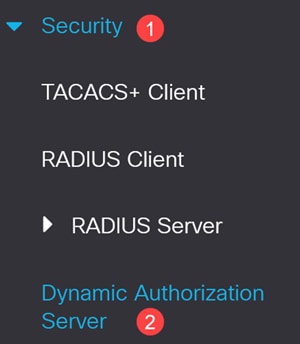
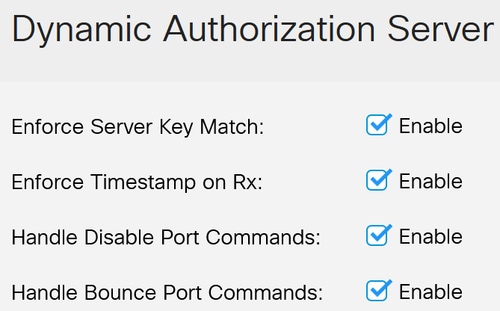
Step 14
Enable the following:
- Enforce Server Key Match
- Enforce Timestamp on Rx
- Handle Disable Port Commands
- Handle Bounce Port Commands
Step 15
Leave the UDP Port at the default value of 1700.

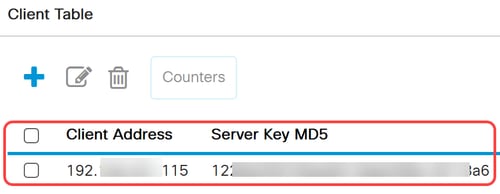
Step 16
Under Client Table, make sure the ISE server is added with the correct server key. Click Apply.
Step 17
Click the red blinking Save icon to save the configurations.

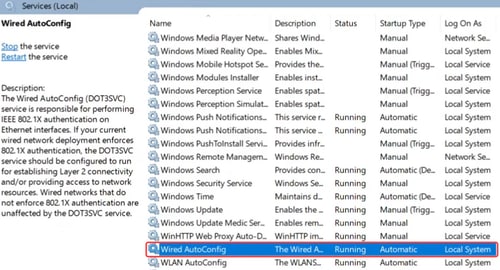
Step 18
On the client laptop connected to port 9, verify the Wired AutoConfig service is enabled for 802.1 X authentication.
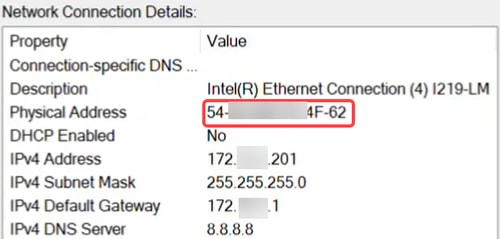
Step 19
On the Ethernet adapter settings, verify that the MAC address matches.
Step 20
Click the Properties button under Ethernet settings and under the Authentication tab, make sure the check boxes are enabled. Also, make sure the authentication method is Protected EAP (PEAP).

Step 21
Click the Settings button to make sure the check box next to Verify the server’s identity by validating the certificate is unchecked.

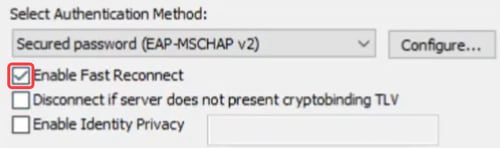
Step 22
Enable Fast Reconnect box should be checked.
Step 23
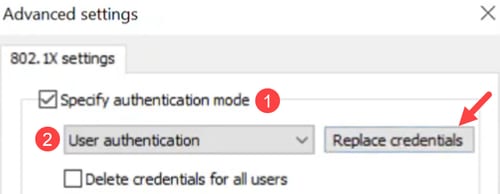
Under Additional settings, make sure Specify authentication mode is enabled, and User authentication is selected from the drop-down menu. You can save the credentials created on ISE or replace it using Replace credentials button.
CoA Operation
Before initiating CoA operation, enable packet capture on the switch.
Step 1
On PuTTY, login to your Catalyst switch and specify the buffer size and capture mode by using the command monitor capture cap1 buffer size 20 circular.
Step 2
Specify the control plane as both by using the command monitor capture cap1 control-plane both.
Step 3
Enter the match criteria as any. The command for this will be monitor capture cap1 match any.
Step 4
Start the packet capture.
Step 5
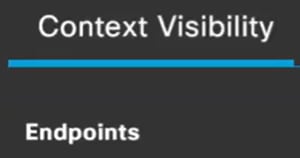
On ISE interface, navigate to Endpoints option under Context Visibility.
Step 6
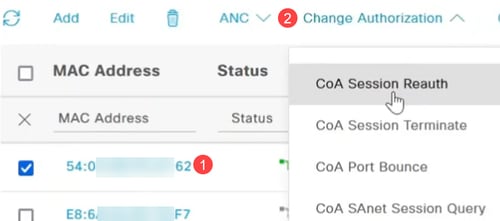
Choose the MAC address and select the CoA operation from the Change of Authorization drop-down menu. In this example, CoA Session Reauth is selected. This forces re-authentication on the port by sending a CoA packet with a reauthenticate command.
Step 7
Go back to the PuTTY terminal to check if the CoA operation was successful.

Step 8
If you select CoA Session Terminate, it will send a disconnect request with a terminate command based on an administrative request.

Step 9
CoA Port Bounce option will send a CoA request packet with a bounce host port command, disabling and re-enabling the port on the switch. The network adapter goes offline for 10 seconds and becomes unauthorized. It will the comeback online, becomes authorized and can forward packets.
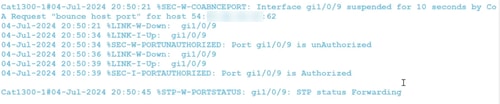
Step 10
CoA Session termination with port bounce will terminate the existing session, bounce the port for 10 seconds, and become unauthorized. It then comes back online, becomes authorized and can forward packets.

Step 11
CoA session termination with port shutdown will terminate the session and administratively shut down the port.

Step 12
To stop the packet capture, use the command monitor capture cap1 stop.
Step 13
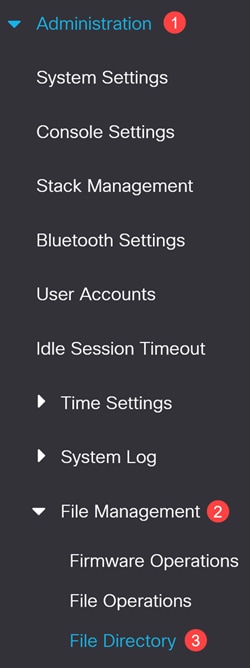
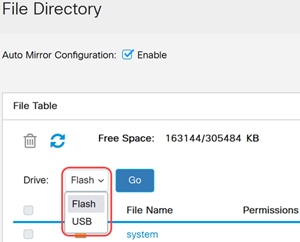
To copy the files, navigate to Administration > File Management > File Directory.
Step 14
The default Flash is available. Alternatively, you can select USB from the Drive drop-down menu.
Conclusion
Now you know all about ISE and how to configure CoA in the Catalyst 1300 series switches.
For more information, check out the video below.
Revision History
| Revision | Publish Date | Comments |
|---|---|---|
1.0 |
17-Feb-2025
|
Initial Release |
 Feedback
Contact Cisco
- Open a Support Case

- (Requires a Cisco Service Contract)