Introduction
This document describes the correct way to add VLANs in CCHN Clusters.
Prerequisites
Requirements
Cisco recommends that you have knowledge of these topics:
- UCS knowledge
- Networking Concepts
Ensure that you have these requirements before you attempt this configuration:
Components Used
The information in this document was created from the devices in a specific lab environment. All of the devices used in this document started with a cleared (default) configuration. If your network is live, ensure that you understand the potential impact of any command.
Background Information
Cisco Compute Hyperconverged with Nutanix have three different management modes:
UCS Manager Mode (UMM):
UCS Manager Mode leverages classic UCSM and Fabric Interconnects for centralized management of compute, networking, and profiles:
- Nodes are connected to Fabric Interconnects, which manage server policies, firmware, and connectivity.
- UCS classic features: Service Profiles and centralized management through UCSM.
Intersight Managed Mode (IMM):
Intersight Managed Mode enables Cisco Intersight to directly manage Fabric Interconnects and UCS servers:
- Provides cloud-based management (or through local appliance) for server and network policies, profiles, and lifecycle operations.
- Supports automation, firmware upgrades, profile assignments, and remote management using Intersight’s portal.
- All compute nodes, FI policies, and networking are managed through Intersight.
Intersight Standalone Mode (ISM):
In this mode, servers are managed individually by Cisco Intersight, without Fabric Interconnects:
- Nodes are networked directly to Top-of-Rack (ToR) switches, and only the servers are managed by Intersight.
- Suitable for environments where you prefer not to use Fabric Interconnects; all management – including firmware, policies, and monitoring – happens through Intersight but on a per-server basis.
The process for adding VLANs to the cluster varies depending on your management mode.
Configure
The overall workflow to add VLAN(s) depends on your management mode.
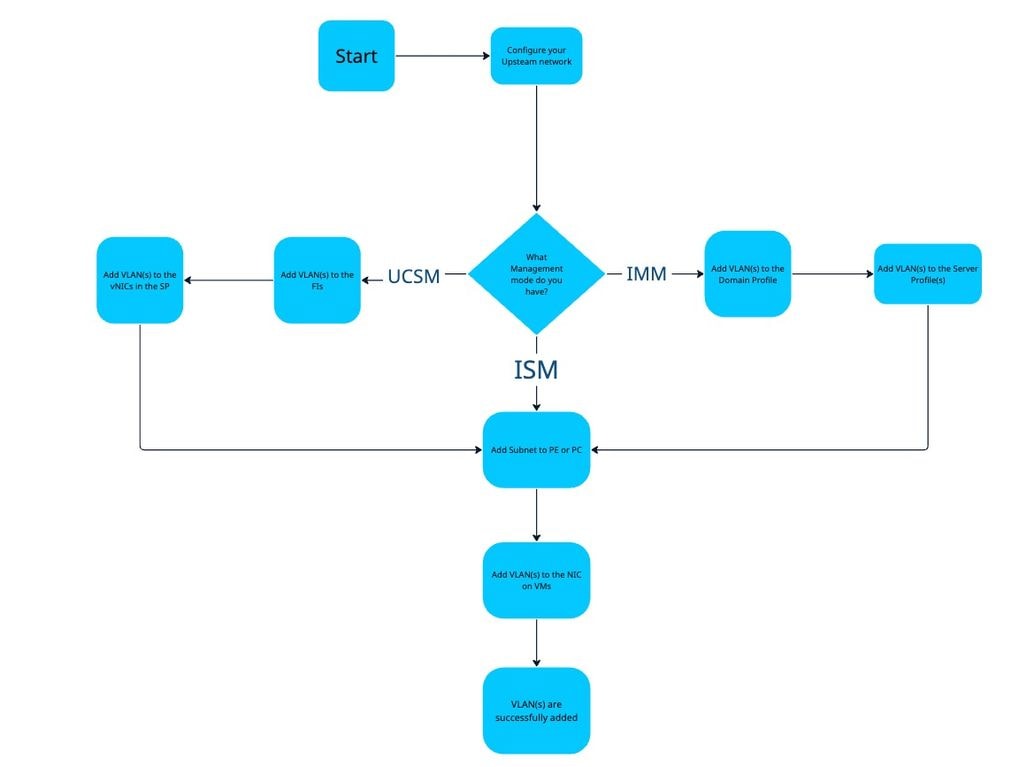 Workflow to add VLAN(s)
Intersight Managed Mode
Step 1. Add VLANs to Domain Profile
Navigate to Profiles> UCS Domain Profiles and select the Domain Profile assigned to the Fabric Interconnects where you need to add VLANs.
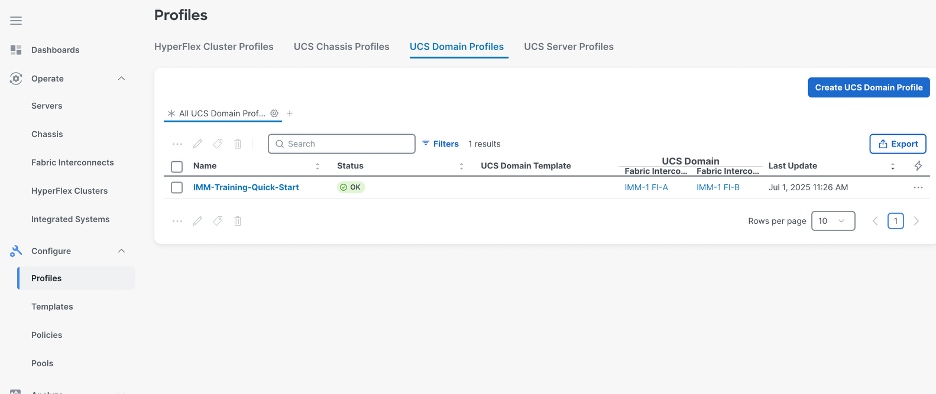
Select the UCS domain profile that belongs to the IMM Nutanix Cluster.
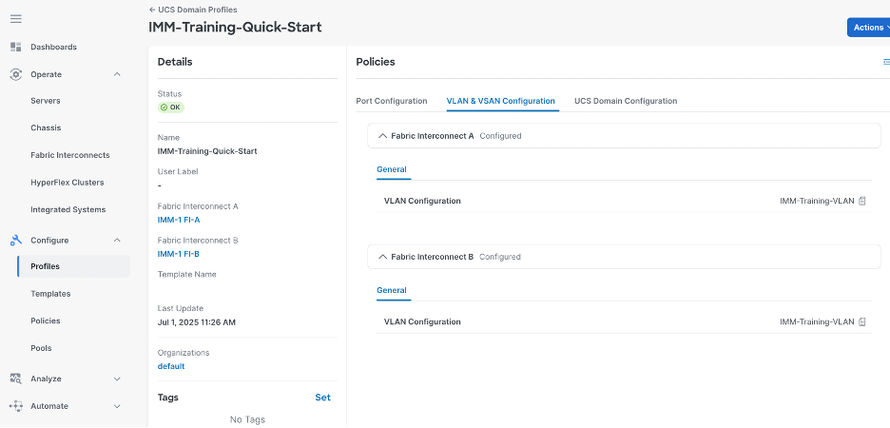
Click Edit to modify the VLAN policy
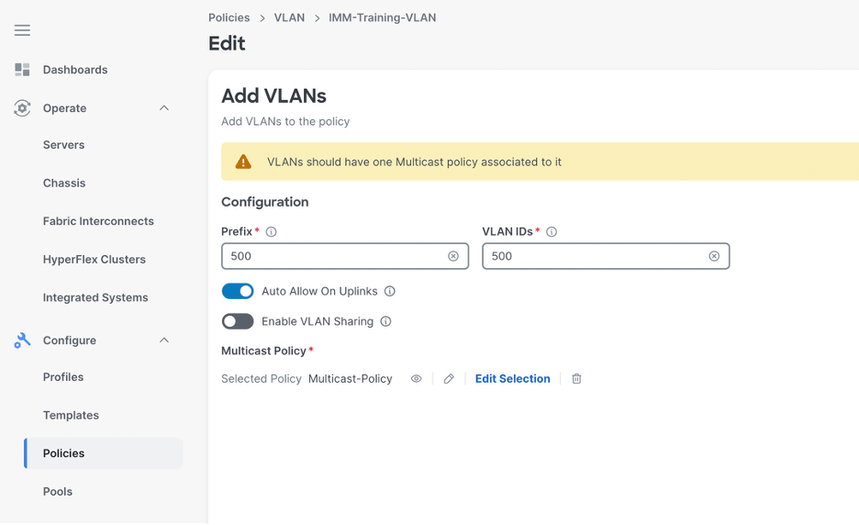
Add the required VLANs. In prefix, you can enter a prefix that identify the VLAN.
Select a Multicast Policy.
Save the changes.
Select Actions and click Deploy.
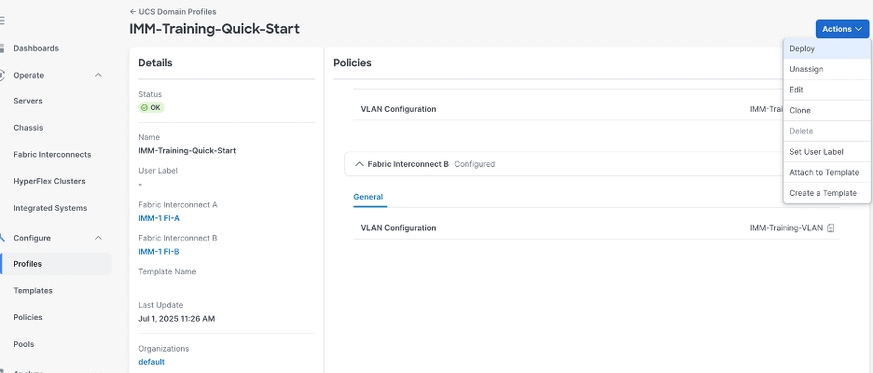

Note: The deployment of the Domain Profile after a VLAN is added or removed does not disrupt traffic on the pre-existing VLANs.
Step 2. Add VLANs to Server Profile
Navigate to Profiles> UCS Server Profiles and select the Service Profile assigned to your server where you are going to add the VLANs.
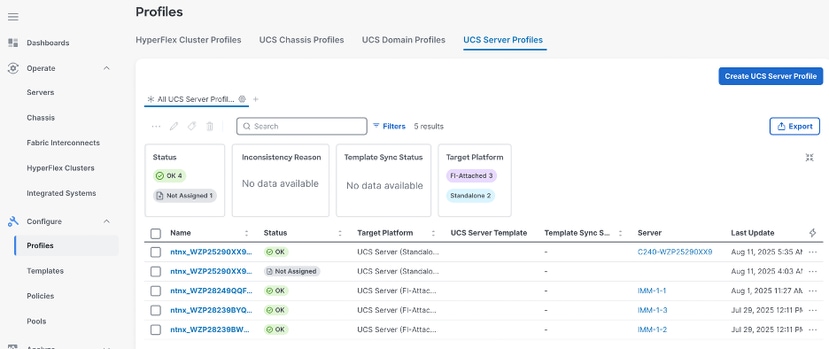
Note: The profiles created by the nutanix foundation central have the formart ntnx_<serial_numer>_<uuid>.
Select edit in the LAN Connectivity Policy.
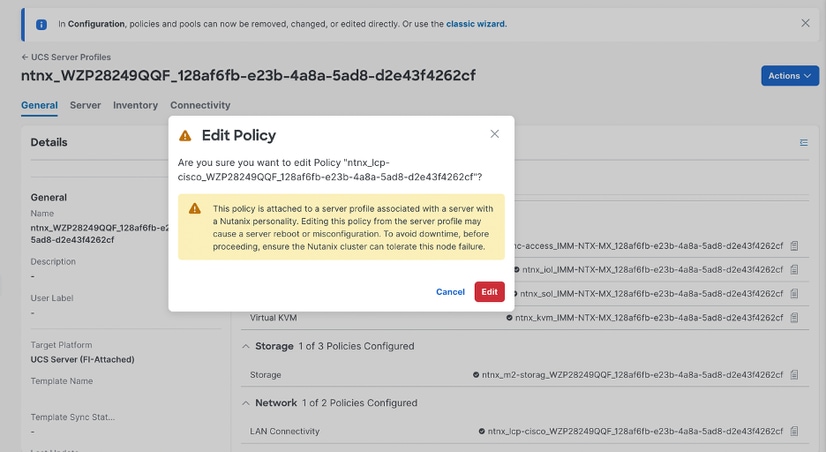
Note: Add additional VLAN(s) do not trigger a server reboot.
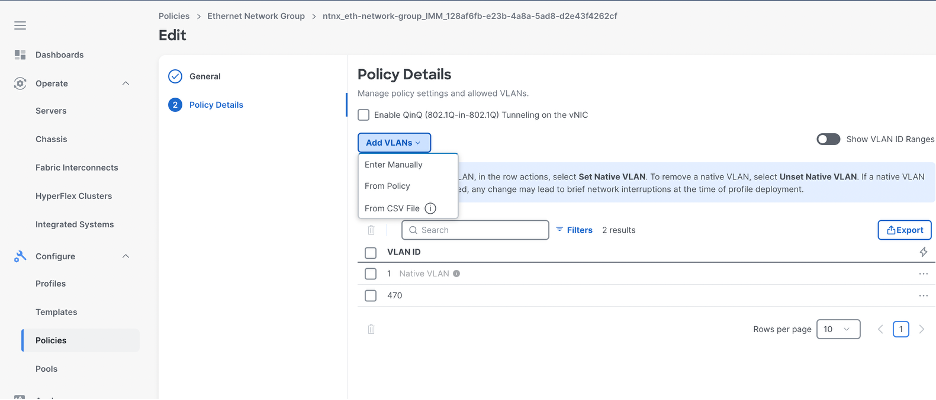
In the LAN Connectivity Policy, select the Ethernet Network Group Policy from the vNICs.
Note: Ensure you modify the correct Ethernet Network Group Policy and LAN Connectivity Policy as there may be multiple policies configured in the cluster.
Select Actions and then Edit.
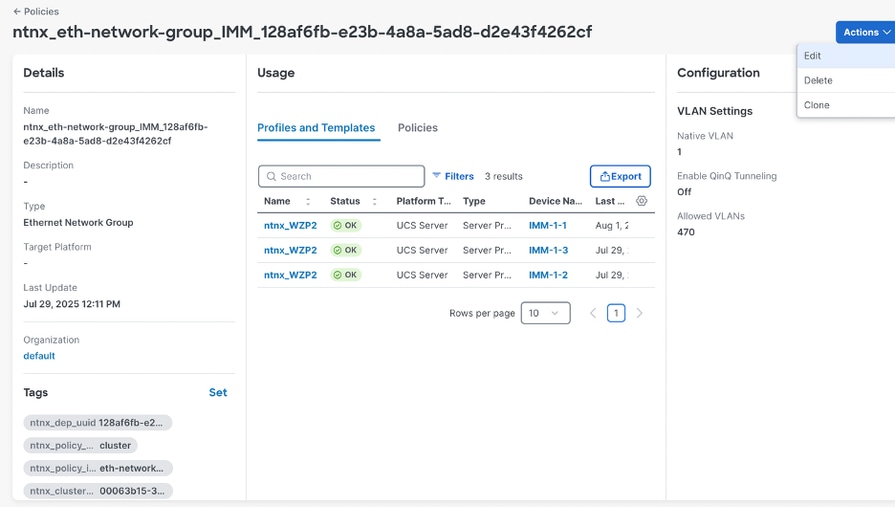
Add the required VLANs and click Save.
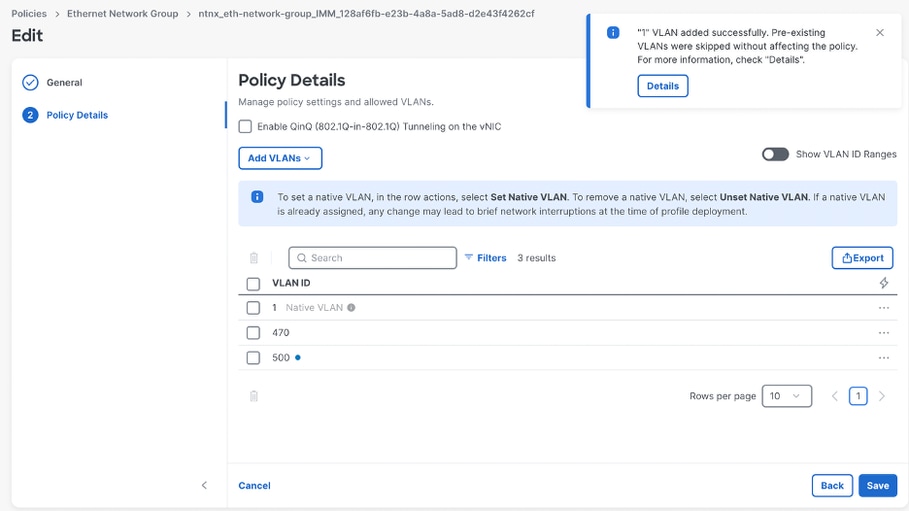
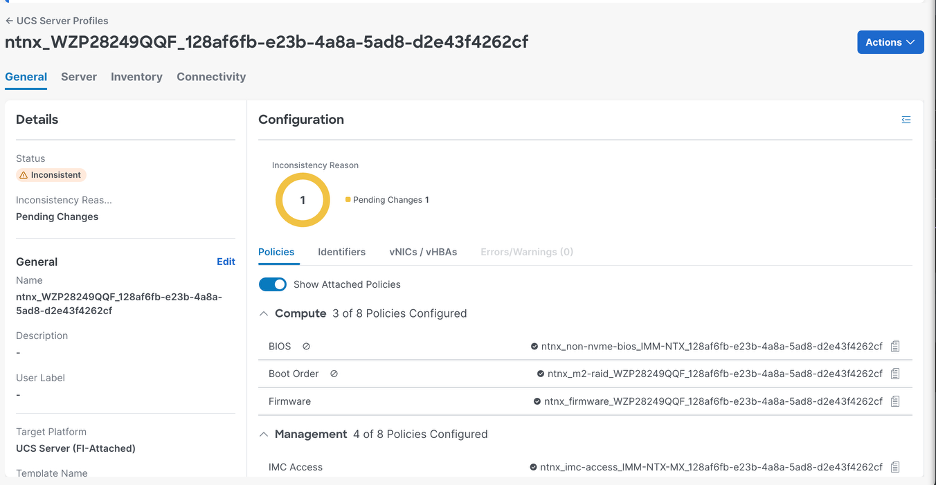
Once the VLAN is added, a Pending Changes warning is present.
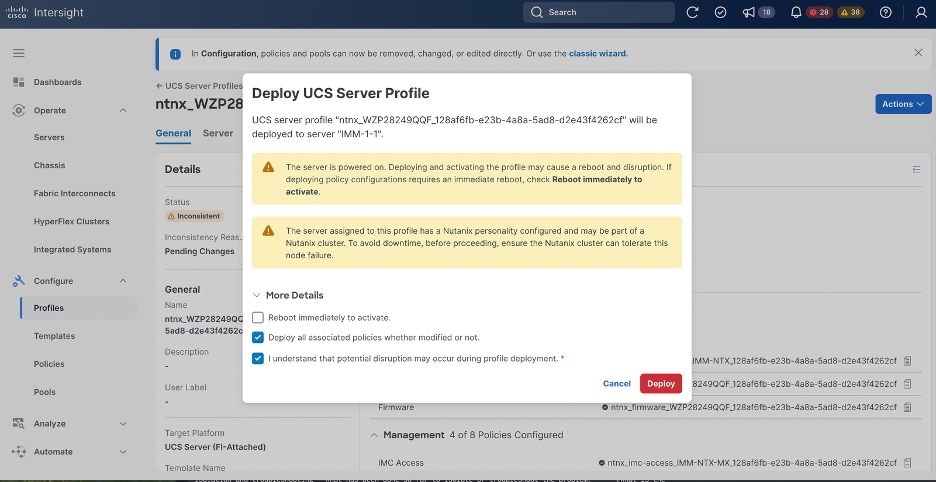
Select Action and click Deploy.
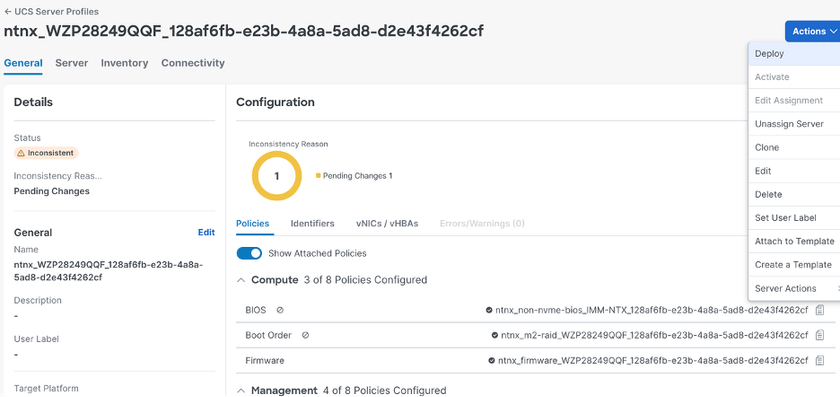
Select the option Deploy all associated policies whether modified or not and I understand the potential disruption may occur during profile deployment and click Deploy.
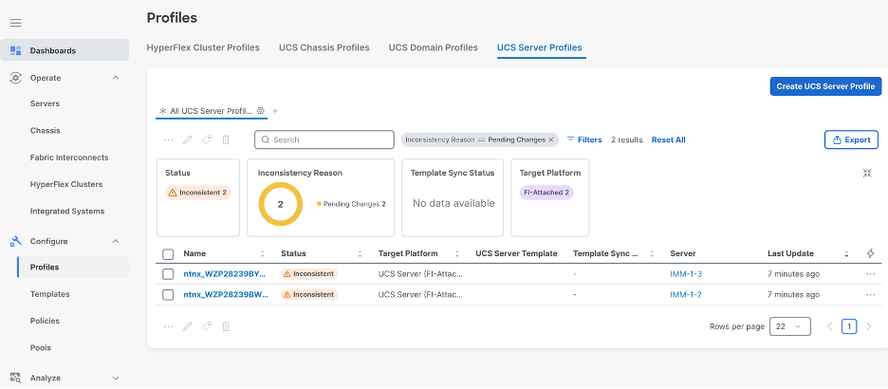
The deployment of the Server Profile must be done in each server profile on the IMM cluster.
Navigate to Profiles> UCS Server Profiles and redeploy the remaining Server Profile.
Click on the 3-dot icon and select Deploy.
Intersight Standalone Mode
In this management mode, you only need to add the VLAN(s) to the upstream switches.
N5KA# show run inter ethernet 1/20
!Command: show running-config interface Ethernet1/20
!Time: Tue Aug 12 21:38:21 2025

version 7.0(2)N1(1)

interface Ethernet1/20
  description CIMC Nutanix ISM C240-M6
  switchport mode trunk
  spanning-tree port type edge trunk


N5KA# show vlan | grep 500
500  VLAN0500                         active    Eth1/16, Eth1/19, Eth1/20
UCS Manager Mode
Step 1. Add VLAN(s) to the Fabric Interconnect
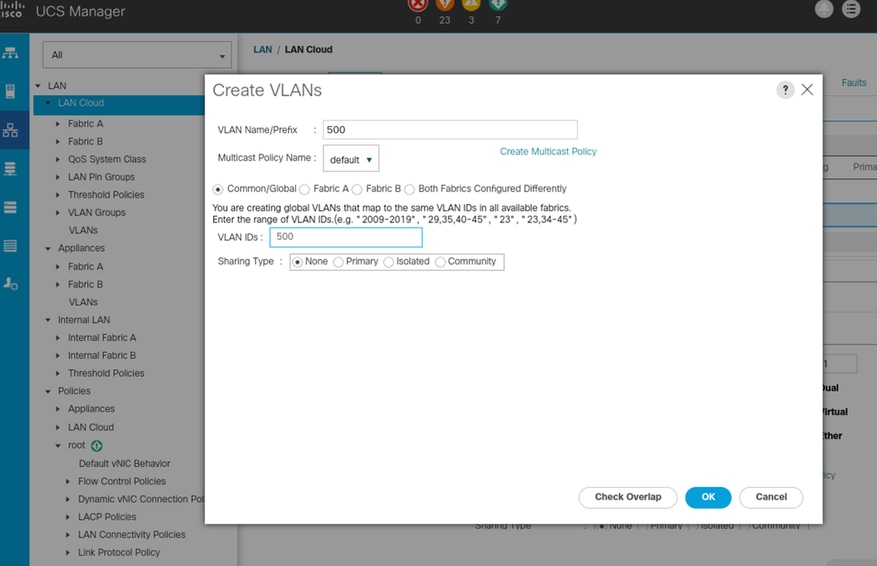
In UCS Manager, Navigate to LAN > LAN Cloud > VLANs.
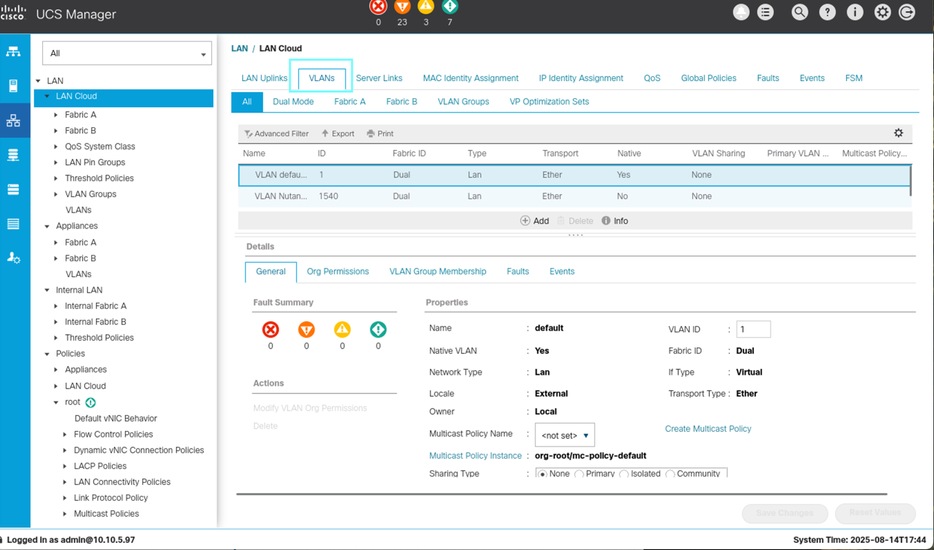
In the right panel, clickAdd.
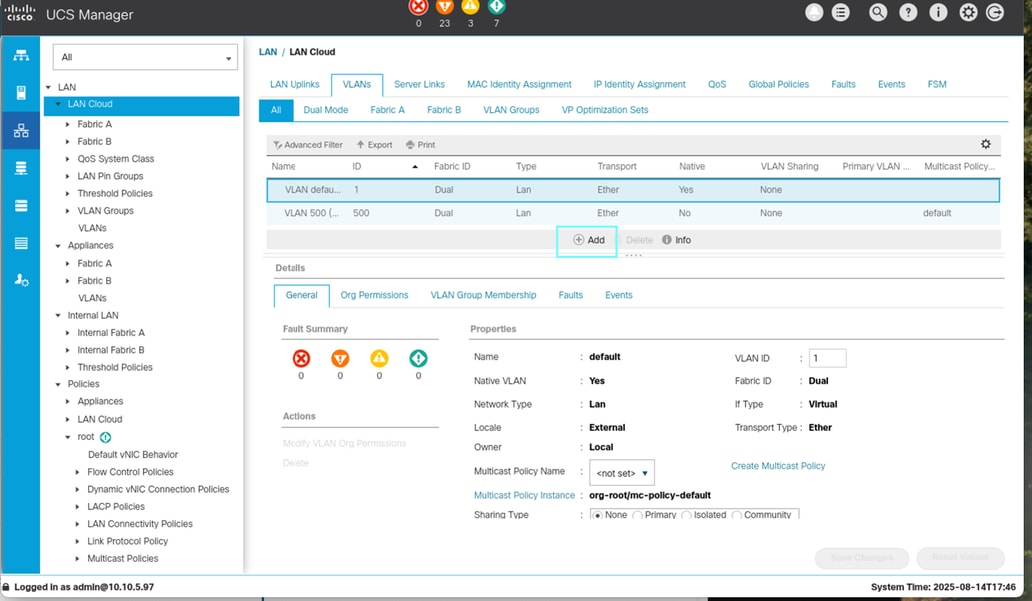
Enter the required information and ClickOK.
VLAN Name/Prefix: name-VLANID
Multicast Policy Name
VLAN ID
Step 2. Add VLAN to Server Profiles
Navigate to Servers > Service Profiles
Look for the sub Organization created for Nutanix
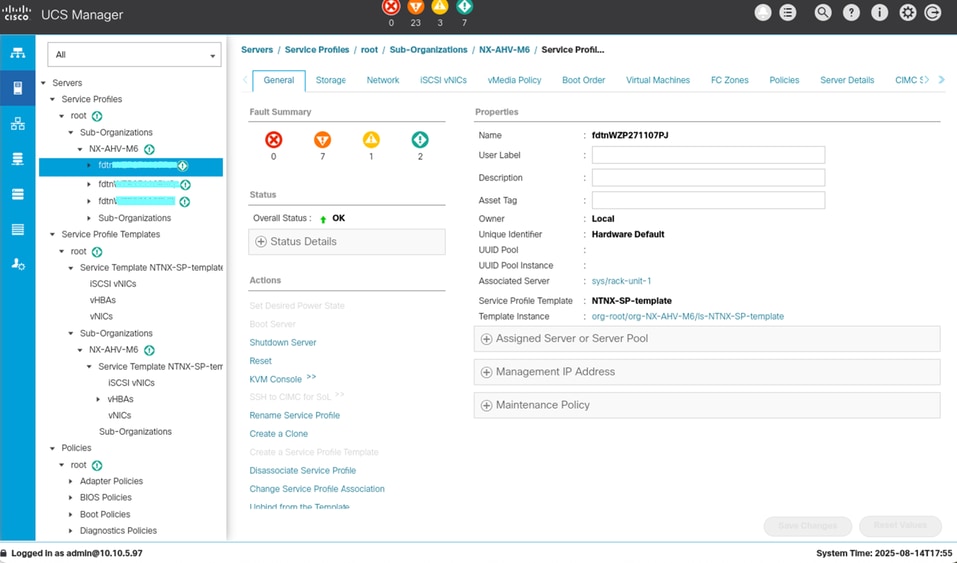
Select the desired Service Profile. Service Profiles created by Nutanix Installed have the format fdtn_<serial_number>.
Nagivate to Network , select the VNIC and click Modify.
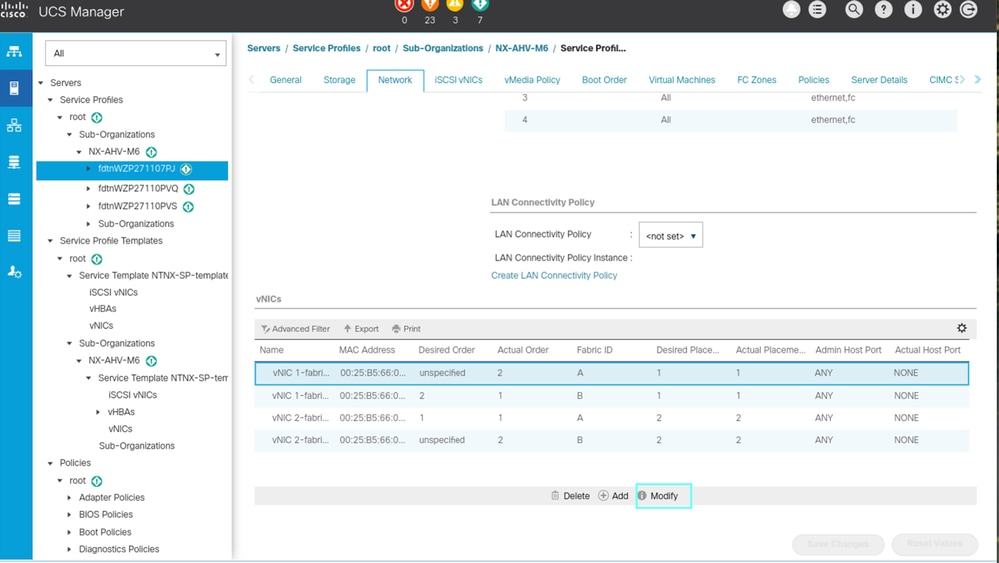
Select the VLAN you want to enable and click OK.
Click on Save Changes.
Note: This must be done on all vNICs that carry VM traffic on both side A and side B, as well as on all node service profiles that belong to the cluster.
Now that you have configured the VLAN(s) at UCS level, there are two options to configure the VLAN(s) at cluster level :
On Prism element, you can add the VLAN(s) for a single cluster
On Prism Central, you can add the VLAN(s) for all the cluster managed by PC
Add VLAN on Prism Element
Note: This process is the same independently of the cluster management mode.
In Prism Element navigate to VM and select Table.
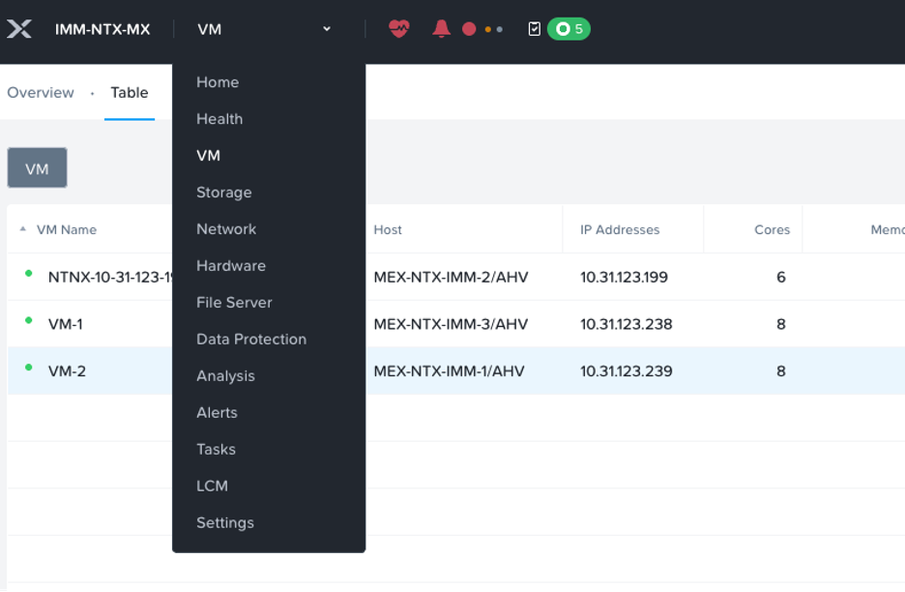
Click Networking Config and select + create Subnet.
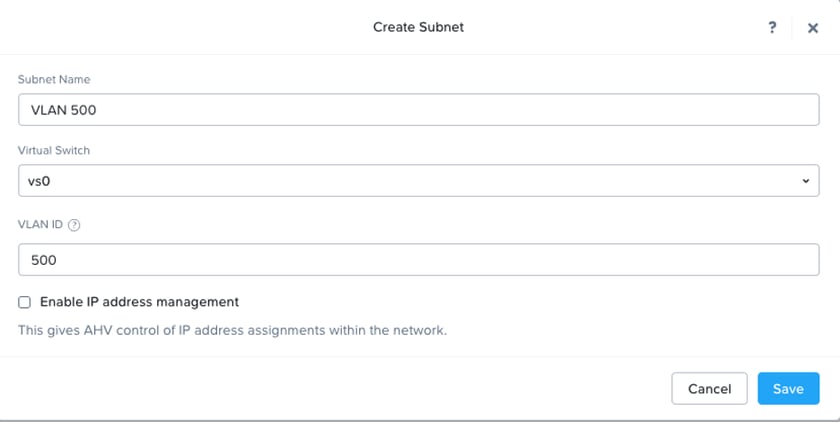
Add the information about VLAN and click Save.
Optionally, you can enable the option Enable IP address management to provision the IP automatically to the VMs.
Add VLAN on Prism Central
Note: This process is the same independent of the cluster management mode.
Navigate to Infrastructure > Network & Security > Subnets.
Click Create Subnet.
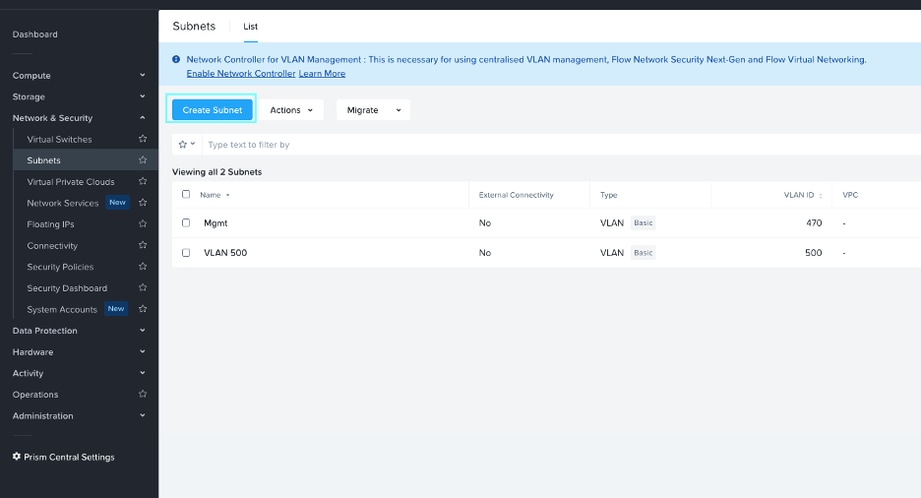
Fill the information with VLAN Name , VLAN ID, and select the virtual switch where the VLAN is assigned.
Select the IP address Management.
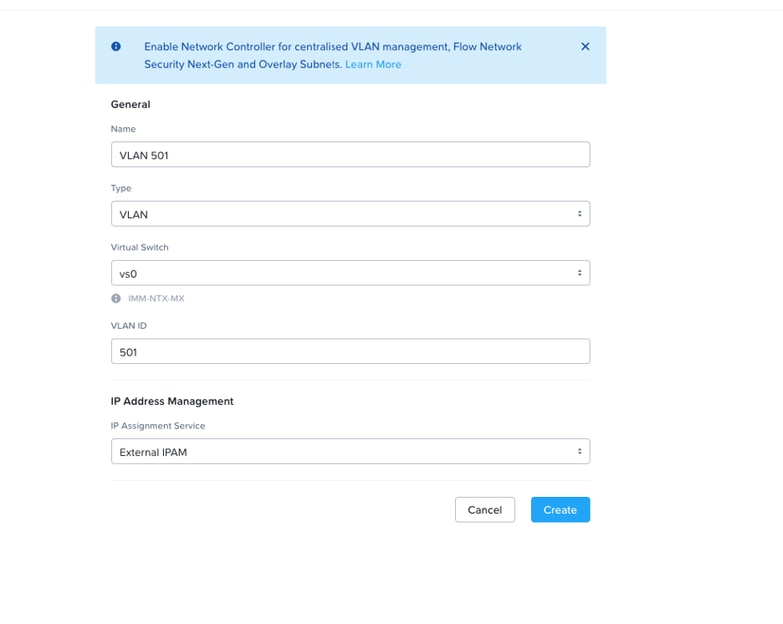
Nutanix IPAM can assign IP addresses automatically to VMs using DHCP. You can configure each virtual network with a specific IP subnet, associated domain settings, and IP address pools available for assignment to VMs.
External IPAM you take care of assign the IP address to the VMs.
Add/Modify the NIC card to the VMs
Prism Element
In prism element nagivate to VM and select table.
Right click on the desired VM and select Update.

On Network Adapter (NIC), you can either modify the current NIC configuration or add additional NICs.
In this example, the current NIC configuration is modified.
Click on the pencil icon.
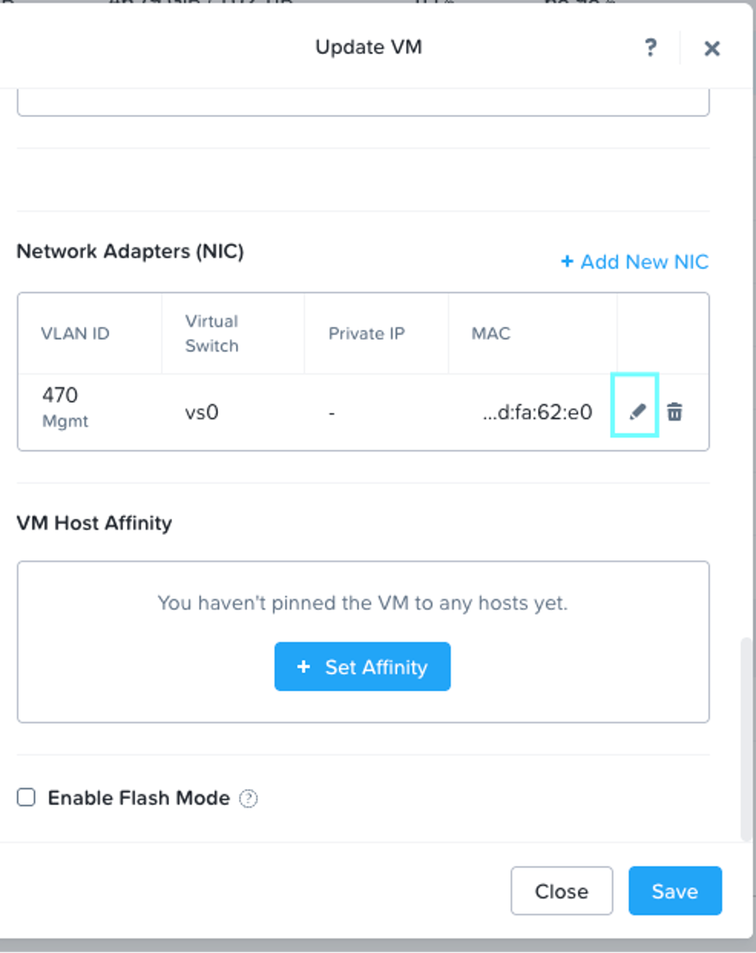
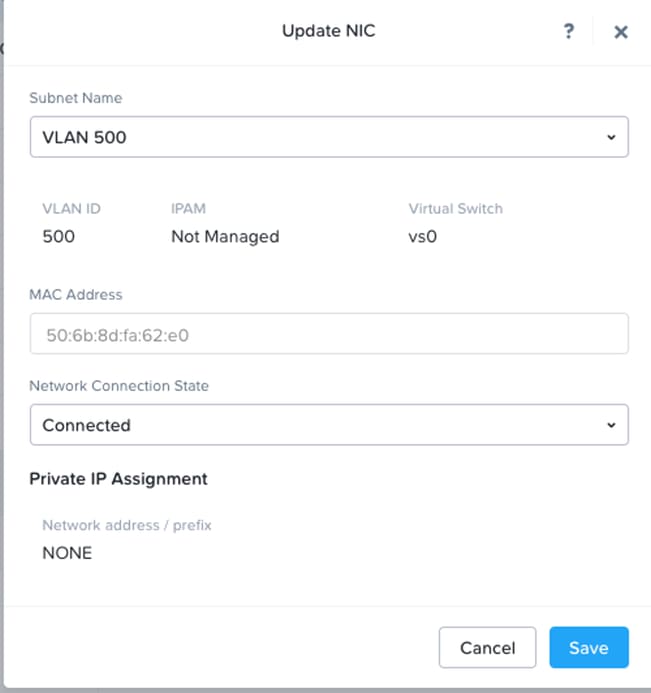
Select the new VLAN and click Save.
Prism Central
You can add additional VLANs from Prism Central as well.
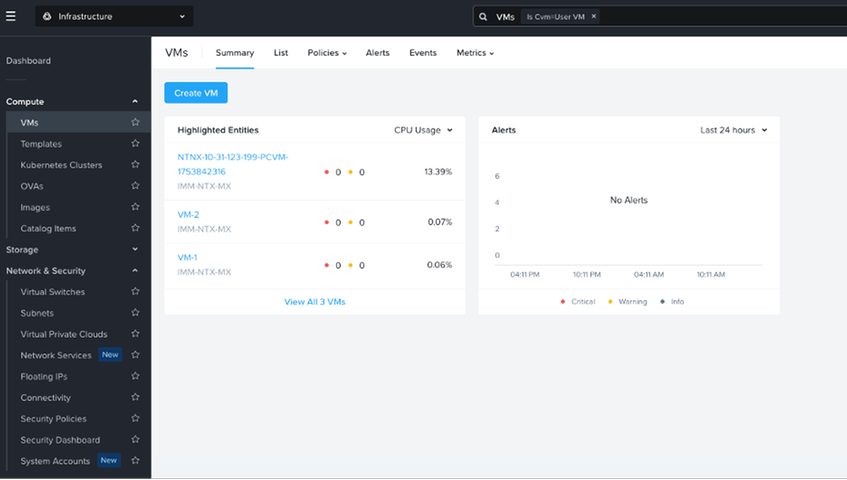
Navigate to Infrastructure > Compute > VMs.
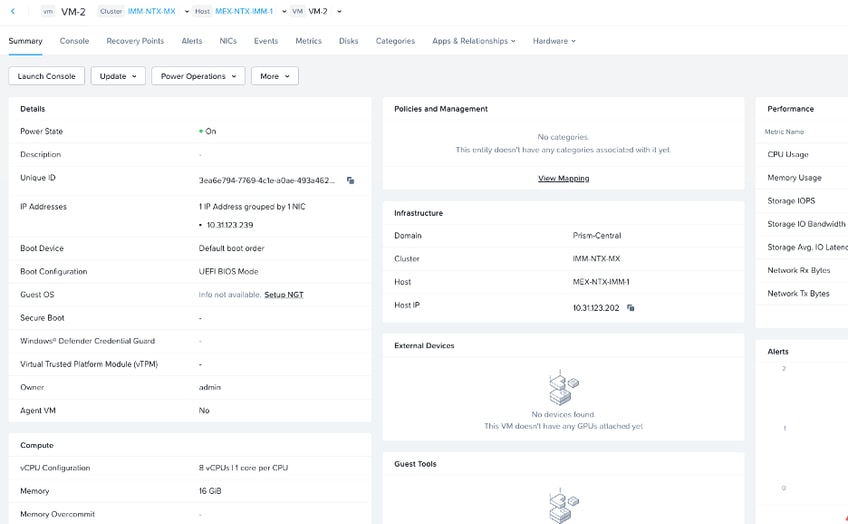
Click List and then select the desired VM.
Select Update and click Select Network.
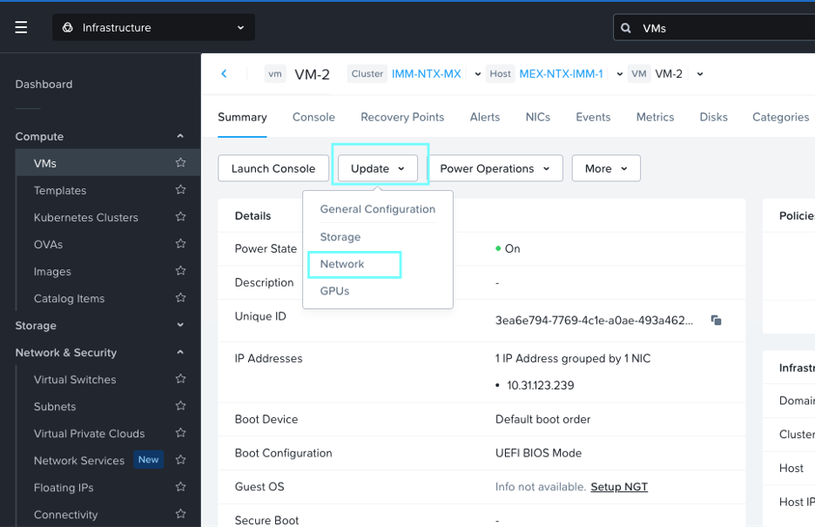
Click on + Attach to Subnet.
Select the VLAN you want to add and click Save.
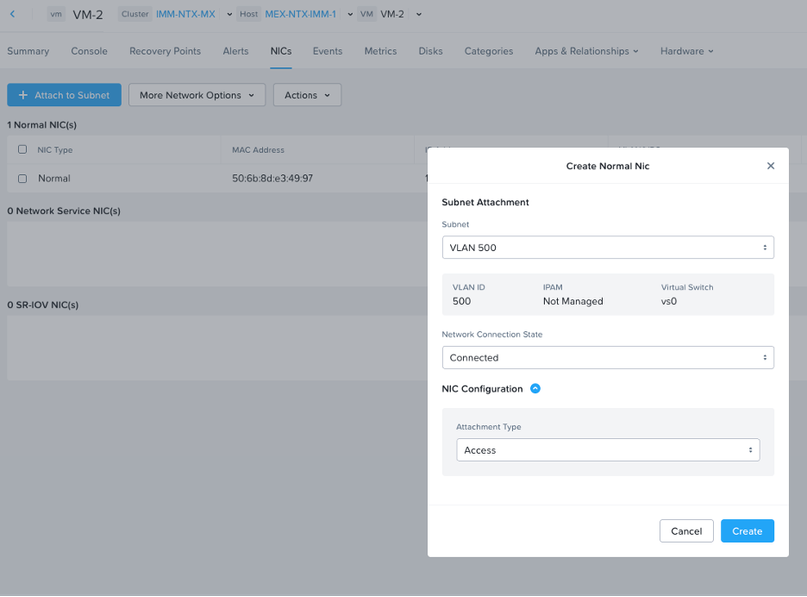
Note: From Prism Central, you can add additional NICs but cannot modify the existing NICs.
You can select the attachment mode to be accessed or trunk depending on your network configuration on the upstream network.
Now you have added the VLAN at cluster level and UCS level.
Related Information
Configuring VLANs on UCS
Add and Remove VLANs for UCS in Intersight Managed Mode
Creating a Basic VLAN Subnet for Guest VM Interfaces
 Feedback