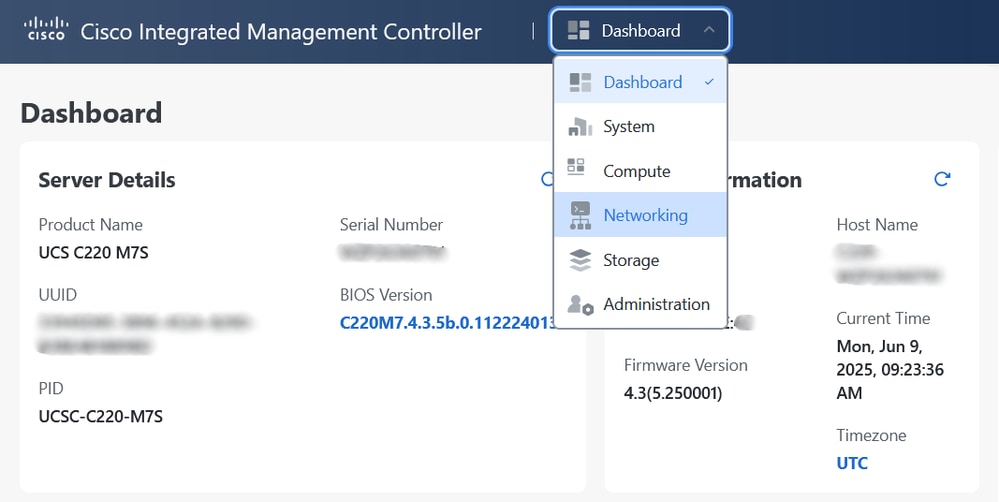
Introduction
This document describes the process to boot from the iSCSI in a server managed by Cisco Integrated Management Controller (CIMC).
Prerequisites
Requirements
Cisco recommends that you have knowledge of these topics:
- Utilization and management of CIMC
- Storage Area Network (SAN) topologies
- Basic concepts of iSCSI communication
Components Used
- UCS C-Series C220 M7 server; firmware version 4.3(5.250001)
- iSCSI Sever
The information in this document was created from the devices in a specific lab environment. All of the devices used in this document started with a cleared (default) configuration. If your network is live, ensure that you understand the potential impact of any command.
Background Information
Internet Small Computer System Interface (iSCSI) communication offers several advantages, such as the ability to use existing Ethernet infrastructure to reduce costs, the provision of secure peer authentication to ensure data integrity, and support for block-level storage to enable seamless integration with existing systems.
Boot from iSCSI allows a server to boot its operating system from an iSCSI target device located remotely over a network. This method is particularly useful in environments where local storage is not preferred or feasible, such as in stateless server configurations or centralized storage setups.
Configure
The configuration shown in this document is performed in the new CIMC graphical interface (as of the date it is published) for C-Series servers in Standalone mode.
Create vNIC Interface
Step 1. Navigate to Networking. Select the adapter you want to use for iSCSI interfaces.
For the purposes of this document, the Cisco VIC Adapter - MLOM is used.
Step 2. Go to Actions > VIC > Create Virtual NIC Interface.

Step 3. Add a vNIC according to your requirements. For this document, the vNIC is called iscsi-a.
Tip: Add a second vNIC for redundancy if your infrastructure allows it.
Step 4. Once the vNIC is created, hit the name of your vNIC. A new window is displayed.
Enable Default VLAN option and add your native VLAN. Click Save.

Step 5. Go to iSCSI Boot Properties, enable PXE Boot and iSCSI Boot.
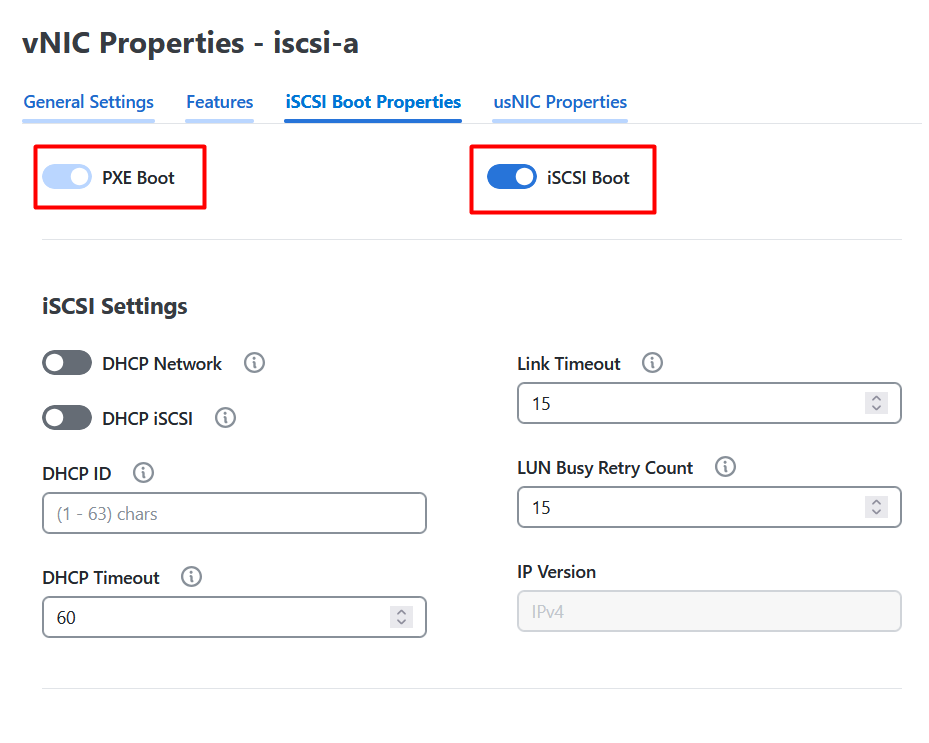
Step 6. Enter the required values to complete the configuration, including details as applicable to your setup such as:
- The initiator name
- Target name
- Target IP address
- DNS information
- Gateway
- LUN ID associated with your remote storage

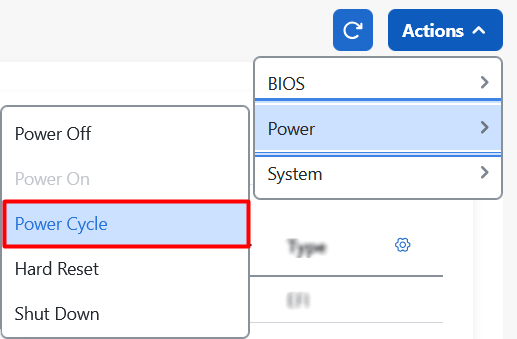
Step 7. Save changes. A power cycle is required for the changes to take effect.
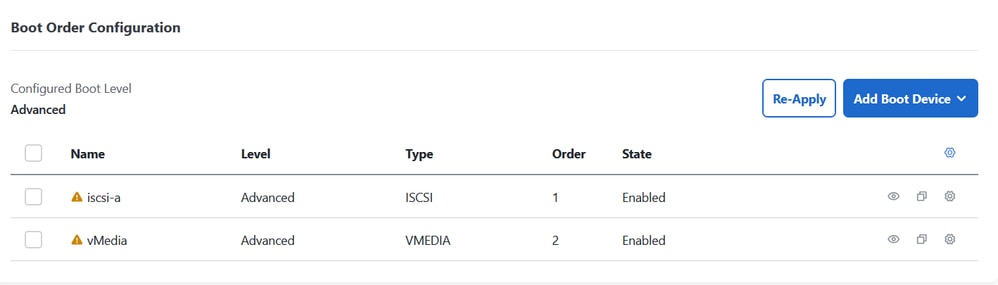
Configure Boot Order
Step 1. Navigate to Compute > BIOS > Boot Order > Boot Order Configuration.

Step 2. Click Add Boot Device. Select iSCSI Boot option.
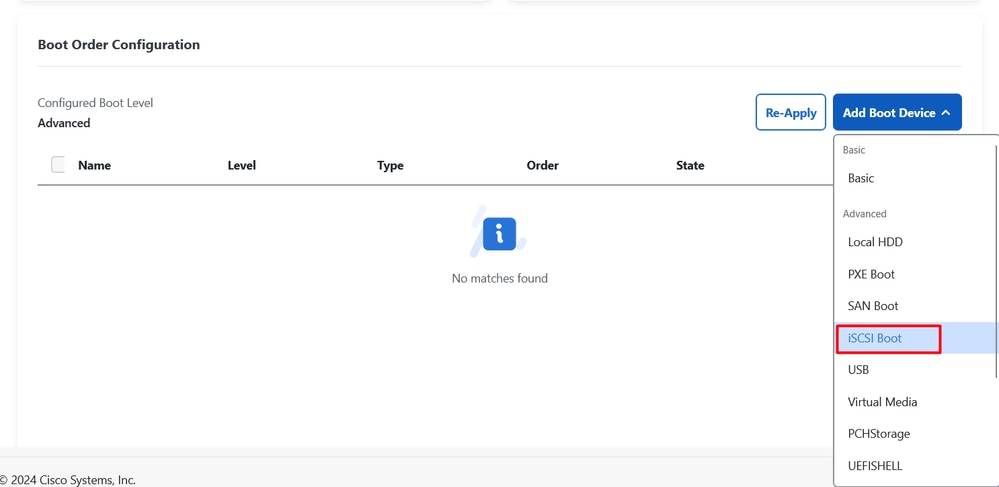
Step 3. Name your boot identifier. For this document, it is called as iscsi-a. In the same way that the vNIC was named.
Tip: Use the same identifier name in the boot order that was used in the vNIC for the iSCSI boot, this is a best practice.
Step 4. Click Save. Select Yes when message box appears.

Step 5. Power cycle is needed for the modifications to take effect. Navigate to Actions > Power > Power cycle.
Step 6 (Optional). Add Virtual Media to install the ISO through the virtual KVM.
The Boot Order configuration for a single path for iSCSI and Virtual Media is:
Verify
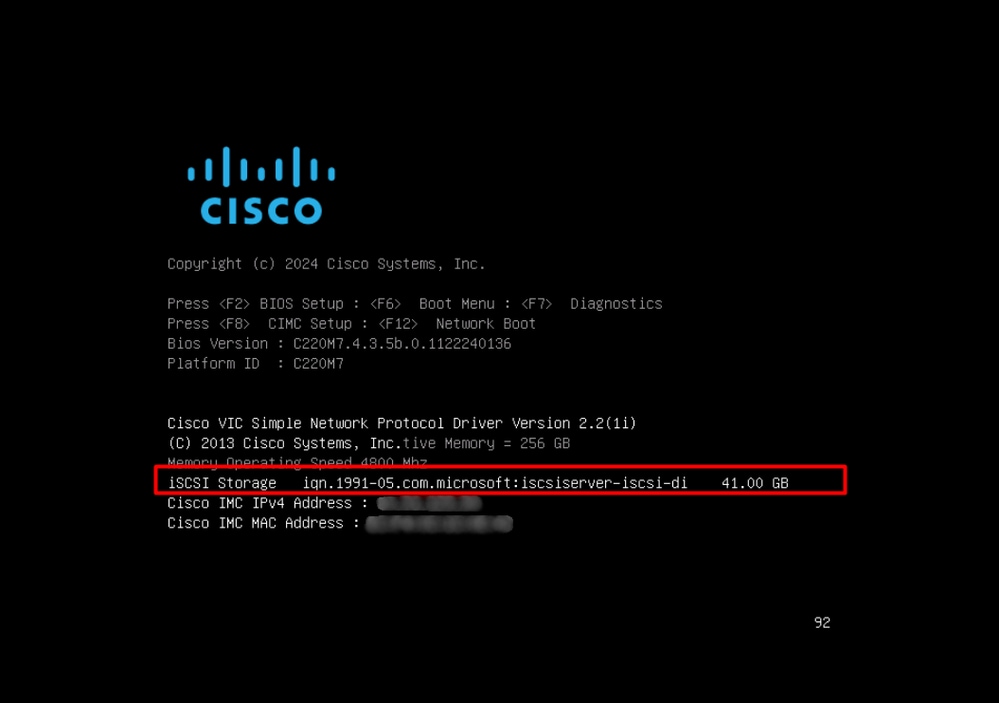
A legend with the iSCSI Target appears on the screen when the server boots. If this happens, it means that the configuration you have made is correct.
Troubleshooting
Consider the next points if iSCSI boot is not working properly:
- Check that the boot order was set up properly.
C220-WZPXXXXXXXX # scope bios
C220-WZPXXXXXXXX /bios # show boot-device
Boot Device                    Device Type  Device State       Device Order
------------------------------ ------------ ------------------ ----------------
iscsi-a                        ISCSI        Enabled            1
vMedia                         VMEDIA       Enabled            2
- Ensure your server can ping the iSCSI server.
C220-WZPXXXXXXXX #scope cimc
C220-WZPXXXXXXXX /cimc #scope network
C220-WZPXXXXXXXX /cimc/network # ping 192.168.0.55
Press CTRL+C to stop.
PING 192.168.0.55 (192.168.0.55): 1456 data bytes
1464 bytes from 192.168.0.55: seq=0 ttl=128 time=1.008 ms
1464 bytes from 192.168.0.55: seq=1 ttl=128 time=0.687 ms
1464 bytes from 192.168.0.55: seq=2 ttl=128 time=0.745 ms
- Verify the MTU size is configured consistently across the network.
- Confirm that the vNIC has PXE Boot and iSCSI boot enabled and native VLAN configured.
C220-WZPXXXXXXXX # scope chassis
C220-WZPXXXXXXXX /chassis # scope adapter MLOM
C220-WZPXXXXXXXX /chassis/adapter # show host-eth-if
Name             MTU  Uplink Port MAC Address       CoS VLAN PXE Boot iSCSI Boot usNIC
---------------- ---- ----------- ----------------- --- ---- -------- ---------- -----
eth0             1500 0           E8:D3:22:72:F6:54 0   470  disabled disabled   0
eth1             1500 1           E8:D3:22:72:F6:55 0   470  disabled disabled   0
iscsi-a          1500 0           E8:D3:22:72:F6:58 0   470  enabled  enabled    0
- Check that the MAC address of your vNIC is learned on your upstream switch.
- Ensure that the iSCSI IQN initiator is authorized on the iSCSI server. Confirm that the target is properly configured to present the specified LUN to the initiator.
Related Information
 Feedback