Introduction
This document describes the procedure to create a RAID configuration through the CIMC and the BIOS.
Prerequisites
Requirements
Cisco recommends that you have knowledge of these topics:
- Basic understanding on Cisco Integrated Management Controller (CIMC).
- Basic understanding of Disks.
- Basic understanding of RAID configuration.
Components Used
- UCS C245 M8SX
- UCS-M2-HWRAID
- Server C series version 4.3(5.250001)
- Disk Model Micron_5300_MTFDDAV240TDS
The information in this document was created from the devices in a specific lab environment. All of the devices used in this document started with a cleared (default) configuration. If your network is live, ensure that you understand the potential impact of any command.
Background Information
A RAID configuration organizes data across multiple physical disks, allows you to manage server storage using different RAID levels to improve performance and fault tolerance. In Cisco UCS, the terms JBOD state and Unconfigured Good state refer to specific configurations for physical drives in a storage environment:
- JBOD stands for Just a Bunch of Disks. In this state, the drives are presented as individual disks without any RAID configuration.
- Unconfigured Good state, the drives are recognized by the system but are not part of any RAID configuration. They are available to be configured as part of a RAID array or used as standalone drives.
Configure
Configuration through The CIMC
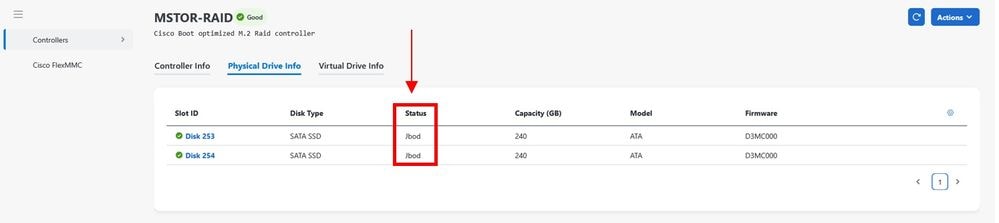
Navigate to Storage tab > Controllers. Then select the desired Controller and click Physical Drive Info, confirming the status of the disks are in JBOD:

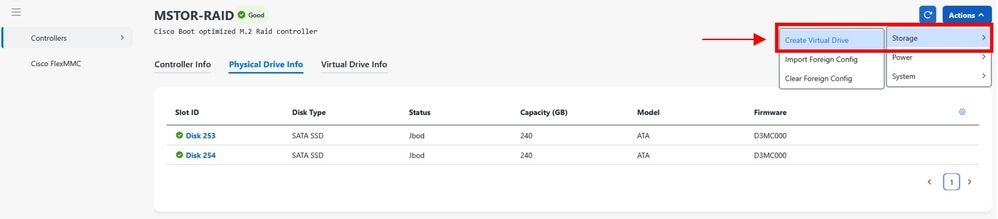
Once you confirmed the disks are in JBOD status, click Actions > Storage and select Create Virtual Drive:
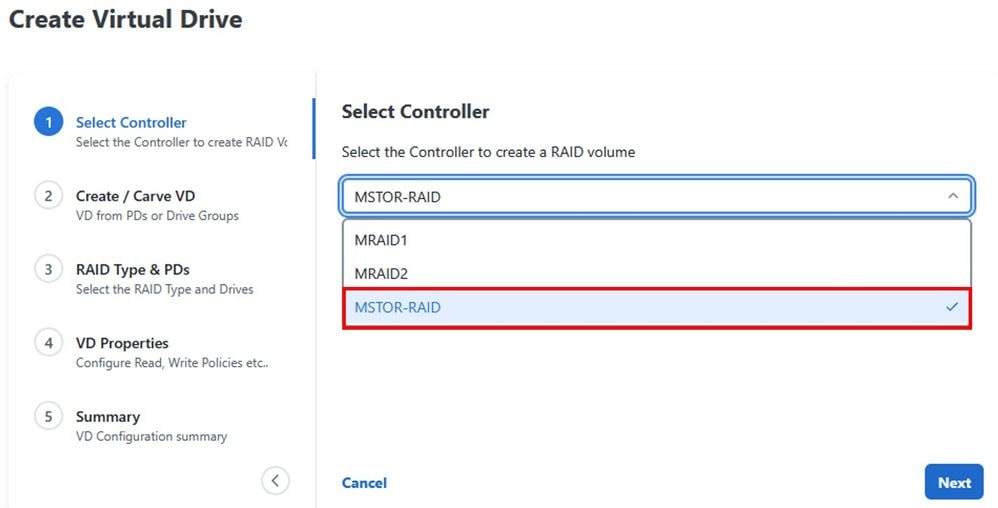
Once a new screen appears, you must first select the Controller that you are using, then click Next:
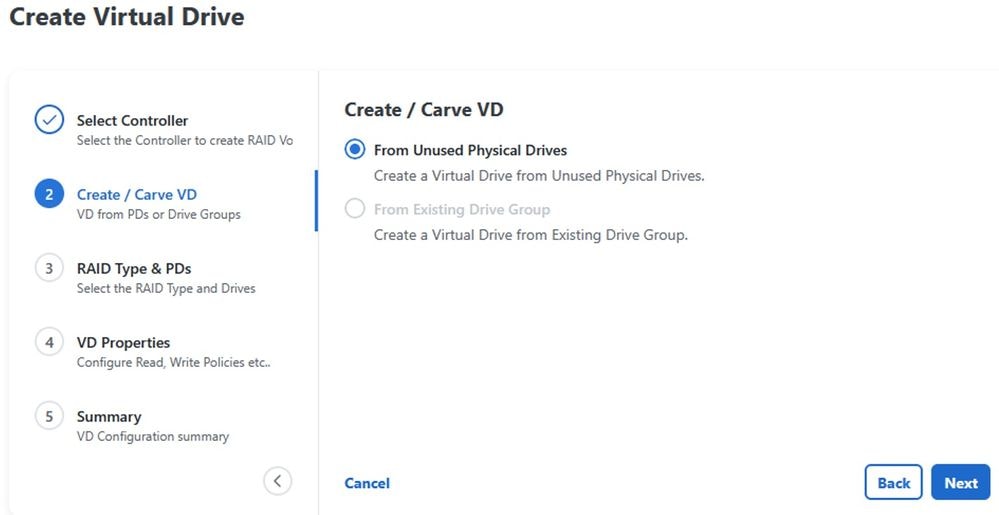
In step 2, you see 2 options to create the Virtual Drive. In this case, the option with From Unused Physical Drives was selected:
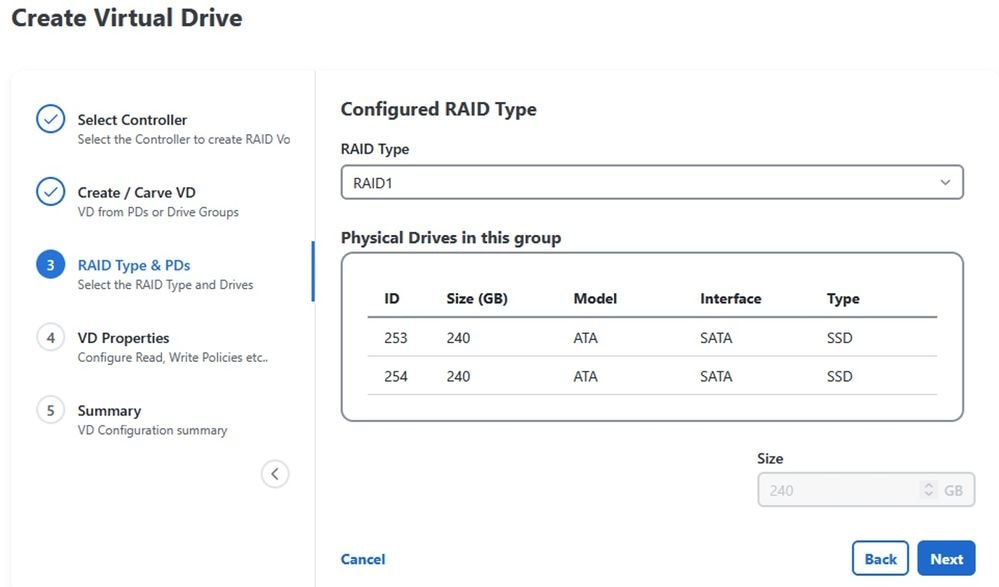
In Step 3, you need to select the RAID Type. In this case, RAID 1 was selected:
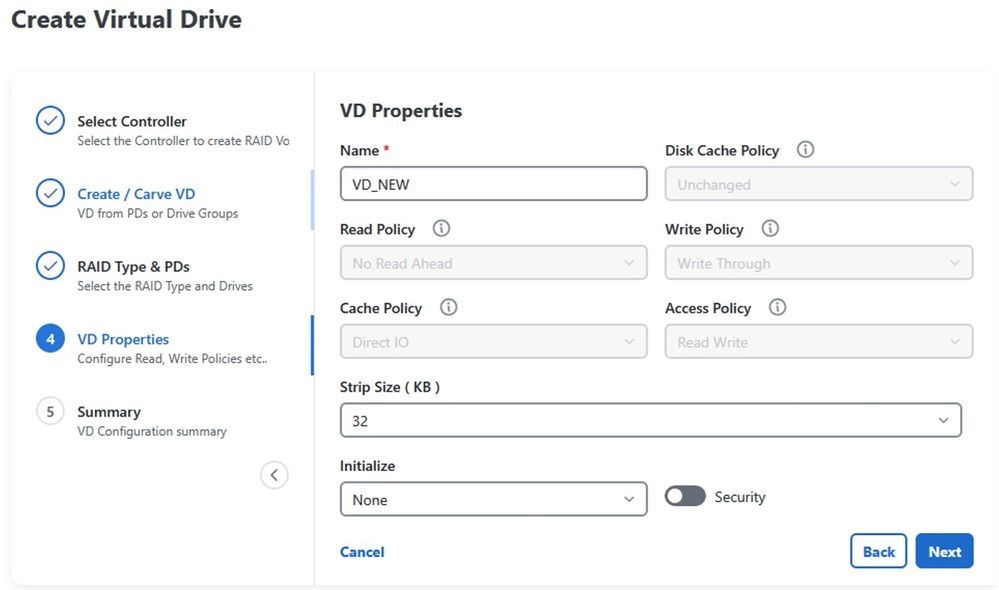
Select the name of the Virtual Drive and the Strip Size:
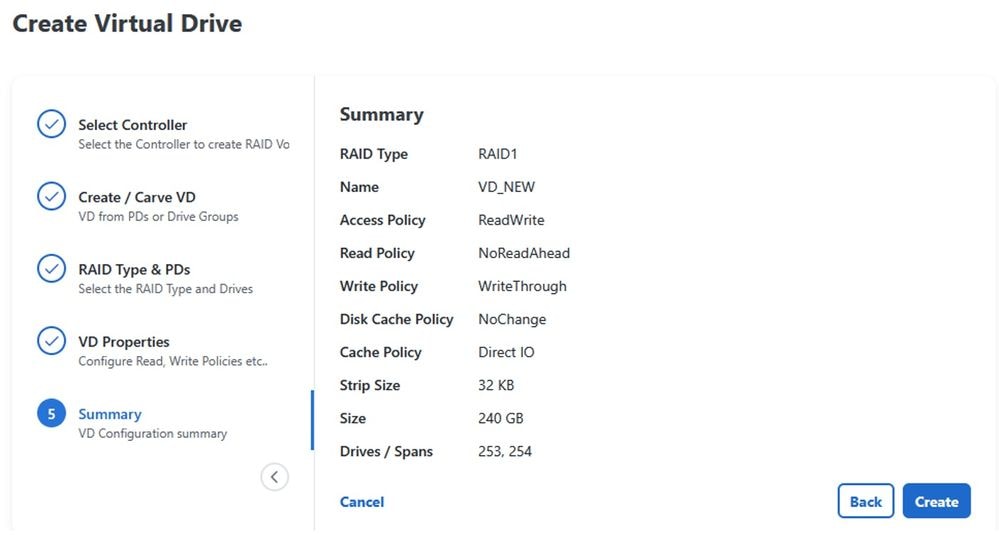
Verify that everything is properly configured, then click Create:

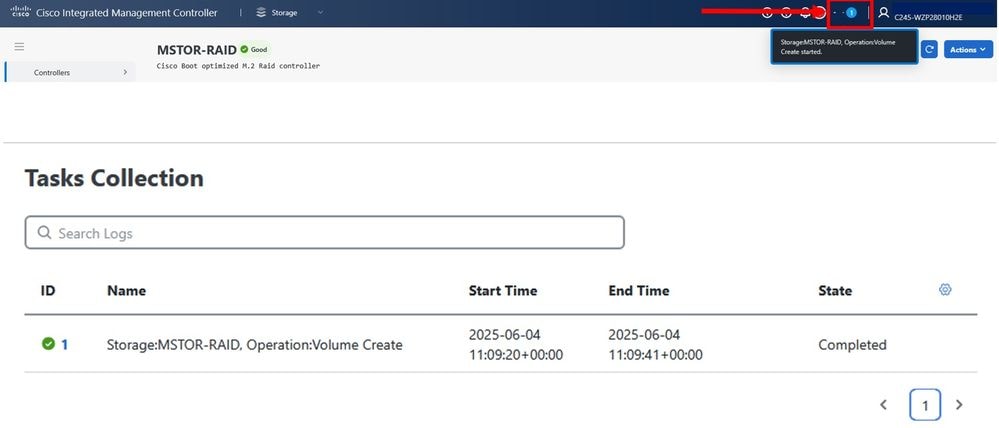
Note: You can check the status of the Virtual Drive creation by clicking the Task Collection tab.
Configuration through the BIOS
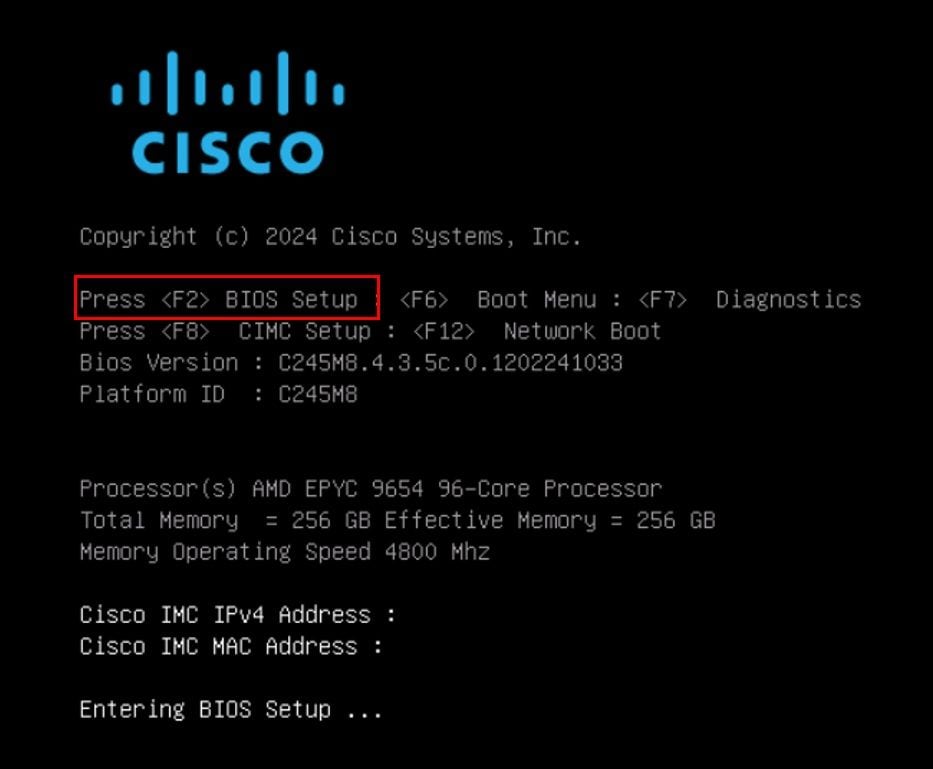
Reboot the server and press F2 to access the BIOS settings:
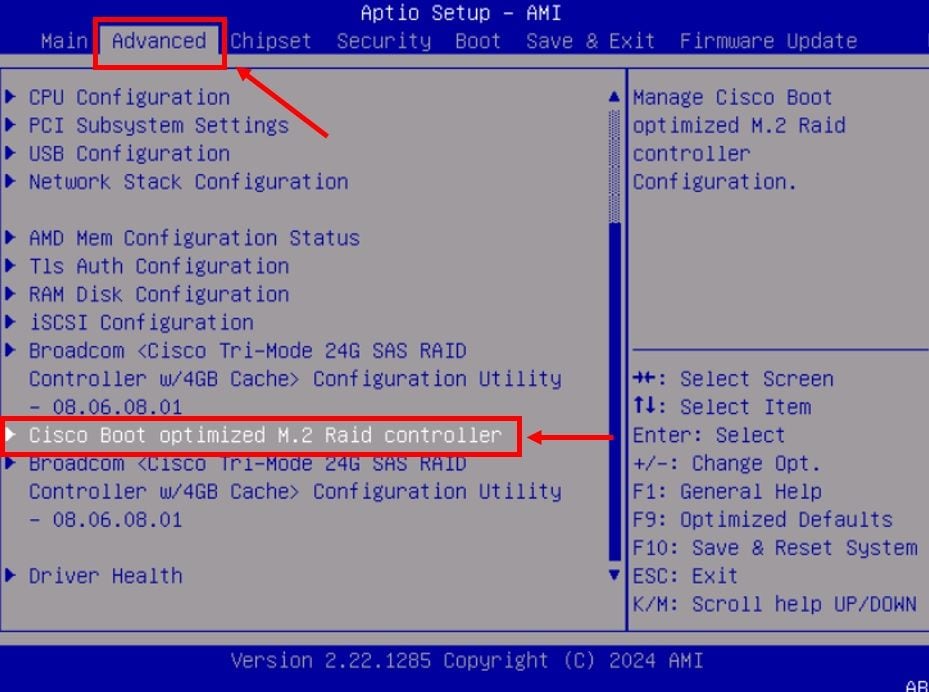
Once you are in the BIOS settings, navigate to the Advanced tab, then select the desired Controller:
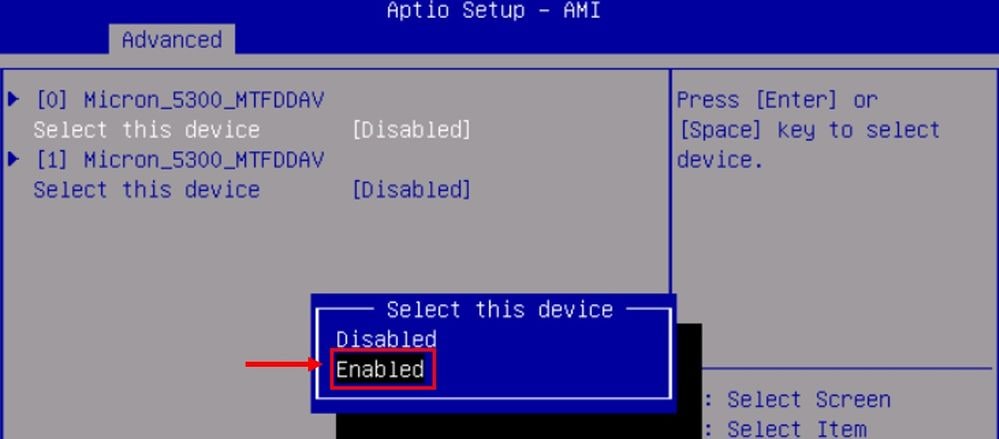
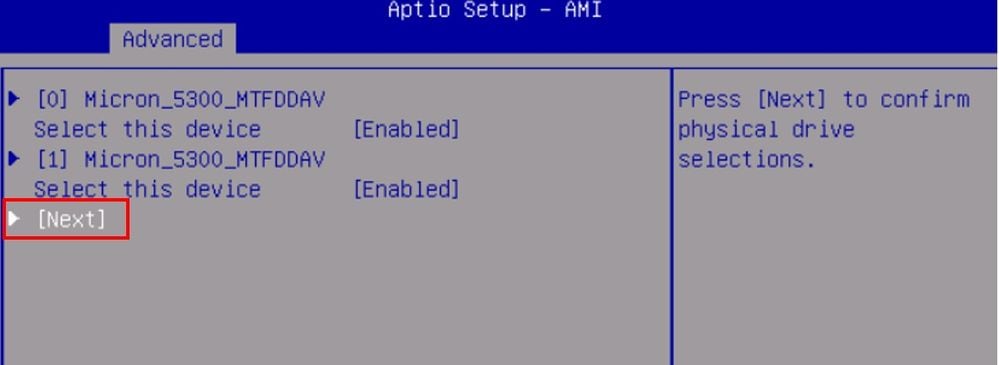
Click Create RAID Configuration and enable the Disks, then click Next:
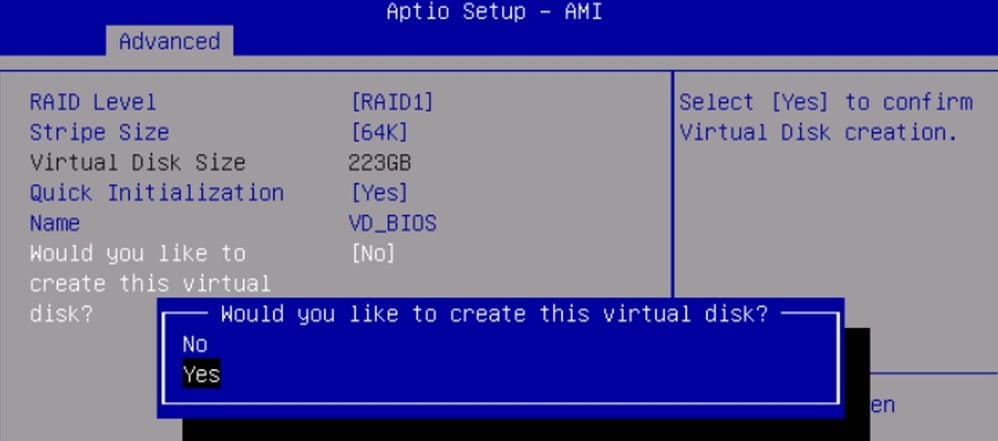
Select the RAID Level, Size and name the Virtual Drive, before you create it:
Verify
You can verify that the Virtual Drive has been created successfully through the GUI. Navigate to Storage tab > Controllers. Select the desired controller and click Virtual Drive Info:

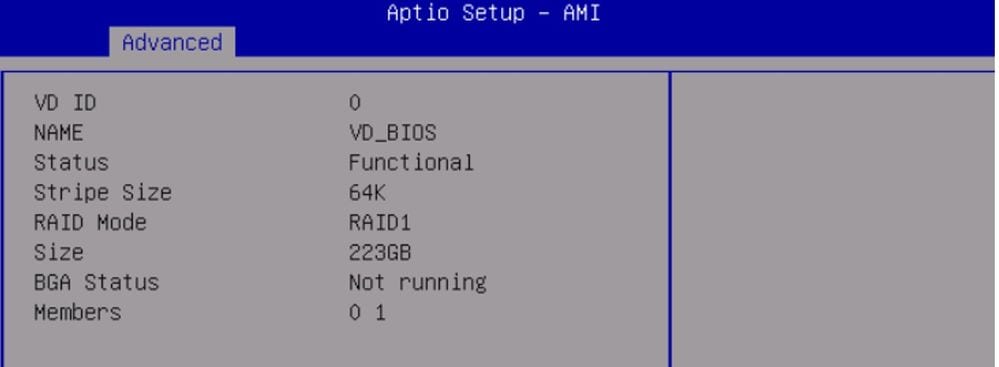
Another way to verify the Virtual Drive is through the BIOS. Navigate to Physical/Virtual Disk Information > Virtual Disk Info and select the Virtual Drive:
Finally, there is also a way to verify the Virtual Drive via CLI, using these commands:
C245-WZP28010H2E#
C245-WZP28010H2E# scope chassis
C245-WZP28010H2E /chassis # scope storageadapter MSTOR-RAID
C245-WZP28010H2E /chassis/storageadapter # show virtual-drive
Virtual Drive Health         Status               Name             Size       Physical Drives      RAID Level
------------- -------------- -------------------- ---------------- ---------- -------------------- ----------
0             Good           Optimal              VD_NEW           228872 MB  253, 254             RAID 1
Related Information
 Feedback