Introduction
This document describes the procedure to convert a UCS-C series integrated in Intersight Managed Mode to standalone mode.
Prerequisites
Ensure that you have these requirements before you attempt this configuration.
- Computer to connect to C-Series Server
- Monitor
- KVM cable
- Keyboard
- 1G cable to connect to the management port
Requirements
Cisco recommends that you have knowledge of these topics:
- Basic understanding on Unified Computing Systems servers (UCS)
- Basic understanding of Intersight Managed Mode (IMM)
- Basic understanding of Cisco Integrated Management Controller (CIMC)
- Basic understanding of Networking
Components Used
- Intersight Managed Mode (IMM)
- Firmware version 4.3(3.240007)
- 6536 Fabric Interconnect
- UCSC-C220-M5SX
The information in this document was created from the devices in a specific lab environment. All of the devices used in this document started with a cleared (default) configuration. If your network is live, ensure that you understand the potential impact of any command.
Background Information
This process is required in situations where Network Adapter requires replacement and part arrives with a lower firmware not allowing server to complete discovery.
Configure
Put The Server In Standalone Mode

Warning: Ensure the server is powered off before you start this procedure.
Step 1. Decommission The Server
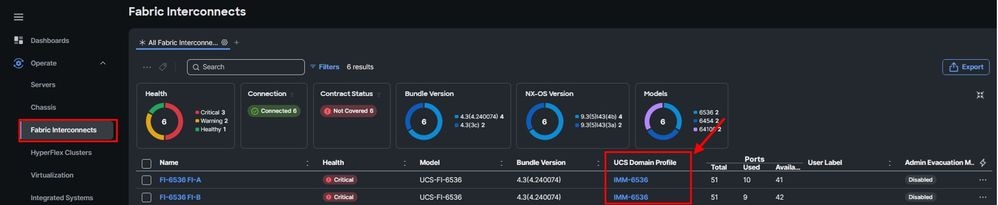
Navigate to your IMM web interface, then navigate to Fabric Interconnects tab > Connections > Servers and select the desired server.
Then, click in the 3 dots and decommission it:


Note: You can verify the decommissioning progress in the requests tab.
Step 2. Unconfigure The Server Ports
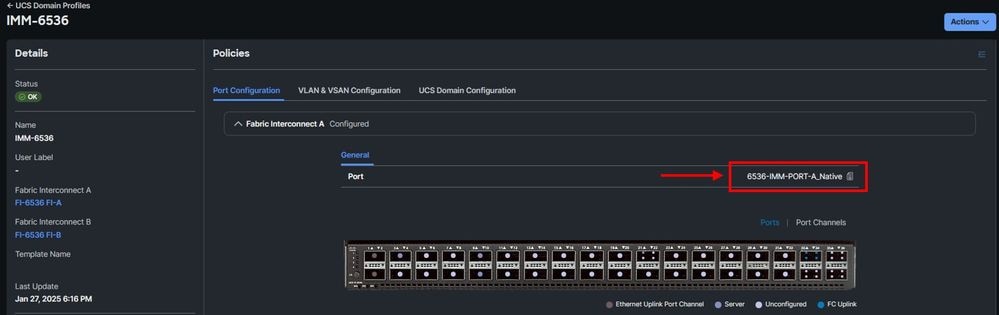
Navigate to Fabric Interconnects tab > UCS Domain Profile and select Port policy:
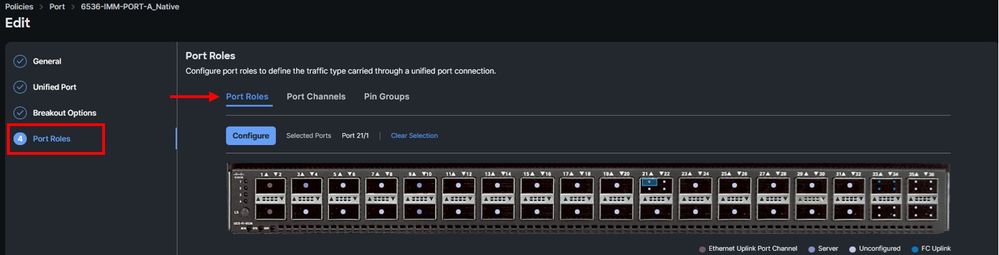
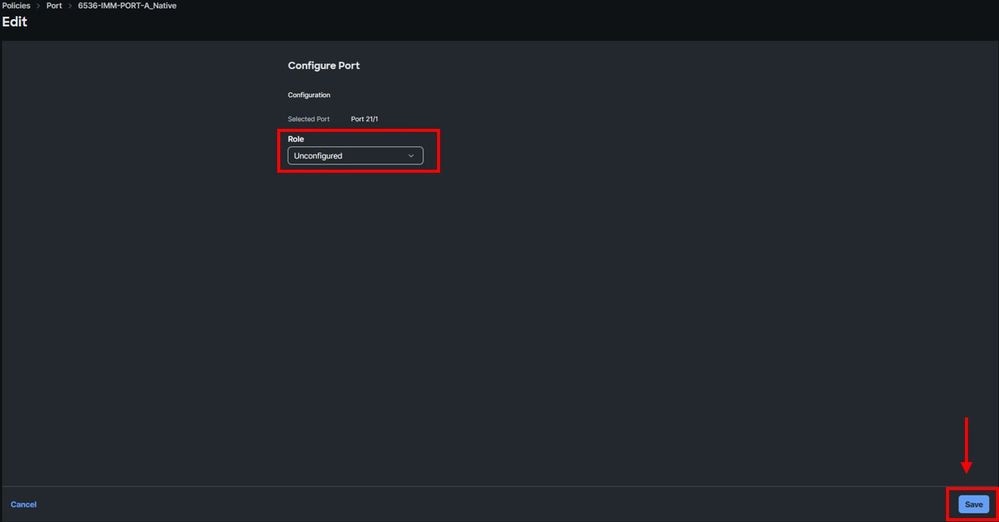
In Port Roles tab, select the current ports that are configured as Server port. Click Configure and select the role as Unconfigured. Save changes and re-deploy the domain profile. Repeat the same procedure on Fabric Interconnect B.
Step 3. Change CIMC To Default Settings
Power off the server and remove power cords.
Wait for 2 minutes and connect the power cords again.
Connect a KVM cable to the console port of the server with a monitor and keyboard.
Monitor the server boot process until you reach the Cisco menu and press F8 to enter Cisco IMC Configuration Utility.
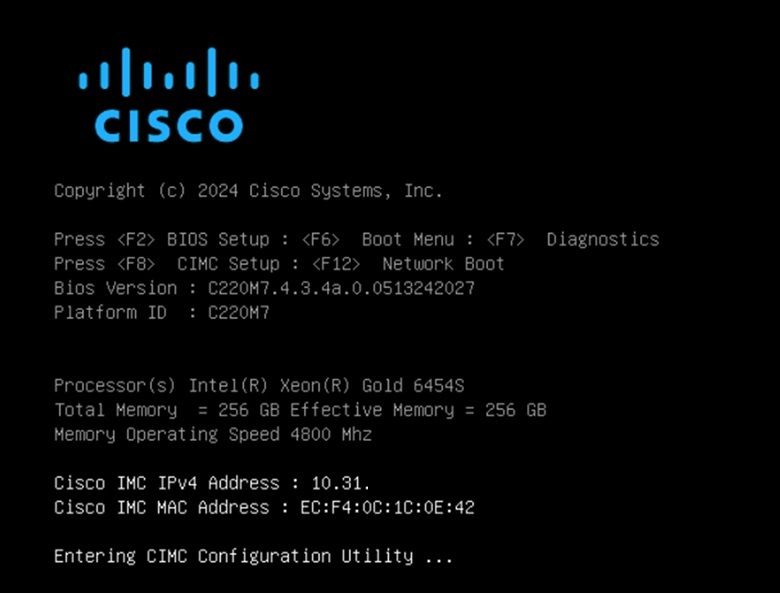
Press F1 and enable Factory Default.
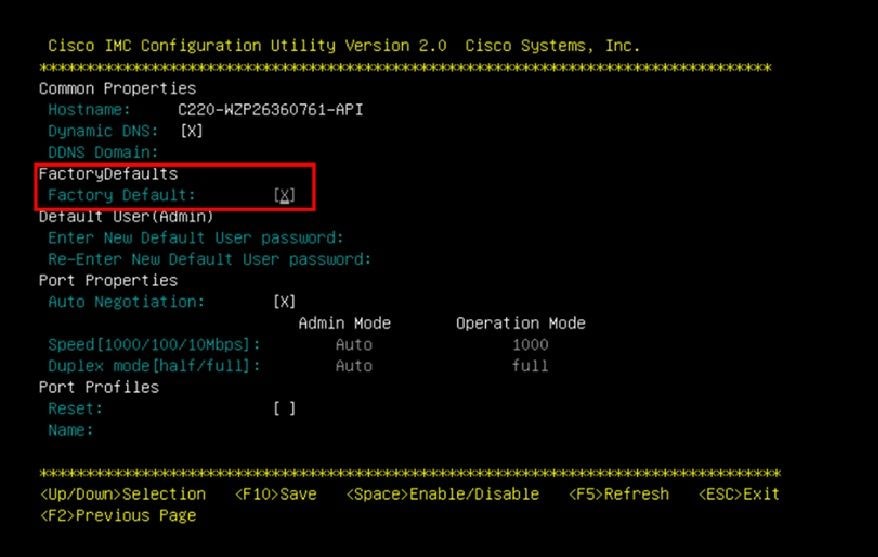
Press F10 to save changes and reboot the server.
Step 4. Configure CIMC To Standalone Mode
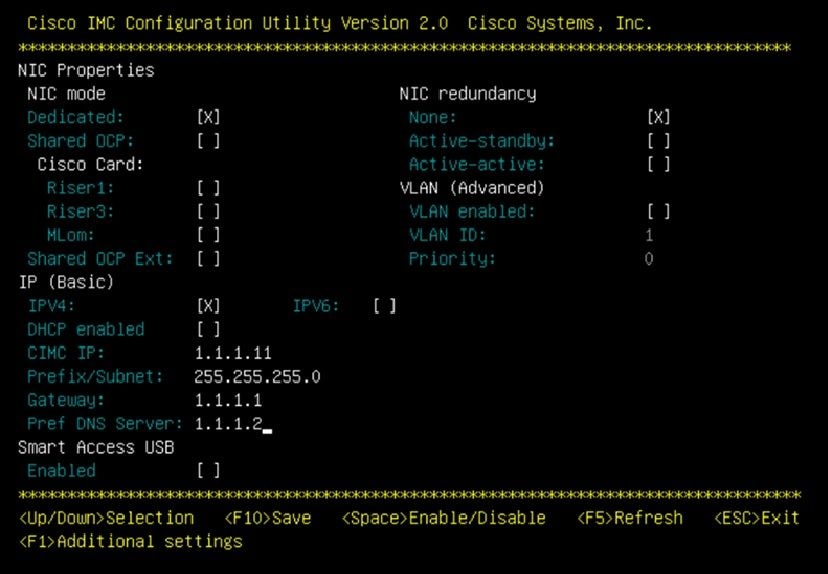
Monitor the server boot process until you reach the Cisco menu and press F8 to enter to Cisco IMC Configuration Utility again.
Apply the next configuration:
- NIC mode selected to Dedicated
- IP to IPV4
- CIMC IP with an IP in the same subnet as your computer.
- NIC redundancy to none
- No VLAN
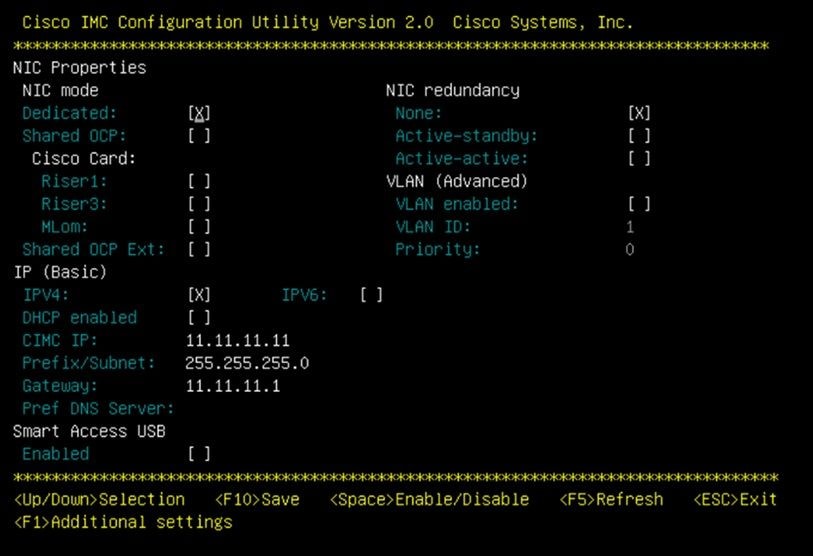
Press F10 to save changes and reboot the server.
Connect your computer to the physical Management Port on the server and open a web browser.
Use the IP you configured https://x.x.x.x
CIMC Prompt view and current CIMC version:
Reimage Firmware Version
Note: In case your Server is integrated back into Intersight, it is highly recommended to reimage the firmware version.
Step 1. Download Host Upgrade Utility (HUU) ISO
You can download HUU ISO at software.cisco.com.
Step 2. Launch KVM And Map HUU ISO
Note: If you prefer, you can expand the KVM tab, navigate to Actions > System and click Launch KVM.
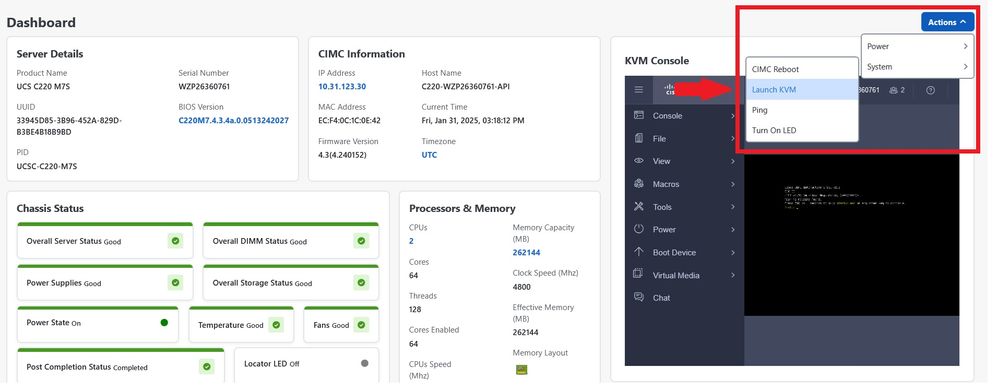
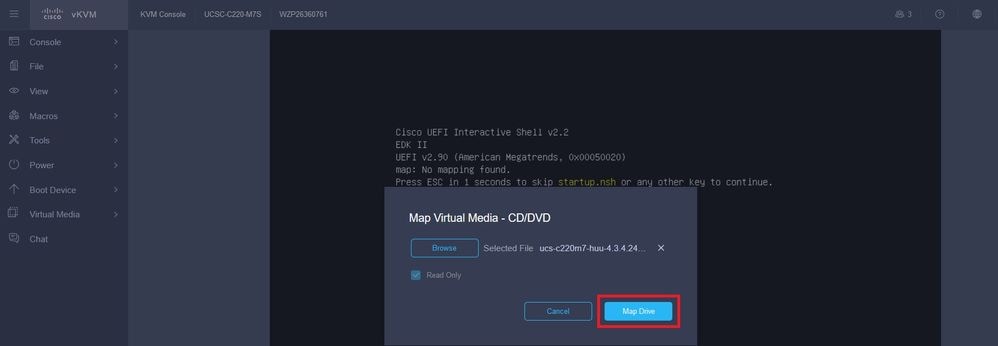
Once you download HUU for the current version, navigate to CIMC, then on the right, see the KVM console and remove on Virtual Media, then click vKVM-Mapped vDVD and map the ISO file:
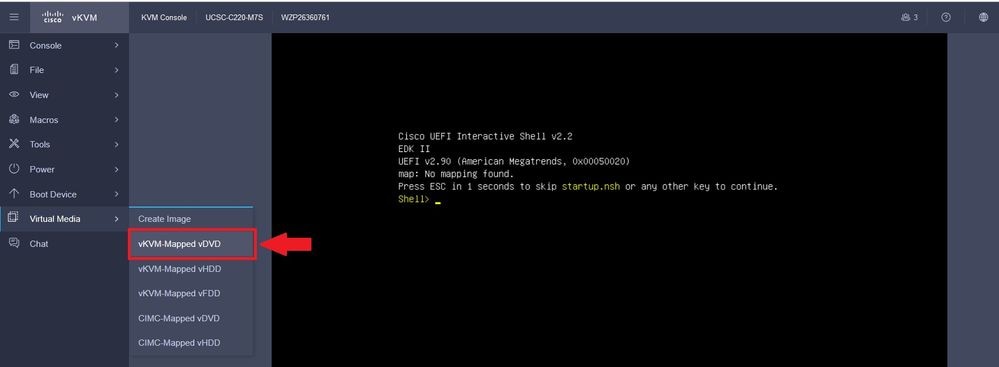
Map HUU on Map CD/DVD:
Step 3. Boot Using HUU ISO
Reboot the server and monitor the boot process until you reach the Cisco menu and press F6 to enter to Boot Menu.
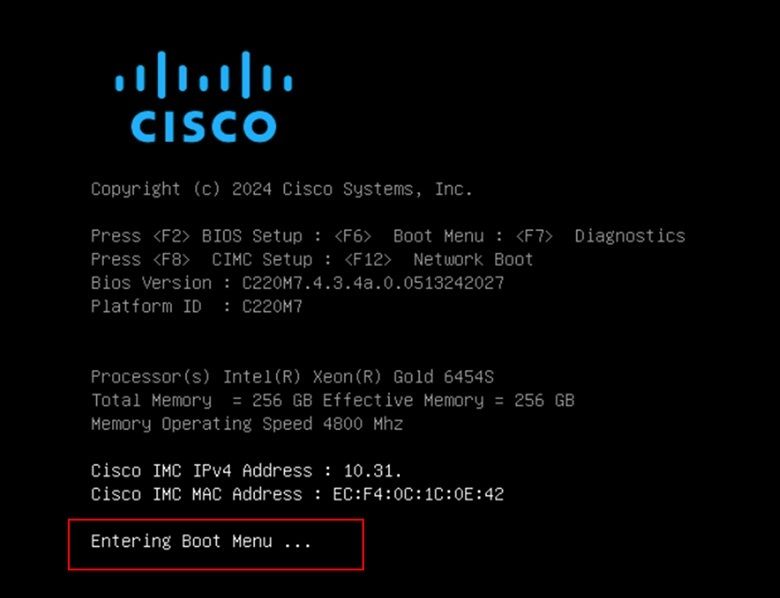
Select vKVM-Mapped vDVD option to boot HUU ISO mapped:

Note: Loading HUU ISO can take several minutes.
Step 4. Reimage Current Version
Wait until HUU ISO loads and accepts the Cisco Software License Agreement.
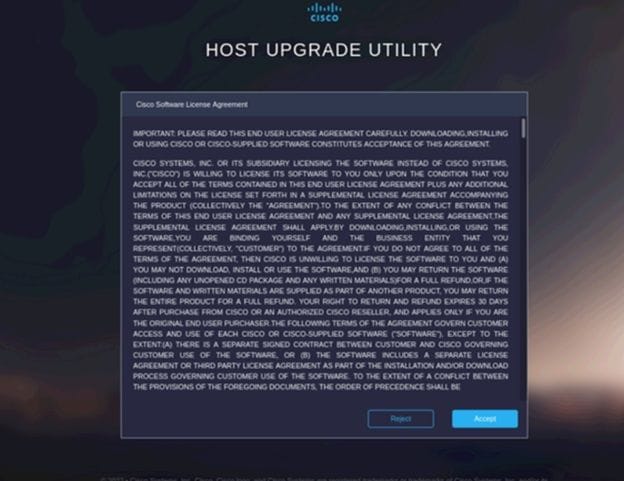
Switch to Advanced Mode and select all the components, then click Update & Activate.
Wait until it finishes the reimage and the server reboots.
Integrate Server to Cisco Intersight
Note: Before integrating the server to Intersight, it is important to Reset CIMC and VIC adapter into factory Default settings so that they can be properly configured.
Step 1. Set BMC And VIC To Factory Default
Navigate to Administration > Utilities > Actions > Admin Utilities > Reset to Factory Defaults:
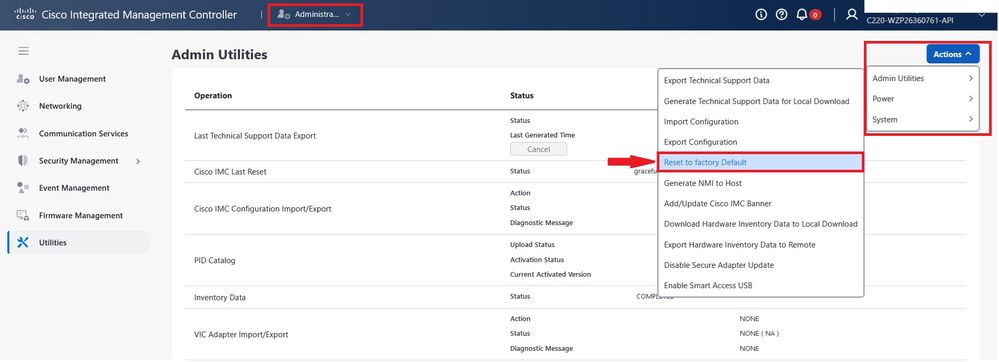
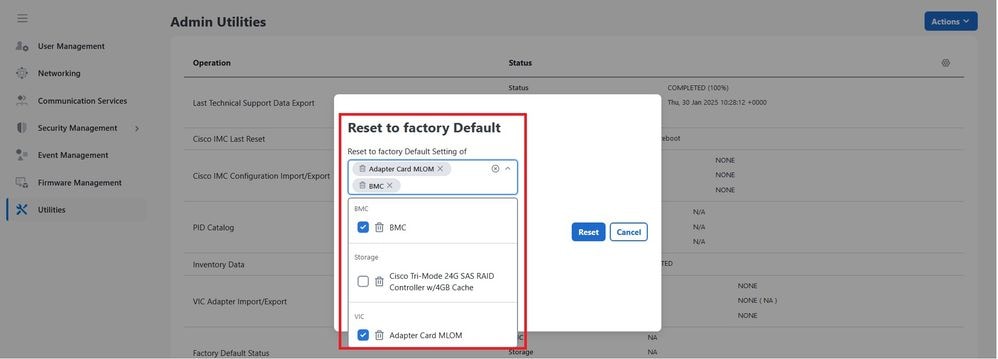
Note: It is not required to reset to default Storage devices. If selected, it erases the Virtual Drives and the data written to the Disks.
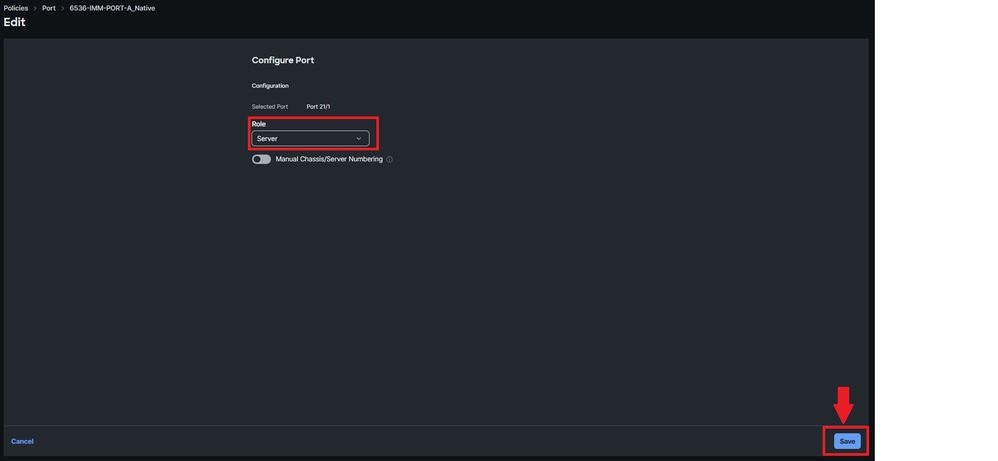
Step 2. Reconfigured Ports As Server Ports
Navigate to Fabric Interconnects tab > UCS Domain Profile and select Port policy.
In Port Roles tab. Select the previous ports that were configured as Unconfigured state. Click Configure and select the port role as Server port. Save the changes and re-deploy the domain profile, repeat the same procedure on Fabric Interconnect B.
Connect the required ports from the Network Adapter to the Fabric Interconnects ports.
Step 3. Recommission The Server
Navigate to Fabric Interconnects tab. Select the Fabric Interconnect connected to the server. Click Connections tab and in Decommissioned area select Servers. Select the server and recommission it.

You can monitor the server discovery process in the Requests tab.
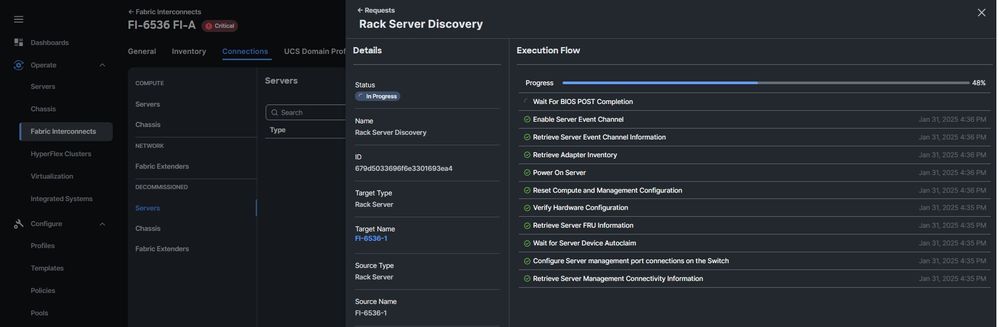
Note: Discovery can take several minutes to start.
Verify
For verification purposes and to confirm via CLI that the C series server has been integrated correctly, you can run this command:
6536-A(nx-os)# show interface chassis-info
Adapter Mode Flags:  I - CIMC IMM mode
                     U - CIMC UCSM mode
                     S - CIMC Standalone mode
                     Y - NCSI Yes
                     N - NCSI No
--------------------------------------------------------------------------------------------------
    Chassis    Chassis    Remote      Chassis                      Module            Adapter Mode
 ID Port      Port State  Uplink  Model      Serial         Model           Serial
--------------------------------------------------------------------------------------------------
  1 Br-Eth1/21/1      Active    1    UCSC-C220-M5SX WZP22460WCD  UCSC-MLOM-C25Q-04 FCH22337SV2  I-Y
Related Information
 Feedback