Introduction
This document describes how to create an automated workflow to send an email notification for a new incident.
Prerequisites
Requirements
There are no specific requirements for this document.
Components Used
This document is not restricted to specific software and hardware versions.
The information in this document was created from the devices in a specific lab environment. All of the devices used in this document started with a cleared (default) configuration. If your network is live, ensure that you understand the potential impact of any command.
Configure
This guide details the steps necessary to configure and activate a workflow to automatically send an email notification when an incident occurs. The steps are detailed as follows.
Install the Workflow from Cisco XDR Exchange
Step 1. Install the Endpoint Isolation Workflow
- Log in to Cisco XDR and navigate to Automate > Exchange.
- Search for the workflow named Cisco XDR - Send Email Notification for New Incident and click Install.
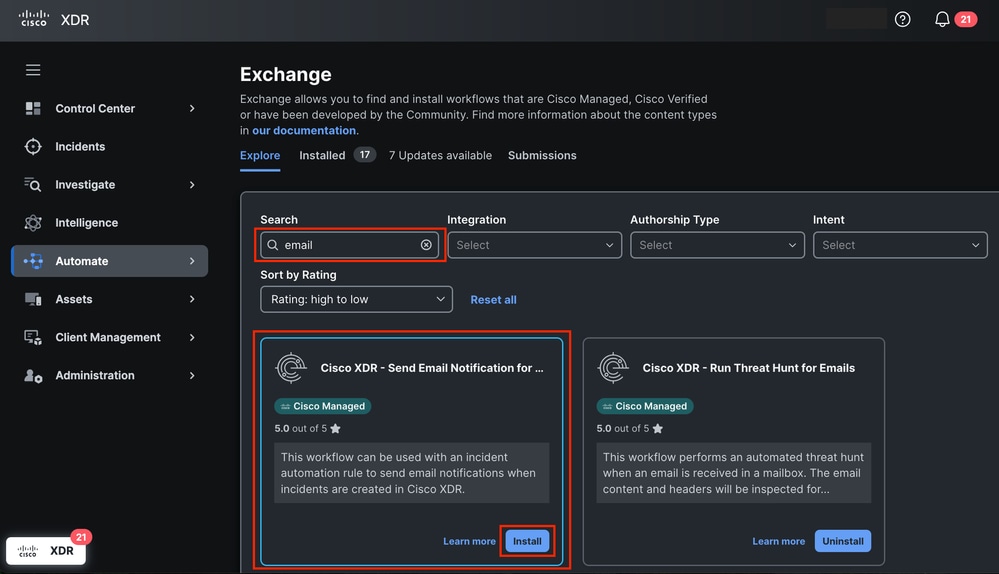 Send Email Notification Workflow from Exchange
- Check the necessary information to configure the workflow correctly.
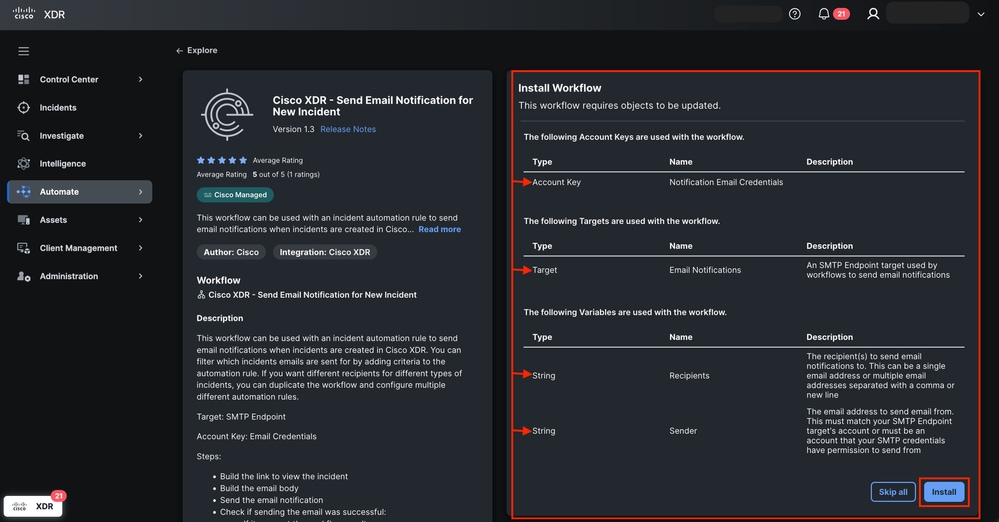 Send Email Notification Workflow Overview
- Fill the Account Keyswith the email credentials to set the sender. The Displayed name is Notification Email Credentials and Click Next.
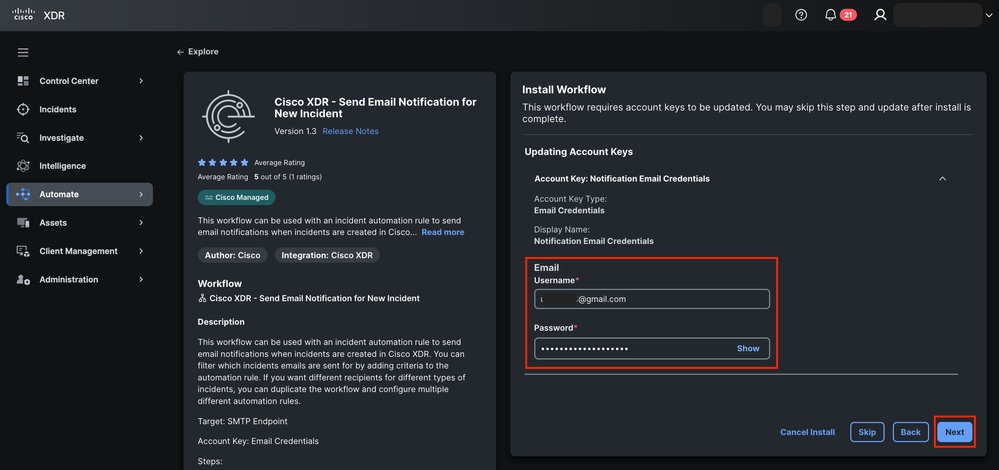 Account Keys for Workflow
- Configure the target information with:
- Account Keys: Notification Email Credentials
- Email
- SMTP server: smtp.gmail.com
- SMTP Port: 587
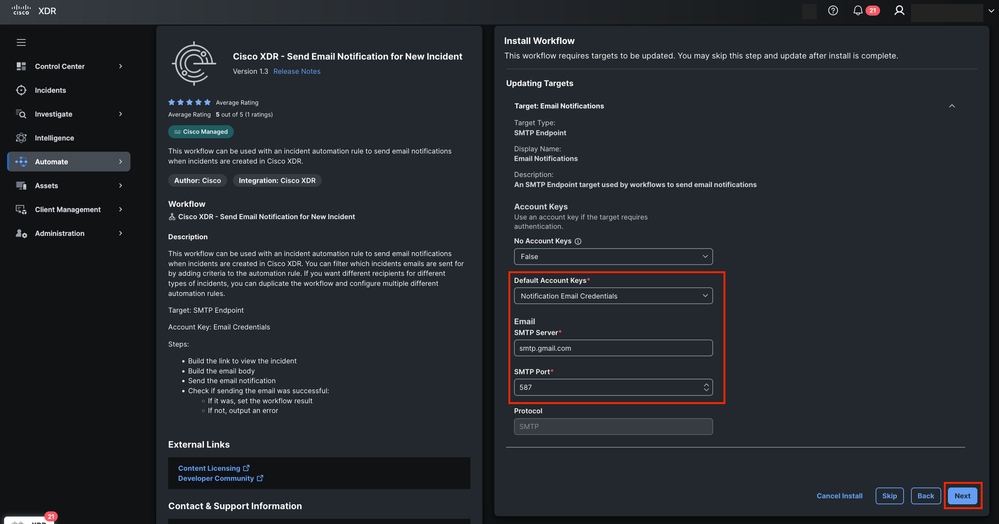 Target Configuration for Workflow
- Click Next.
- Update the variable for:
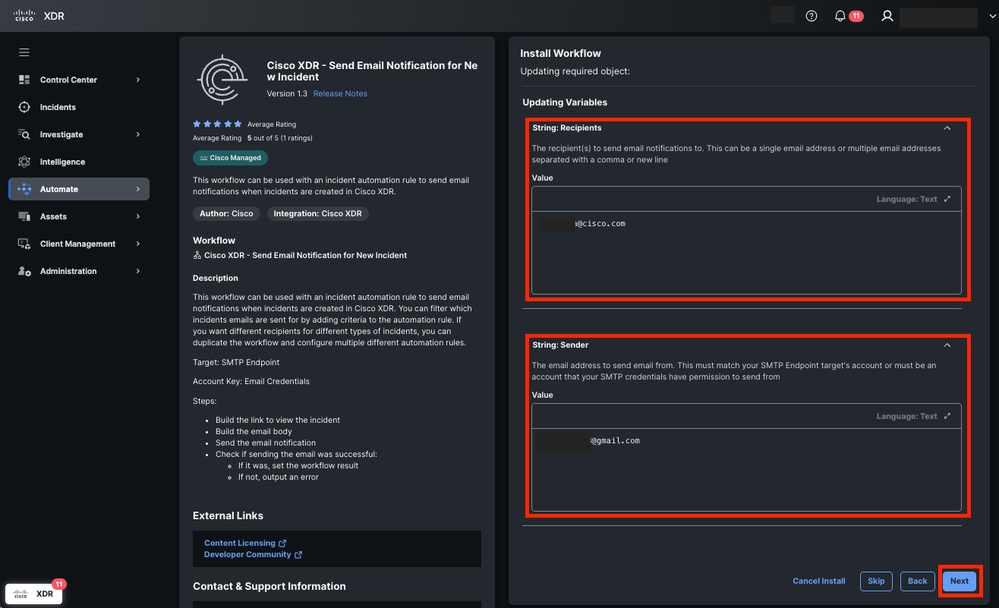 Assign Variables for Workflow
8. Click Next.
9. Navigate to Automate > Workflows to check the Validated status.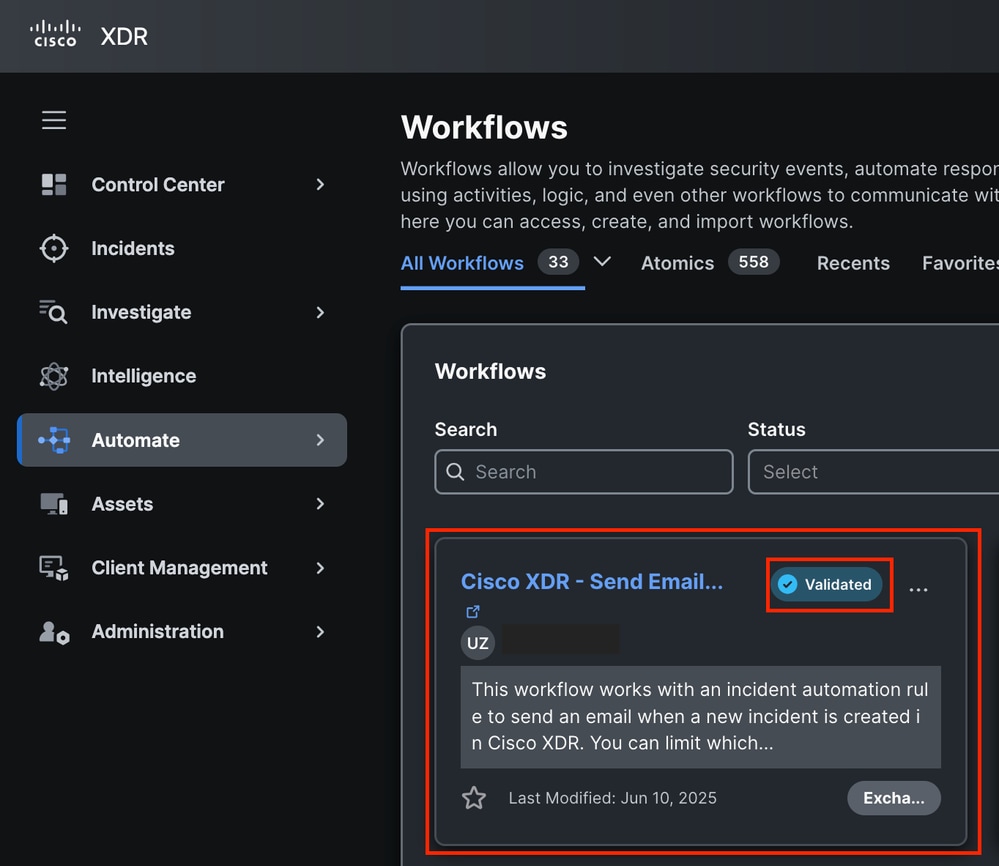 Workflow Validated Status
Create an Automation Rule
Step 2. Configure an Automation Rule
- Navigate to the Automation > Triggers section.
- Create a new rule. Click Add automation rule and assign a name.
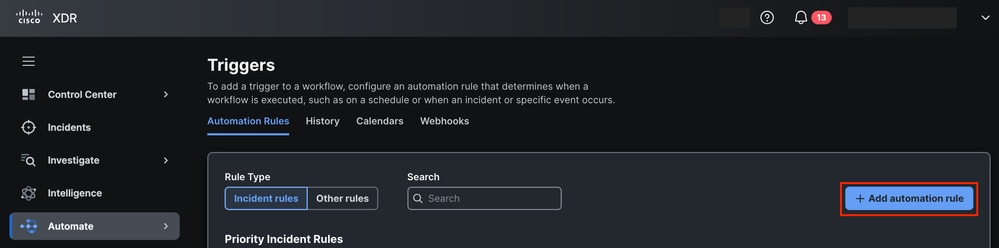 Add Automation Rule from Triggers
- Select Incident Rule type and define the trigger conditions. You can proceed without the need to add a rule condition, which ensures that any incident activates this rule. Customize the conditions if necessary.
 Automation Rule Type and Conditions
4. Apply the Automation Rule to the Cisco XDR - Send Email Notification for New Incident workflow you installed earlier. Set the Recipients and Sender variables. Apply the Automation Rule to the Workflow and Assign Variables
5. Save the rule.
Validate Workflow Functionality
Step 3. Verify Workflow Execution
- Generate or wait for an incident that meets the conditions of the rule.
 New Incident in Cisco XDR Detected
- Click Incident and then View Incident Detail.
 View Incident Details Button
3. Once the incident is created, check the Worklog tab within the incident to confirm that the workflow executed successfully. Incident Worklog Tab Information
Step 4. Confirm Email Notification
- Log in to the email account.
- Locate the Inbox mailbox.
- Check the email received.
- Verify the Incident title, Source and Short Description.
 New Incident Notification Email

Note: The initial incident name is generated based on the first detection; however, it can change if additional detections occur or new information enriches the incident.
 Feedback