Introduction
This document describes how to create an automation workflow to isolate an endpoint for a new incident.
Prerequisites
Requirements
There are no specific requirements for this document.
Components Used
This document is not restricted to specific software and hardware versions.
The information in this document was created from the devices in a specific lab environment. All of the devices used in this document started with a cleared (default) configuration. If your network is live, ensure that you understand the potential impact of any command.
Configure
This guide details the steps necessary to configure and activate a workflow to automatically isolate an endpoint when an incident occurs. The integration is performed with Cisco Secure Endpoint and the workflow automation functionality. The steps are outlined as follows.
Initial Configuration in Cisco Secure Endpoint
Step 1.1: Enable the Isolation Feature in the Policy
- Log in to the Cisco Secure Endpoint portal.
- Navigate to the Management > Policies section.
- Select the policy that applies to the endpoint you want to isolate.
- Ensure that the Device Isolation option is enabled within the policy settings.
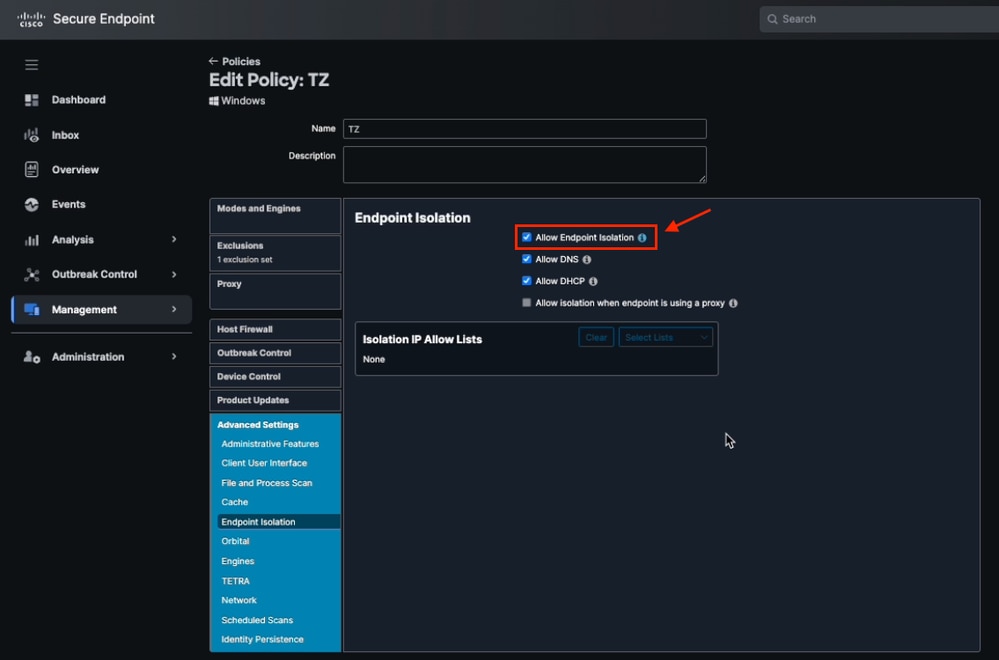 Allow Endpoint Isolation from Secure Endpoint Policy
- Save the changes and distribute the policy if necessary.
Validate the Integration with Cisco Secure Endpoint
Step 2.1: Verify the Integration
- Log into Cisco XDR.
- Navigate to Administration > Integrations > My Integrations section.
- Ensure that the integration with Cisco Secure Endpoint is properly configured:
Verify the integration status in Connected.
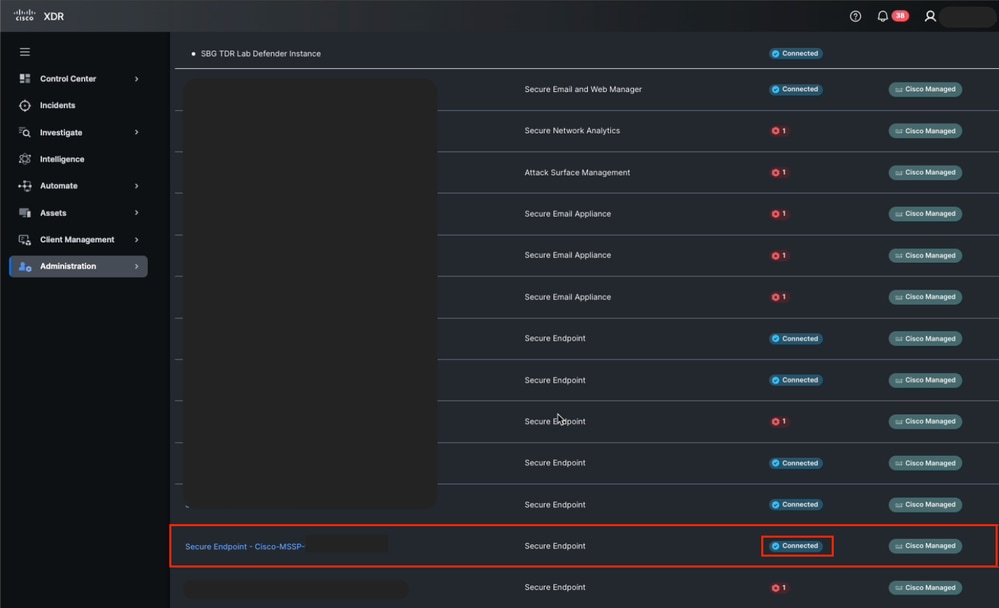 Secure Endpoint Integration Status from Cisco XDR
Confirm that there are no errors in the API configuration.
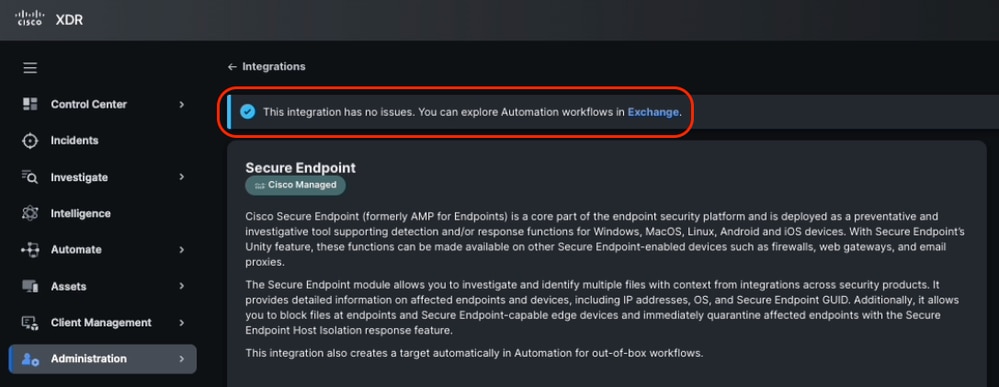 Secure Endpoint integration health check
Install the Workflow from Cisco XDR Exchange
Step 3.1: Install the Endpoint Isolation Workflow
- Log in to Cisco XDR and navigate to Automate > Exchange.
- Search for the workflow named Cisco Secure Endpoint - Isolate Hosts and clik Install.
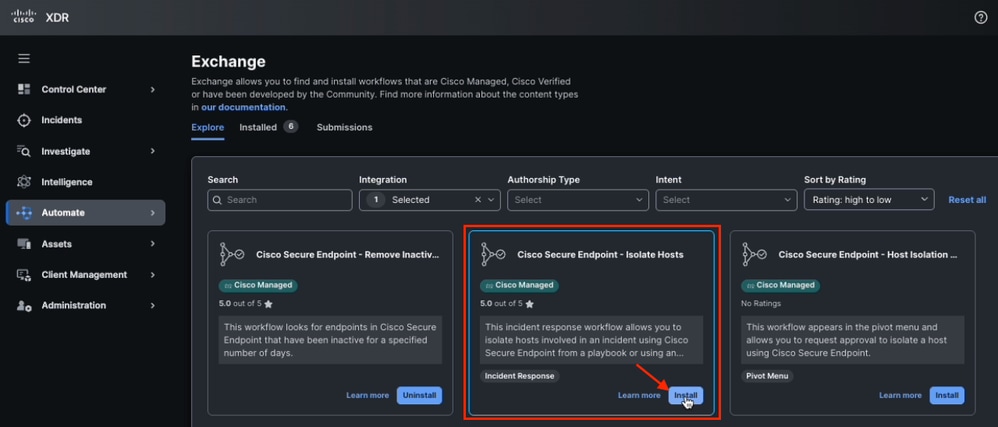 Isolate Host Workflow from Exchange
- Verify the target is availabe before install.
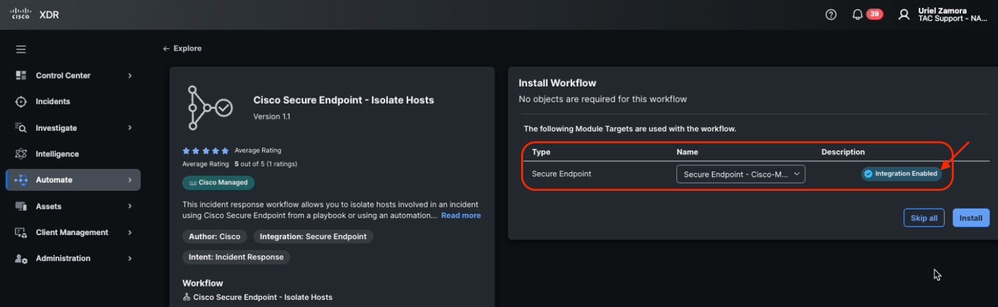 Module Target Enabled from Workflow
4. Install the workflow in your automation system.
Create an Automation Rule
An Automation Rule is a configuration that defines when a workflow should be executed, based on specific events or a predefined schedule. These rules can include optional conditions, and if those conditions are met, the associated workflow(s) are triggered automatically.
Step 4.1: Configure an Automation Rule
- Navigate to the Automation > Triggers section.
- Create a new rule. Click Add automation rule and assign a name.
 Add Automation Rule from Triggers
- Set the trigger conditions. You can leave the conditions blank, this ensures that any incident activates this rule. Customize condition if it is necessary.
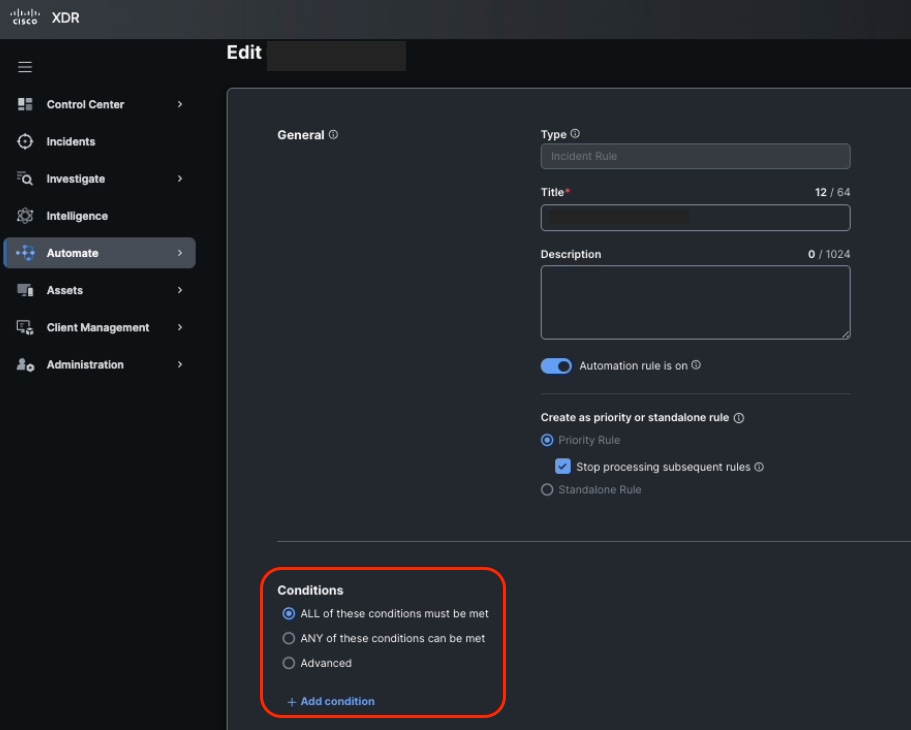 Automation Rule Conditions
- In the rule's action, select the Cisco Secure Endpoint - Isolate Hosts workflow you installed earlier.
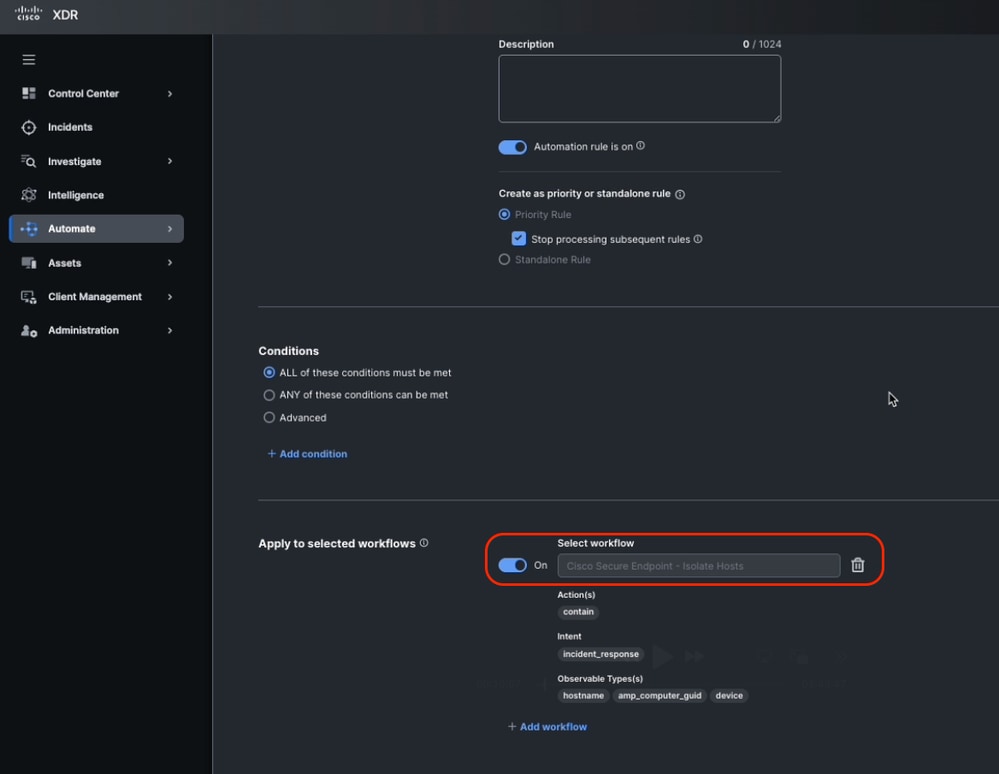 Assign the Automation Rule to the Workflow
- Click Save.
Validate Workflow Functionality
Step 5.1: Verify Workflow Execution
- Generate or wait for an incident that meets the rule's conditions.
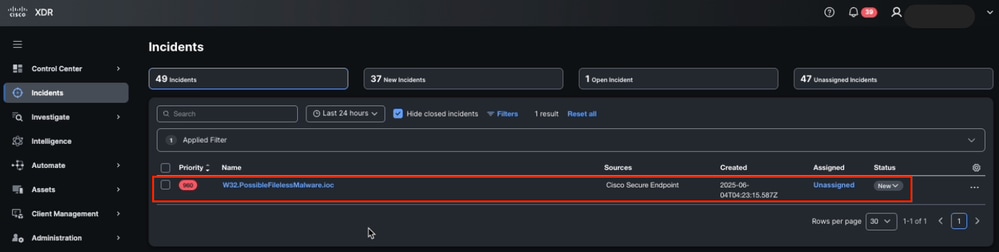 New Incident in Cisco XDR Detected
- Once the incident is created, check the Worklog tab (within the incident) to confirm that the workflow executed successfully.
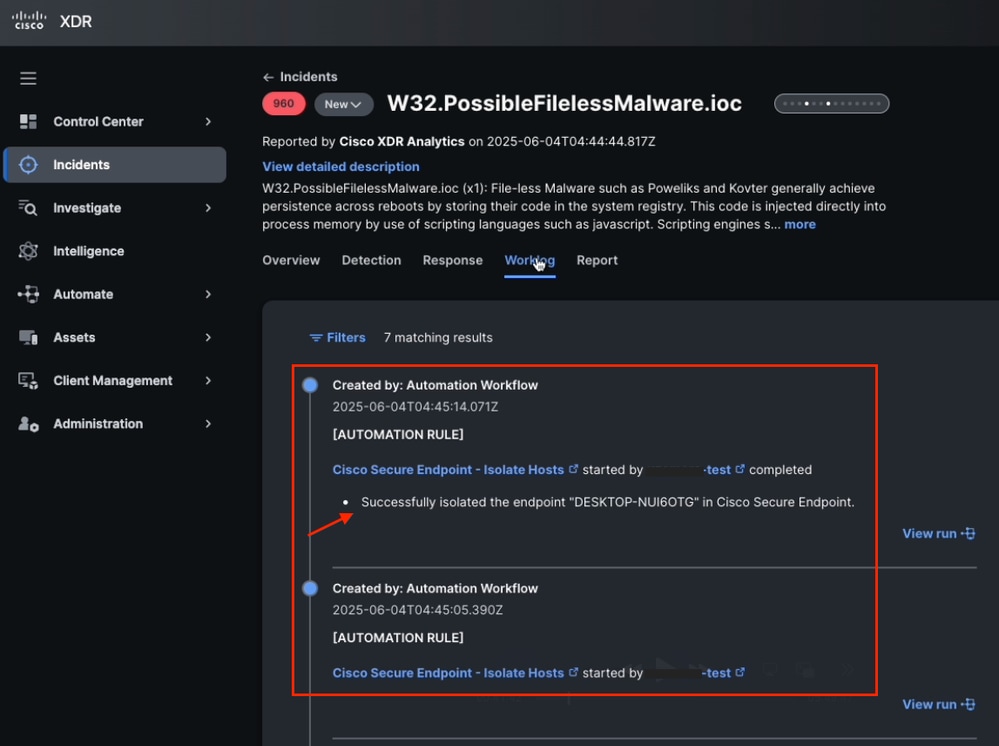 Incident Worklog Tab Information
Step 5.2: Confirm Endpoint Isolation
- Log in to the Cisco Secure Endpoint portal.
- Navigate to the Managment > Computers section and locate the target endpoint.
- Confirm that the device status is Isolated.
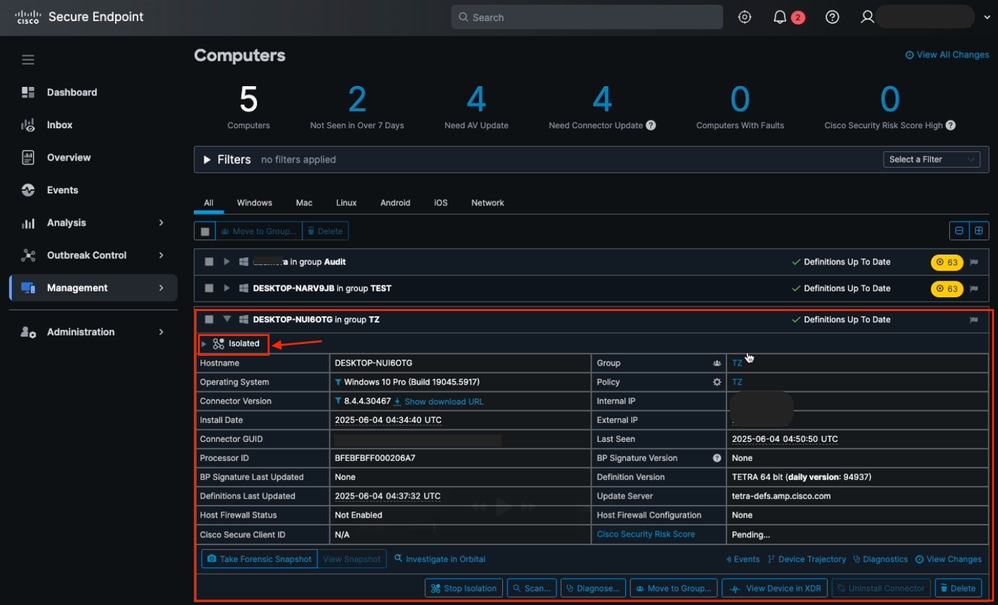 Isolation Status from Secure Endpoint Computers
- If the endpoint is not isolated, review the workflow logs and configuration to identify possible issues.
Common issue
Isolation feature is not enabled from Cisco Secure Endpoint
1. From Cisco XDR, navigate to Incidents, locate the last incident and navigate to Worklog.
2. Check if there is any related error after run the automation worflow.
For example, Endpoint isolation did not allow to isolate the host due to Endpoint isolation was not enabled on the Secure Endpoint Policy.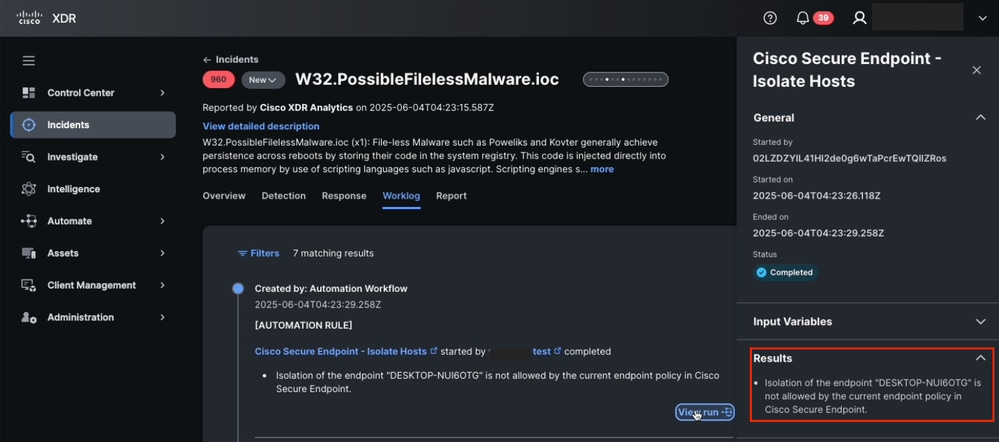 Automation Workflow results from Incident Worklog
3. From Secure Endpoint, navigate to Management > Policies select the Policy in question.
4. Once in the policy, navigate to Advanced Settings > Ednpoint Isolation and check the box Allow Ednpoint Isolation.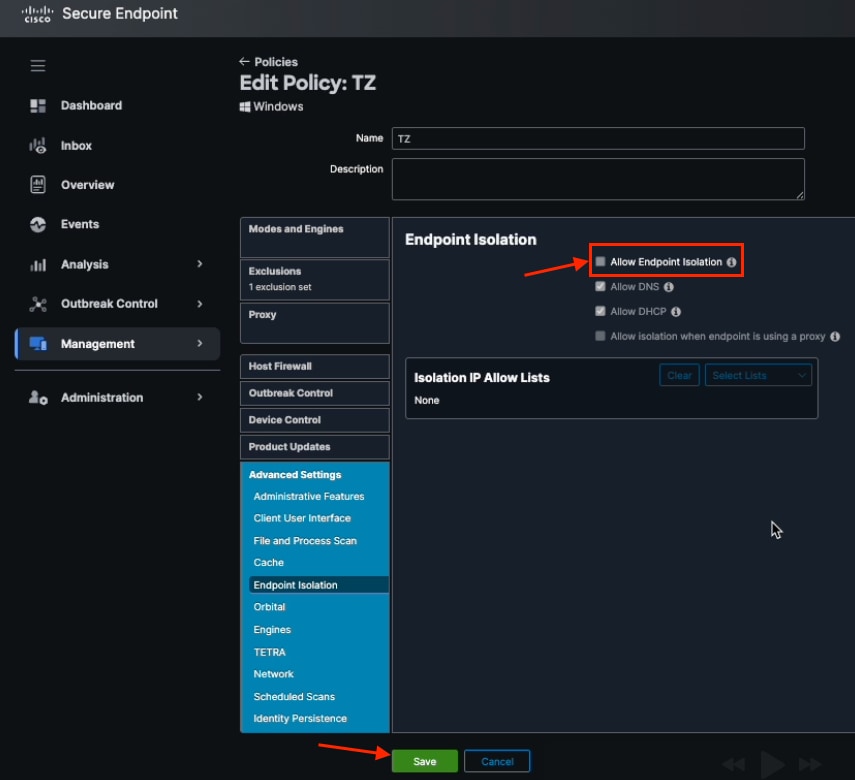 Allow Endpoint Isolation Checkbox in Secure Endpoint Policy
5. Click Save.

Note: Ensure you have the necessary administrative permissions to configure the integration and workflow.

Tip: Test the setup in a controlled environment before you deploy the automation in production.
Tip: Document any custom adjustments made to the workflow or automation rule.
Once these steps are done, you successfully configure and activate a workflow that automatically isolates an endpoint after an incident is created and ensure a rapid and effective response to security threats.
 Feedback