Introduction
This document describes how to configure Splunk to analyze DNS traffic logs from a Cisco-managed S3 bucket.
Overview
Splunk is a tool for log analysis. It provides a powerful interface for analyzing large chunks of data, such as the logs provided by Cisco Umbrella for your DNS traffic. This article describes how to:
- Set up your Cisco-managed S3 bucket in your dashboard.
- Ensure AWS Command Line Interface (AWS CLI) prerequisites are met.
- Create a cron job to retrieve files from the bucket and store them locally on your server.
- Configure Splunk to read from a local directory.
Prerequisites
Create a Cron Job on the Splunk Server
-
Create a shell script named pull-umbrella-logs.sh with the provided contents, which runs on a scheduled cron job:
<local data dir> : Directory on disk to store the downloaded log files.<accesskey> : Access key from the Umbrella dashboard.<secretkey> : Secret key from the Umbrella dashboard.<data path> : Data path from the log management UI (for example, s3://cisco-managed-<region>/1_2xxxxxxxxxxxxxxxxxa120c73a7c51fa6c61a4b6/dnslogs/ ).
-
Save the shell script and set the run permission. The script must be owned by root.
$ chmod u+x pull-umbrella-logs.sh
-
Run the pull-umbrella-logs.sh script manually to confirm that the sync process is functional. Full completion is not required; this step confirms that credentials and script logic are correct.
-
Add this line to your Splunk server crontab:
*/5 * * * * root root /path/to/pull-umbrella-logs.sh &2>1 >/var/log/pull-umbrella-logs.txt
Make sure to edit the line to use the correct path to the script. This runs a sync every five minutes. The S3 storage directory updates every 10 minutes and the data remains on the S3 storage for 30 days. This keeps the two in sync.
Configure Splunk to Read from a Local Directory
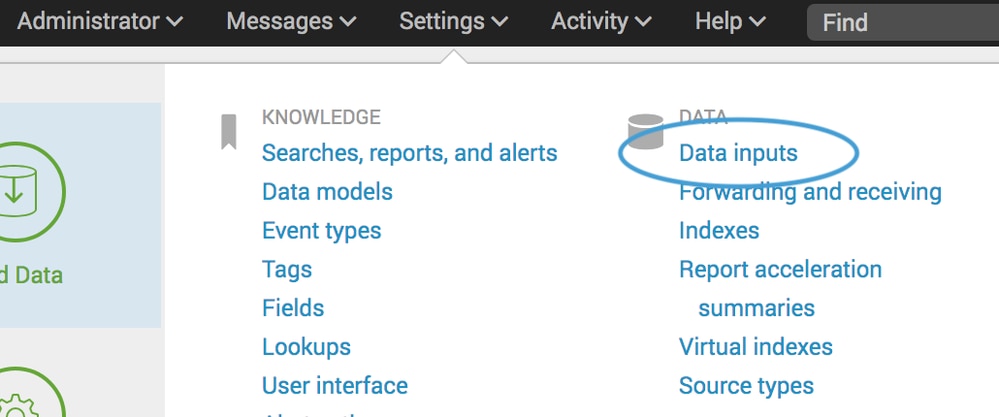
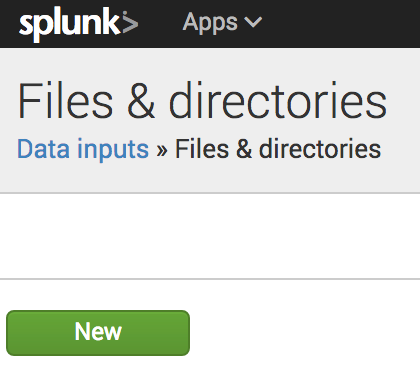
- In Splunk, navigate to Settings > Data Inputs > Files & Directories and select New.
 360002731126
 360002731146
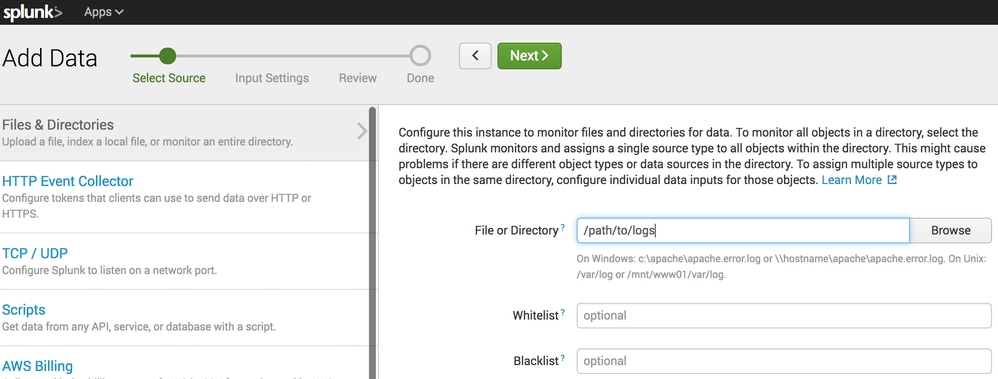
- In the File or Directory field, specify the local directory where the S3 sync places files.
 360002731106
- Click Next and complete the wizard using the default settings.
Once there is data in the local directory and Splunk is configured, the data can be available to query and report on in Splunk.

 Feedback