Introduction
This document describes how to configure NSG logs as a data input for Cisco Telemetry Broker (CTB).
Prerequisites
Requirements
- Azure cloud portal access with privilege to create storage account, Network Security Group (NSG) flow logs.
- Azure resources group in any location.
- CTB with one Manager and at least 1 broker node.
Components Used
The information in this document was created from the devices in a specific lab environment. All of the devices used in this document started with a cleared (default) configuration. If your network is live, ensure that you understand the potential impact of any command.
Configuration Steps
Configure Storage Account
Create storage account and resource in same Azure location.
Step 1: Navigate to Resource group from dashboard search bar.
 Azure-UI- Resource Group
Step 2: Locate your Resource group and check the Location column.
 Azure-UI Resource Group with location

Note: Since the resource group is in the South India location, the storage account is also in the South India location.
Step 3: Navigate to Storage account via dashboard search bar.
 Azure-UI Storage Account
Step 4: Select your Resource group, assign Storage accountname, and select Region .
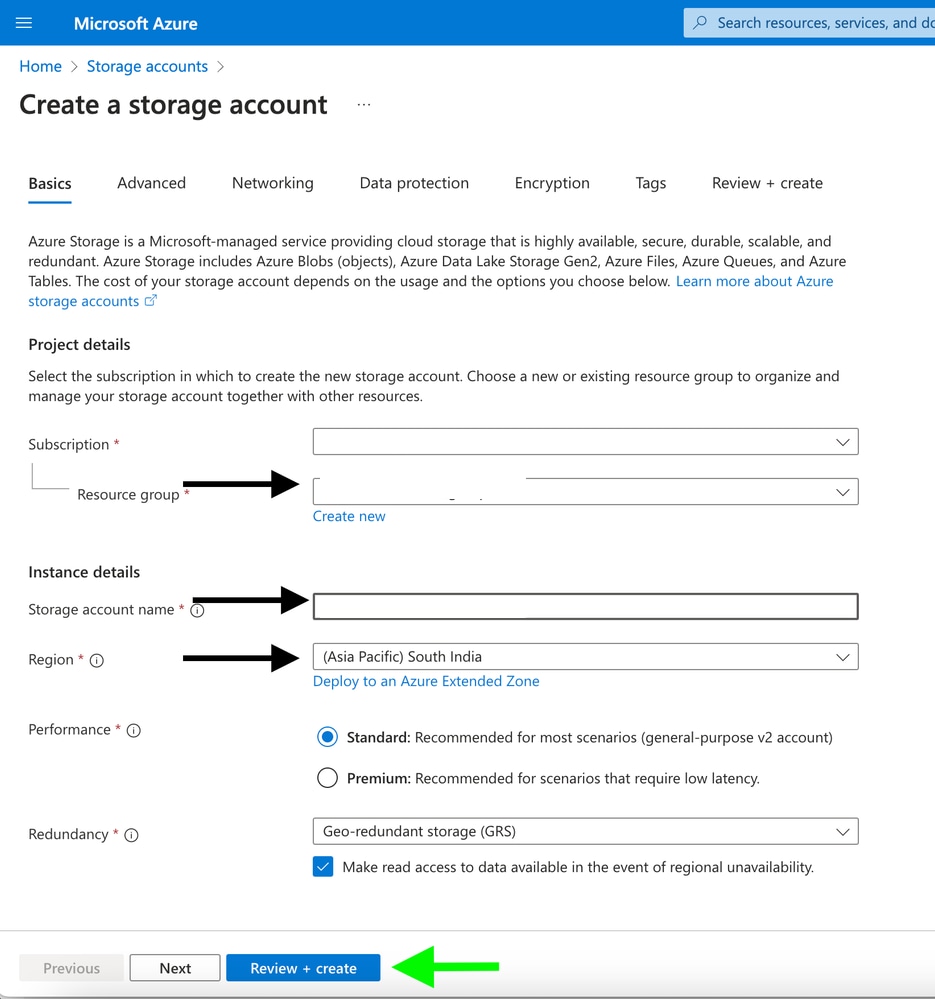 Azure-UI Create Storage Account Step 1
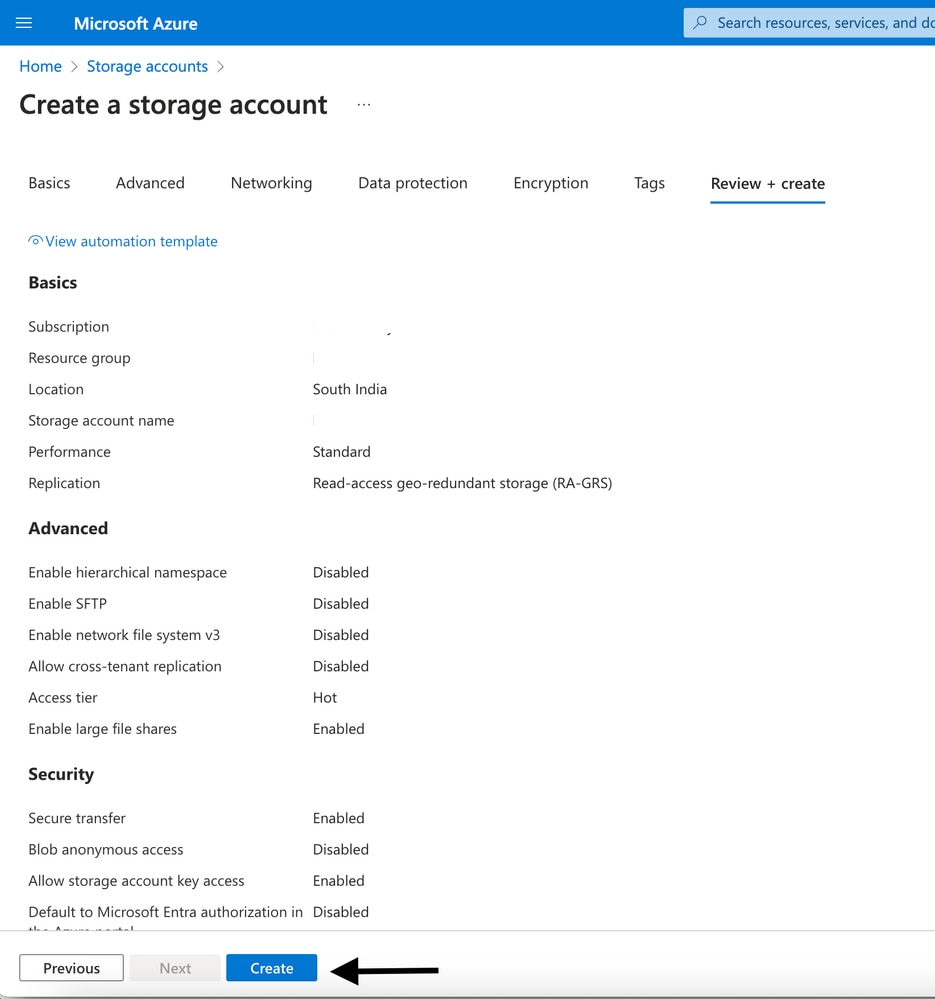 Azure-UI Create Storage account Step 2

Tip: You can go directly to review and create storage account if there are no further customizations to be done on storage account.(retention days, encryption type and so on).
Create NSG Flow Logs
Steps to create NSG Flow logs.
Step 1: Navigate to Network Watcher from search bar.
 Azure-UI Network Watcher
Step 2: Expand the Logs folder on the left side and click Flow logs.
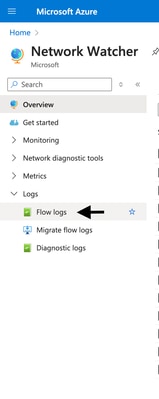 Azure-UI Logs Folder
Step 3: Click create.
 Azure-UI Click Create
Step 4: On the new pop-up page select Subscription.
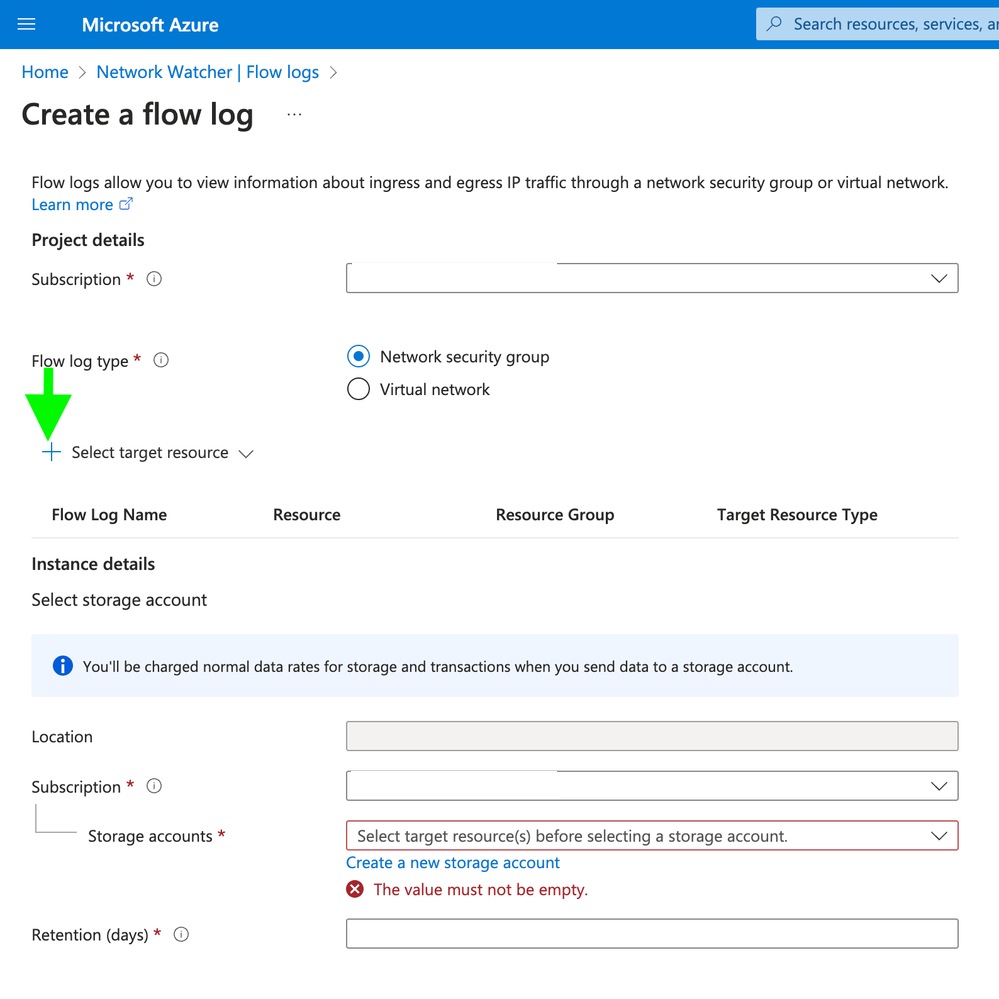 Azure-UI Select Target Resource
Step 5: Select target resource which would be your configured NSGs, click Confirm selection.
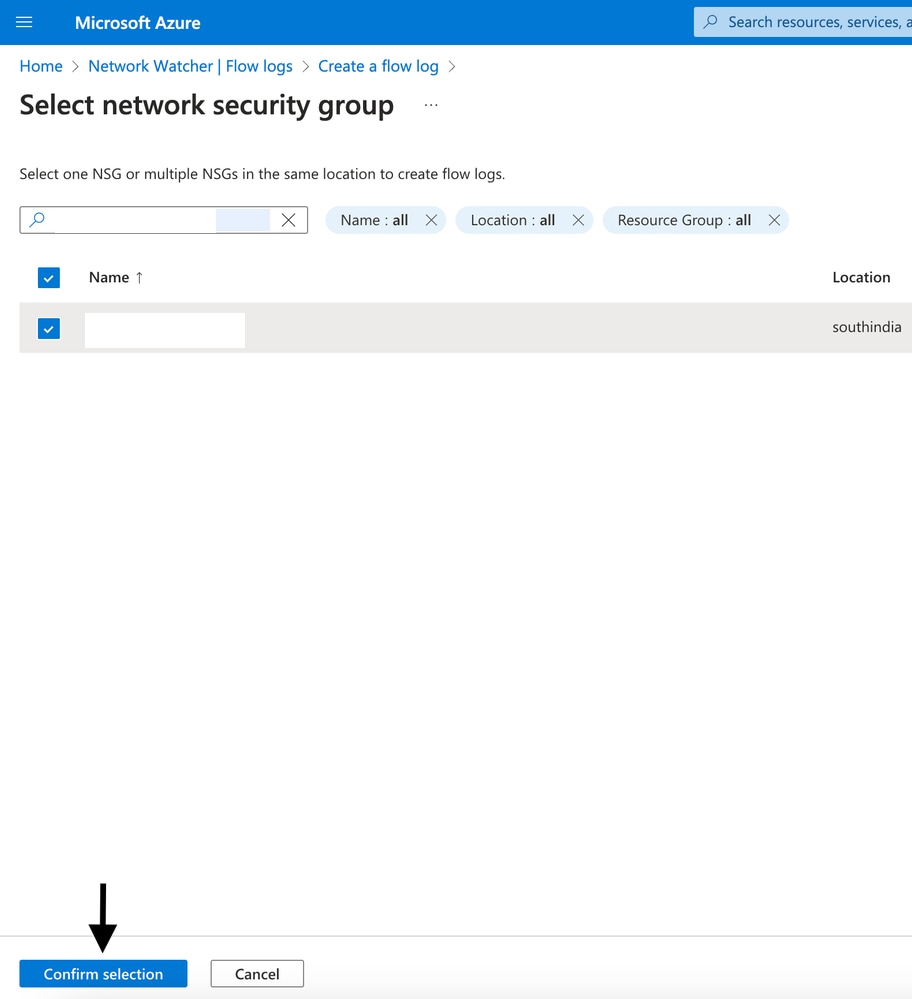 Azure-UI Confirm Selection
Step 6: Select Storage accounts.
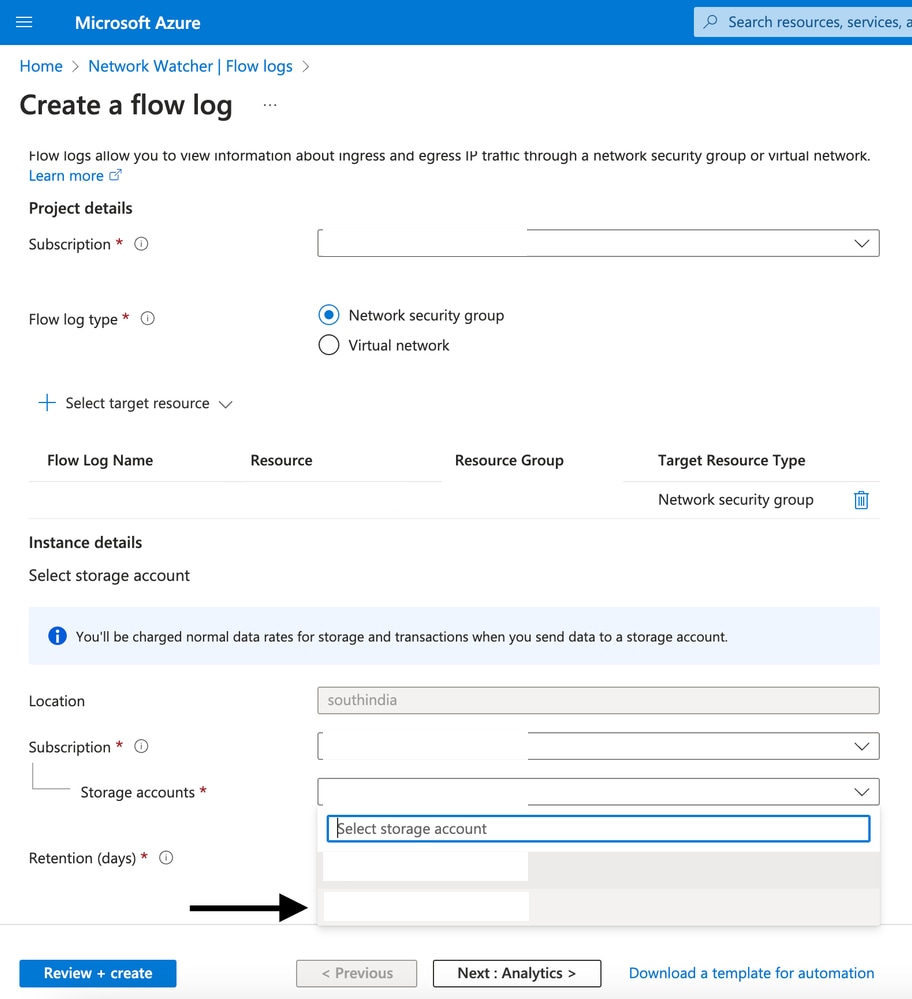 Azure-UI Select Storage Account
Step 7: Choose your Retention (days), click review+ create.
 Azure-UI Select Retention days
Step 8: Click Create.
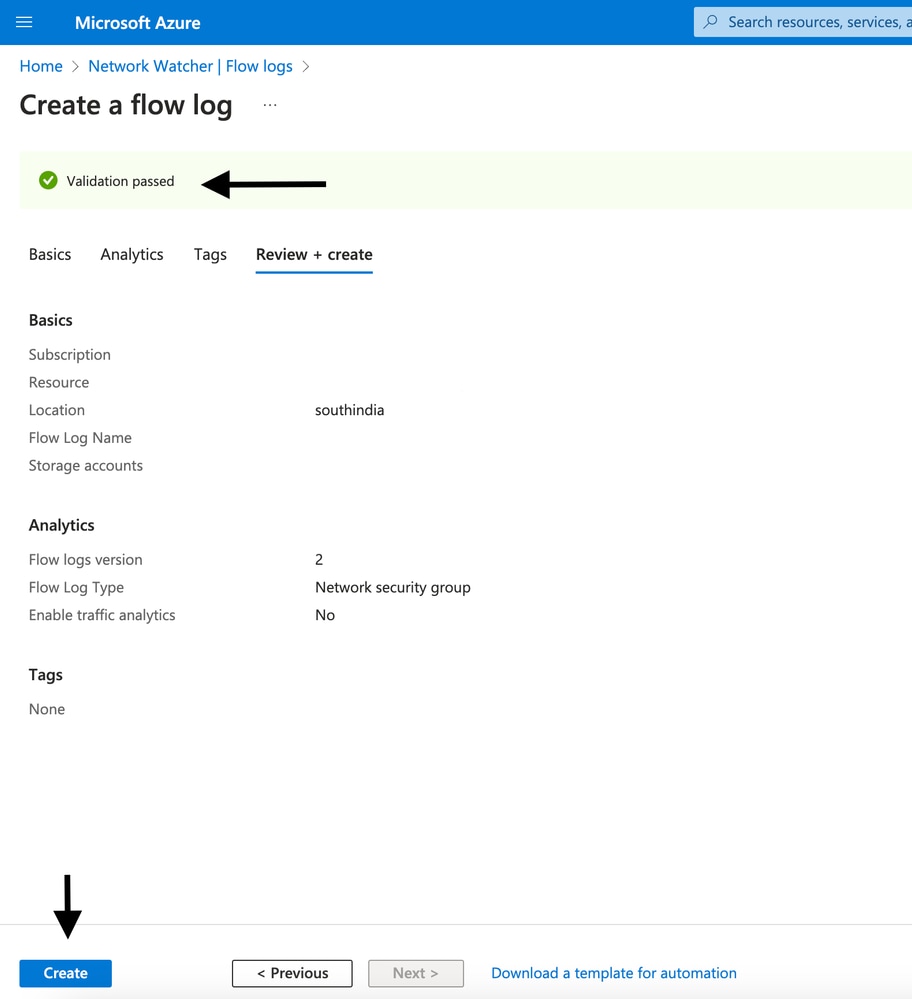 Azure-UI Click Create
Configure NSG Flow Log Input to CTB
Step 1: Navigate to Storage accounts from search bar.
<  Azure-UI Navigate to Storage Account
Step 2: Search your Storage account name.
<  Azure-UI Select Storage Account
Step 3: Select your Storage account to slide open further options, click Shared access signature.
< 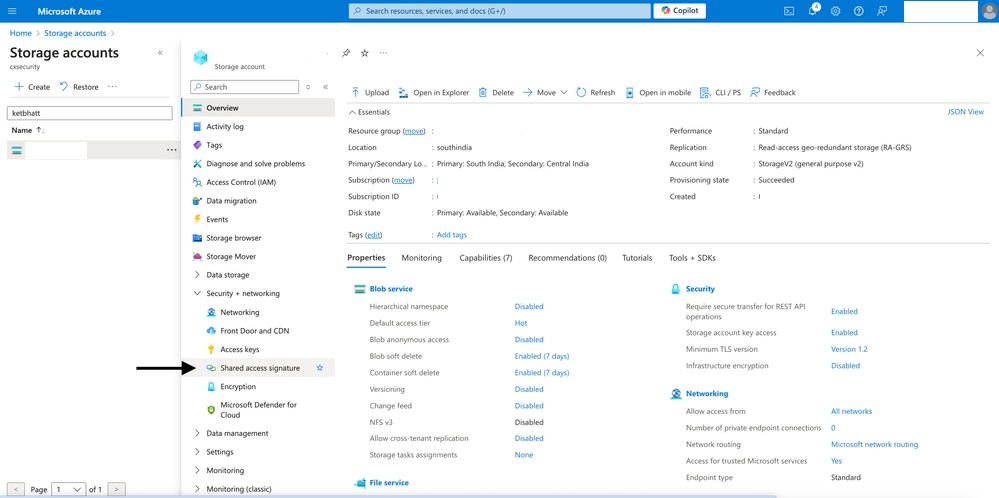 Azure-UI Click Shared Access Signature
Step 4: Select the checked options along with key expiration date and time.
< 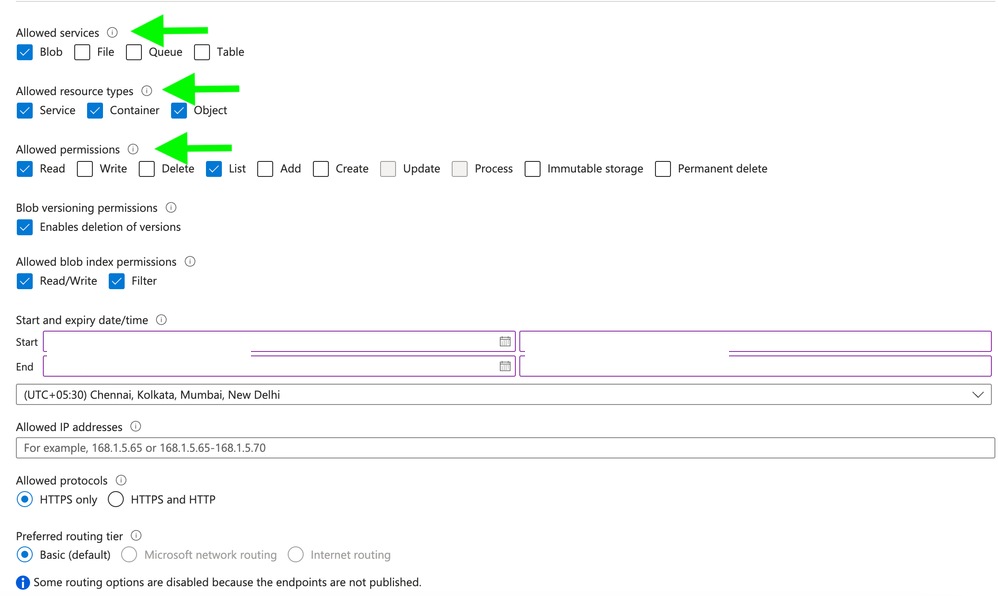 Azure-UI Set Key Expiration time and Allow Services
Step 5 : Click Generate SAS and connection string.
<  Azure-UI Create SAS Connecting String
Step 6: Copy Blob service SAS URL.
< 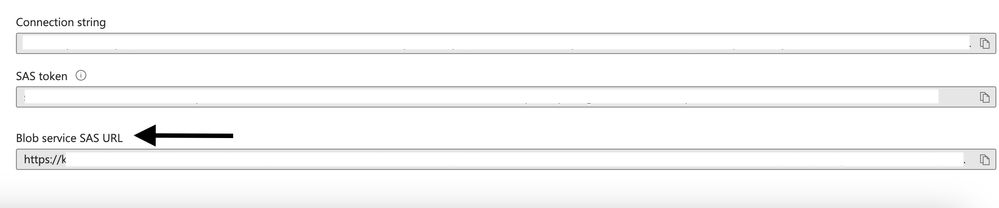 Azure-UI Copy SAS URL
Step 7: Access CTB Web UI, navigate to Explorer > Broker node tab > click open broker node > Data Flow tab > Click Add Input.
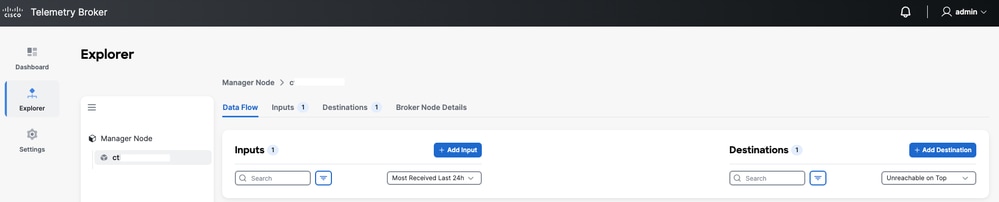 CTB-UI Navigate to CTB UI
Step 8: Select input type Azure NSG Flow log.
< 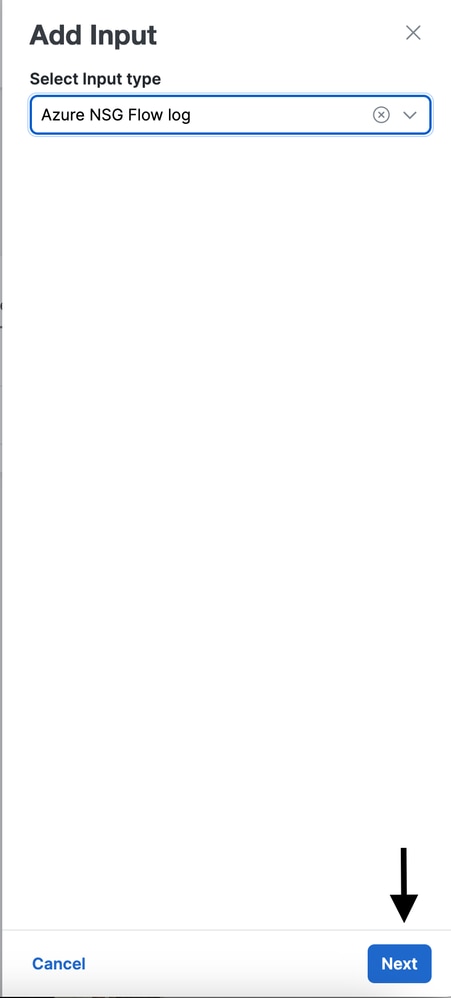 CTB-UI Add Input
Step 9: Input Name, Blob Service SAS URL and Input IP Address.
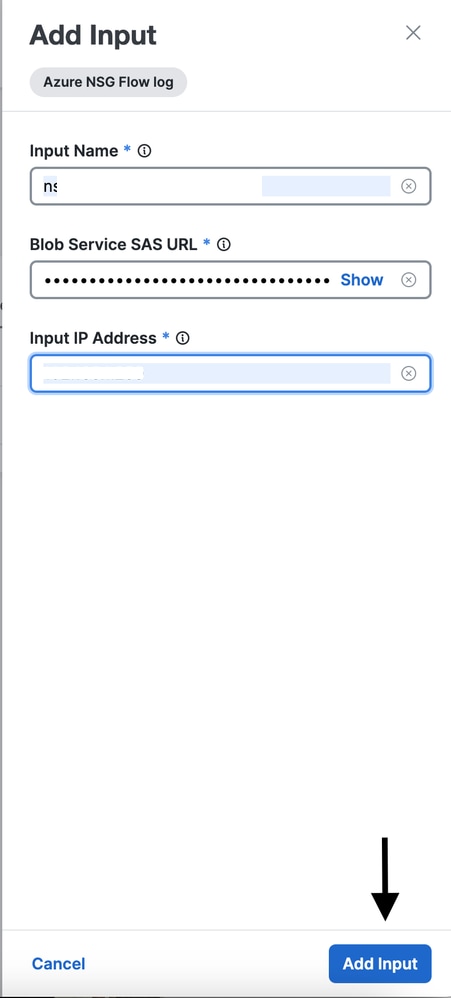 CTB-UI Fill Azure Input Details
Verify
Step 1: Log in to CTB UI navigate to Explorer > Broker node tab > click open broker node > switch tab to Input > Click open the NSG input.
Step 2: Verify that configured NSG-flow logs have active status and received metrics have rising graph.
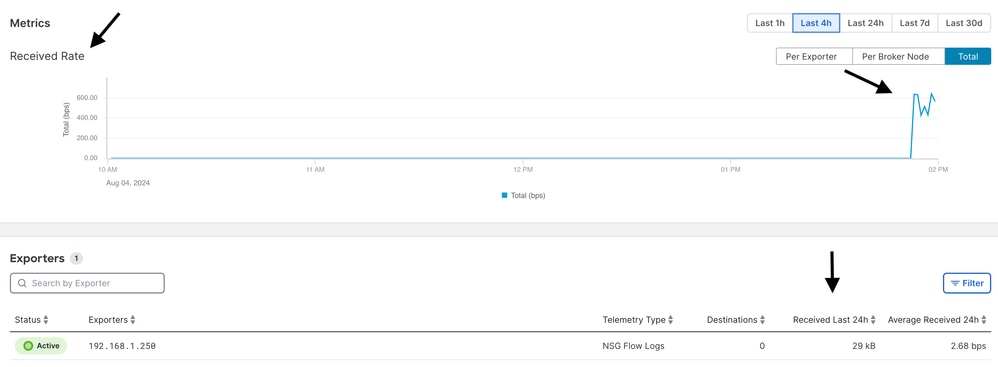 CTB-UI Verify NSG Flow logs
Troubleshoot
Ensure your container has NSG flow logs, otherwise you get "Could not find container" error.
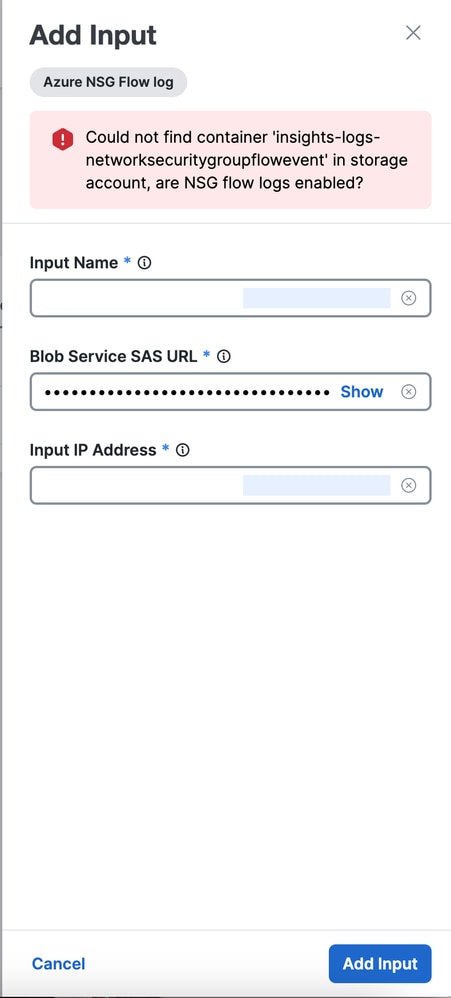 CTB-UI Error while creating NSG Input
Container must have NSG logs with another folder down the logs.
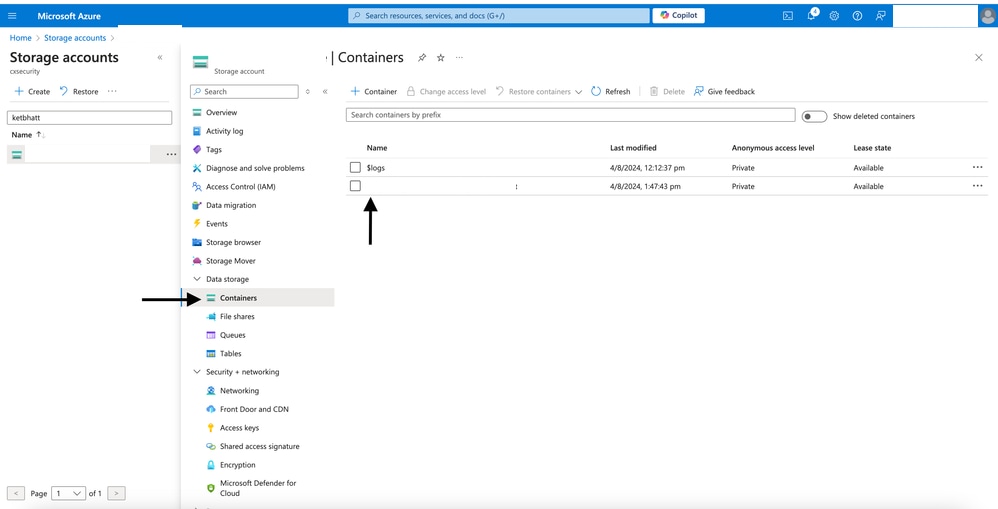 Azure-UI Check NSG Logs Folder
 Feedback