Introduction
This document describes the procedure to migrate Paloalto Firewall to Cisco Firepower Threat Device .
Prerequisites
Requirements
Cisco recommends that you have knowledge of these topics:
- Firepower Migration tool
- Paloalto Firewall
- Secure Firewall Threat Defense (FTD)
- Cisco Secure Firewall Management Center (FMC)
Components Used
The information in this document is based on these software and hardware versions:
- Mac OS with Firepower Migration Tool (FMT) v7.7
- PAN NGFW version 8.0+
- Secure Firewall Management Center (FMCv) v7.6
- Secure Firewall Threat Defense version 7.4.2
Disclaimer: The networks and IP addresses referenced in this document are not associated with any individual users, groups, or organizations. This configuration has been created exclusively for use in a lab environment.
The information in this document was created from the devices in a specific lab environment. All of the devices used in this document started with a cleared (default) configuration. If your network is live, ensure that you understand the potential impact of any command.
Overview
Specific requirements for this document include:
- PAN NGFW version 8.4+ or later
- Secure Firewall Management Center (FMCv) Version 6.2.3 or later
The Firewall Migration Tool supports this list of devices:
- Cisco ASA (8.4+)
- Cisco ASA (9.2.2+) with FPS
- Cisco Secure Firewall Device Manager (7.2+)
- Check Point (r75-r77)
- Check Point (r80-r81)
- Fortinet (5.0+)
- Palo Alto Networks (8.0+)
Background Information
Before you migrate your Paloalto Firewall configuration, execute these activities:
Obtain Paloalto Firewall Configuraton zip file
- Paloalto Firewall must be version 8.4+.
- Export the current running configuration from the Palo Alto firewall (*.xml must be in xml Format).
- Log in to Paloalto Firewall Cli to execute show routing route and save the ouput in txt format (*.txt).
- Compress the running configuration file (*.xml) and Routing file (*.txt) with the an extension of *.zip.
Pre-Migration Checklist
- Ensure the FTD has been registered to the FMC before beginning the migration process.
- New user account with administrative privileges has been created on the FMC. Or existing admin credentials can be used.
- Exported Palo Alto running configuration file.xml must be zipped with an extension of .zip (follow the procedure mentioned in previous section).
- Firepower device must have the same or more number of Physical or Sub-interface or Port-channels compared to Paloalto Firewall interfaces.
Configure
Migration Steps
1. Download the most recent Firepower Migration Tool from Cisco Software Central that is compatible to your computer:
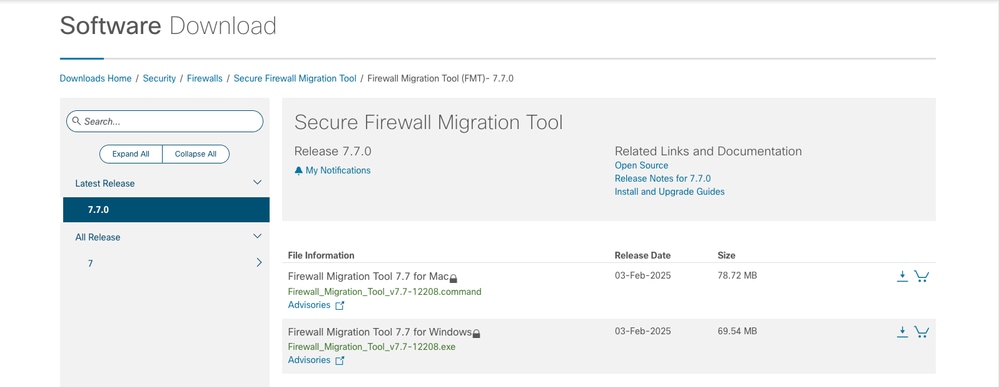 FMT Download
- Open the file you previously downloaded to your computer.

Note: The program opens automatically and a console auto generates content on the directory where you ran the file.
- After you run the program, it opens a web browser that displays the End User License Agreement.
- Select the check box to accept terms and conditions.
- ClickProceed.
- Log in using a valid CCO credentials in order to access FMT GUI.
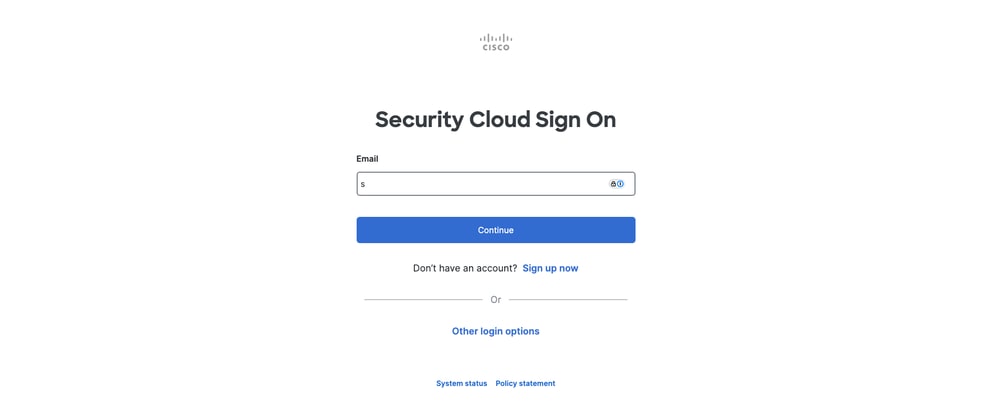 FMT Login Prompt
- Select the Source Firewall to migrate and click Start Migration.
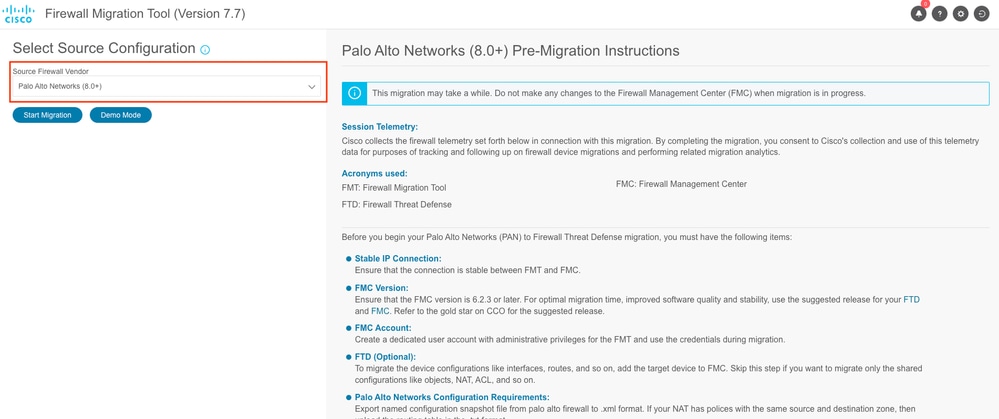 FMT GUI
- Extraction Methods section is now displayed, where you must upload the Zip configuration file from Paloalto Firewall to the FMT.
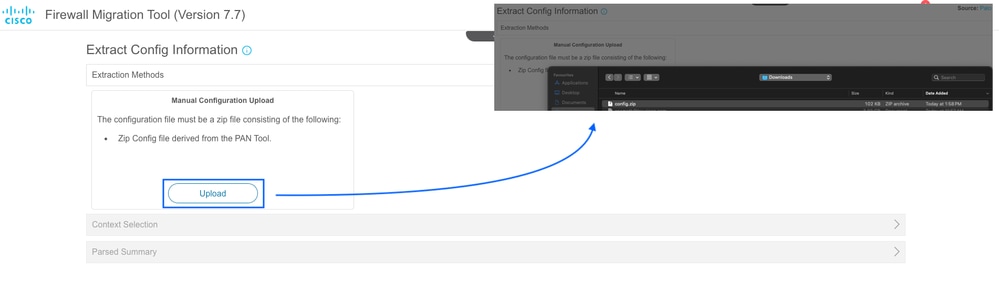 Configuration Upload Wizard
- Parsed Configuration summary is now displayed after the configuration file is uploaded. In case of VSYS, separate VSYS selections are available. Each of them must be parsed and migrated one after another.
Validate the parsed summary and click Next icon.
 Configuration Validation Summary
- You can choose the type of FMC in this section. Provide its management IP address and click on Connect.
A pop up is displayed prompting for providing FMC credentials. Enter the credentials and click Login.
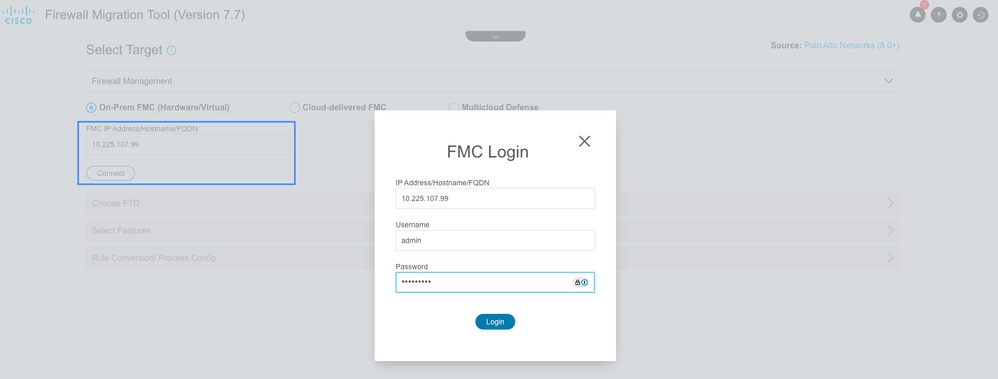 FMC Login
- Up on successfully connecting to FMC, you can now choose the Domain (if any) and click Proceed.
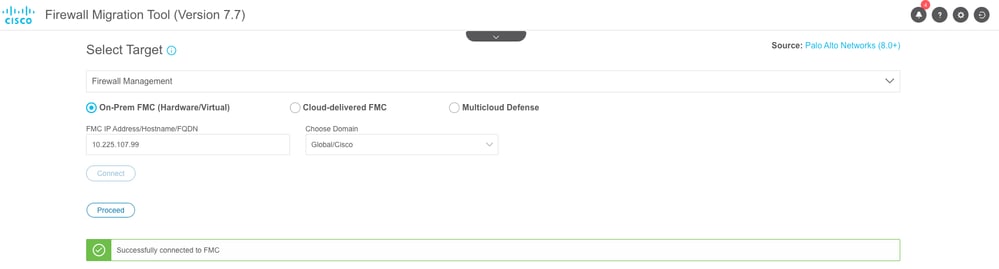 Domain Selection
- Choose the FTD to which you are going to migrate to and click Proceed.
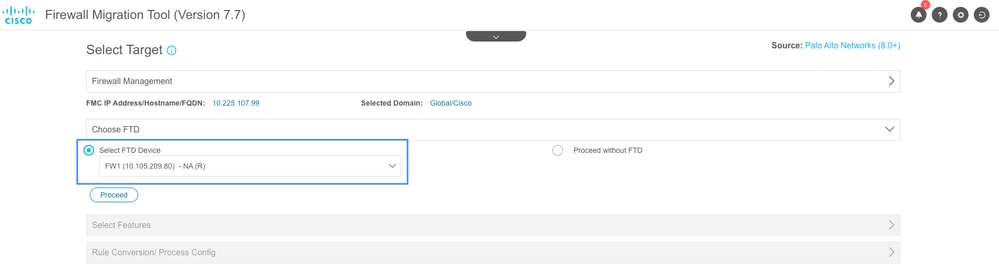 Select Target FTD
- The tool now list out the features that are going to be migrated. Click Proceed.
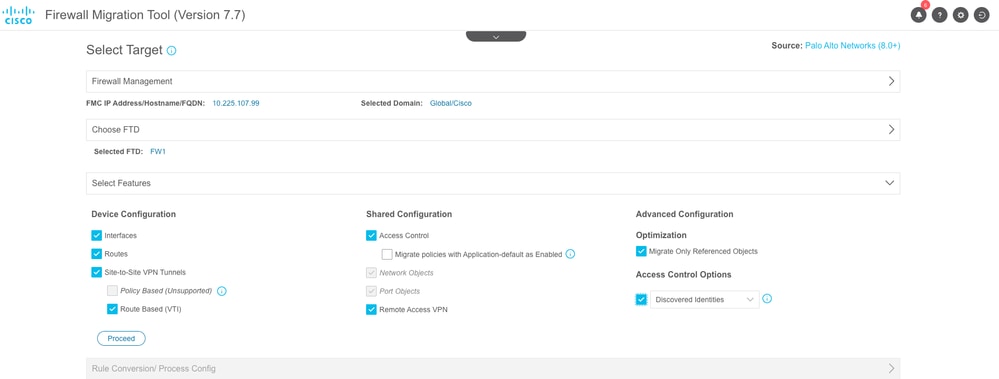 Feature Selection
Note: All the features are selected by default. You can deselect any configuration which is not to be migrated.
- Click on Start Conversion for converting the configuration.
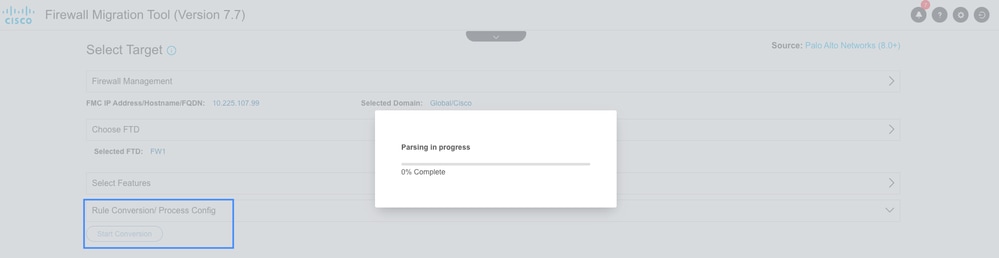 Parsing Configuration
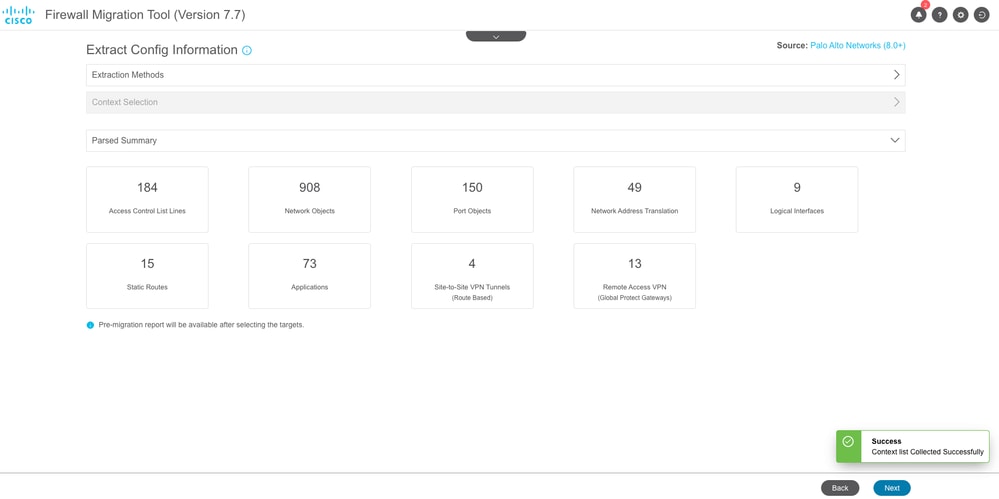
The Tool Parses the configuration and display the conversion summary as shown in the image. You can also download the Pre-Migration Report for validating the migrated configuration for any Errors or Warnings, if any. Navigate to next page by clicking Next.
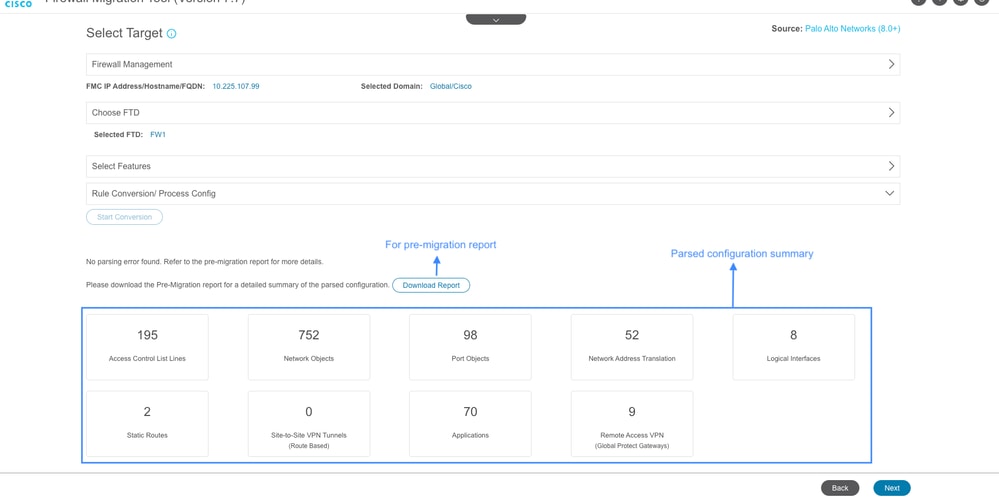 Parsed Configuration Summary
- You can define Paloalto to FTD interface mapping as well as edit interface name for each interface in the Interface Mapping Section. Click Next after the Interface Mapping is completed.
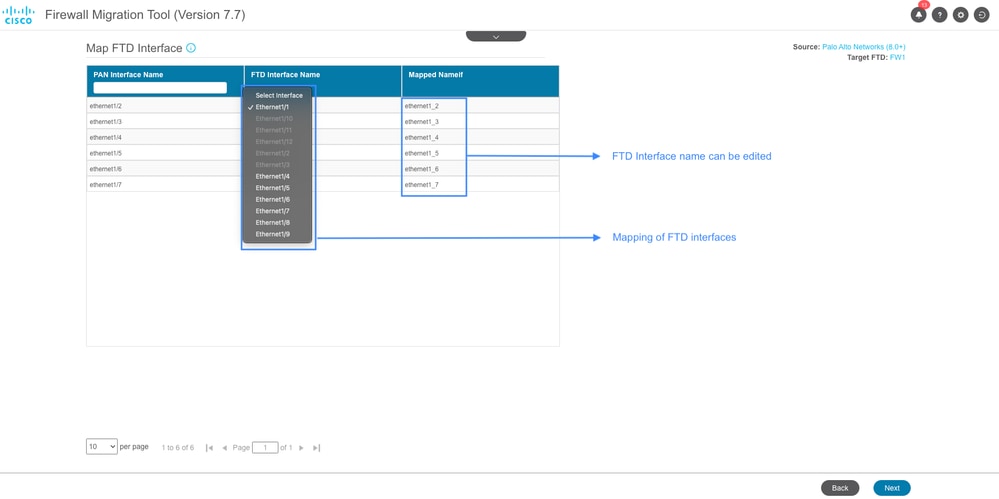 Interface Mapping
- You can either Add the Security Zone manually for each interfaces or Auto Create it in Map the Security Zone section . Click Next after creating and mapping Security Zones.
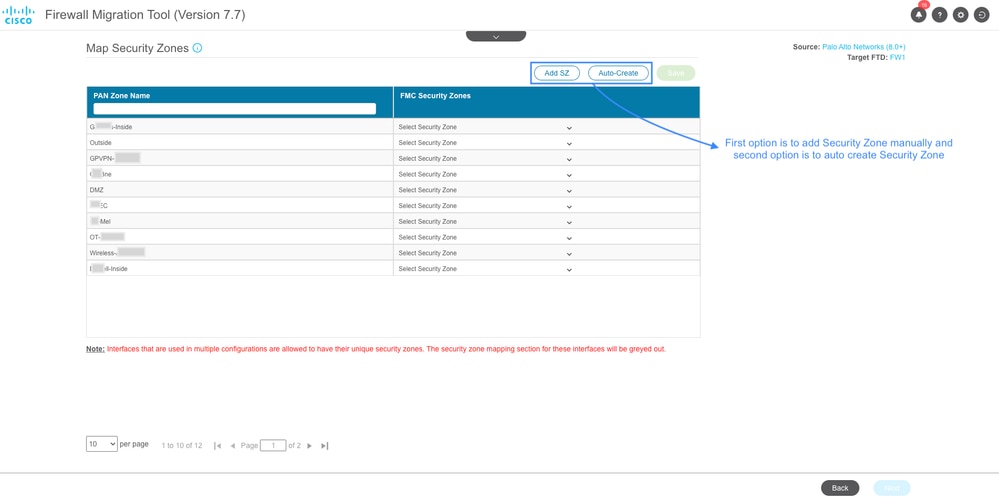 Security Zone Creation
Manual Creation of Security Zones:
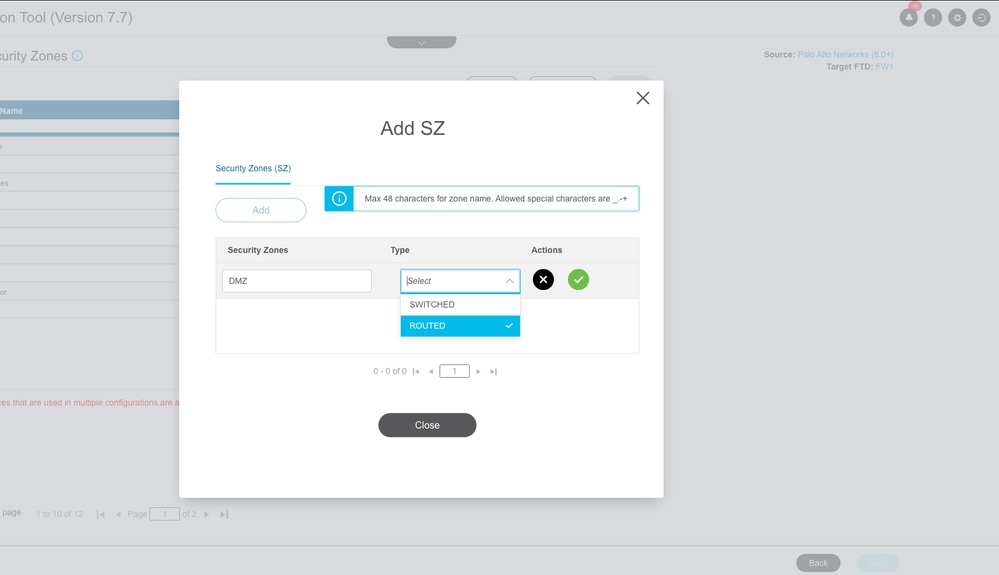 Manual Security Zone Creation
Auto Create Security Zones:
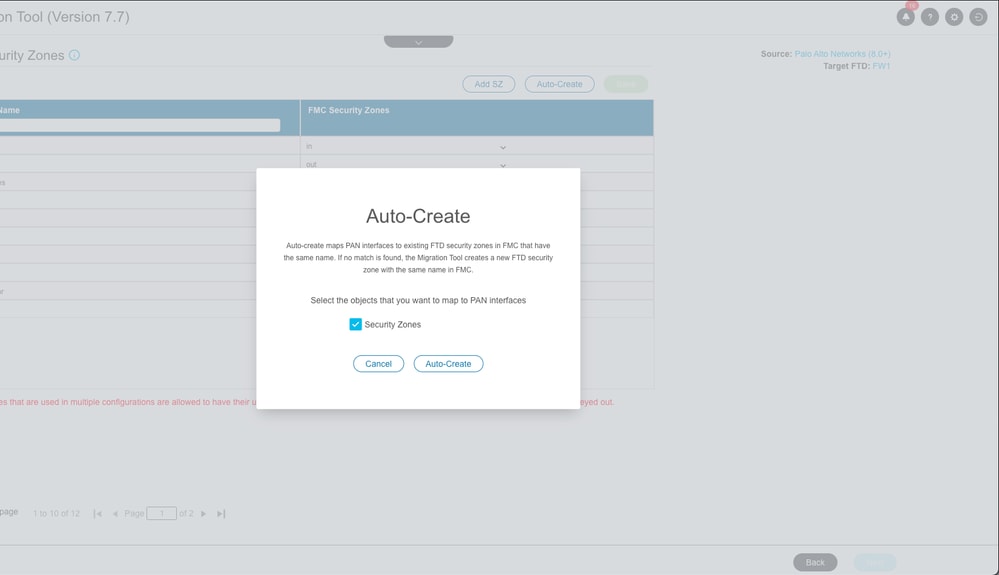 Auto Security Zone Creation
-
You can now move on to Application Mapping section. Click on Validate button to validate the application mapping.
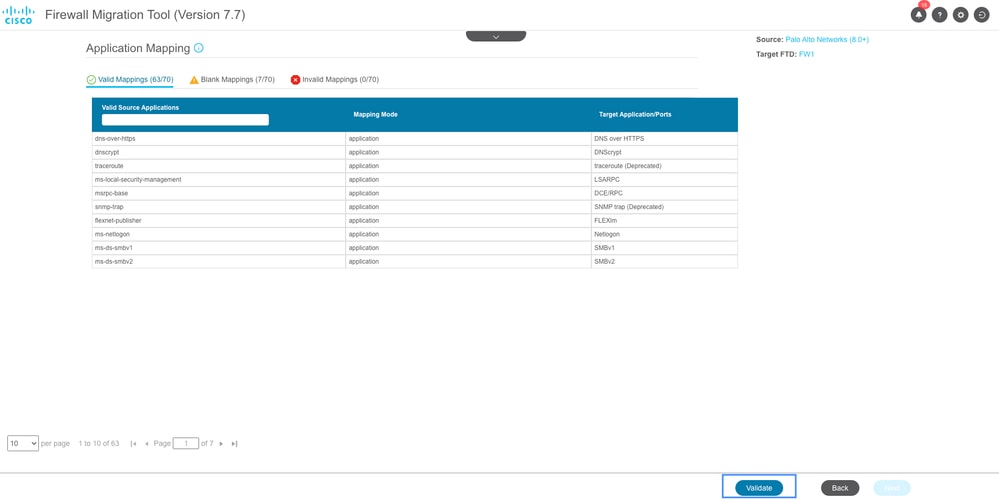 Application Mapping
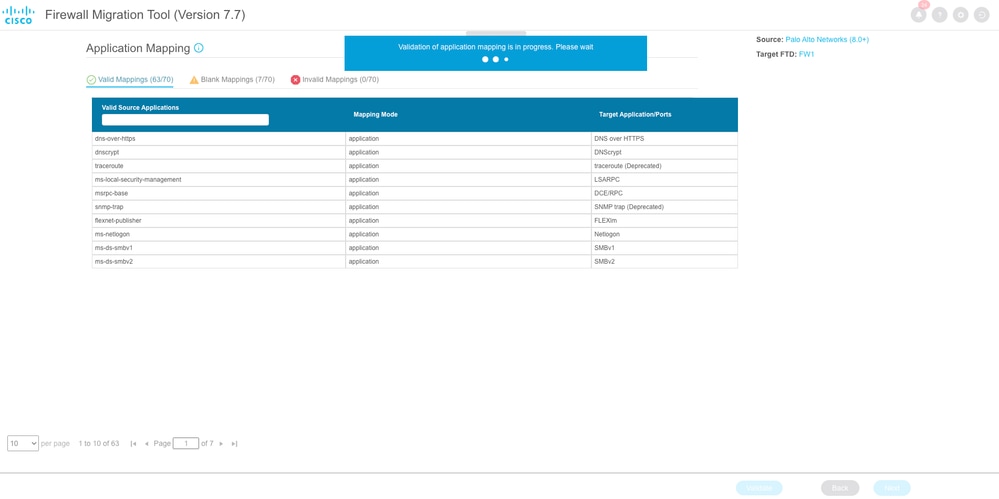 Application Mapping Validation
Upon validation, FMT lists the Blank and invalid Mappings. Invalid Mappings must be corrected before proceeding further and correcting Blank mappings are optional.
Click Validate once again to validate the corrected mappings. Click Next after the validation is succeeded.
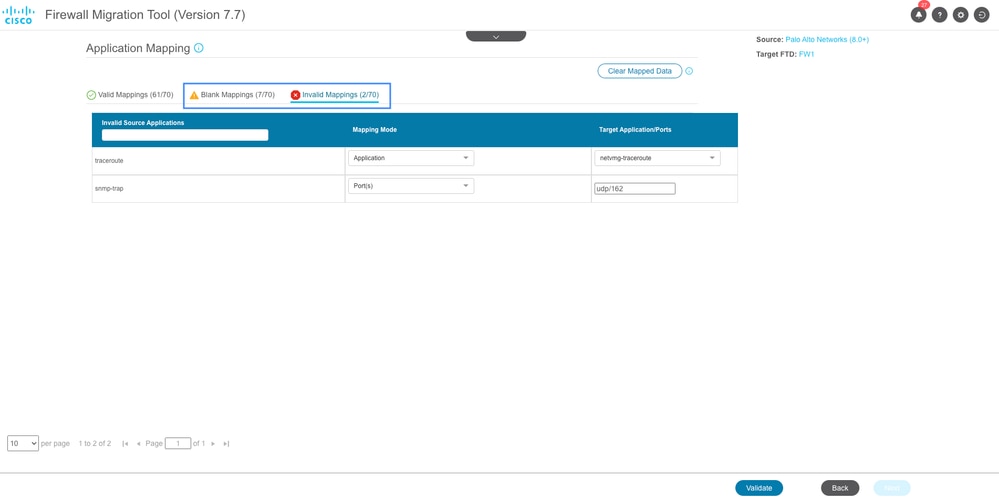 Blank & Invalid Application Mapping
- ACL can be optimized in the next section, if required. Review the configuration in each section such as Access control, Objects, NAT, Interfaces, Routes, and Remote Access VPN. Click on Validate after reveiwing the configurations.
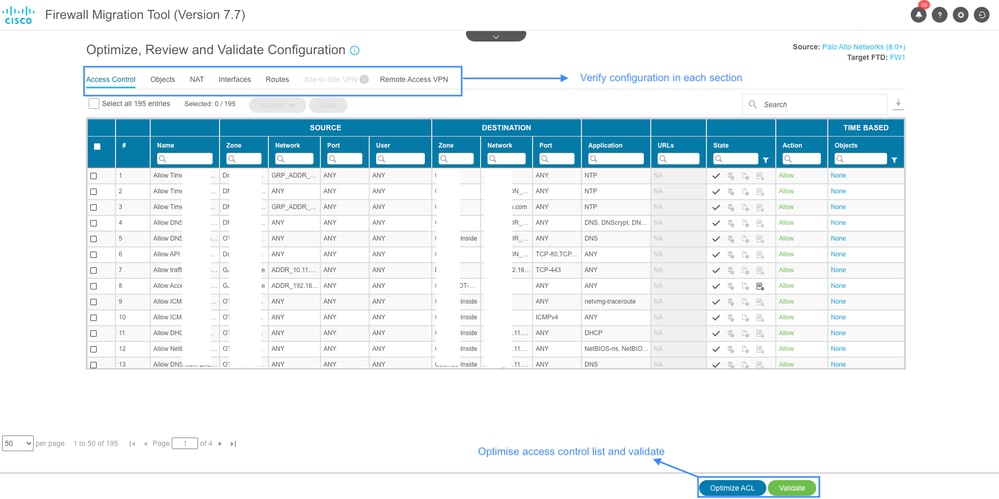 Configuration Validation
- A validation summary is displayed after the validation is successfully completed. Click Push Configuration to push the configuration to the targeted FMC.
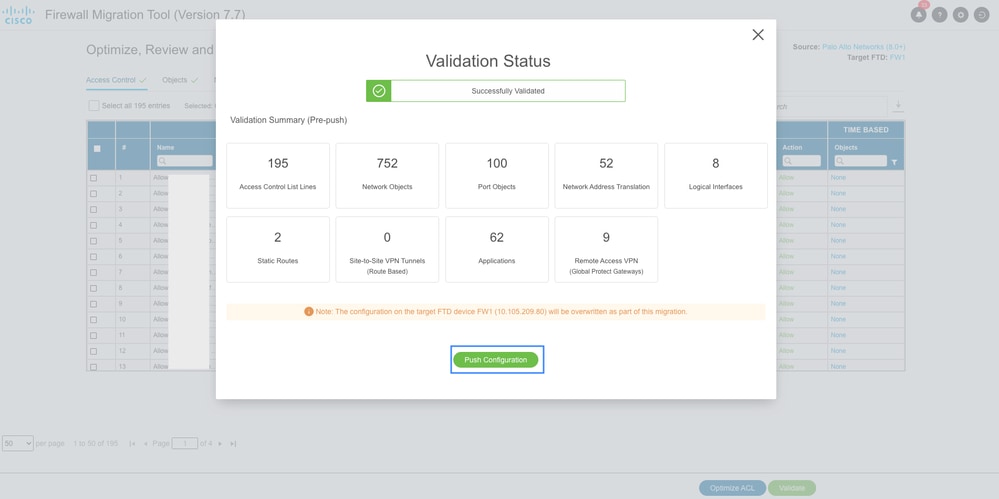 Configuration Validation Summary
- Progress of configuration push to FMC is now visible in the Migration Status Section. You can use the FMT terminal window for monitoring the migration status as well.
 Migration Status
- A Migration Summary is displayed by the tool up on successful migration. It also lists out partially migrated configurations, if any. For example, Remote access VPN configuration in this scenario due to missing Secure Client Package.
You can also download the Post Migration Report to review the migrated configurations as well as if there are any errors or corrections that are to be made.
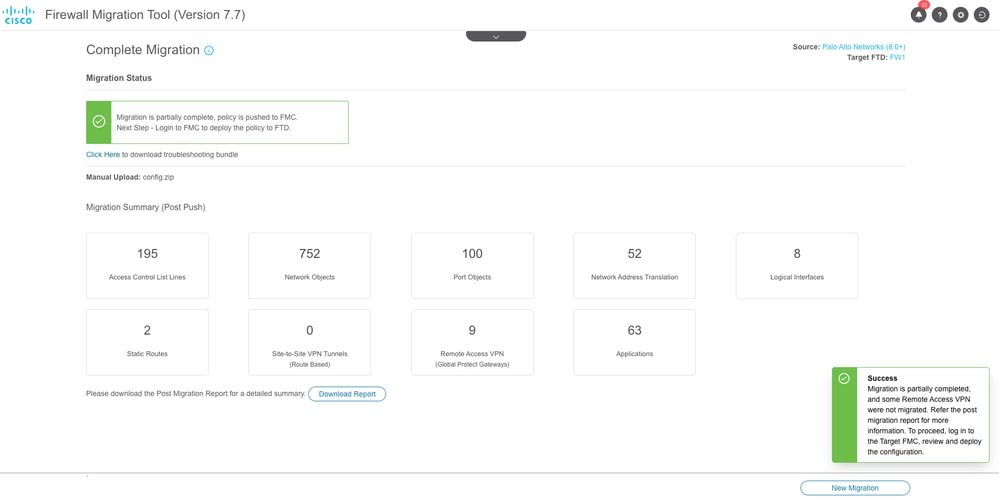 Successfull Migration Summary
- The last step is to review the migrated configuration from FMC and Deploy the configuration to FTD.
In order to deploy the configuration:
- Log in to the FMC GUI.
- Navigate to the Deploy tab.
- Select the deployment to push configuration to the firewall.
- Click Deploy.
Troubleshoot
Troubleshooting Secure Firewall Migration Tool
Common migration failures:
- Unknown or invalid characters in the PaloAlto configuration file.
- Missing or incomplete configuration elements.
- Network connectivity issues or latency.
- Issues during PaloAlto configuration file upload or while pushing configuration to the FMC.
Using the Support Bundle for troubleshooting:
- On the "Complete Migration" screen, click the Support button.
- Select Support Bundle and choose the configuration files to download.
- Log and DB files are selected by default.
- Click Download to get a .zip file.
- Extract the .zip to view logs, DB, and configuration files.
- Click Email us to send failure details to the technical team.
- Attach the support bundle in your email.
- Click Visit TAC page to create a Cisco TAC case for assistance.
 Feedback