Introduction
This document describes the configuration steps required to integrate Cisco Secure Email (CES) with Microsoft 365 quarantine.
Background Information
In modern email infrastructures, multiple security layers are typically deployed, which can result in messages being quarantined by different systems. In order to enhance the user experience and maintain consistent notification workflows, it is recommended to centralize quarantine management within a single platform.
This guide outlines the process for redirecting unwanted messages, such as spam and graymail, detected by Cisco CES to the Microsoft 365 user quarantine.
Prerequisites
Requirements
Cisco recommends that you have knowledge of these topics:
- An active tenant in CES Gateway
- An active tenant in Microsoft Exchange online
- Access to Microsoft 365 (O365) services
- A Microsoft 365 Defender license (required to configure quarantine policies and notifications)
Components Used
This document is not restricted to specific software and hardware versions.
The information in this document was created from the devices in a specific lab environment. All of the devices used in this document started with a cleared (default) configuration. If your network is live, ensure that you understand the potential impact of any command.
Configure Microsoft 365 (O365)
Start by setting up Microsoft 365 in order to receive and manage quarantined messages.
Enable Quarantine Notifications in Microsoft Exchange Online
There are multiple configuration options to control how messages are directed to Microsoft 365 quarantine.
If the objective is to prevent end users from accessing quarantined messages or receiving quarantine notifications, this can be achieved by implementing a mail flow (transport) rule that redirects the messages directly to quarantine.
Conversely, if the requirement is for end users to receive quarantine notifications and have the ability to release messages, the rule configuration must be adjusted accordingly. In this scenario, the Spam Confidence Level (SCL) value must be set to 9, which designates the message as high-confidence spam and enables user notifications and release functionality.
These configurations are detailed in the official documentation of Microsoft; Microsoft Quarantine Notification configuration.
The example illustrates the configuration that allows end users to receive quarantine notifications and release messages.
Create a Mail Flow Rule
Once notifications are active, configure a rule that redirects messages marked by CES Gateway to the quarantine hosted by Microsoft.
- Open the Microsoft Exchange Admin Center.
- From the left-hand menu, navigate to Mail Flow > Rules.
- Click Add a rule, and then choose Create a new rule.
- Set the rule name to CSE Quarantine Rule.
- Under Apply this rule if, choose The message header, then choose matches text patterns.
- In the header name, enter X-CSE-Quarantine, and set the value to match true.
- Under Do the following, choose Modify the message properties, Set the spam confidence Level,and then 9.
- Save the configuration.
- After saving, ensure the rule is enabled.
In the picture you can see how the rule looks like.
 Microsoft Rule
Configure Cisco Secure Email
In Cisco CES, a custom header (X-CSE-Quarantine: true) can be added to any message that must be redirected to the quarantine of Microsoft. These messages can be flagged by any content filter or engine in CES. In this example, it is configured for Suspect Spam messages.
- Open the Cisco Secure Email Management Console.
- Navigate to Mail Policies > Incoming Mail Policies.
- Edit the policies you wish to modify (for example, choose the Default Policy).
- Click on the Spam settings for the chosen policy.
- Under Suspect Spam, change the action from Quarantine to Deliver.
- Click Advanced and add a custom header:
- Header name: X-CSE-Quarantine
- Value: true (same value used in the Microsoft rule)
- Click Submit and then Commit Changes in order to apply the configuration.
In the picture you can see how the configuration looks.
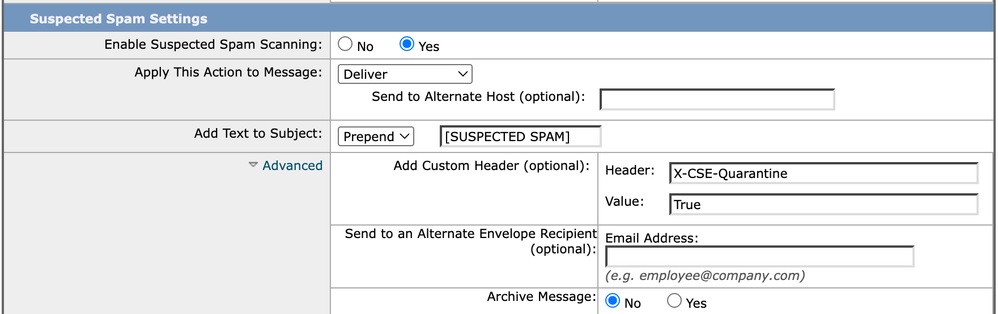 CES configuration
Verify
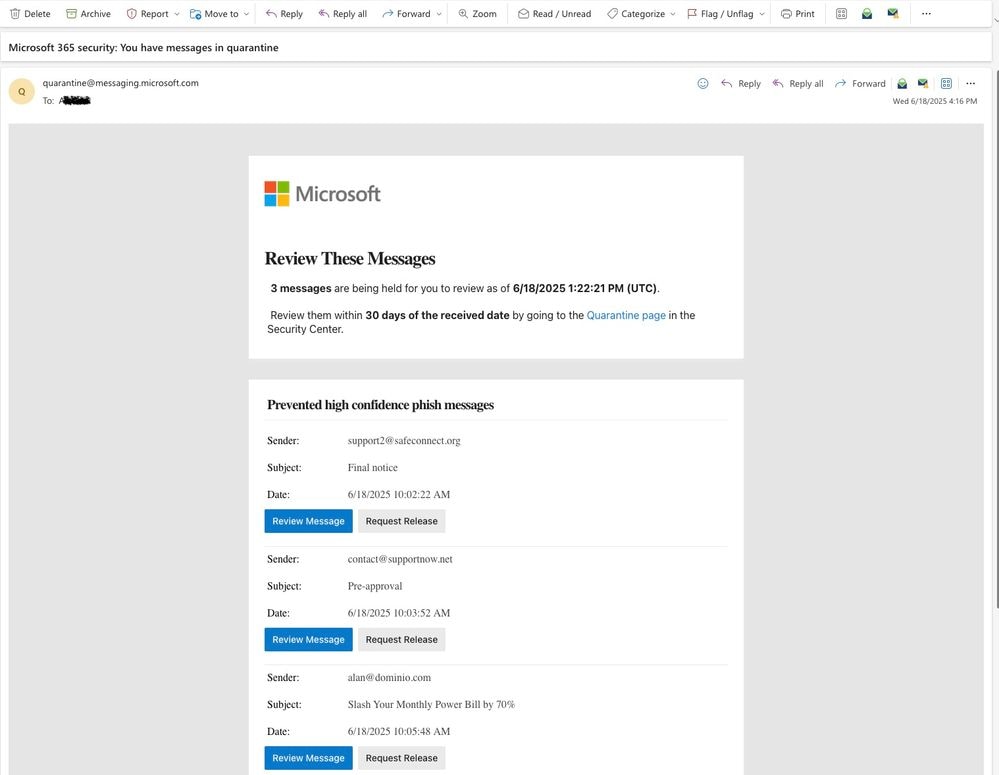
From this point on, emails identified by Cisco CES as potential spam are going to be tagged with the custom header. Microsoft 365 detects this tag and redirects the message to the Microsoft quarantine.
Users are going receive quarantine notifications according to the Microsoft 365 configuration.
Troubleshoot
In order to validate the effectiveness of the configuration and confirm that Microsoft routes the message to the intended quarantine, an Incoming Content Filter can be created to insert the same header when the message subject matches a specific keyword or pattern.
By implementing this filter, the Secure Email Gateway (SEG) appends the designated header, allowing Microsoft 365 to process the message according to its standard anti-spam logic — effectively replicating the behavior that can occur if the header is injected by the native spam filtering engine.
Here is an example of a content filter:
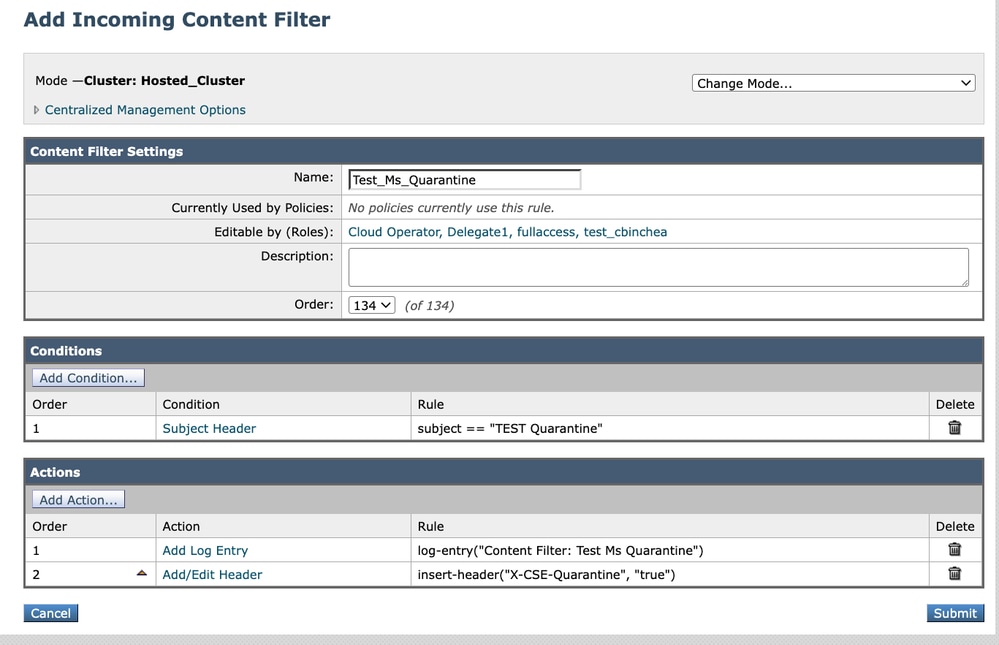 Content Filter test
 Feedback