Introduction
This document describes how to configure Cisco Secure Access with Meraki MX for High Availability using health checks.
Prerequisites
Requirements
- Meraki MX must be running firmware version 19.1.6 or later
- When using Private Access, only one tunnel is supported due to a Meraki limitation that prevents changing the health check IP, making NAT required for additionals SPA (Secure Private Access) tunnels. This does not apply when using SIA (Secure Internet Access).
- Clearly define which internal subnets or resources are routed through the tunnel to Secure Access.
Components Used
- Cisco Secure Access
- Meraki MX Security Appliance (firmware version 19.1.6 or later)
- Meraki Dashboard
- Secure Access Dashboard
The information in this document was created from the devices in a specific lab environment. All of the devices used in this document started with a cleared (default) configuration. If your network is live, ensure that you understand the potential impact of any command.
Background Information

Cisco Secure Access is a cloud-native security platform that enables secure access to both private applications (via Private Access) and internet destinations (via Internet Access). When integrated with Meraki MX, it allows organizations to establish secure IPsec tunnels between branch sites and the cloud, ensuring encrypted traffic flow and centralized security enforcement.
This integration uses static routing IPsec tunnels. Meraki MX establishes primary and secondary IPsec tunnels to Cisco Secure Access, and leverages its built in uplink health checks to perform automatic failover between tunnels. This provides a resilient and high-availability configuration for branch connectivity.
Key elements of this deployment include:
- Meraki MX acting as a non-Meraki VPN peer to Cisco Secure Access.
- Primary and secondary tunnels configured statically, with health checks determining availability.
- Private Access supports secure access to internal applications through SPA (Secure Private Access), while Internet Access allows traffic to reach internet-based resources with policy enforcement in the cloud.
- Due to Meraki limitations in health check IP flexibility, only one tunnel group is supported in Private Access mode. If multiple Meraki MX devices need to connect to Secure Access for Private Access, you must either use BGP for dynamic routing, or configure static tunnels, understanding that only one Network Tunnel Group can support health checks and high availability. Additional tunnels operate without health monitoring or redundancy.
Configure
Configure the VPN on Secure Access
Navigate to the admin panel of Secure Access.
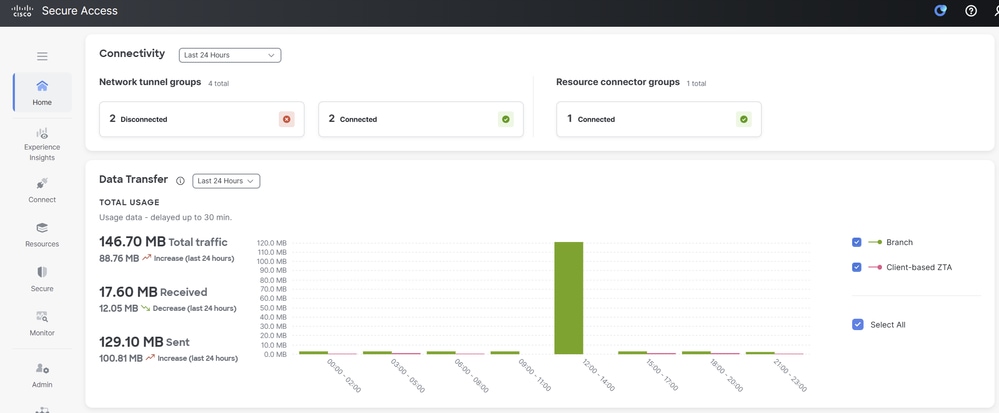
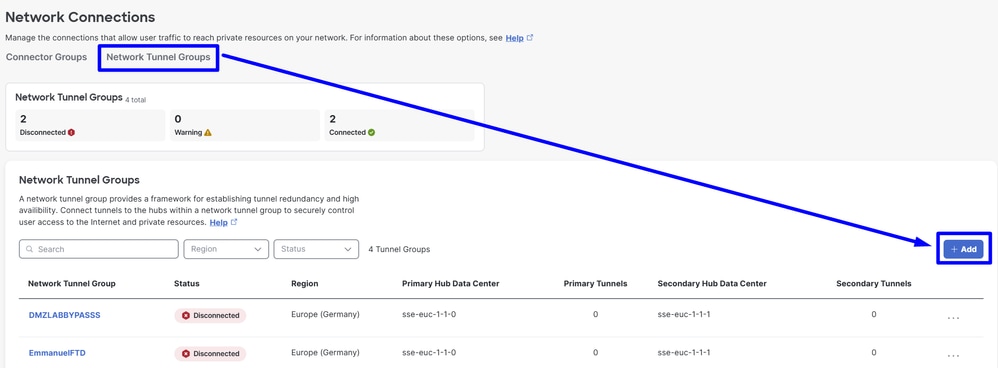
- Click on
Connect > Network Connections

- Under
Network Tunnel Groups click on + Add
- Configure
Tunnel Group Name, Region andDevice Type
- Click
Next

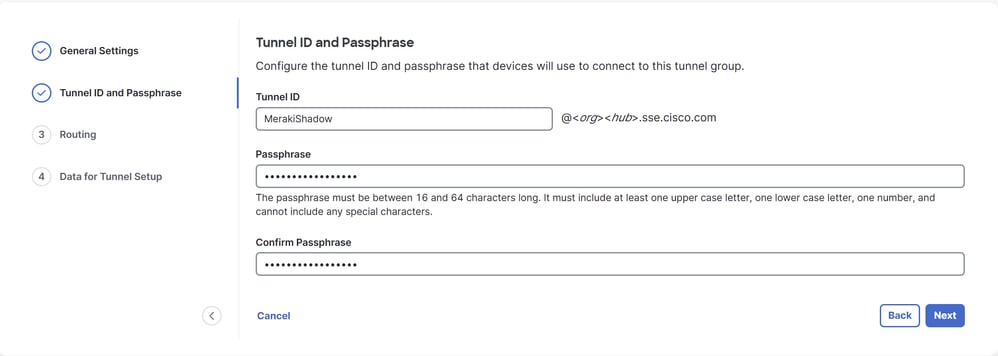
- Configure the
Tunnel ID Format and Passphrase
- Click
Next
- Configure the IP address ranges or hosts that you have configured on your network and want to pass the traffic through Secure Access and and make sure to include the Meraki monitoring probe IP
192.0.2.3/32 to allow return traffic from Secure Access back to the Meraki MX.
- Click
Save
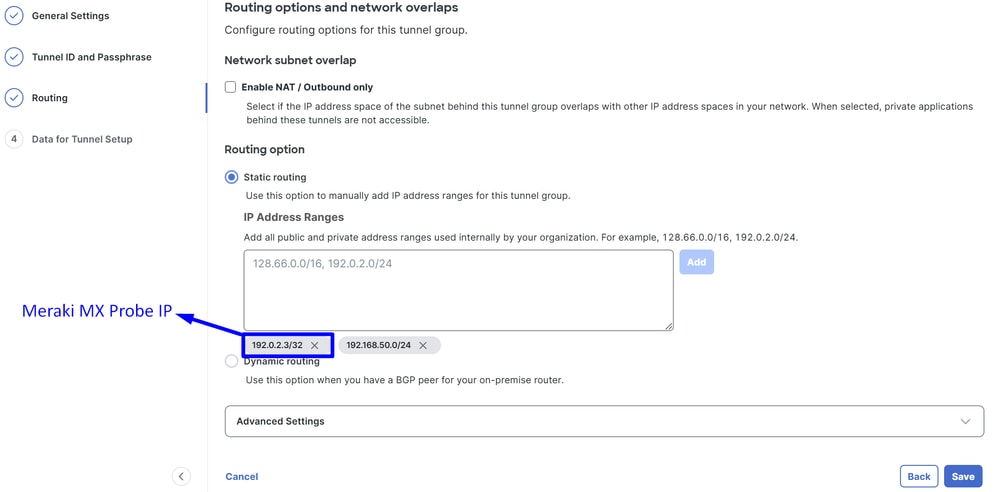

Caution: Be sure to add the monitoring probe IP (192.0.2.3/32); otherwise, you can experience traffic issues on the Meraki device that route the traffic to Internet, VPN Pools and CGNAT Range 100.64.0.0/10 used by ZTNA.
- After you click on
Save the information about the tunnel gets displayed, please save that information for the next step, Configure the tunnel on Meraki MX.
Secure Access VPN Configuration
Copy the configuration of the tunnels in a notepad, Use this information to complete the configuration in Meraki Non-Meraki VPN Peers.

Configure the VPN on Meraki MX
Navigate to your Meraki MX and click on Security & SD-WAN > Site-to-site VPN
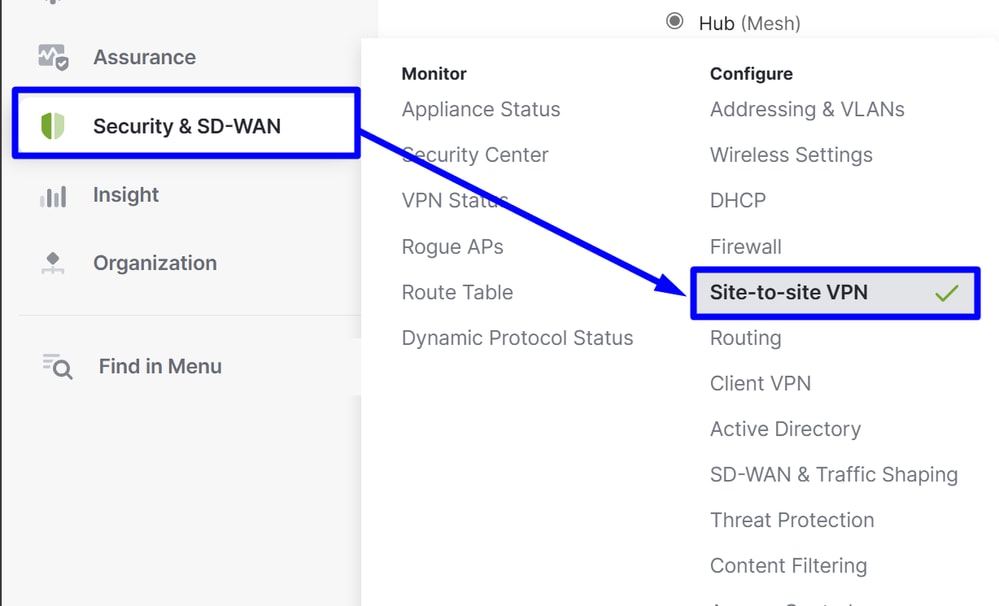
Site-to-site VPN
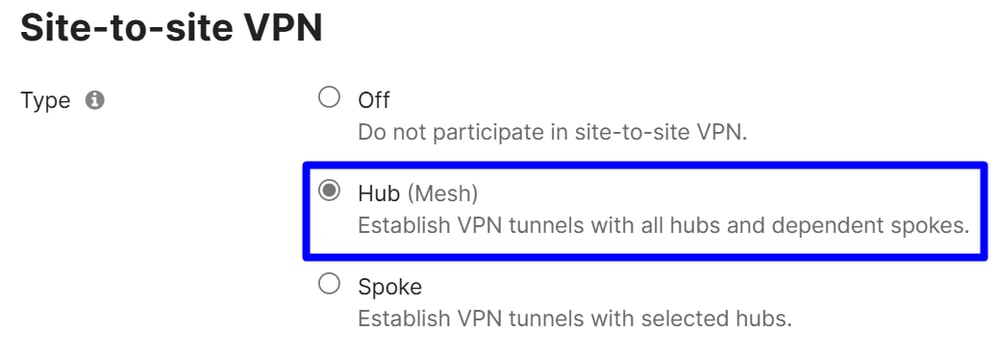
Choose Hub.
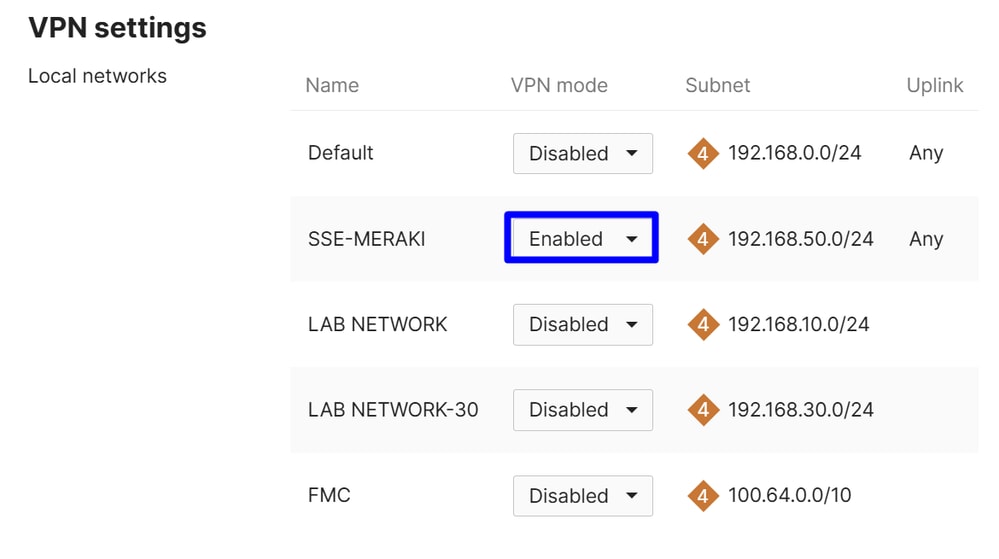
VPN Settings
Choose the networks that you selected to send traffic to Secure Access:
Choose in NAT Traversal Automatic

Non-Meraki VPN Peers
You need to configure the health checks that Meraki uses to route traffic to Secure Access:
Click on Configure Health Checks
- Click on
+Add health Check


Note: This domain responds only when accessed via a site-to-site tunnel with Secure Access or Umbrella: access attempts from outside these tunnels fail.
Then click Done two times to finalize.
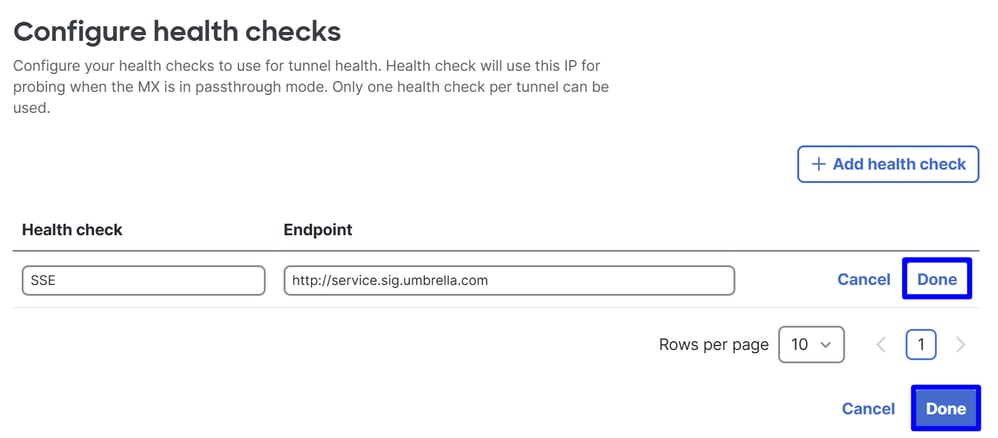
Now your health checks are configured and you are ready to configure the Peer:
Configure Primary Tunnel
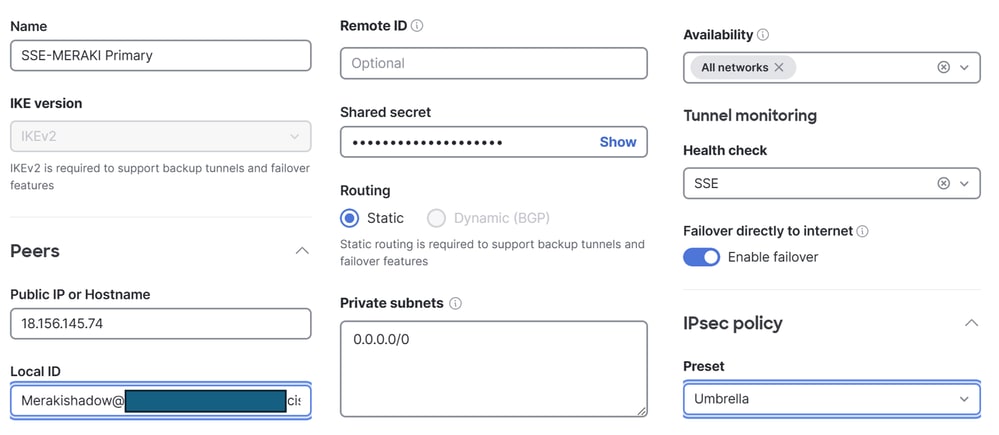
- Add VPN Peer
- Name: Configure a name for the VPN to Secure Access
- IKE version: Choose IKEv2
- Peers
- Public IP or Hostname: Configure the
Primary Datacenter IP given by Secure Access in the step Secure Access VPN Configurations
- Local ID: Configure the
Primary Tunnel ID given by Secure Access in the step Secure Access VPN Configurations
- Remote ID: N/A
- Shared secret: Configure the
Passphrase given by Secure Access in the step Secure Access VPN Configurations
- Routing: Choose Static
- Private subnets: If you plan to configure both Internet Access and Private Access, use
0.0.0.0/0 as the destination. If you are configuring only Private Access for that VPN tunnel, specify the Remote Access VPN IP Pool and the CGNAT range 100.64.0.0/10 as destination networks
- Availability: If you have only one Meraki device, you can select
All Networks. If you have multiple devices, make sure to select only the specific Meraki network where you are configuring the tunnel.
- Tunnel Monitoring
- Health check: Use the previously configured health check to monitor tunnel availability
- Failover directly to internet:If you enable this option, and both Tunnel 1 and Tunnel 2 fail their health checks, traffic is redirected to the WAN interface to prevent loss of internet access.

Health Check Functionality:If Tunnel 1 is being monitored and its health check fails, traffic automatically fails over to Tunnel 2. If Tunnel 2 also fails, and the Failover directly to Internet option is enabled, traffic is routed through the WAN interface of the Meraki device.
Then click Save.
Configure Secondary Tunnel
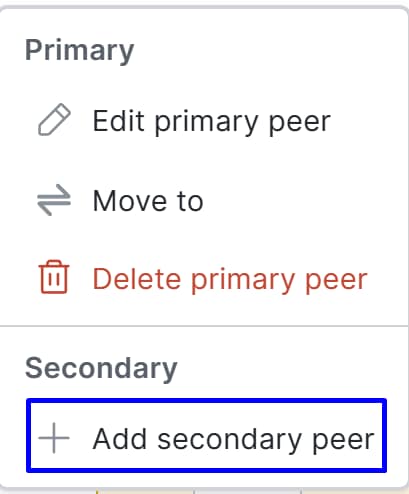
To configure the secondary tunnel, click on the options menu of the primary tunnel:

- Click on
+ Add Secondary peer
- Click on
Inherit primary peer configurations
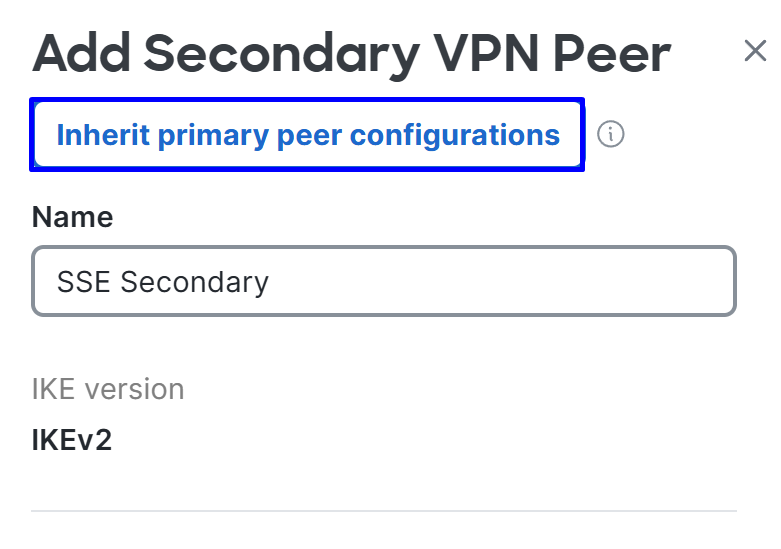
Then you notice some fields are filled in automatically. Review them, make any necessary changes, and complete the rest manually:
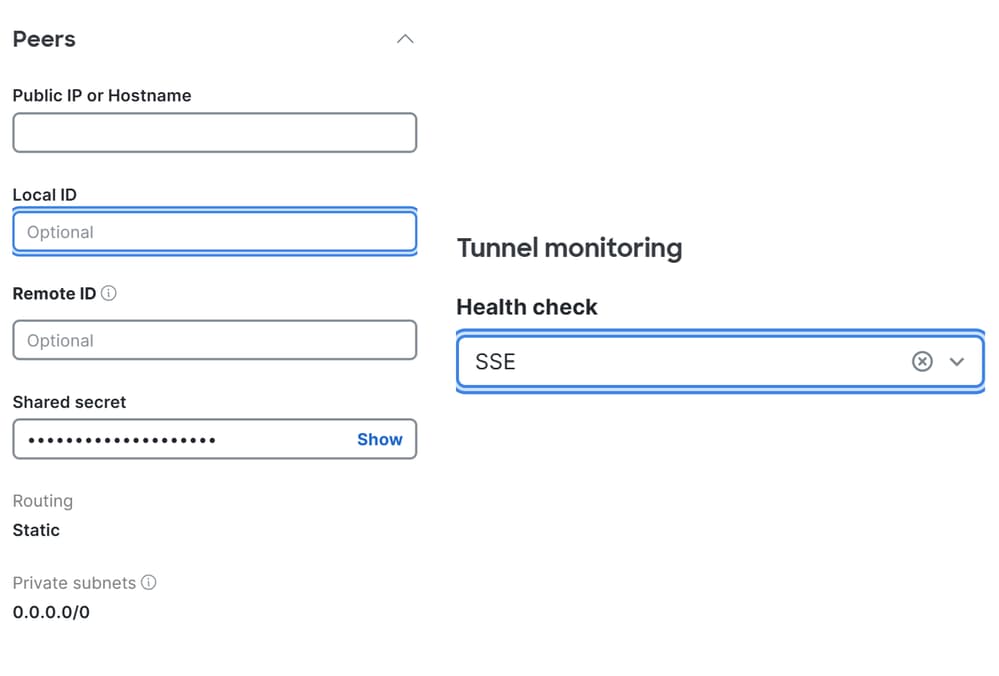
- Peers
- Tunnel Monitoring
- Health check: Use the previously configured health check to monitor tunnel availability
Then after that you can click Save, and the next alert appears:

Do not worry an click Confirm Changes.
Configure Traffic Steering (Tunnel Traffic Bypass)
This feature allows you to bypass specific traffic from the tunnel by defining domains or IP addresses in the SD-WAN Bypass configuration:
- Navigate to
Security & SD-WAN > SD-WAN & Traffic Shaping
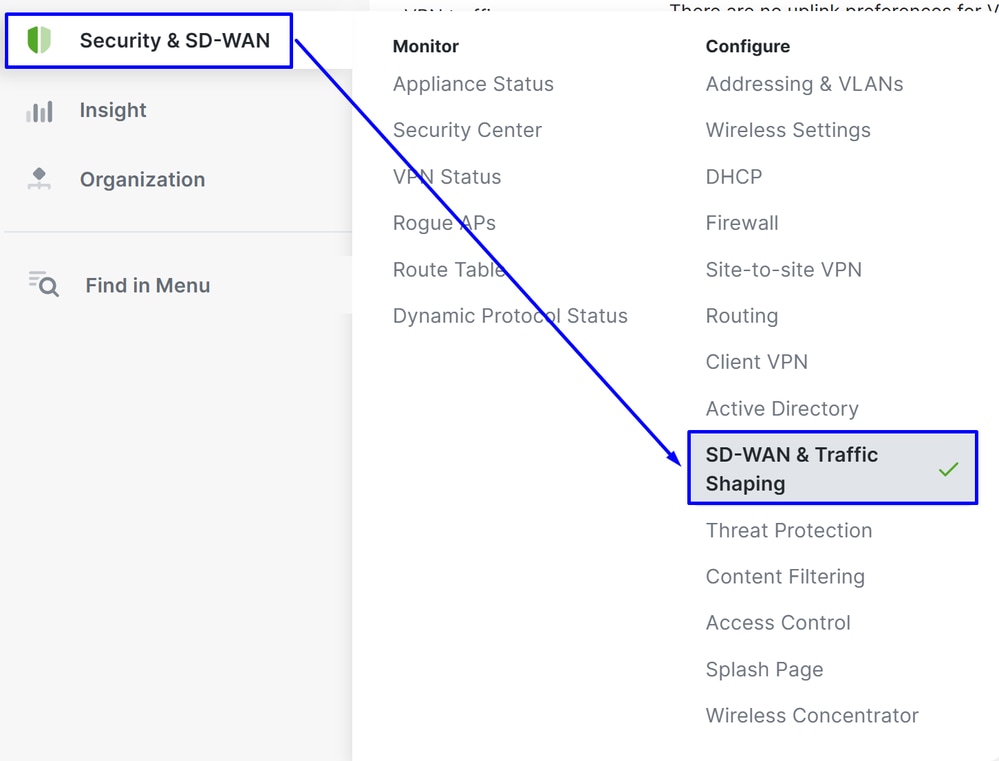
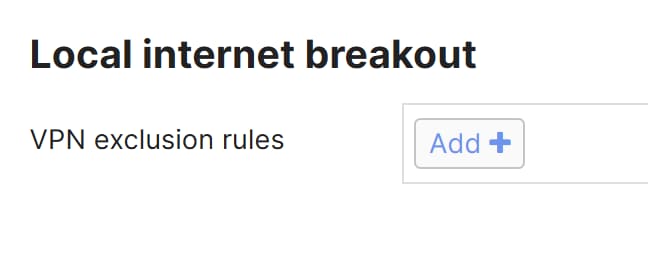
- Scroll down to the
Local Internet Breakout section and click on Add+
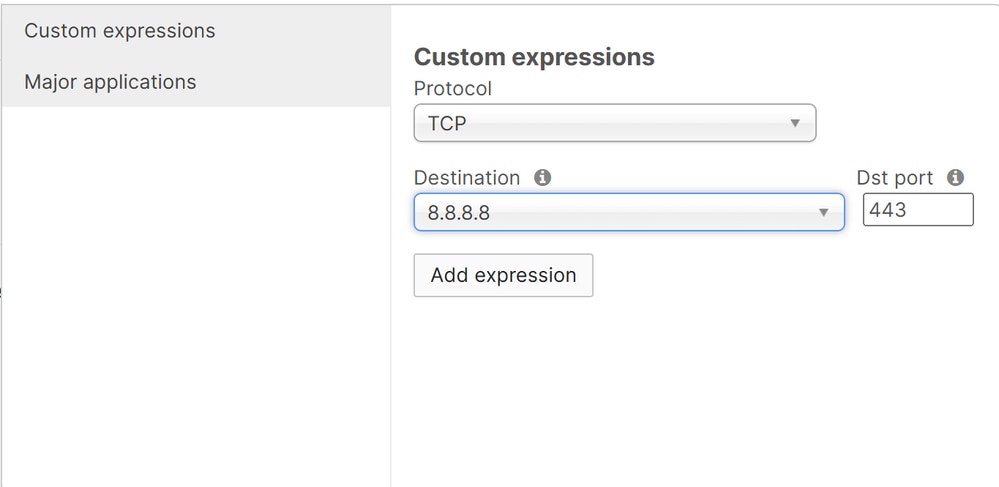
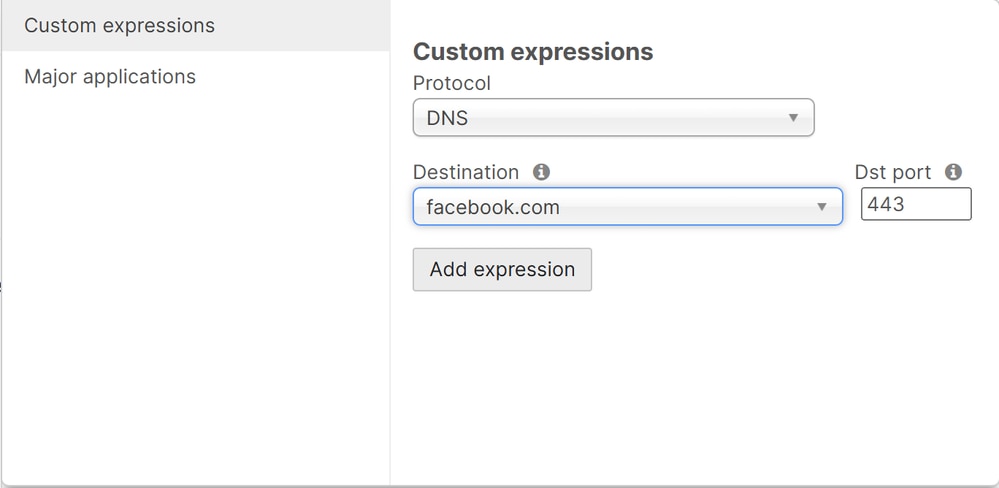
Then create the bypass based on Custom Expressions or Major Applications:
Custom Expressions - Protocol
Custom Expressions - DNS
Major Applications
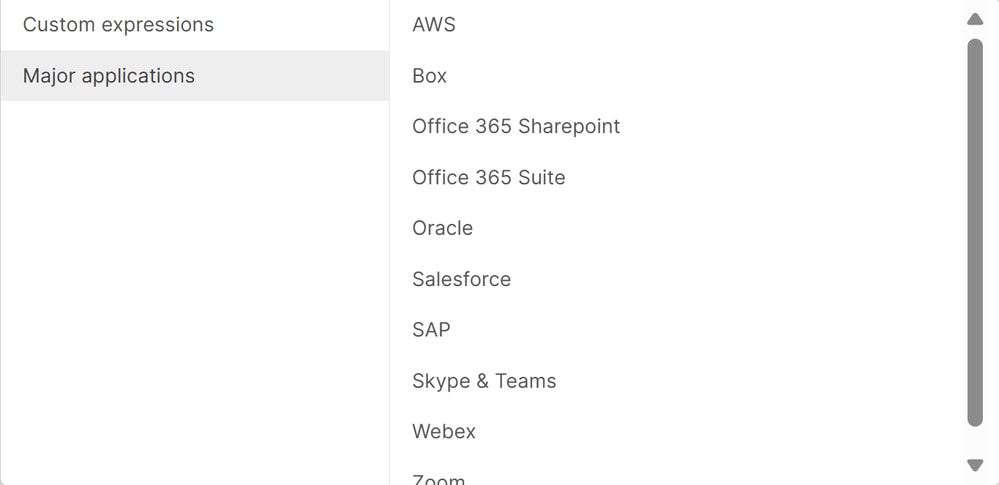
For more information, please visit: Configuring VPN Exclusion Rules (IP/Port/DNS/APP)
Verify
To check if the tunnels are up, please verify the status in:
- Click on
Security & SD-WAN > VPN Status on the Meraki Dashboard.
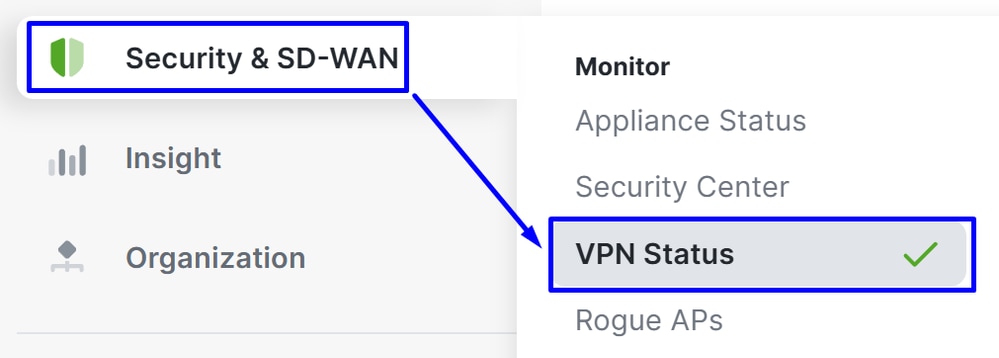
- Click on
Non-Meraki peers:

If both the Primary and Secondary VPN statuses are shown in green, it means the tunnels are up and active.
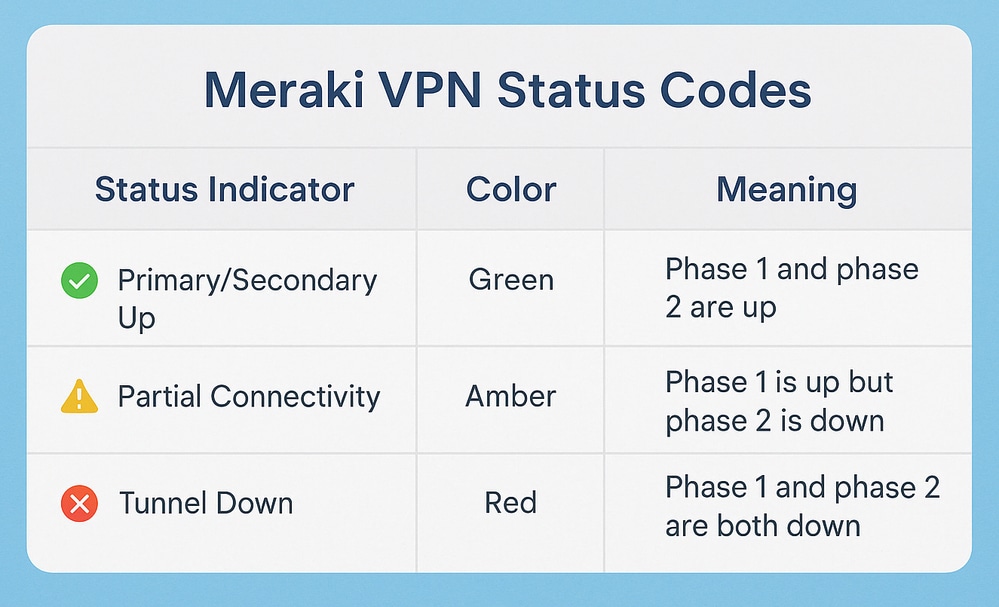
Troubleshoot
Verify HealthChecks
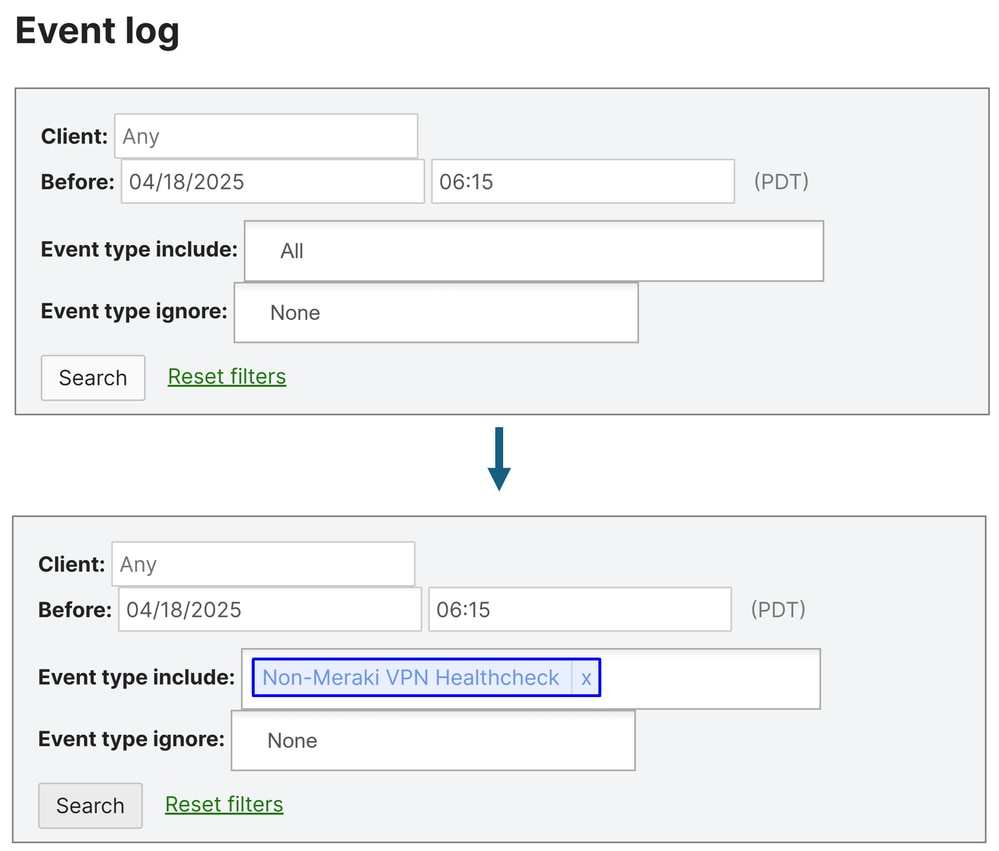
To verify if Meraki health checks for the VPN are working properly, Navigate to:
- Click on
Assurance > Event Log
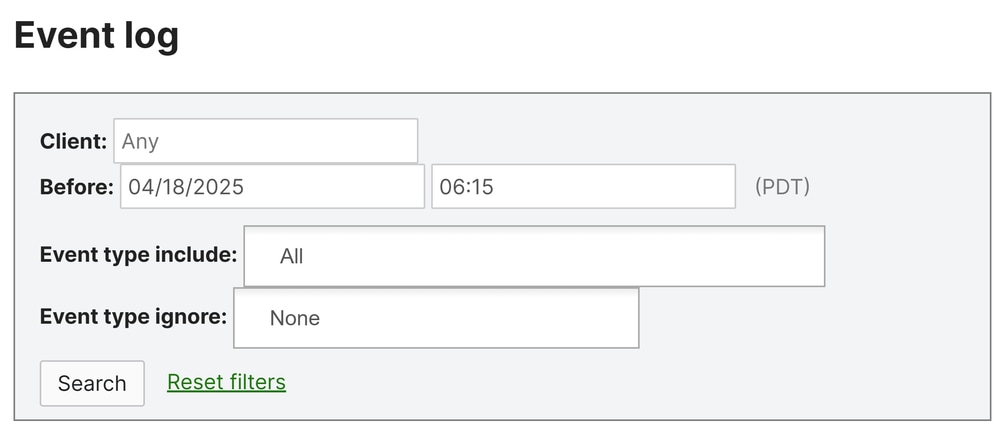
Under Event Type Include, choose Non-Meraki VPN Healthcheck
When the primary tunnel to Cisco Secure Access is active, packets arriving through the secondary tunnel are dropped to maintain a consistent routing path.
The secondary tunnel remains in standby and is only used if a failure occurs on the primary tunnel, either from the Meraki side or within Secure Access, as determined by the health check mechanism.

- The Primary tunnel health check shows status: up, meaning it is currently passing and actively forwarding traffic.
- The Secondary tunnel health check shows status: down, not because the tunnel is unavailable, but because the primary is healthy and actively in use. This behavior is expected, as traffic is only permitted to pass through Tunnel 1, causing the secondary tunnel’s health check to fail.
Related Information


 Feedback