Introduction
This document describes how to configure Cisco ISE on AWS using CloudFormation template (CFT) and Amazon Machine Image (AMI).
Prerequisites
Requirements
Cisco recommends that you have knowledge of these topics before proceeding with this deployment:
- Cisco Identity Services Engine (ISE)
- AWS EC2 instance management and networking
- SSH key pair generation and usage
- Basic understanding of VPCs, security groups, and DNS/NTP configuration in AWS
Components Used
The information in this document is based on these software and hardware versions:
- Identity Services Engine (ISE)
- Amazon Web Services (AWS) Cloud Console
The information in this document was created from the devices in a specific lab environment. All of the devices used in this document started with a cleared (default) configuration. If your network is live, ensure that you understand the potential impact of any command.
Configure
Part 1: Generating an SSH Key Pair
1. For this deployment, you can either use a pre-existing key pair or create a new one.
2. To create a new pair, navigate to EC2 > Network and Security > Key Pairs and click Create key pair.

3. Enter the key pair name and click Create key pair.
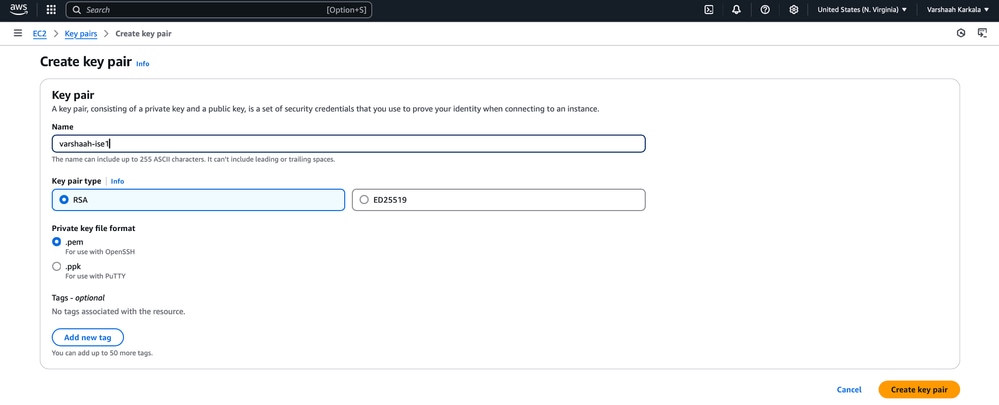
The key pair file (.pem) is downloaded on your local machine. Ensure that you keep this file safe as this is the only way in which you can access your EC2 instance once it is launched.
Part 2: Configuring ISE Using a CloudFormation Template (CFT)
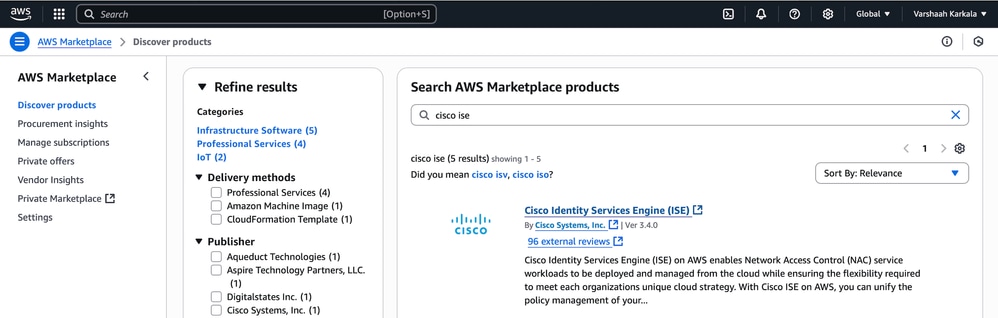
- Log in to the AWS Management Console and search for AWS Marketplace Subscriptions.
-
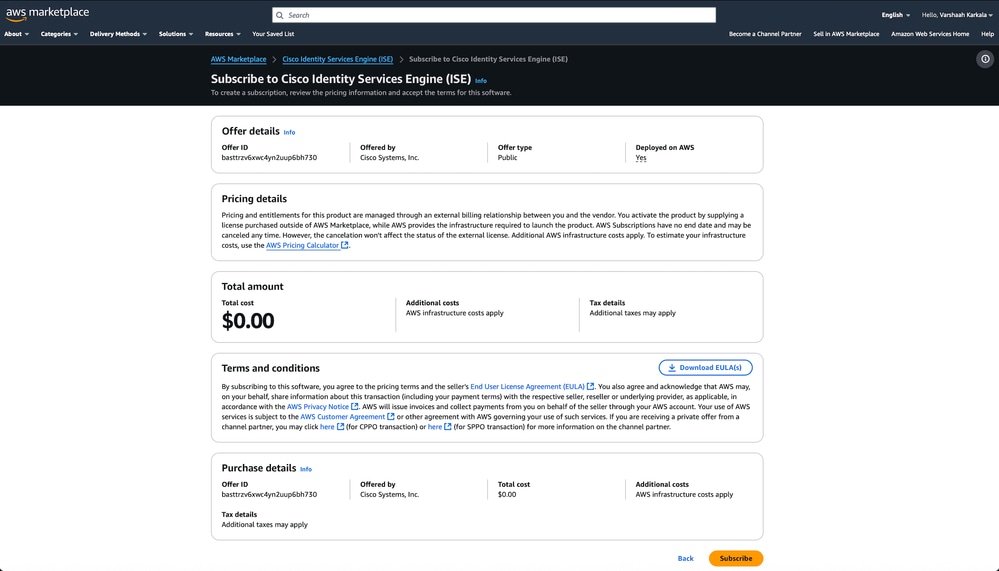
In the search bar, type cisco ise and click Cisco Identity Services Engine (ISE) from the results. Click Subscribe.
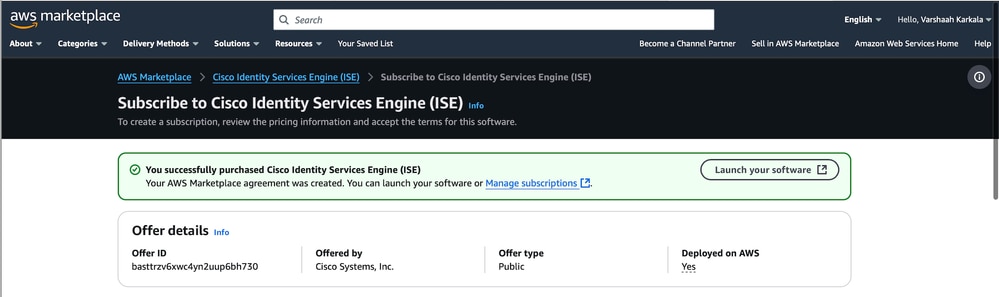
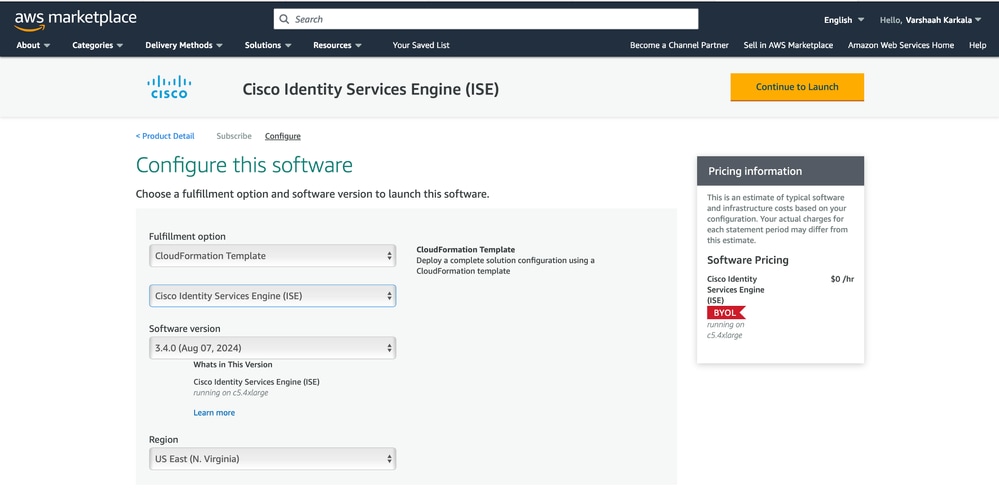
3. After subscription, click Launch Your Software.
4. Under Fulfilment Option, choose CloudFormation Template. Choose the Software version (ISE version), and Region where you want to deploy the instance. Click Continue to Launch.
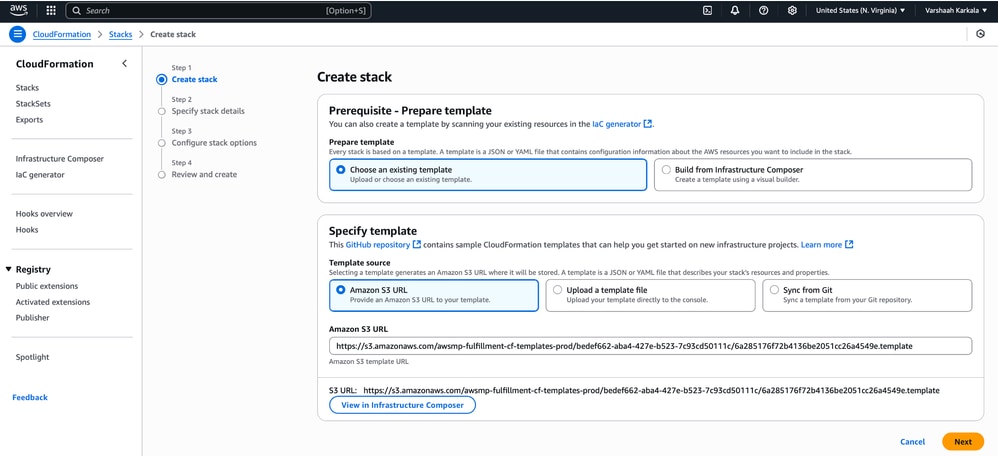
5. On the next page, choose Launch CloudFormation as the action and click Launch.

6. Under the stack settings, keep the default settings and click Next.
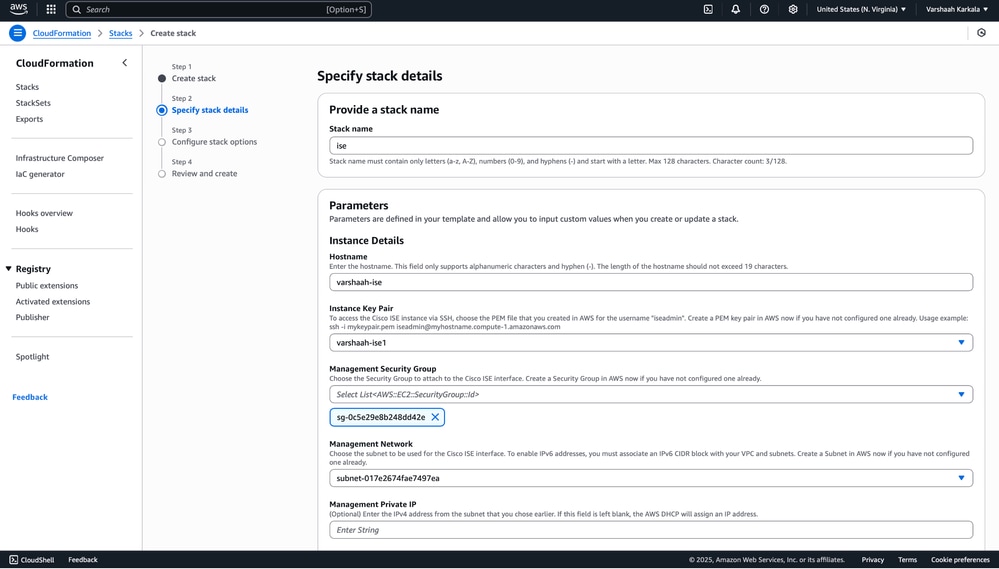
7. Enter required parameters:
- Stack Name: Provide a unique name for your stack.
- Hostname: Assign the hostname for the ISE node.
- Key Pair: Select the key pair generated or pre-existing to access the EC2 instance later.
- Management Security Group:
-
Either use the default security group (as shown) or create a custom one through the EC2 dashboard.
- To create a new security group, navigate to the EC2 Dashboard and navigate to Network and Security > Security Groups to create a new security group.
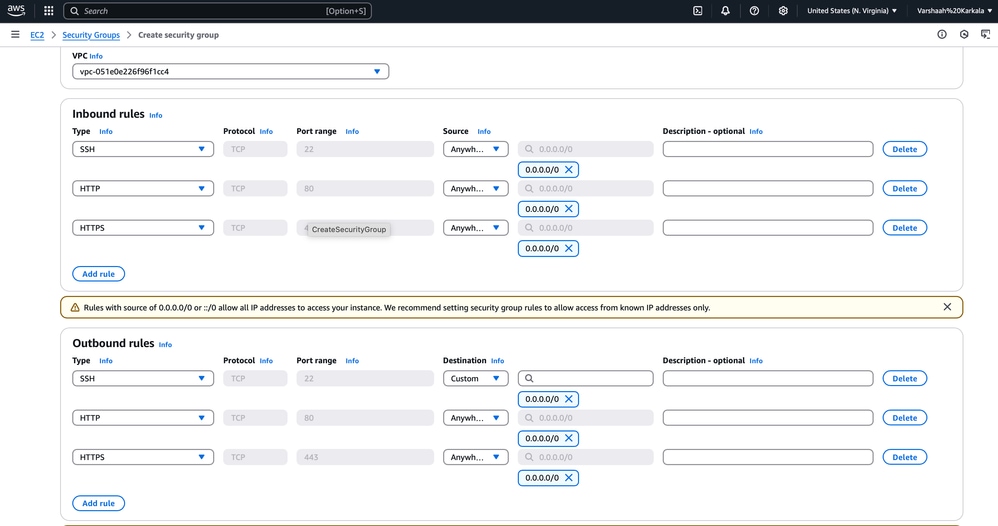
- Click Create security group and enter the required details.
-
Ensure the security group is configured to allow the required inbound and outbound traffic. For example, enable SSH (port 22) access from your IP address for CLI access.
-
If SSH access is not properly configured, you can encounter an "Operation timed out" error when attempting to connect via SSH.

-
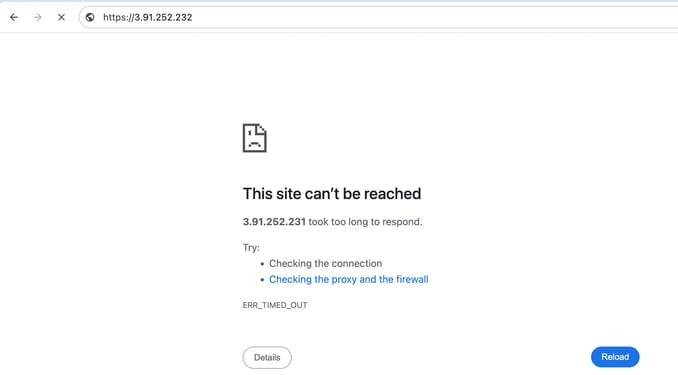
If HTTP/HTTPS access is not configured, you can see a "This site can't be reached" error when trying to access the GUI.
- Management Network: One of the pre-existing subnets is selected.
If your design requires a distributed deployment with some nodes hosted in AWS and others on-premises, configure a dedicated VPC with a private subnet and establish a VPN tunnel to the On-Prem VPN Headend Device to enable connectivity between AWS-hosted and on-premises ISE nodes.
For detailed steps on configuring the VPN Headend Device, refer to this guide.
8. EBS Encryption
- Scroll down to locate the EBS encryption settings.
- In Cisco ISE Release 3.3 and later, the default value of the EBS Encryption field is True.
- Set EBS Encryption to False in case you want to disable encryption.

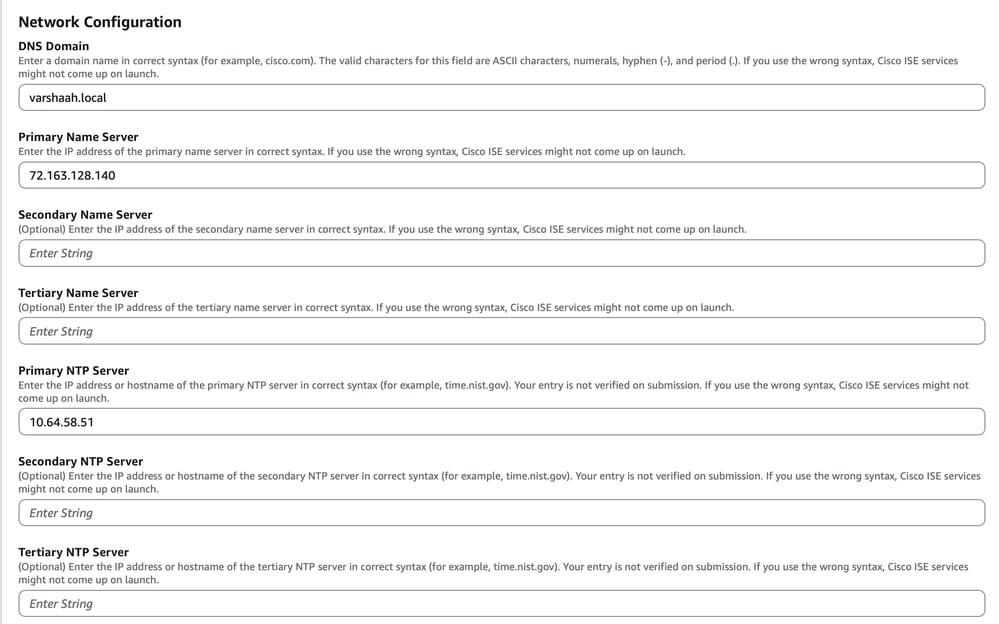
9. Network Configuration:
-
Scroll down to access options for configuring network settings, such as the DNS domain, Primary Name Server, and Primary NTP Server.
Ensure these values are entered accurately.

Note: Incorrect syntax here can prevent ISE services from starting properly after deployment.
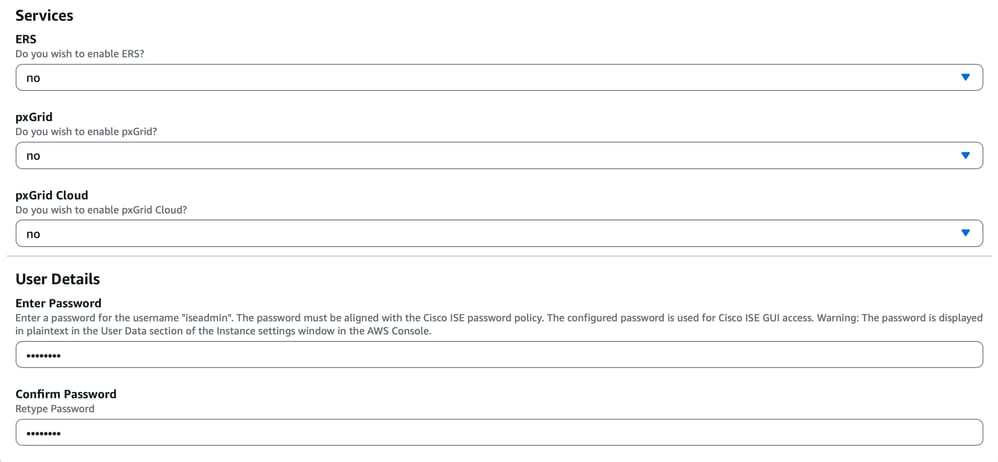
10. Service and User Details:
- Scroll down to locate the option for enabling ERS and pxGrid services
- Choose whether to enable ERS and pxGrid services by selecting yes or no.
- Under User Details, set the password for the default admin user.
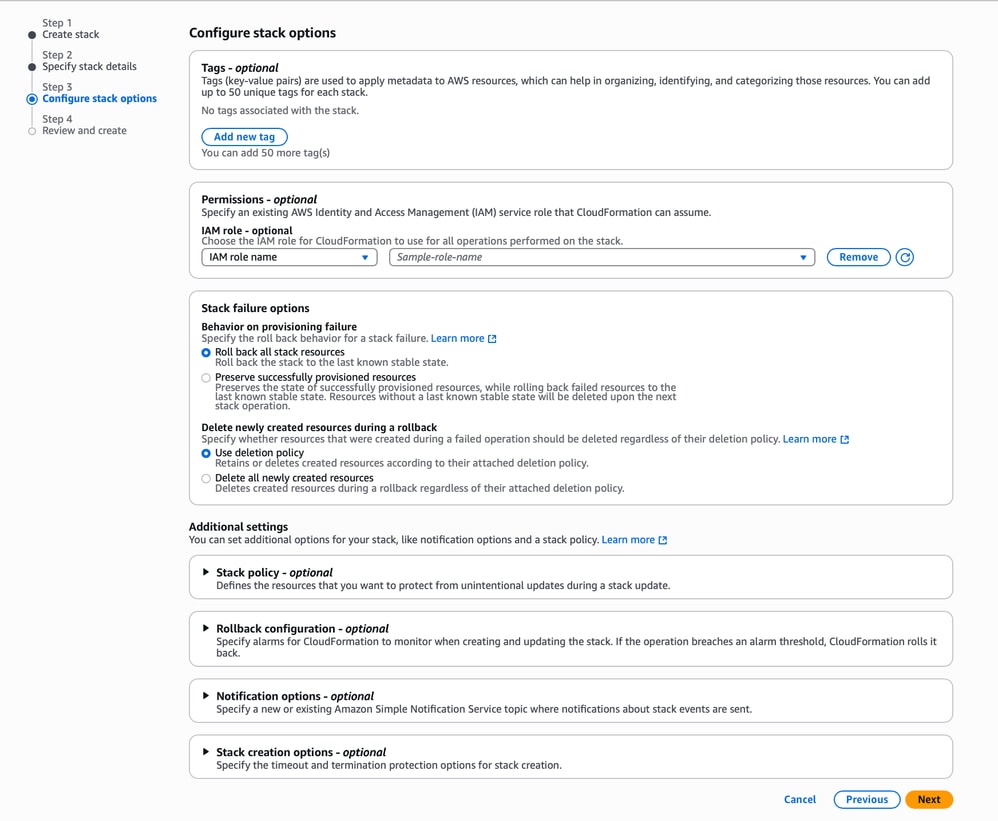
11. Configure stack Options:
- Leave all default options as they are and click Next.
12. Review the template to ensure all configurations are correct, then click Submit. Once the template is built, it resembles the example shown below:

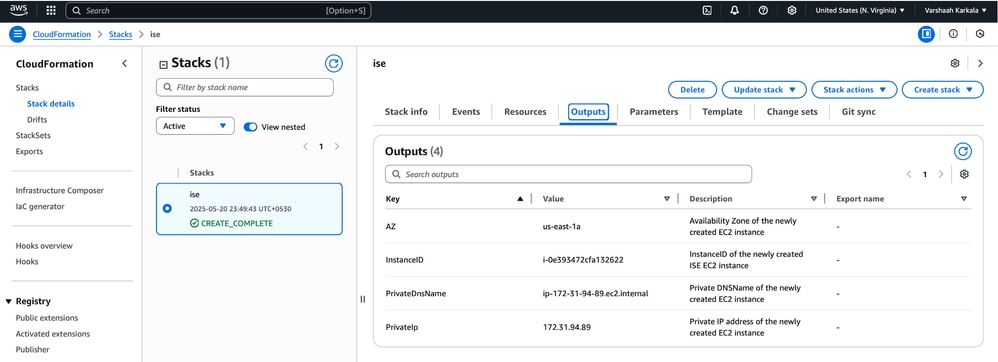
13. Access the stack details:
Navigate to CloudFormation > Stacks and locate your deployed stack.
14. View Outputs Tab:
Select your stack and open the Outputs tab. Here, you find important information generated during the deployment process, such as:
• Availability Zone: The region where the resources are deployed.
• Instance ID: The unique identifier of the deployed instance.
• DNS Name: The private DNS name of the instance, which can be used for remote access.
• IP Address: The public or private IP address of the instance, depending on your configuration.
This information helps you connect to the instance and verify its availability. The Outputs tab resembles this example:
Part 3: Configuring ISE Using an Amazon Machine Image (AMI)
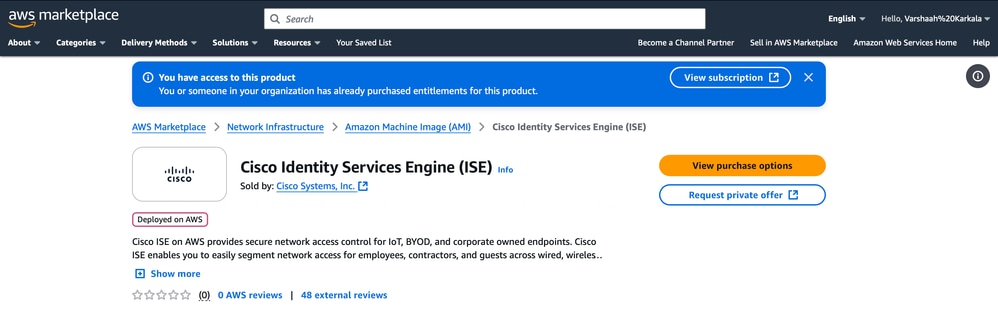
1. Log in to the AWS Management Console and search for AWS Marketplace Subscriptions.
2. In the search bar, type cisco ise and click Cisco Identity Services Engine (ISE) from the results.
 ISE on AWS Markeplace
3. Click View purchase options.
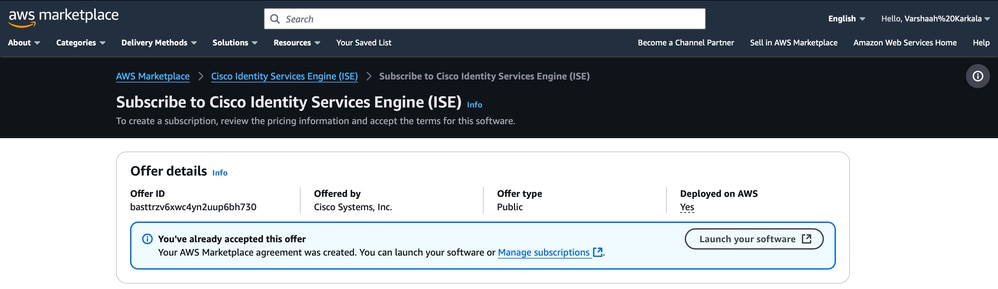
4. Click Launch your software.
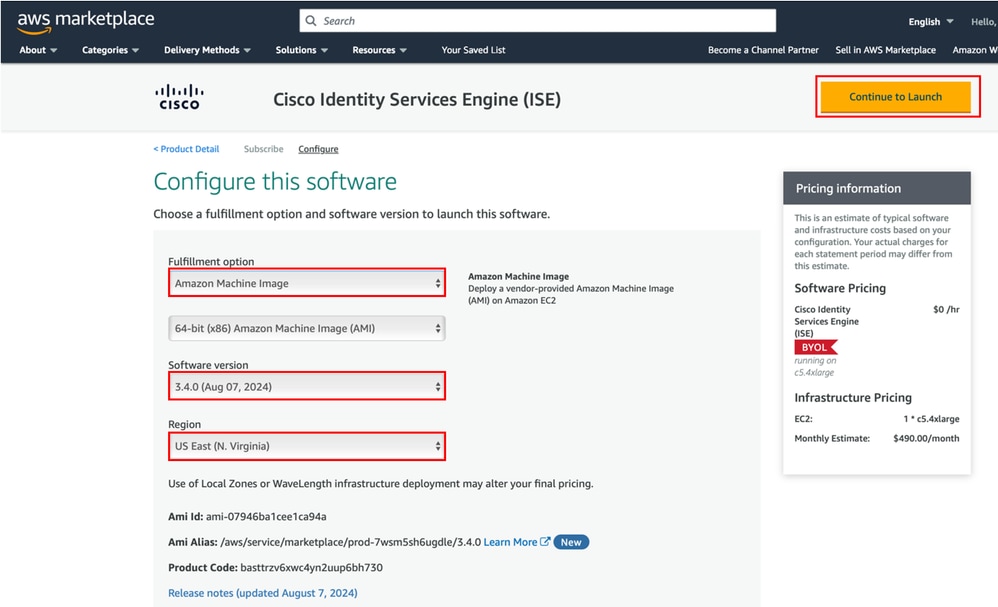
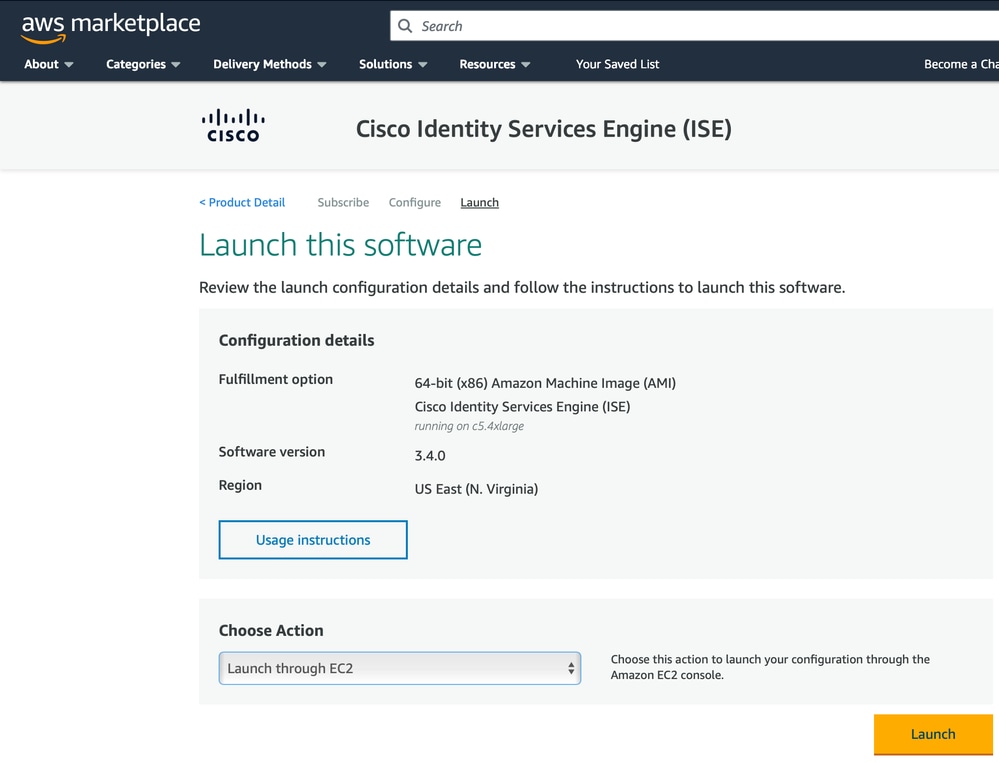
5. Under the Fulfillment Option, choose Amazon Machine Image. Choose the desired Software version and Region. Click Continue to Launch.
6. Under Choose Action, choose Launch through EC2. Click Launch to proceed.
7. You are redirected to the EC2 Launch an Instance page to configure your instance settings.
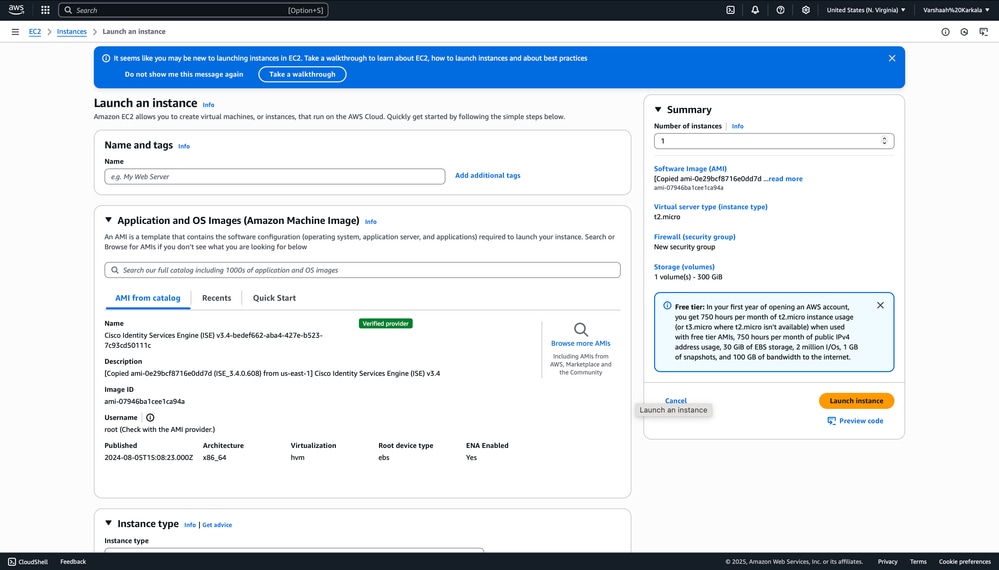
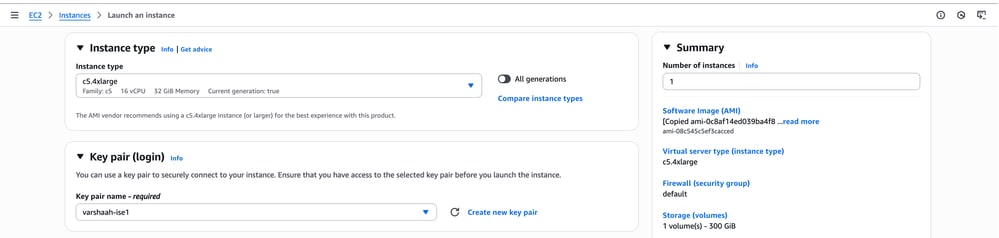
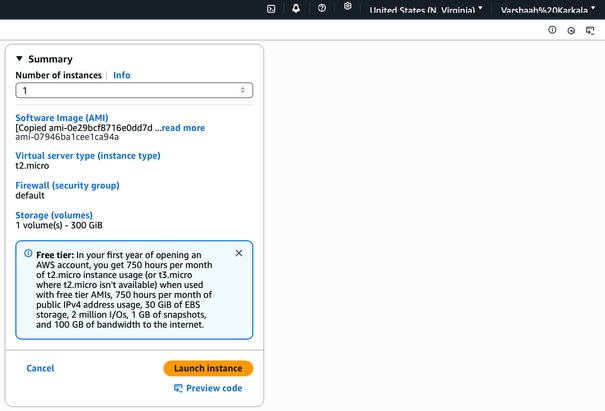
8. Scroll down to the Instance Type section and choose an appropriate instance type based on your deployment requirements.
Under Key pair (login), select the key pair that was generated earlier or create a new one (refer to the key pair creation steps provided previously).
Set the Number of Instances to 1.
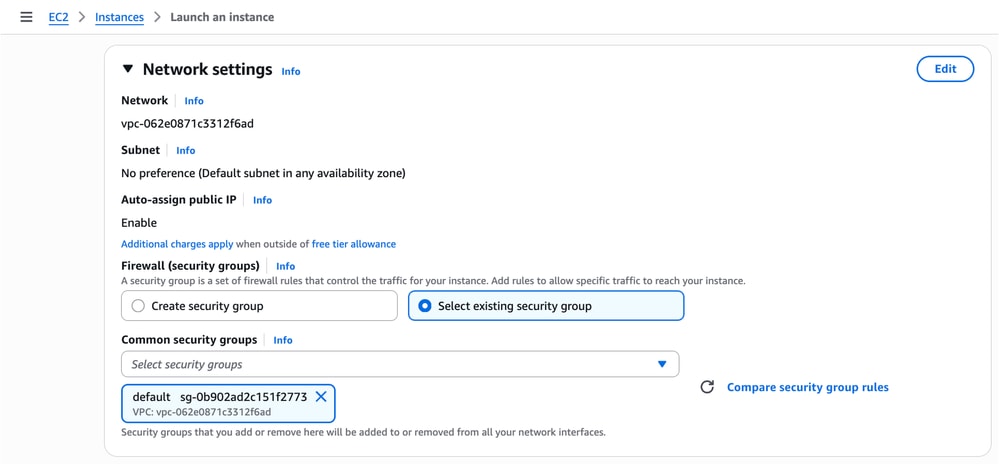
9. In the Network settings section:
- Configure your VPC and subnet as needed.
- For the Security Group, either select an existing one or create a new group (as shown in the example).
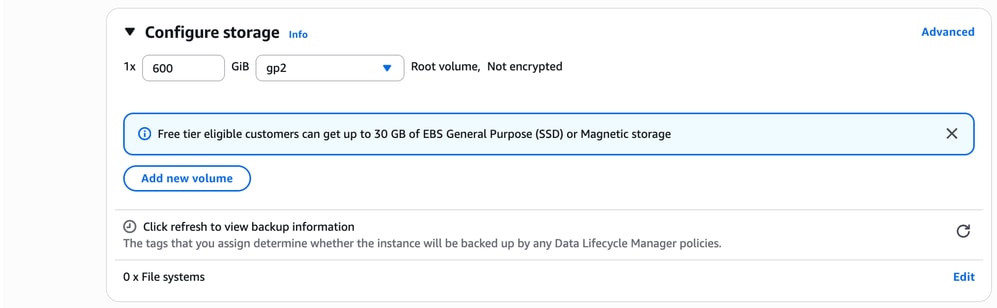
10. In the Configure Storage section, configure the desired volume size.
Example: 600 GiB using gp2 volume type.
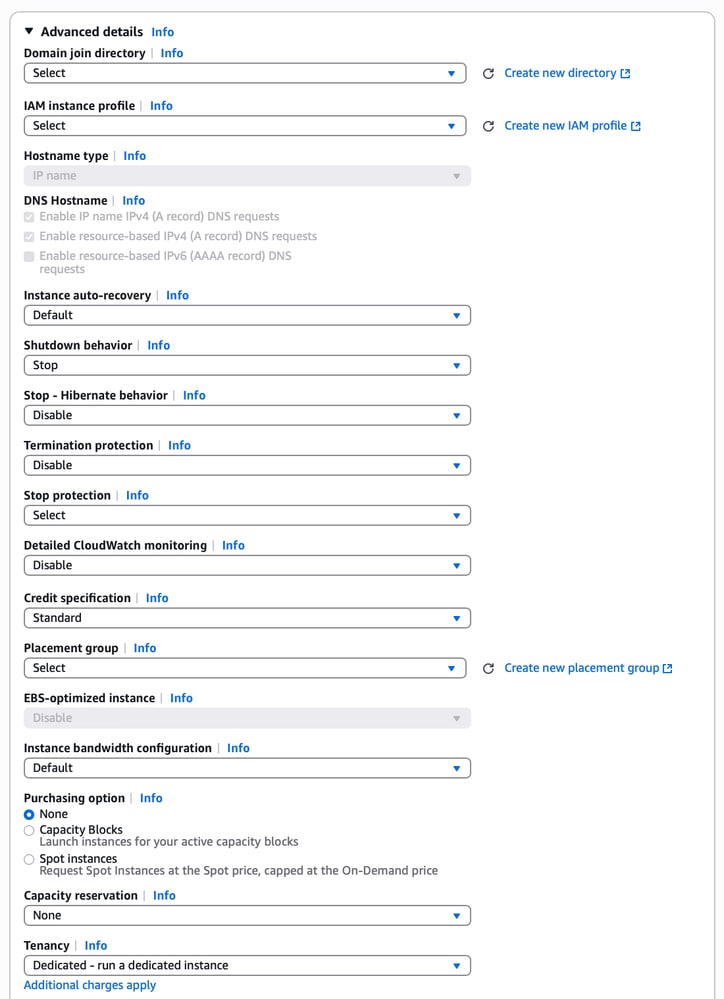
11. In the Advanced Details section, configure any additional settings as required for your deployment, such as IAM instance profile, user data, or shutdown behavior.
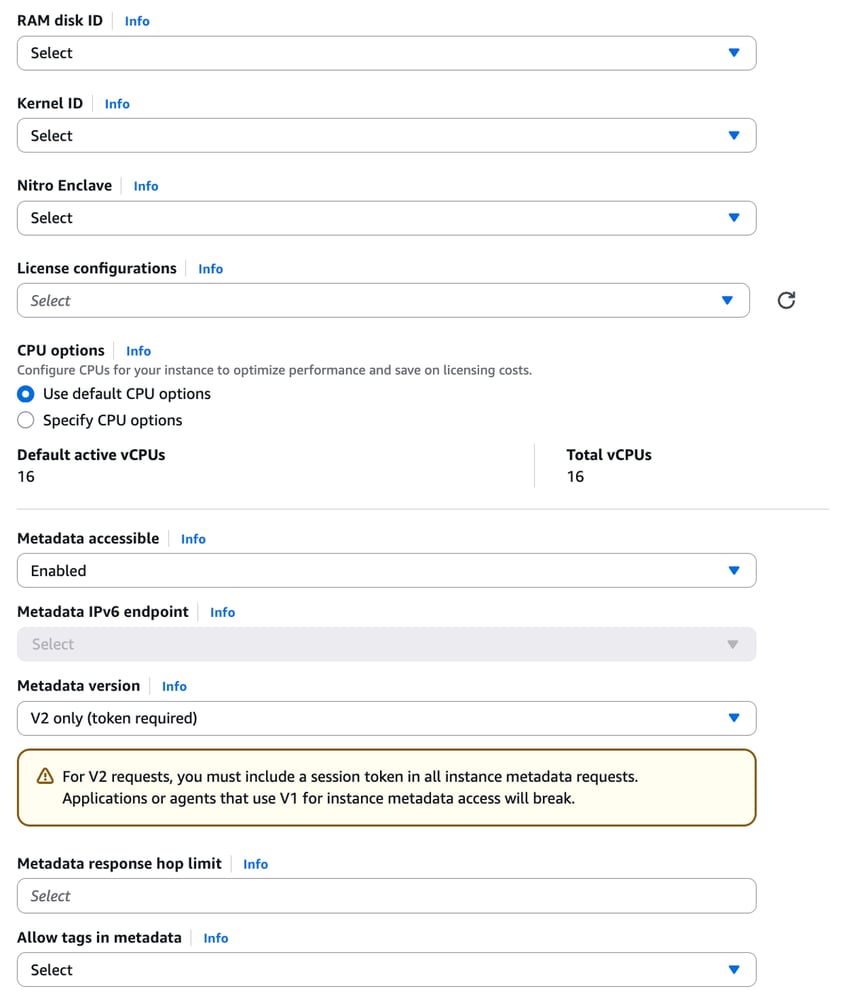
12. In the Metadata version section:
- For ISE version 3.4 and above, choose V2 only (token required) — this is the recommended option.
- For ISE versions earlier than 3.4, choose V1 and V2 (token optional) to ensure compatibility.
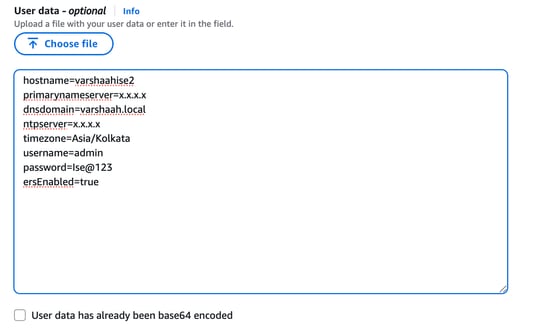
13. In the User data field, provide the initial configuration parameters for the ISE instance, including hostname, DNS, NTP server, timezone, ERS, and admin credentials.
Example:
hostname=<hostname of Cisco ISE>
primarynameserver=<IPv4 address>
secondarynameserver=<IPv4 address of secondary nameserver> (Applicable to Cisco ISE 3.4 and later releases)
tertiarynameserver=<IPv4 address of tertiary nameserver> (Applicable to Cisco ISE 3.4 and later releases)
dnsdomain=<example.com>
primaryntpserver=<IPv4 address or FQDN of the NTP server>
secondaryntpserver=<IPv4 address or FQDN of the secondary NTP server> (Applicable to Cisco ISE 3.4 and later releases)
tertiaryntpserver=<IPv4 address or FQDN of the tertiary NTP server> (Applicable to Cisco ISE 3.4 and later releases)
timezone=<timezone>
Note: From Cisco ISE release 3.2, the username is fixed as iseadmin; therefore, the tag username=<admin> is not supported.
password=<password>
Note: Ensure the password complies with Cisco ISE password policy.
ersapi=<yes/no>
pxGrid=<yes/no>
pxgrid_cloud=<yes/no>
Note: OpenAPI is enabled by default. Hence, the openapi=<yes/no> field is not required.
After entering the user data and completing the configuration, click Launch Instance.
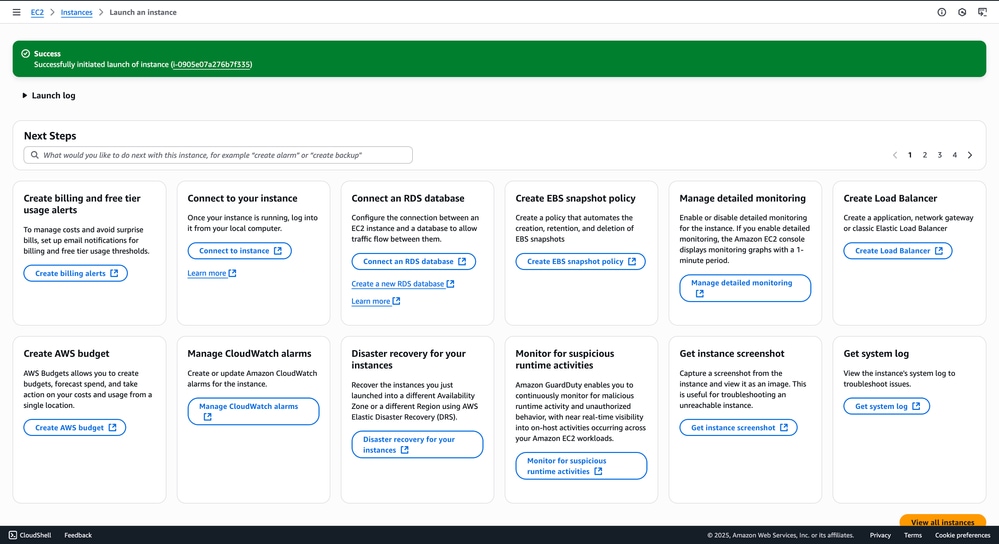
14. After the instance is launched, a confirmation message appears stating: 'Successfully initiated launch of instance <instance_name>'. This indicates that the launch process has started successfully.
Verify
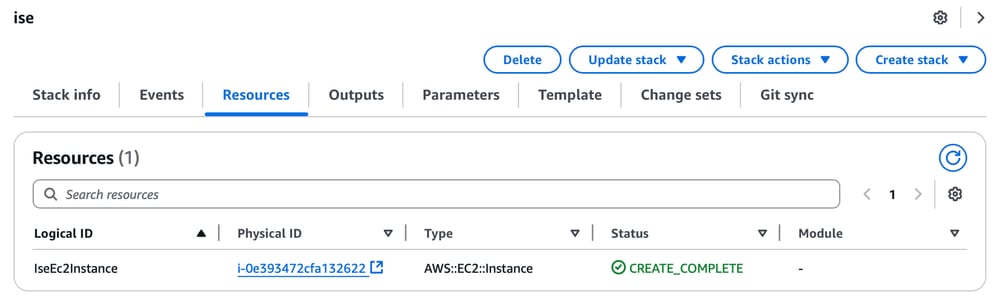
Access the ISE Instance Built Using CFT
Navigate to the Resources tab in your CloudFormation stack and click the Physical ID. It redirects you to the EC2 dashboard where you are able to see the instance.

Access the ISE Instance Built Using AMI
Click View all Instances to navigate to the EC2 instances page. On this page, verify that the Status Check shows as 3/3 checks passed, indicating that the instance is up and healthy.

Access the ISE GUI
The ISE server is now successfully deployed.
To access the ISE GUI, you need to use the instance’s IP address in your browser. Since the default IP is private, it cannot be accessed directly from the internet.
Check if a public IP is associated with the instance:
- Navigate to EC2 > Instances and select your instance.
- Look for the Public IPv4 address field.
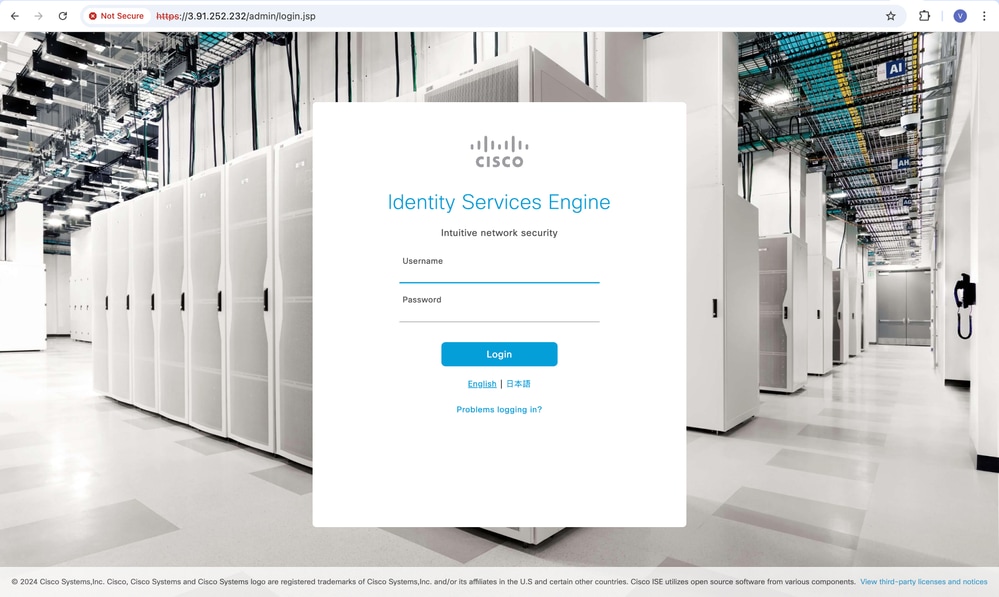
Here, you can see a public IP address which you can use to access the ISE GUI.

Open a supported browser (for example, Chrome or Firefox) and enter the public IP address.
The ISE GUI login page appears.

Note: After SSH access becomes available, it typically takes an additional 10–15 minutes for ISE services to fully transition to a running state.
Access CLI via SSH from Terminal
In the EC2 console, select your instance and click Connect.
Under the SSH client tab, follow these steps:
- Navigate to the folder containing your downloaded .pem key file.
- Run these commands:
- cd <path-to-key-file>
- chmod 400 <your-key-pair-name>.pem
- ssh -i "<your-key-pair-name>.pem" admin@<public-ip-address>
Note: Use admin as the SSH user, since Cisco ISE disables root log in via SSH.
Access CLI via SSH Using PuTTy
-
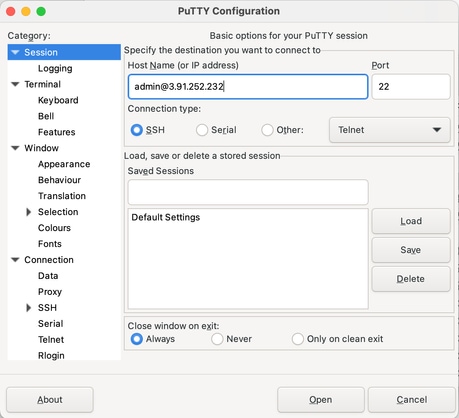
Open PuTTY.
-
In the Host Name field, enter: admin@<public-ip-address>
-
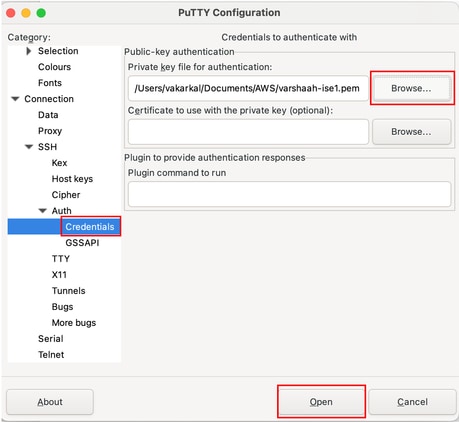
In the left pane, navigate to Connection > SSH > Auth > Credentials.
-
Click Browse next to Private key file for authentication, and select your SSH private key file.
-
Click Open to initiate the session.
-
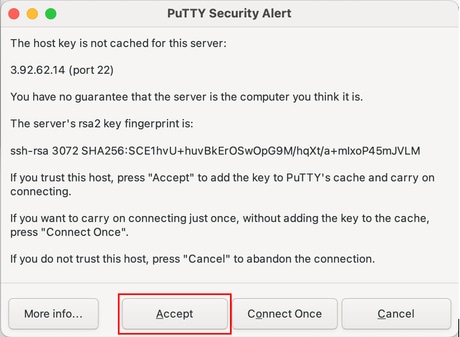
When prompted, click Accept to confirm the SSH key.
-
Your PuTTY session now connects to the ISE CLI.
Note: It can take up to 20 minutes for ISE to become accessible via SSH. During this time, connection attempts can fail with the error: "Permission denied (publickey)."
Troubleshoot
Invalid Username or Password
Authentication issues are often caused by incorrect user input during instance creation. This produces an error message as "Invalid Username or Password. Please try again." error when trying to log in to the GUI.
Solution
-
In the AWS EC2 Console, navigate to EC2 > Instances > your_instance_id.
-
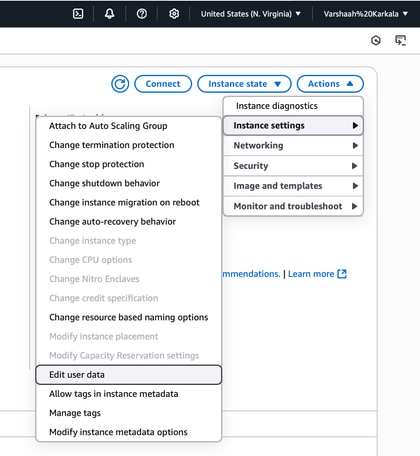
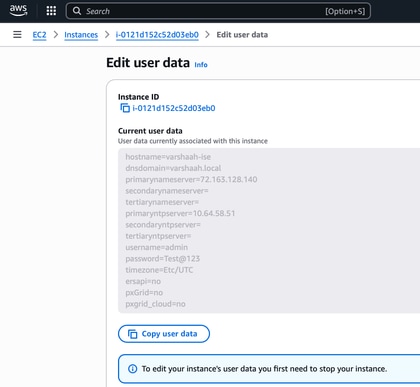
Click Actions and choose Instance settings > Edit user data.

-
You can find the specific username and password that were set during the instance launch here. These credentials can be used to log in to the ISE GUI.
-
Verify Hostname and Password when setting up the hostname and password:
- If the configured password does not meet the ISE password policy, log in attempts fail; even with the correct credentials.
-
If you suspect the password was misconfigured, follow these steps to update it:
1. In the EC2 Console, navigate to EC2 > Instances > your_instance_id
2. Click Instance state > Stop instance.
3. After the instance is stopped, click Actions > Instance settings > Edit user data.

4. Modify the user data script to update the password accordingly.
5. Click Save to save your changes. Click Instance state > Start instance to restart the instance.
Known Defects
| Bug ID |
Description |
| Cisco Bug ID 41693 |
ISE on AWS fails to retrieve user data if the metadata version is set to V2 only. Only IMDSv1 is supported in versions prior to ISE 3.4. |
 Feedback